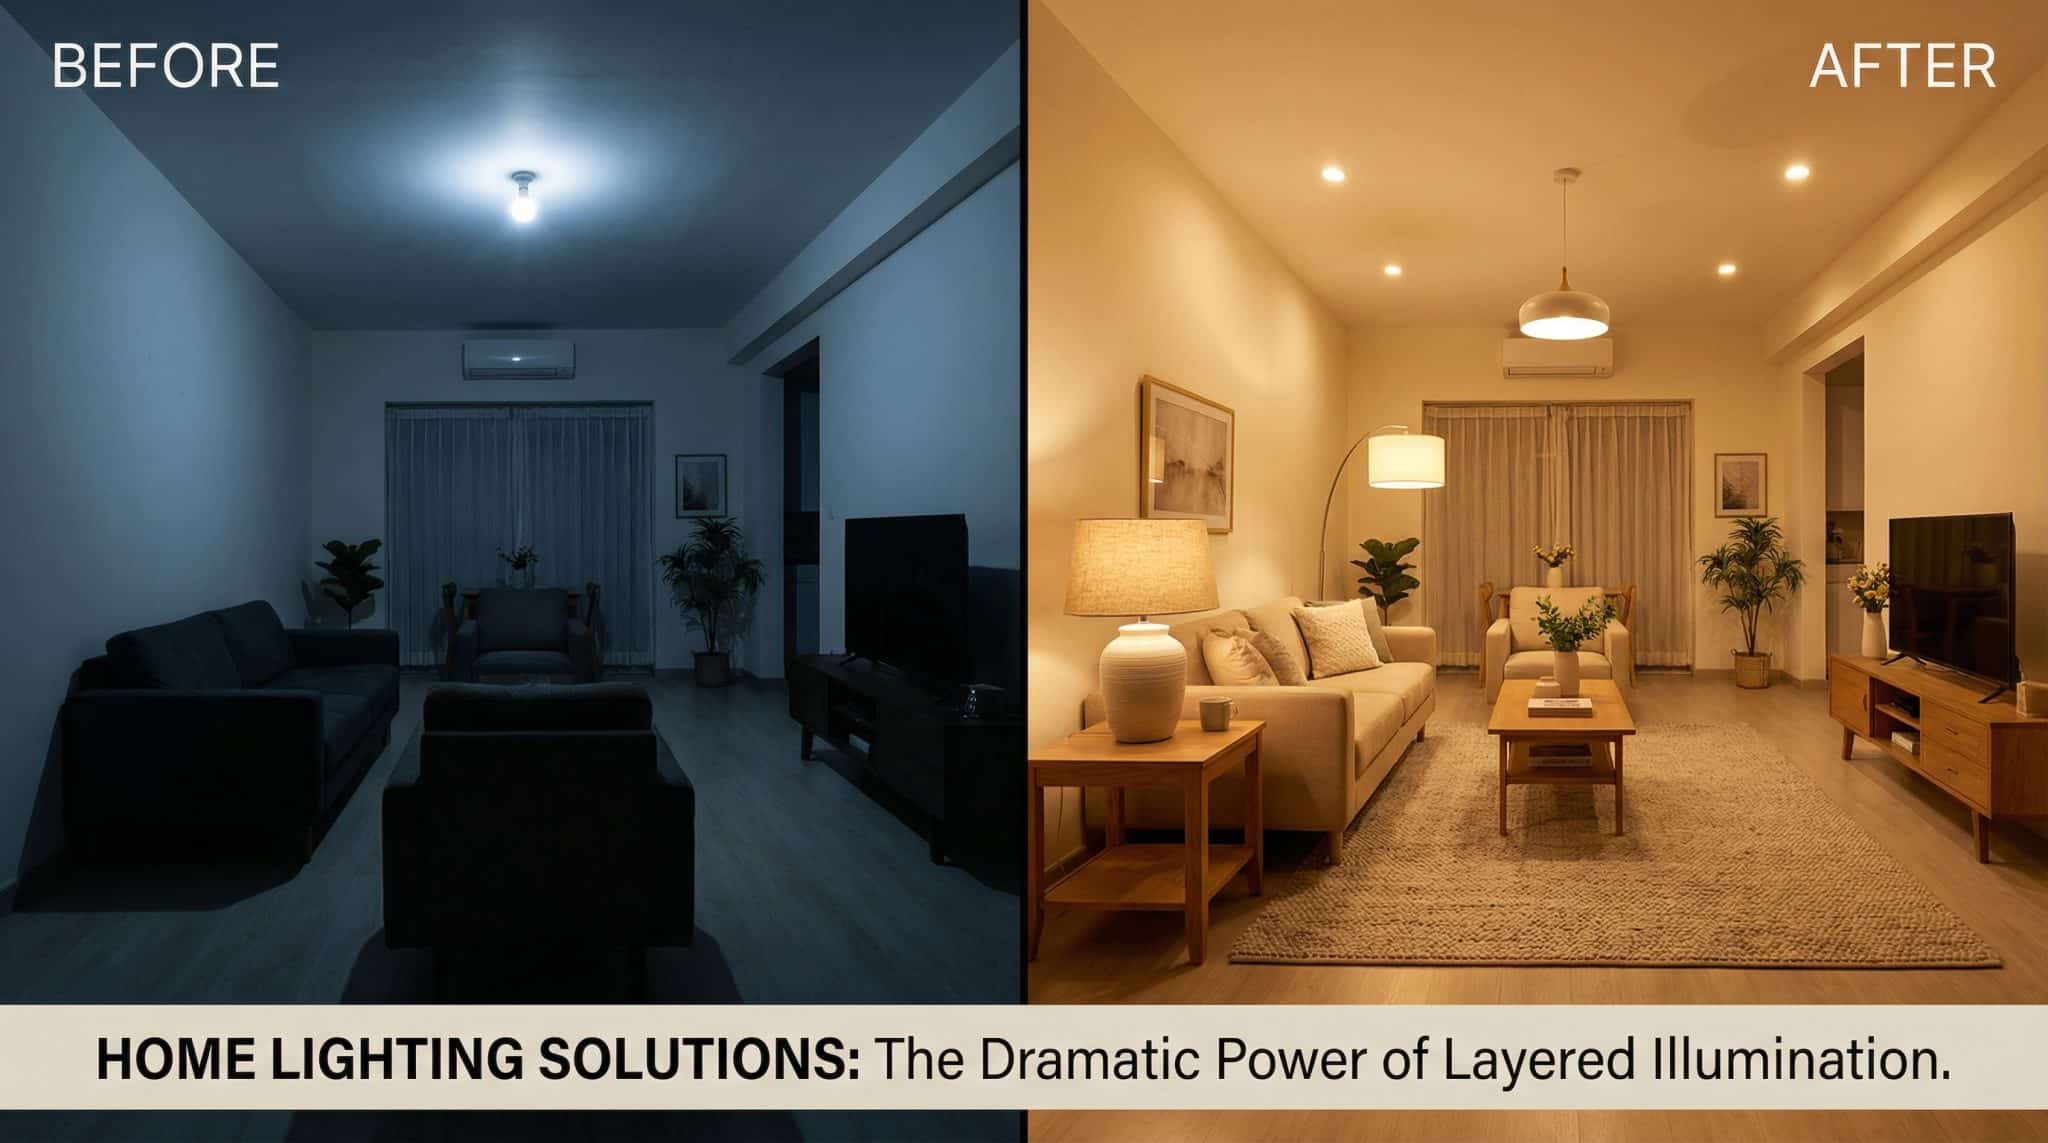

Why Your Dark Room Still Feels Like a Cave (Spoiler: It’s Not Just the Bulbs)
You know that one corner of your house that feels like it’s permanently set to “moody dusk,” even when every light is on? The hallway that somehow looks darker at noon than it did in your last apartment at 10 p.m.? The basement that makes you squint like you’re reading ancient scrolls?
Yeah. I’ve lived in those rooms. I’ve also tried the classic “just buy brighter bulbs” move… and then wondered why my room still looked dim and now also felt like an interrogation scene.
Here’s the deal: most dark rooms don’t need more light so much as they need light from better places. The usual culprit is the sad little single ceiling fixture that blasts straight down, lights up the middle of the room, and leaves your walls and corners to fend for themselves. It’s like shining a flashlight at the floor and being offended the rest of the room didn’t get the memo.
The fix is layered lighting—multiple sources, different heights, different directions. And the best part? A lot of these upgrades are plug in, renter friendly, and don’t require you to become a wiring wizard.
The Problem With “One Big Light” (and Why It Makes Everything Worse)
A single overhead light creates what I call the bright donut effect: the center of the room is lit, the edges are gloomy, and your face looks like it’s starring in a true crime reenactment. Overhead only lighting also loves to cast shadows under your eyes and chin, which is just rude.
What you actually want is light that hits the room the way daylight does: spread out, bouncing around, coming from more than one direction.
I like to think of lighting in three layers:
- Ambient (the “overall glow”): fills the room
- Task (the “help me see what I’m doing” light): reading, cooking, makeup, desk work, etc.
- Accent (the “remove the creepy shadows” light): corners, walls, shelves, that one spot that always looks dim
And height matters. Ceiling light + eye level lamps + a little low glow (like an uplight or LED strip) is the magic combo. Once you get light at a few levels, the whole room stops feeling like it’s swallowing your furniture.
My “Don’t Waste Money” Plan for Fixing a Dark Room
If you do nothing else, do this in this order. It keeps you from rage buying six random lamps and then returning five of them (not that I’ve ever done that… twice).
- Do a nighttime shadow check. Turn on every light you’ve got and walk the room. Where do shadows collect? That’s where you’re missing a layer.
- Add ambient light first. If your room has one sad ceiling boob light, don’t panic—you can absolutely build “ambient” with lamps.
- Add task lighting where you actually live your life. Sofa = reading lamp. Desk = desk lamp. Kitchen counter = under cabinet lighting.
- Finish with accent light. This is how you erase the last stubborn dark corner without cranking everything up to “surgical suite.”
- Then choose the right bulbs. Bulbs can make a good setup look bad fast, so we’ll keep this simple and not overly nerdy (even though I am a little nerdy about it).
Fixtures That Actually Help (Without Overcomplicating Your Life)
Before we get fancy: you do not need a chandelier budget to fix a dark room. The fastest wins usually come from adding light at eye level.
Ambient: your “overall glow”
- LED ceiling panels (great in basements/low ceilings): they spread light evenly without stealing headroom.
- Canless recessed LEDs: cleaner look, and they work when you don’t have tons of ceiling depth. (If you’re cutting holes and running wire, that’s the moment to call an electrician if you’re not 100% comfortable.)
- Track lighting: honestly underrated in multi-use rooms because you can aim it where you need it.
Task: light where your hands/eyes are
- Floor lamp with an adjustable arm: my go to for fixing a dark corner next to a sofa.
- Table lamps: two is usually better than one—put them on opposite sides of the room so the light overlaps.
- Under cabinet LED strips: if you cook even a little, this is one of those “why didn’t I do this sooner” upgrades.
Accent: the secret sauce
- LED strips behind furniture/shelves: you don’t stare at the light source; you just notice the room feels brighter.
- Wall sconces: amazing for adding mid level light (roughly eye level), which is where a lot of rooms feel gloomy.
- Torchieres/uplights: bouncing light off the ceiling makes the room feel taller and less cave-y.
Bulb Stuff That Matters (and the Part Everyone Gets Wrong)
You can have gorgeous lamps and still hate the room if your bulbs are off. Here’s what I actually pay attention to:
1) Color temperature (Kelvin): warm vs. cool
Kelvin is basically the vibe.
- 2700K = warm and cozy (great for evenings, bedrooms, living rooms)
- 3000-3500K = “soft white” but a little fresher (nice middle ground)
- 4000-4500K = brighter/cleaner (great for kitchens, offices, basements, windowless rooms)
Two opinions I will die on:
- Super warm bulbs everywhere can make a dark room feel… kind of murky. Cozy is good. Muddy is not.
- 5000K+ at night can feel harsh (and it’s not exactly bedtime friendly).
Also: try to keep bulbs in the same room within roughly the same range so you don’t end up with one lamp looking “golden sunset” and the other looking “dentist office.”
2) Brightness (lumens): how much light you’re actually getting
If you only remember one thing: don’t judge brightness by “watts” anymore—look at lumens.
A simple rule of thumb:
- Living rooms/bedrooms: about 10-20 lumens per square foot
- Kitchens/bathrooms: about 30-40 lumens per square foot
- Home offices: about 40-50 lumens per square foot
And no, you don’t need to do math like you’re filing taxes. Just know that if your kitchen is dim, it usually needs way more total lumens than your living room.
3) CRI: will your colors look normal?
CRI is “color rendering.” Low CRI can make everything look a little flat and weird—like your banana is somehow beige.
If you can, aim for CRI 90+ (especially in kitchens, bathrooms, closets, anywhere you care what things actually look like).
Smart Lighting (If You Want the Room to Behave All Day)
I love smart bulbs for one reason: you can have bright, cooler light in the morning and warm, dim light at night without swapping bulbs or buying seventeen lamps.
Two quick notes:
- Smart dimmers can be great, but some homes (especially older ones) don’t have the wiring they require. If you open a switch box and immediately regret your choices, it’s okay to call a pro.
- Wi-Fi only bulbs can be a little dramatic when the internet hiccups. If reliability matters, look for systems that don’t depend entirely on the cloud.
For hallways, I’m also a fan of motion sensors, because nothing says “welcome home” like small hallway and landing style with no fumbling for a switch in the dark while carrying groceries.
Where to Put Lights So They Actually Work
This is where people lose the plot. You can buy all the right stuff, but if your light and reflective surfaces for tight spaces are shoved into one spot, the room will still feel dim.
If you’re doing recessed lights…
- Spacing: a simple guideline is spacing them about half your ceiling height (8-foot ceiling → ~4 feet apart).
- Don’t hug the walls: keep the first row roughly 3 feet from the walls so you don’t get weird shadow lines.
In seating areas…
Don’t put a light directly behind your head like you’re being interrogated. Put task lamps slightly to the side—think a 45-degree angle—or bounce light off a wall/ceiling with an uplight.
Under cabinet lighting…
Don’t shove the strip all the way at the back by the wall. That creates hot spots and shadows. Aim for mounting it a bit forward so it actually lights your workspace (and not just your backsplash).
Quick Room Fixes (Because You Don’t Want a Lighting Dissertation)
Living room
Overhead for general fill, then two lamps on opposite sides of the room so the light overlaps. If one corner still looks like a void, stick a floor lamp there. At night, I like the “lamps do the work, overhead stays low” approach. Cozy beats blinding.
Bedroom
Bedside lamps on both sides if you can swing it (your future self will thank you). Keep it warmer at night. If you have a desk/vanity, give that spot its own brighter task light so you’re not doing eyeliner in candlelight like it’s 1840.
Kitchen
Under cabinet lights are the MVP. For pendants over an island, hanging them about 30-36 inches above the countertop is usually the sweet spot—low enough to light the surface, high enough you’re not bonking your head.
Windowless bathroom
Overhead only lighting is a scam in bathrooms. If you can, add light on both sides of the mirror at about face height so you don’t get spooky under eye shadows. If you want that “hotel glow,” a hidden LED strip near the ceiling can help soften the whole space.
Basement / low ceilings
Go for low profile fixtures (panels or canless recessed). Add some wall or floor lighting so it doesn’t feel like everything is coming straight down from above.
Renter friendly fixes
Plug in floor lamps, table lamps, peel and stick LED strips, rechargeable little lamps—these can do a shocking amount. You don’t need permission to add lamps. (The landlord cannot stop you from purchasing a very committed torchiere.)
Lighting Improvements by Budget (Because Real Life)
Under $100
- Move lamps into the darkest corners (free, and weirdly effective)
- Swap to better bulbs (often the biggest bang for your buck)
- Add a mirror opposite your best light source if your room can handle it
$100-$500
- Add 2-3 lamps to create layers
- Under cabinet lighting in the kitchen
- Smart bulbs if you want easy day to night changes
$500+
- Recessed lighting or upgraded ceiling fixtures
- Hardwired sconces (so pretty, so effective)
Just a note: if you’re opening walls, adding circuits, or you’re not confident with electrical work, call an electrician. This is your home, not an episode of “Guess That Burning Smell.”
Common Mistakes That Keep Rooms Dark
- Only using recessed lights: they can leave the lower half of the room dim. You still need lamps.
- Blocking light with furniture: a couch shoved in front of a window or a tall bookcase parked next to a lamp can steal a surprising amount of light.
- Old dimmers + LEDs: if your lights flicker or buzz, you may need an LED rated dimmer.
- Ignoring reflectivity: light walls and ceilings bounce light around; dark finishes absorb it (beautifully, but aggressively).
The Boring Final Step That Makes a Huge Difference
Dust. I know. I’m sorry.
But dusty shades and dirty bulbs can noticeably cut light output over time. Give fixtures a quick clean every few months (more in kitchens where grease likes to float around and settle on everything like it pays rent).
Also: if you have a multi-bulb fixture and one bulb dies, consider replacing the set so color and brightness match. Nothing ruins a room’s vibe faster than one sad, off color bulb trying its best next to five newer ones.
If your darkest room is making you feel personally attacked, start small: add one lamp at eye level and swap in a better bulb. Then layer from there. You don’t need to “install more light” so much as you need to place light like you mean it.
And once you fix one room, be warned: you’ll start noticing every other dim corner in your house like a superpower. A very specific, very domestic superpower.