
A media wall pulls your TV, storage, fireplace, and cables into one clean feature that doesn’t eat half the room.
But the gap between a polished media wall and a “why does this look like a dentist’s waiting room” situation comes down to a few decisions most people rush through.
This guide covers media wall ideas that suit real UK homes, from open-plan new builds to terraced living rooms where every centimeter matters.
Whether you want a media wall with a fireplace centerpiece, a simple paneled backdrop, or a full built-in unit, you’ll find a layout here that fits your space and budget.
Also read: DIY Media Wall Build Guide: Costs, Steps, Pitfalls
Media Wall Ideas with Fireplace
Unlike a traditional hearth, an electric fire slots into a stud wall build-out that’s usually 200- 300 mm deep, keeping everything flush and tidy.
Here are the most popular fireplace media wall layouts for your home:
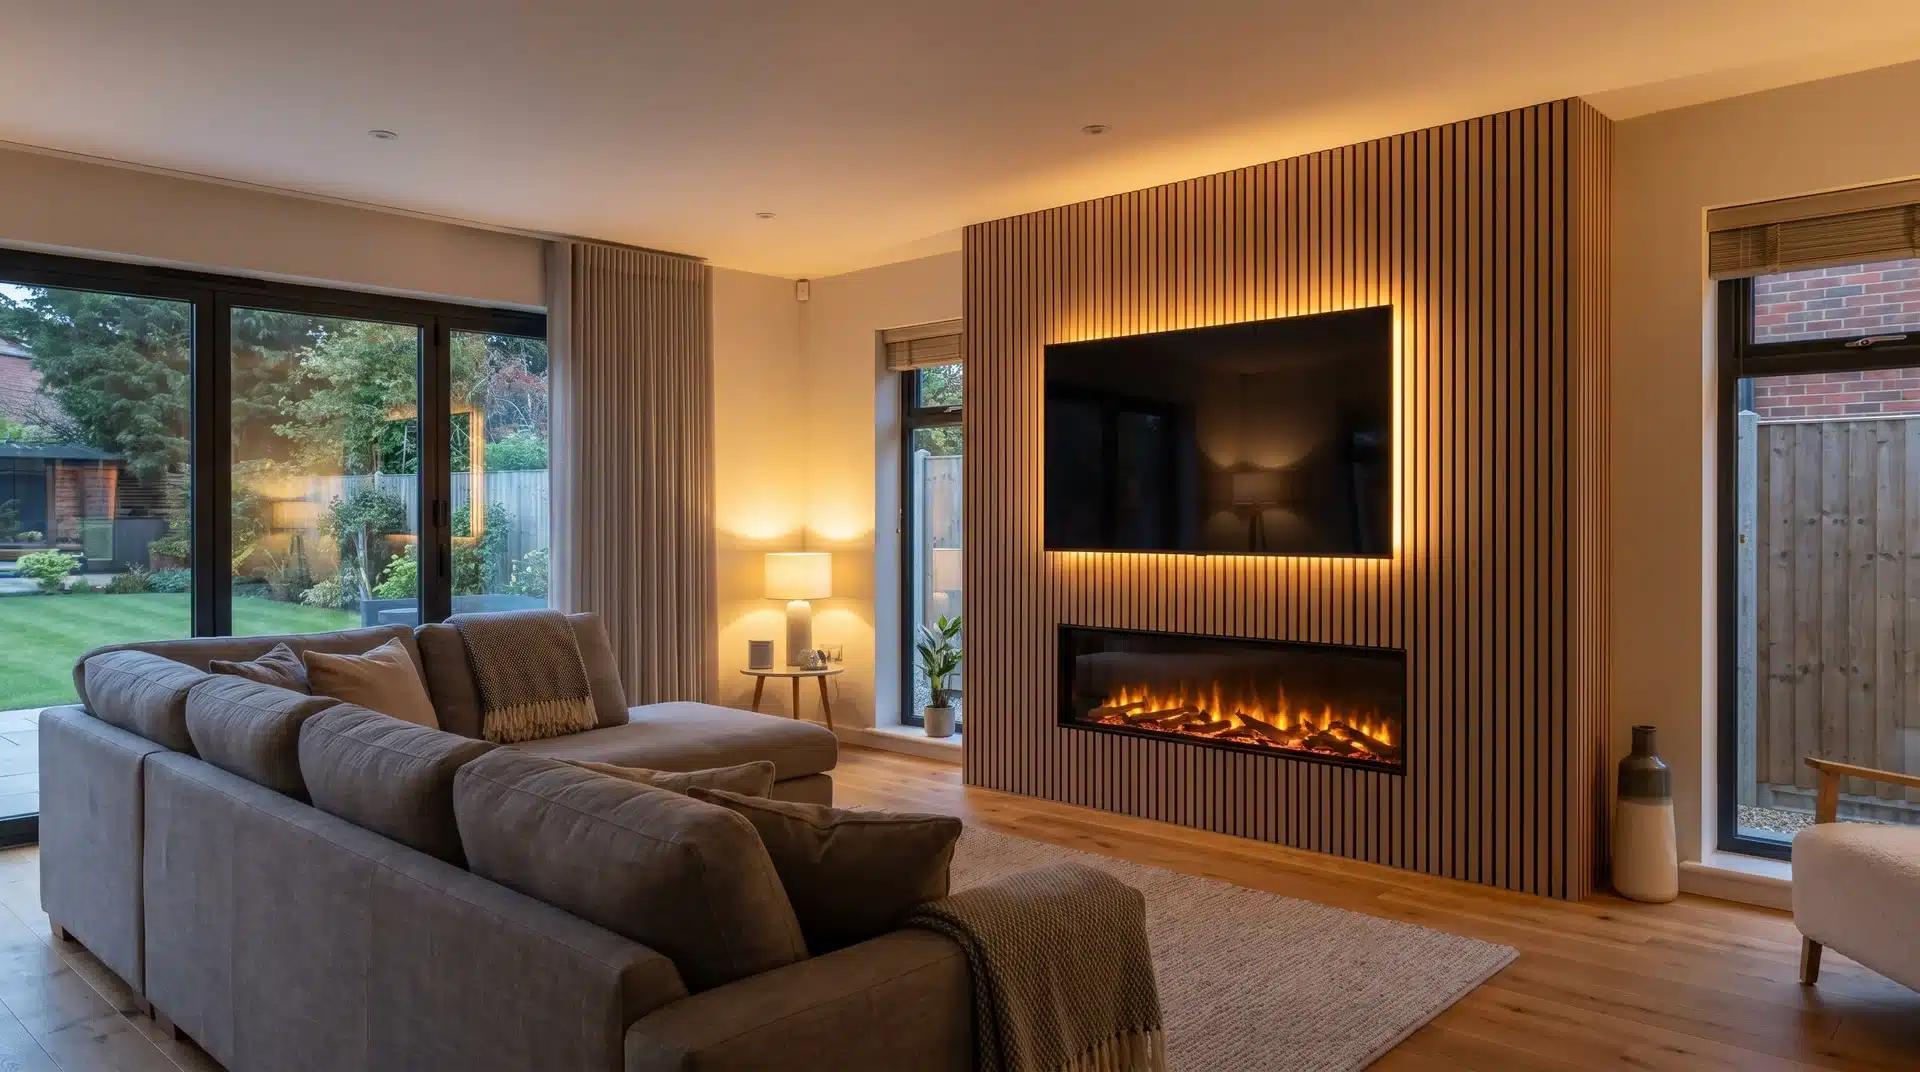
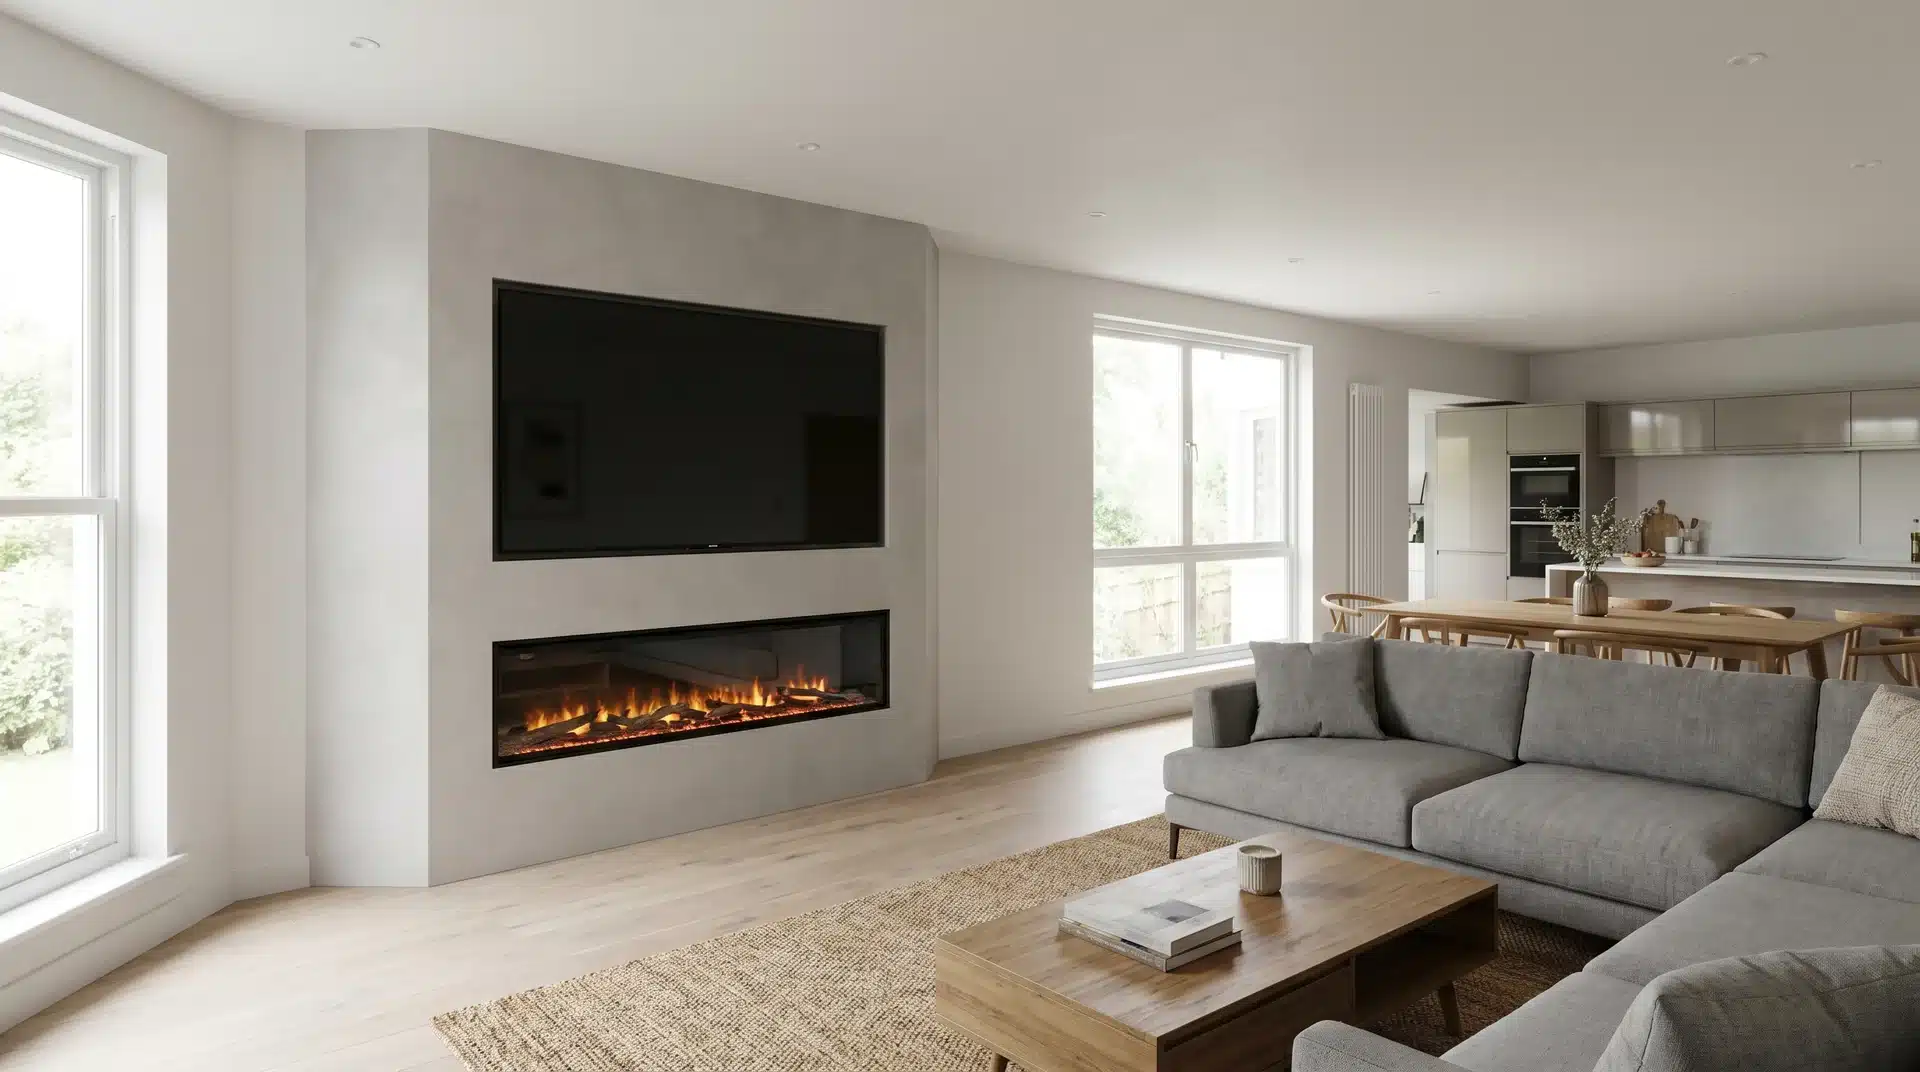
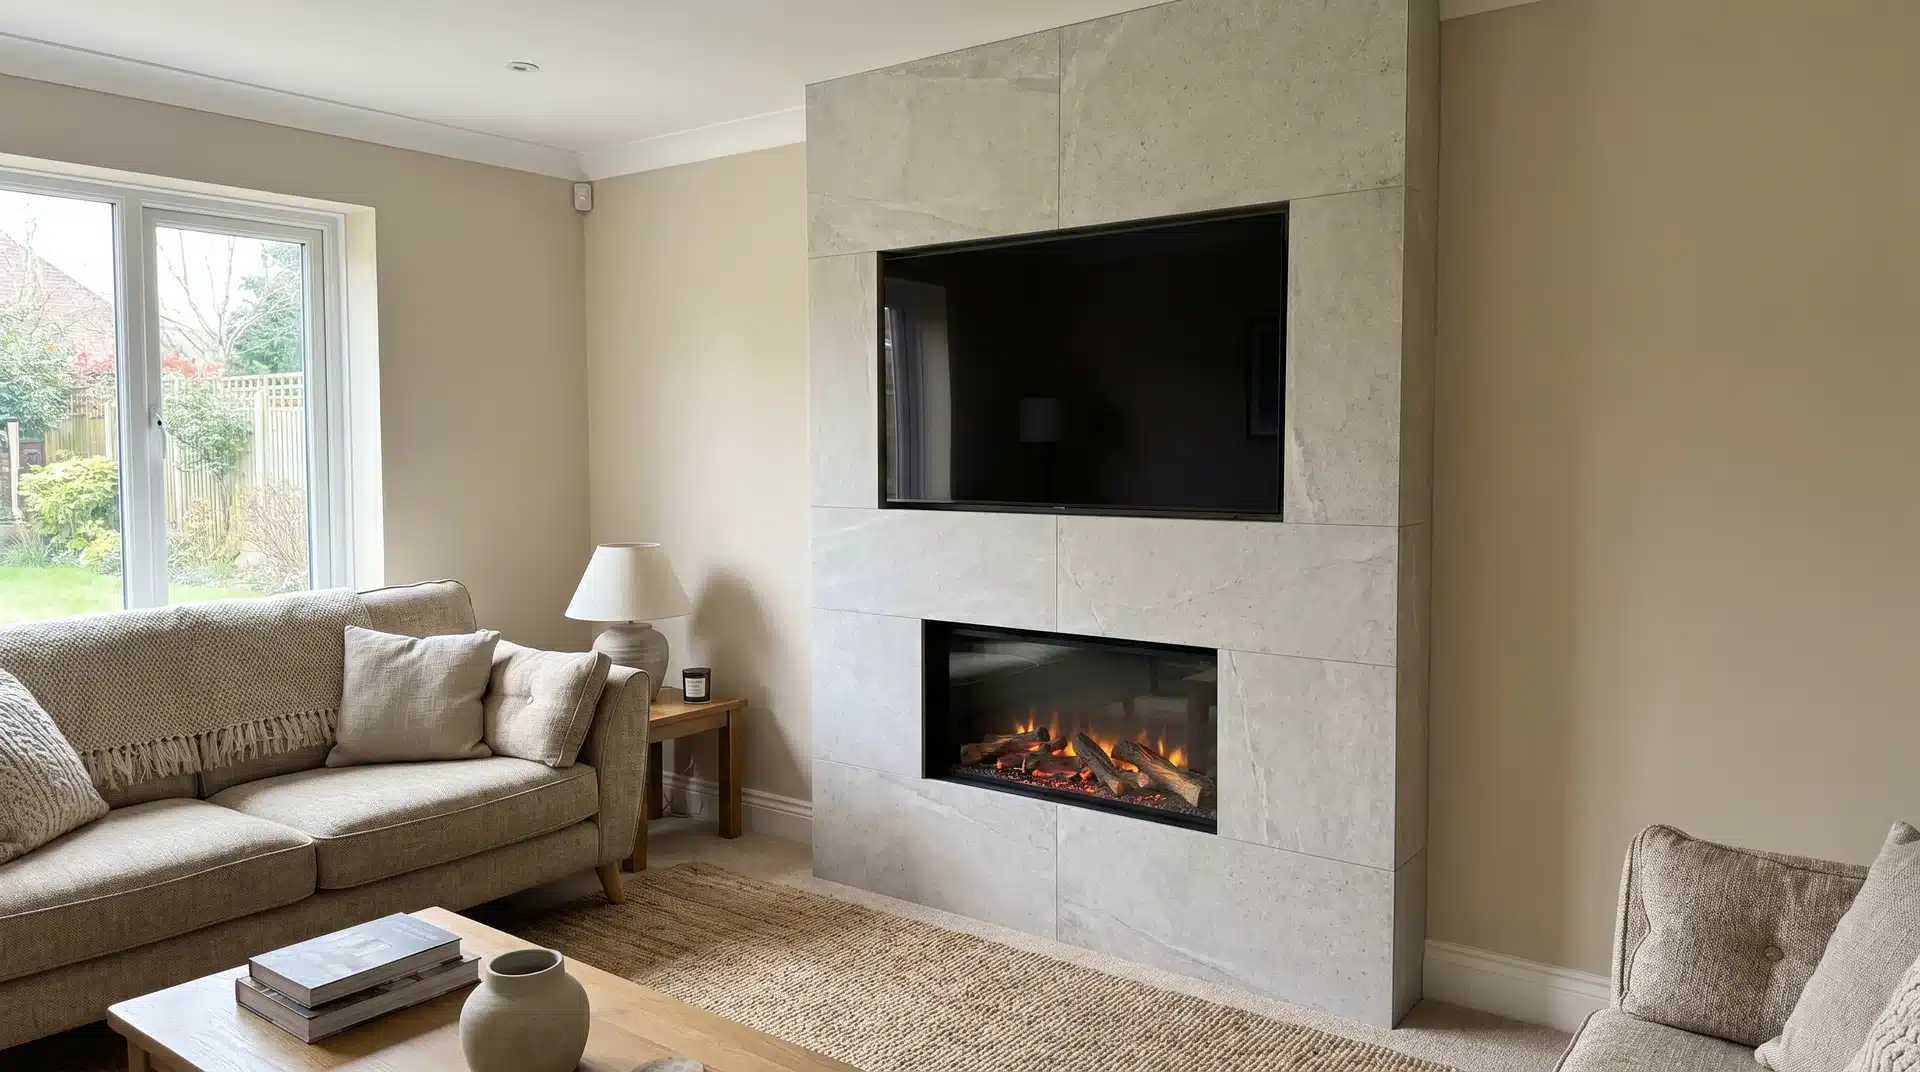
1. Recessed Electric Fire with Flush TV
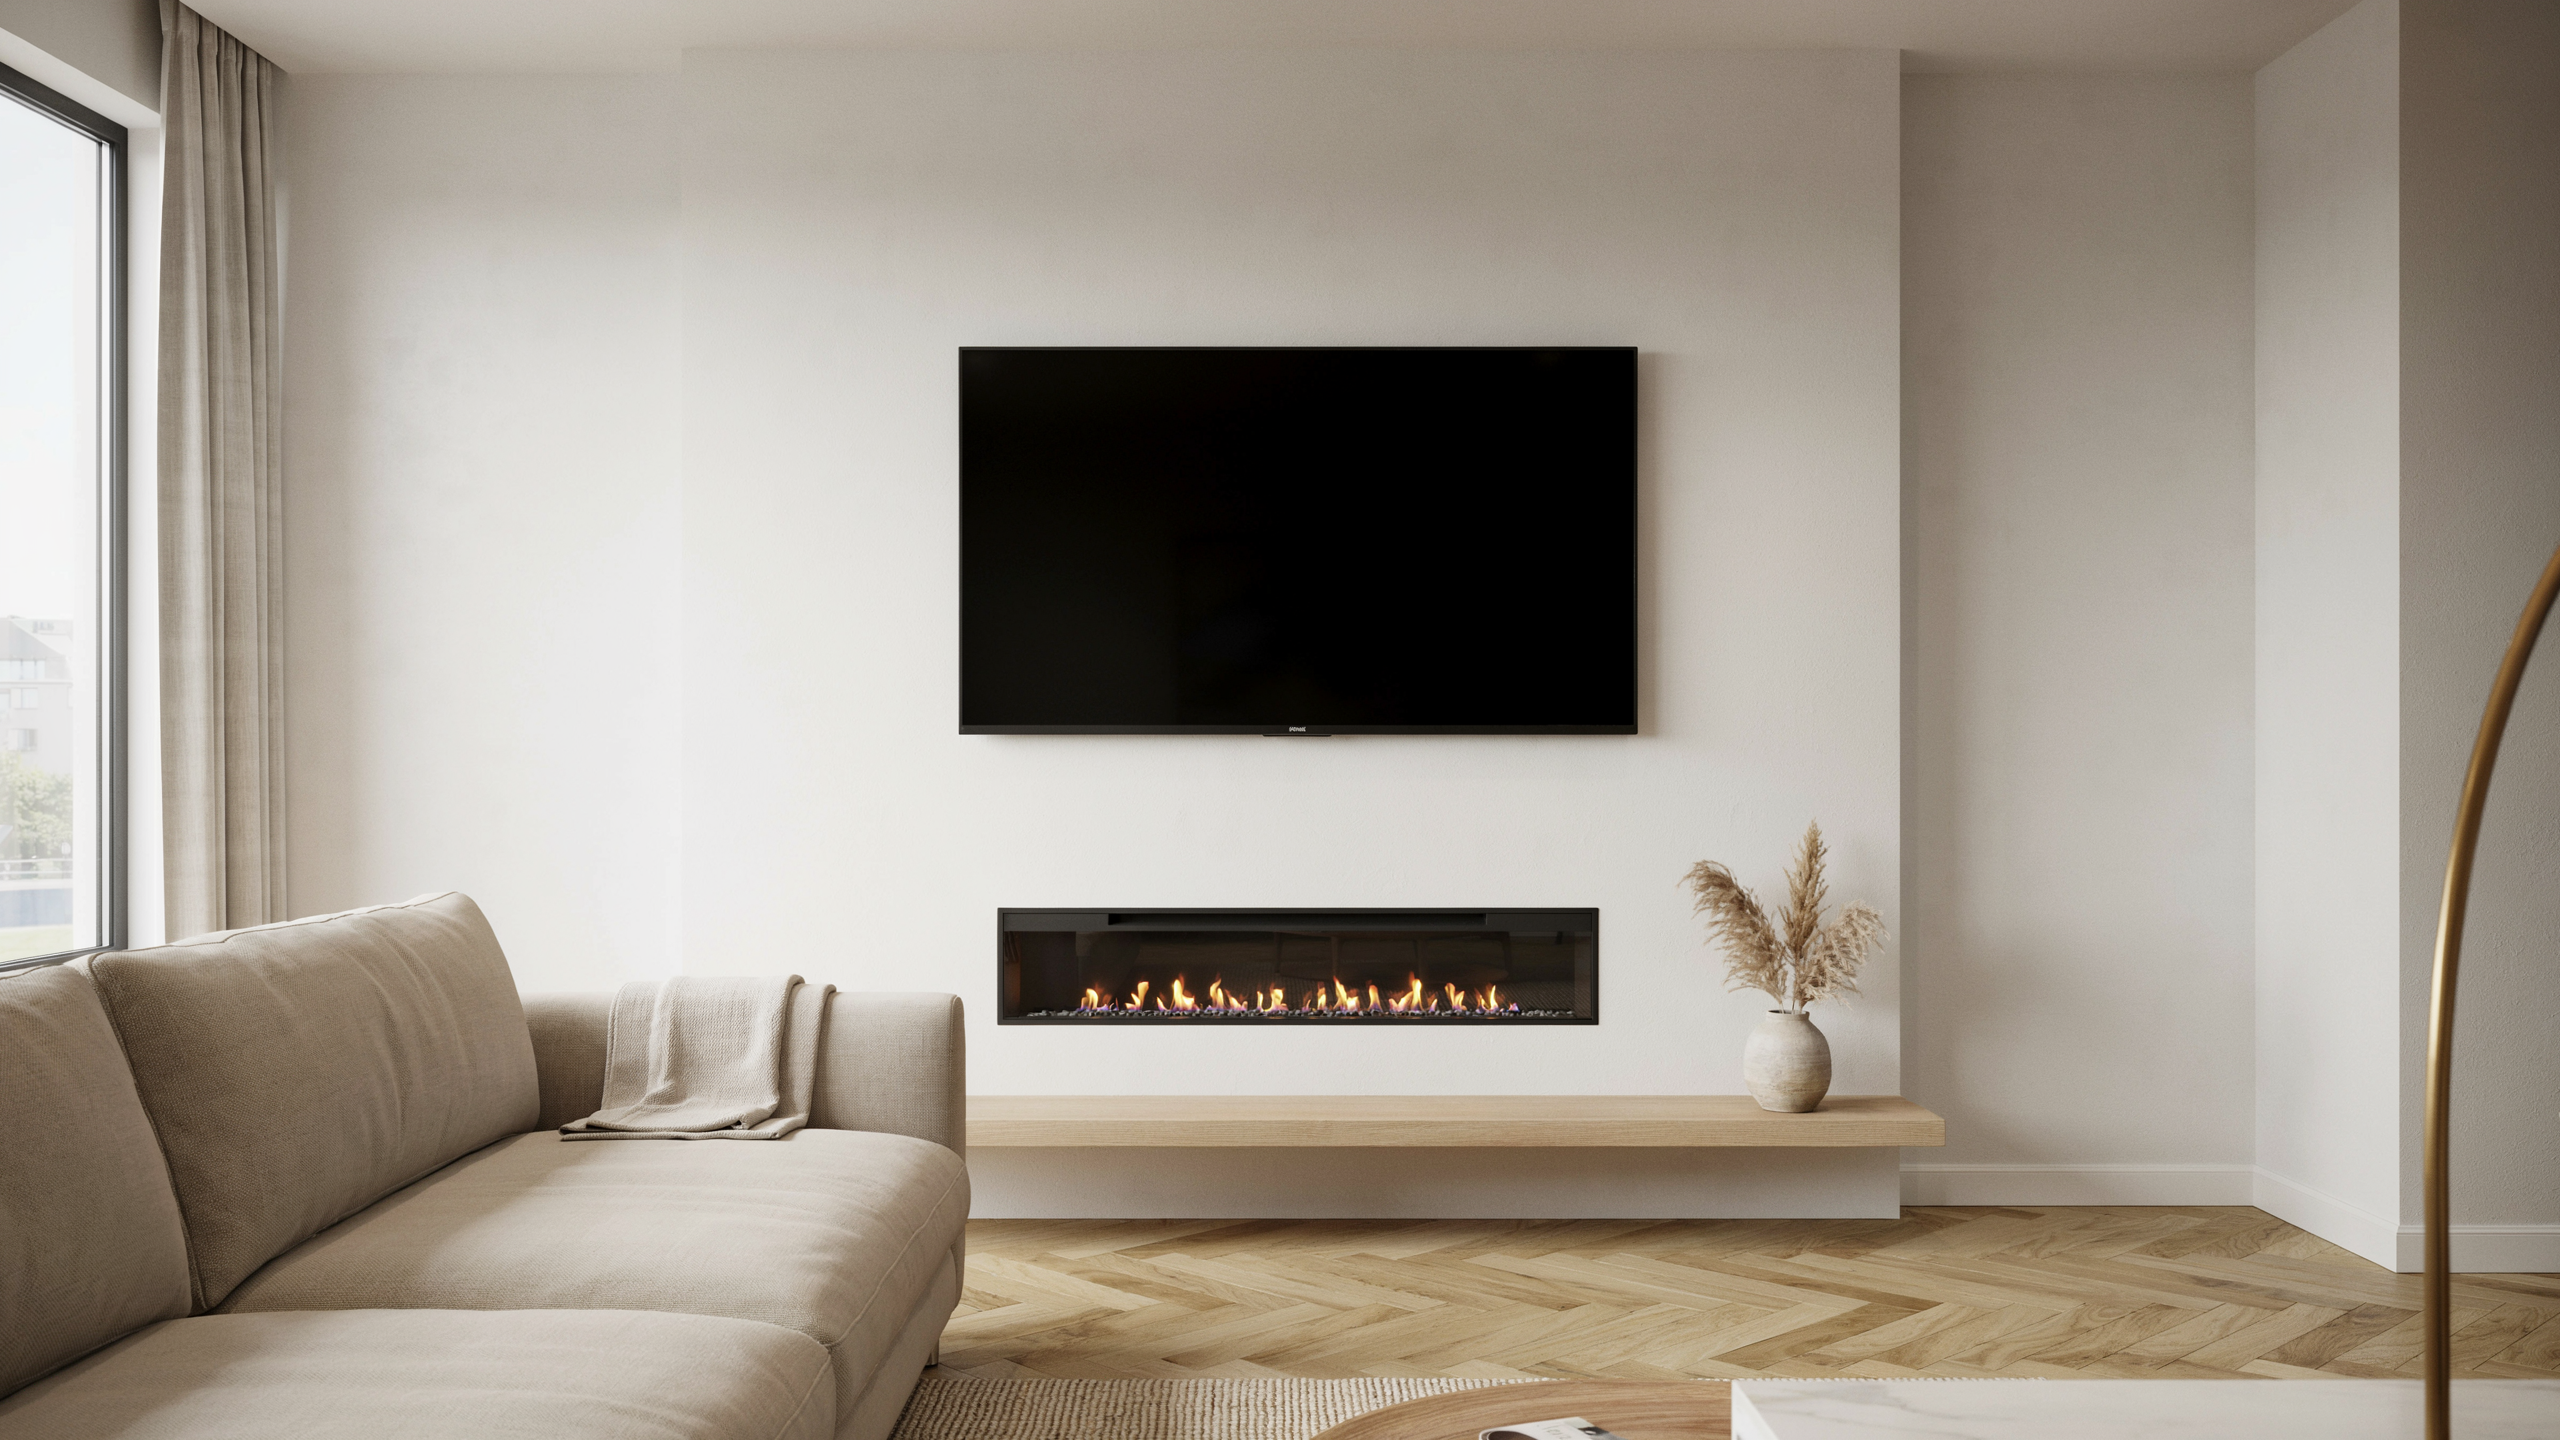
A linear electric fire (typically 1000-1500 mm wide) sits inside a plasterboard recess, with the TV mounted flush above.
The whole wall reads as one flat surface. This is the default media wall with fire layout for good reason: it works in almost any room width and doesn’t need a chimney or flue.
Keep a minimum of 300mm between the top of the fire unit and the bottom of your TV. Most electric fires direct heat downward and forward, but that clearance protects your screen and keeps your wall warranty intact.
2. Wide Panoramic Fire, No TV Recess
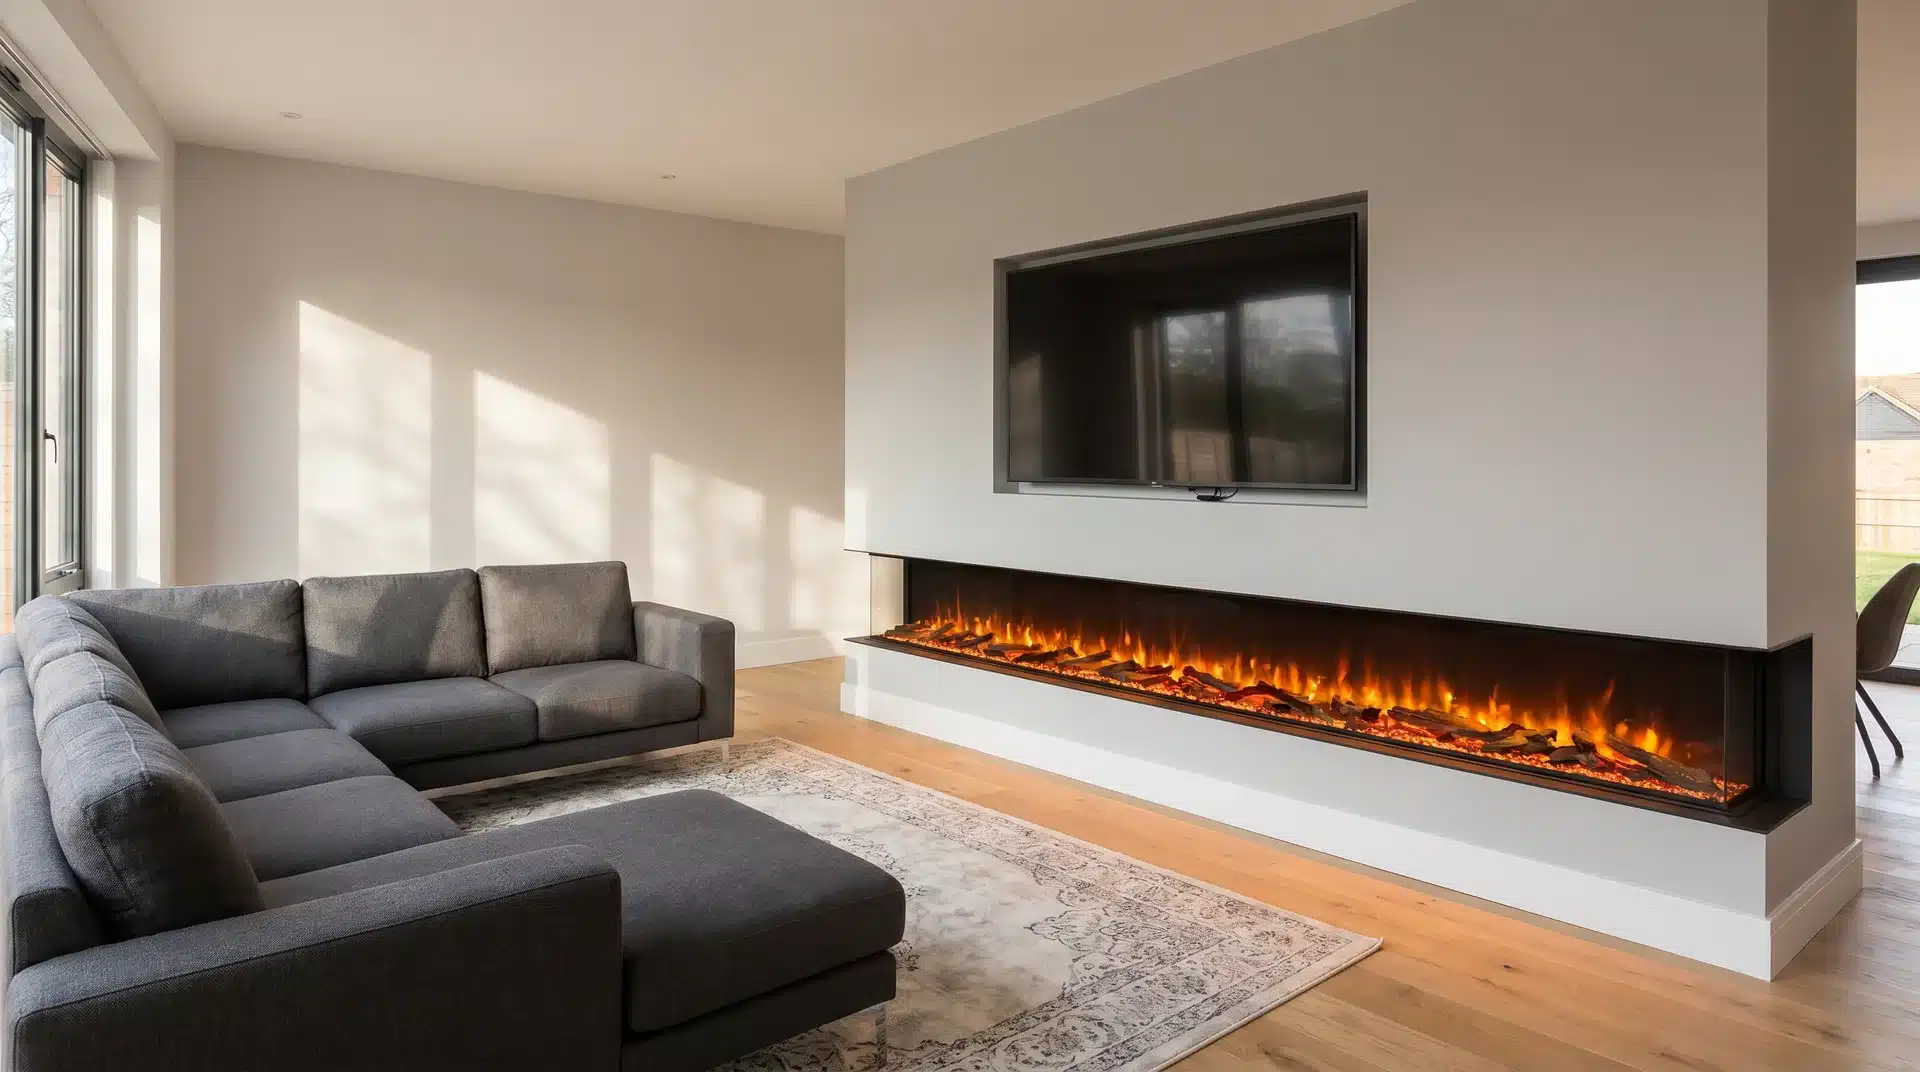
An 1800- 2000 mm panoramic electric fire stretches across the lower half of the wall while the TV hangs above it without a recess, just a standard bracket on the finished wall. The wide flame bed becomes the visual anchor, and the TV takes a secondary role.
This works well in rooms wider than 3.5 meters where a narrow fire can look lost. It also simplifies the build because you only need to frame out the fire recess, not a separate TV cavity.
3. Double-Stacked Fire and TV in Alcove
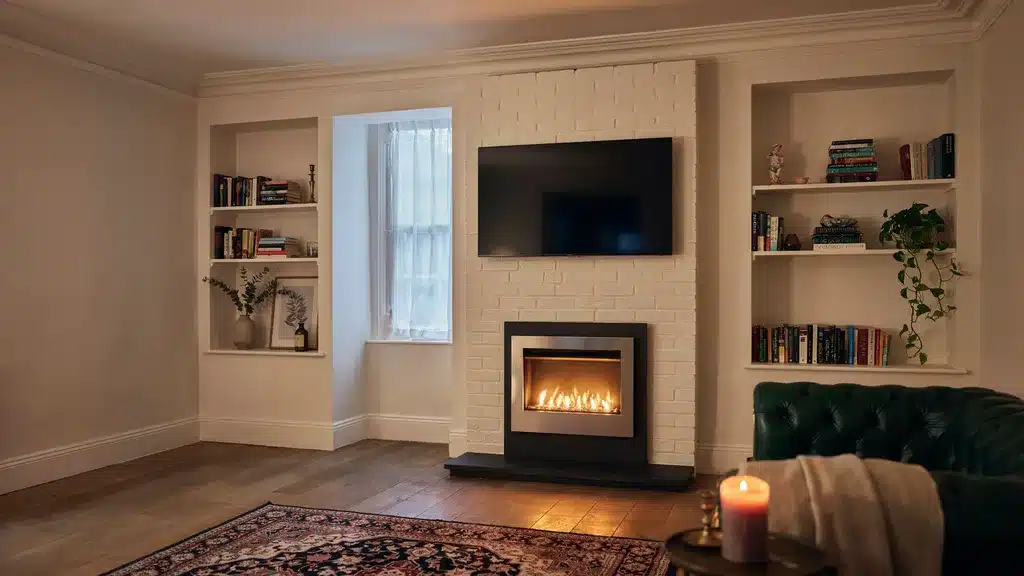
In rooms with a chimney breast, the existing alcove provides a natural frame. An electric fire drops into the old fireplace opening (or a purpose-built recess at the base), and the TV mounts above within the chimney breast width. Side alcoves hold shelving or storage.
This layout saves time because you’re working with existing architecture instead of building an entirely new stud wall. It also preserves the character of period homes, which matters if your property is in a conservation area.
Choosing the right fire width: Match the fire to your TV width or go slightly wider. A 55-inch TV is roughly 1230mm wide. Pairing it with a 1200mm fire creates visual balance. A 1500mm fire under the same TV adds drama. Avoid fires narrower than your screen, as the proportions look awkward.
4. Corner Media Wall with Angled Fireplace
Not every room has a straight wall to work with. A corner media wall angles the screen and fire at 45 degrees into an unused corner, turning dead space into the room’s focal point. The stud frame wraps around the corner and creates depth without projecting far into the room.
Particularly useful in L-shaped living rooms and new-build open-plan spaces where the sofa doesn’t face a flat wall.
5. Minimalist Fireplace-Only Feature Wall
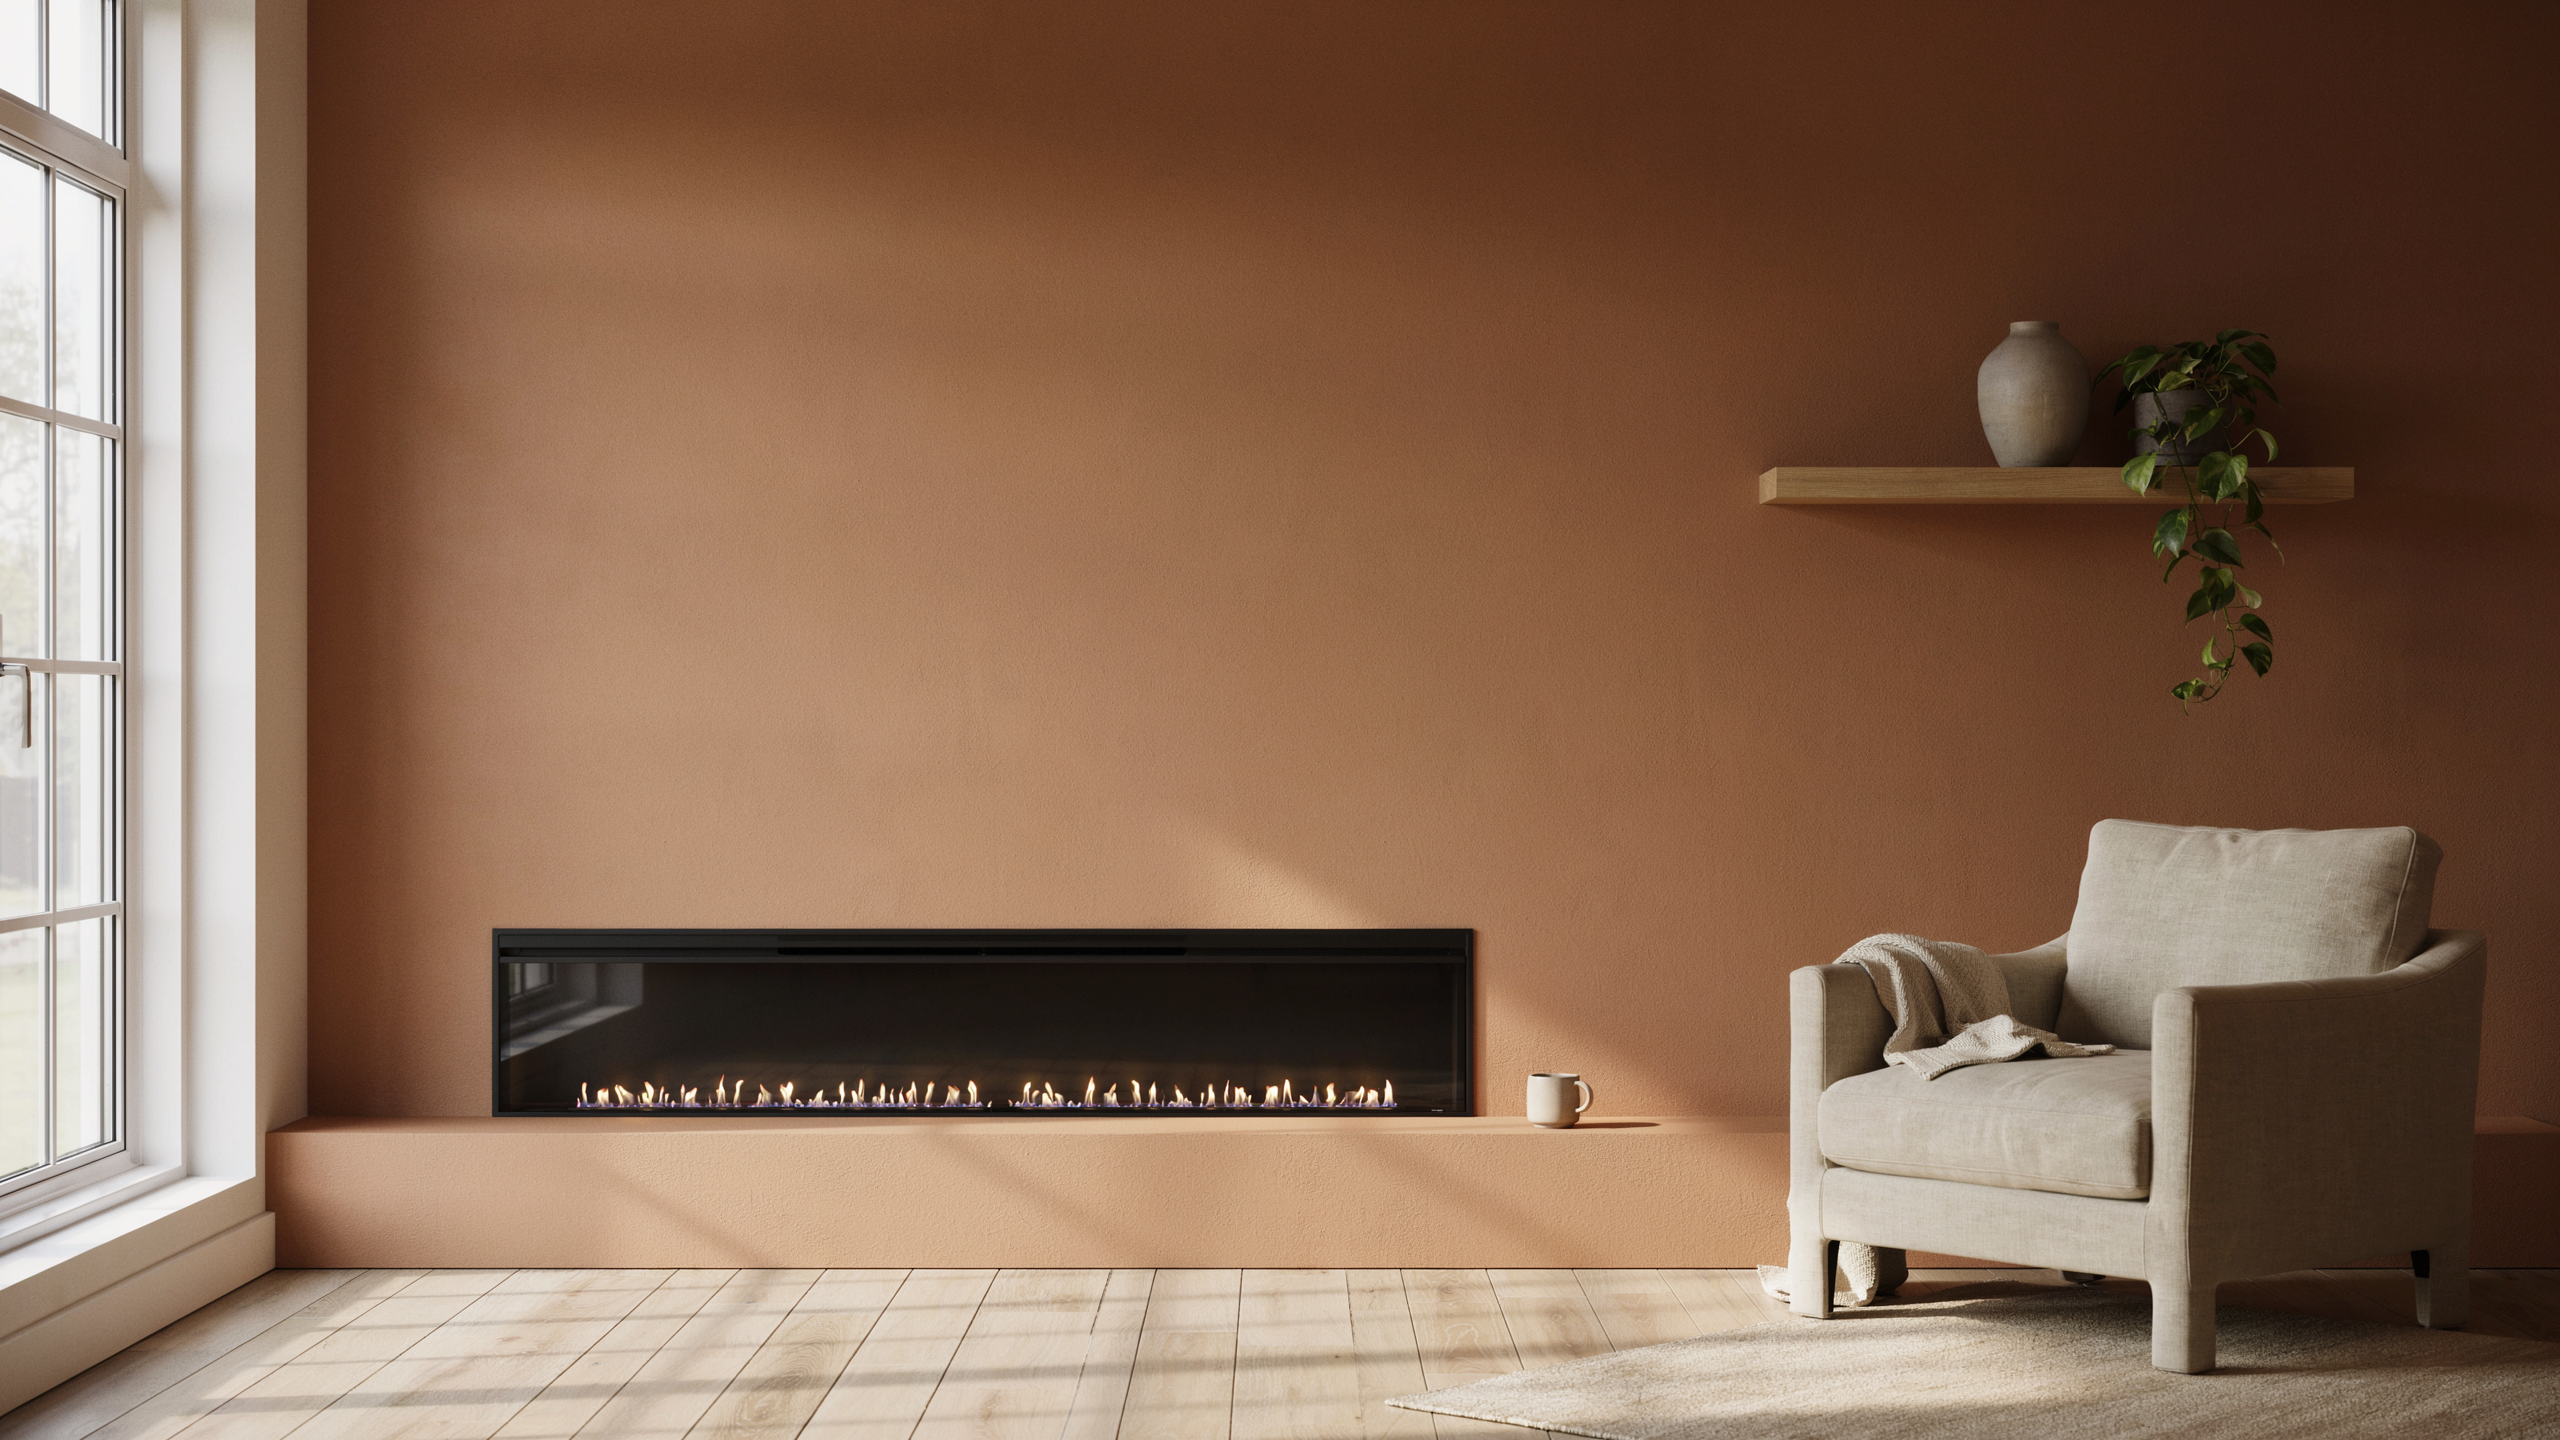
Not every media wall needs a TV. A long, low electric fire set into a smooth rendered or plastered wall creates a modern fireplace feature wall that works beautifully on its own. Add a single floating shelf above it for a few objects, and the wall is complete.
This is an underrated approach for second living rooms, snugs, and dining areas where a screen isn’t wanted but warmth and atmosphere are.
Log Burner Media Wall Ideas
Electric fires dominate the media wall world, but nothing quite matches a real wood burner for warmth and character.
The build is more involved because you need a flue, non-combustible linings, and a HETAS-certified installation, but the result feels completely different to live with.
6. Inset Stove with Heat Deflector and TV Above
A DEFRA-approved inset stove sits inside a fire-rated chamber with the TV mounted at least 500mm above it.
A stainless-steel or glass heat-deflector shelf between the two pushes rising heat away from the screen.
It’s the cleanest way to combine real flame with a media wall, though the deflector is non-negotiable if you want your TV warranty to survive.
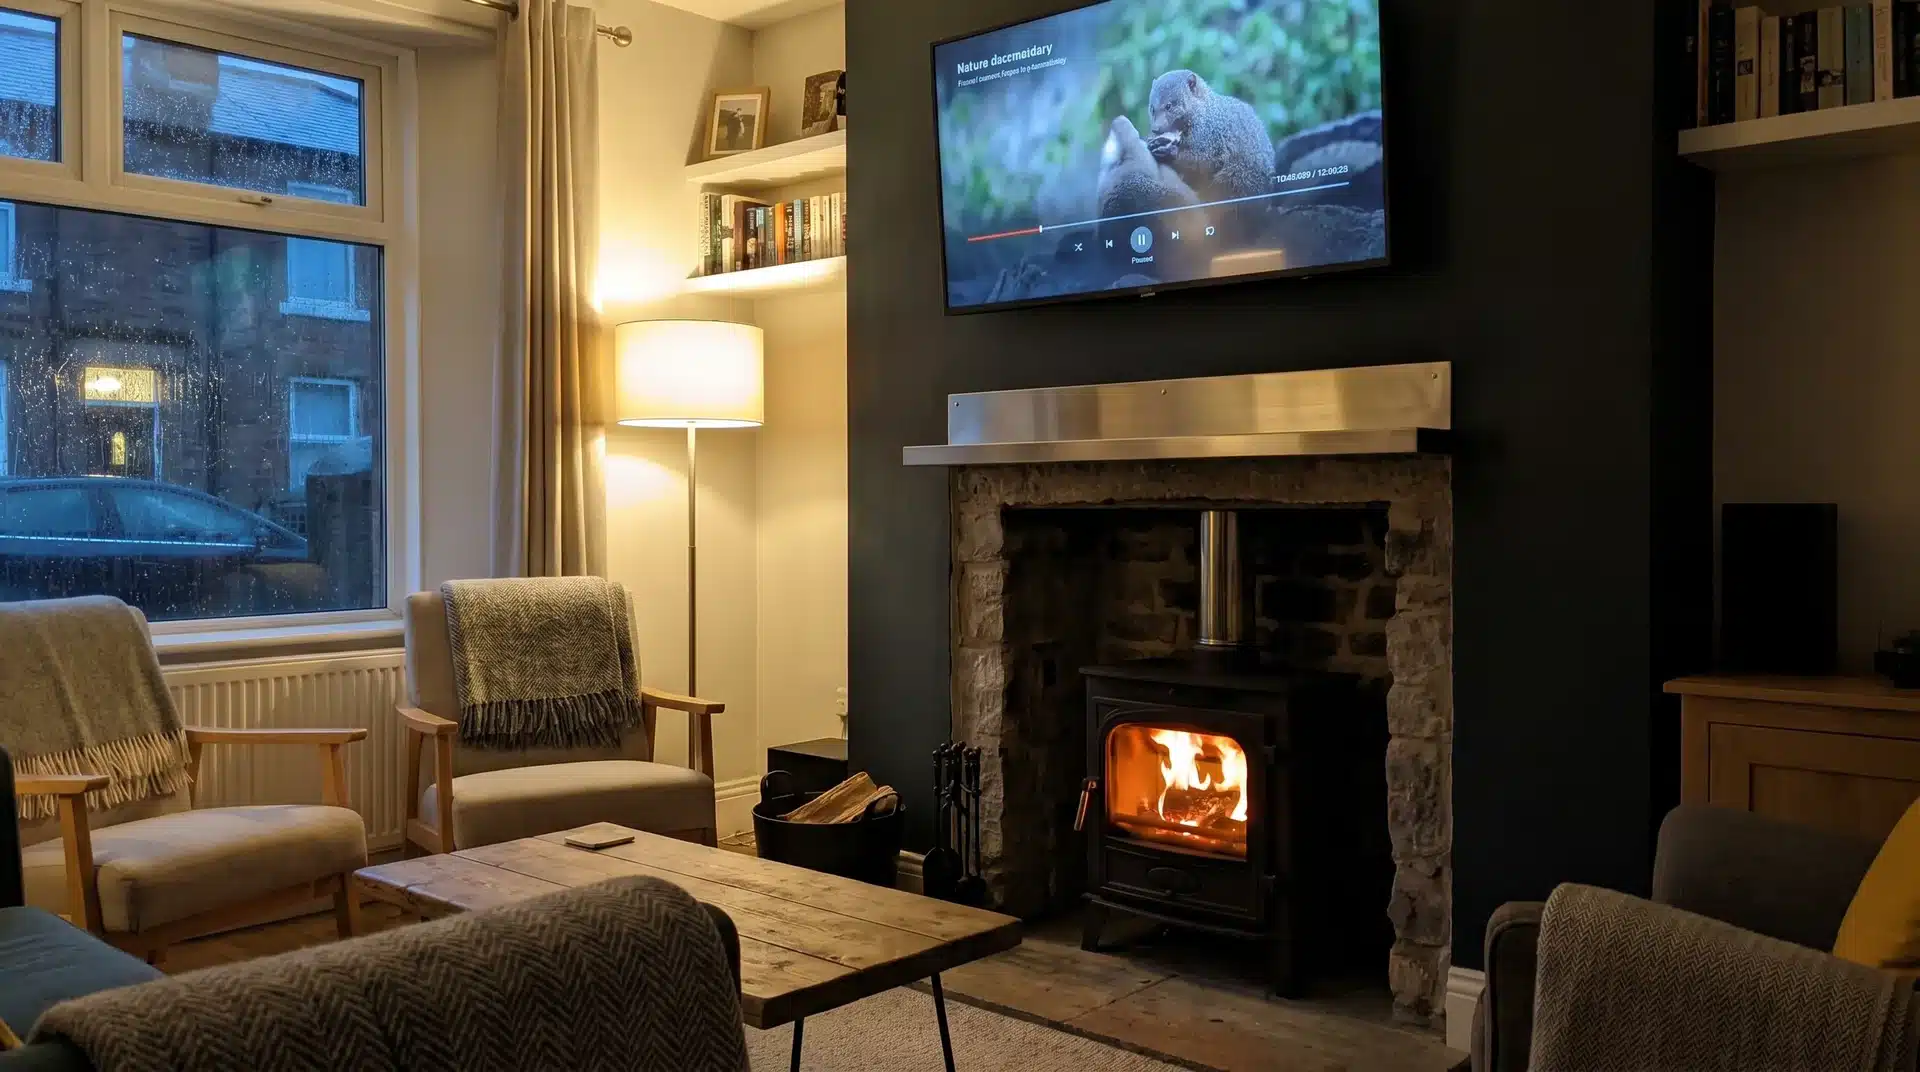
7. Freestanding Stove on a Raised Hearth
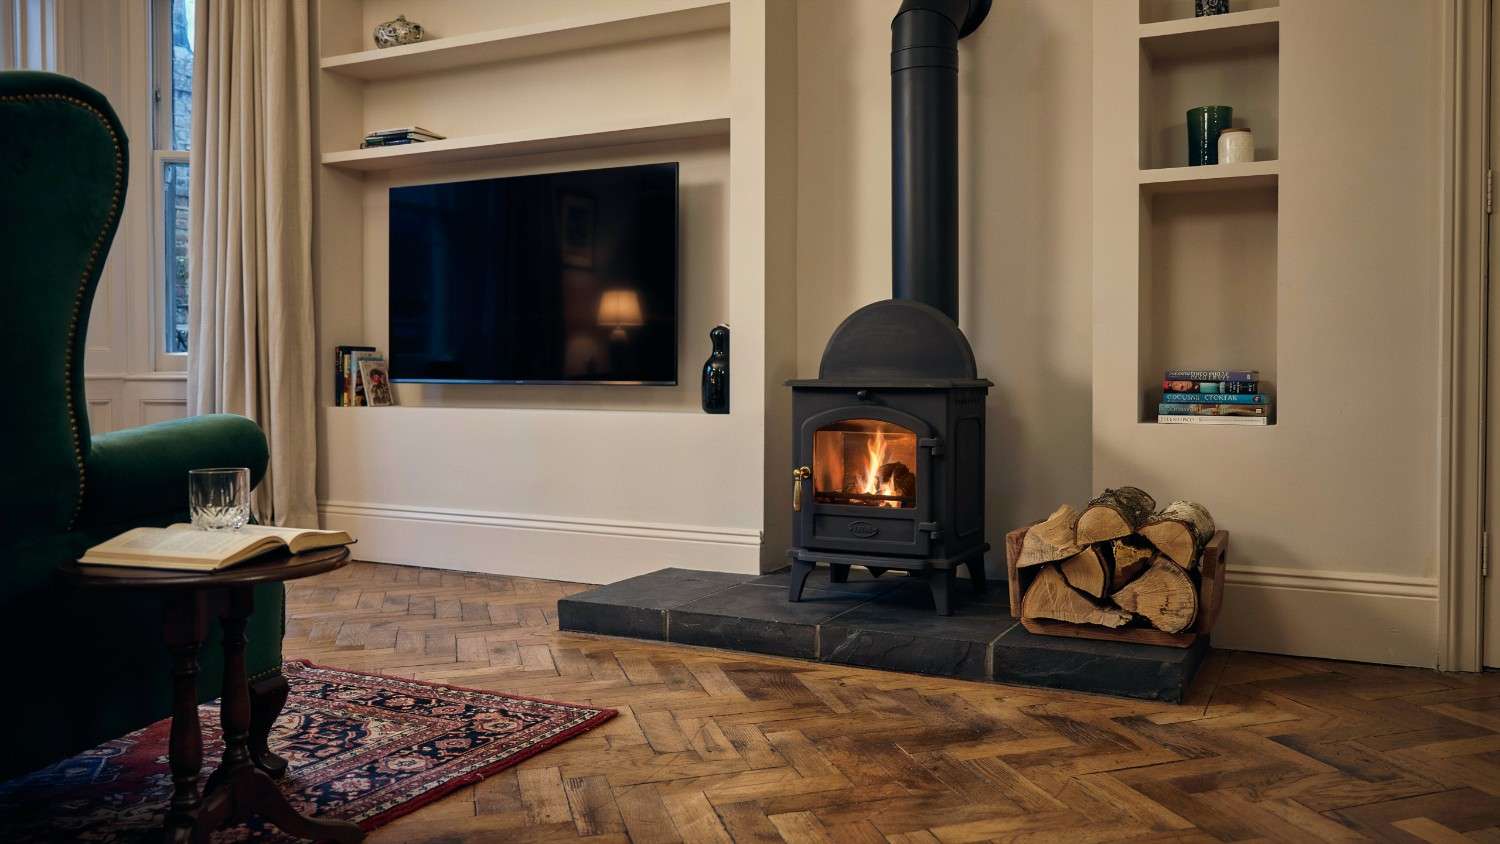
Rather than recessing the stove into the wall, it stands on a slate or stone hearth in front of the media wall.
The built-out wall behind holds the TV and hides cables while the stove’s flue pipe runs up the surface.
This suits period homes where you want the burner to feel like a piece of furniture rather than a built-in appliance.
8. Brick Slip Surround with Oak Beam Mantel
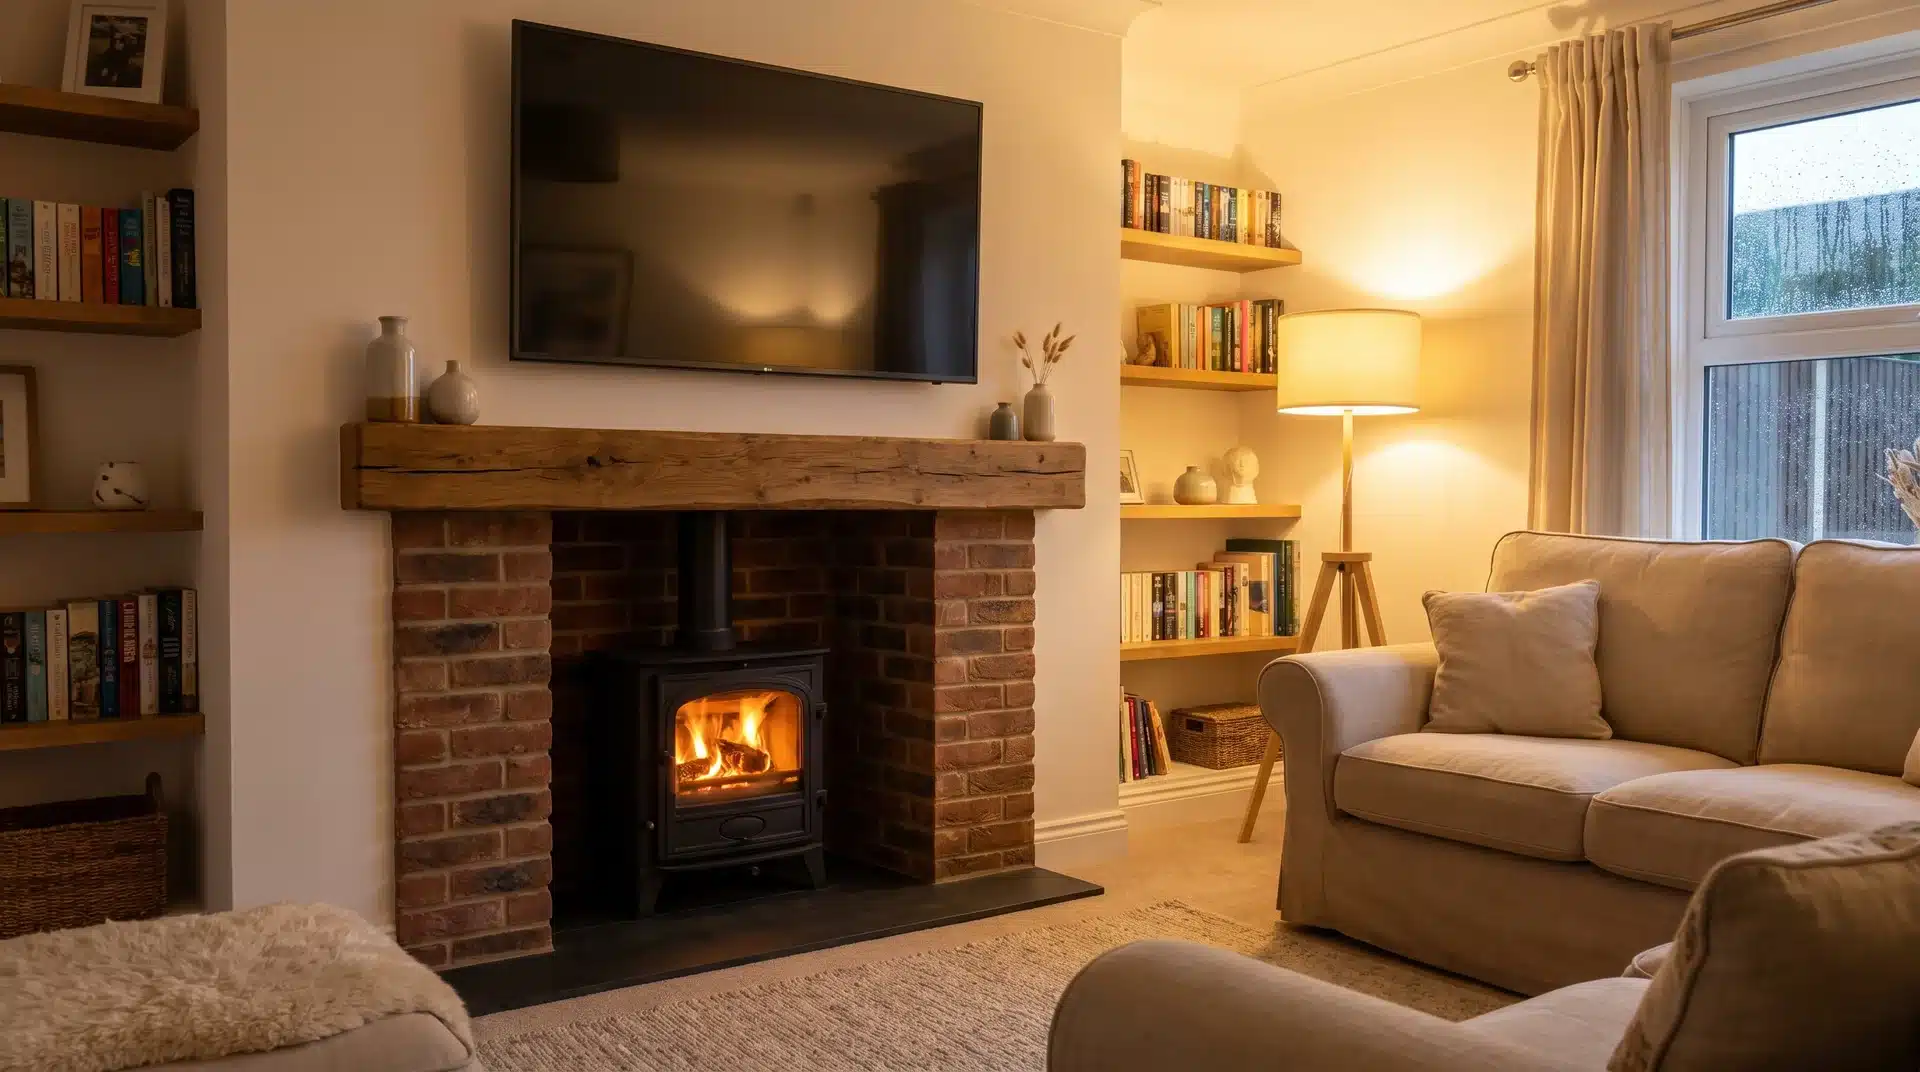
Brick-slip cladding around the stove recess paired with a chunky oak beam above it gives the most popular rustic media wall look in the UK right now.
The brick retains heat beautifully, and the timber provides a natural visual break between fire and screen.
We’ve covered log burner media walls in much more depth, including Scandinavian layouts, storage niche designs, regulations, and cost breakdowns, in our full guide to log burner media wall ideas for modern homes.
Media Wall Paneling Ideas
Wall paneling transforms a flat plasterboard surface into something with depth and texture.
It’s also one of the most budget-friendly ways to make a media wall look deliberately designed rather than “we just mounted a TV on a wall.”
9. Vertical Slat Paneling
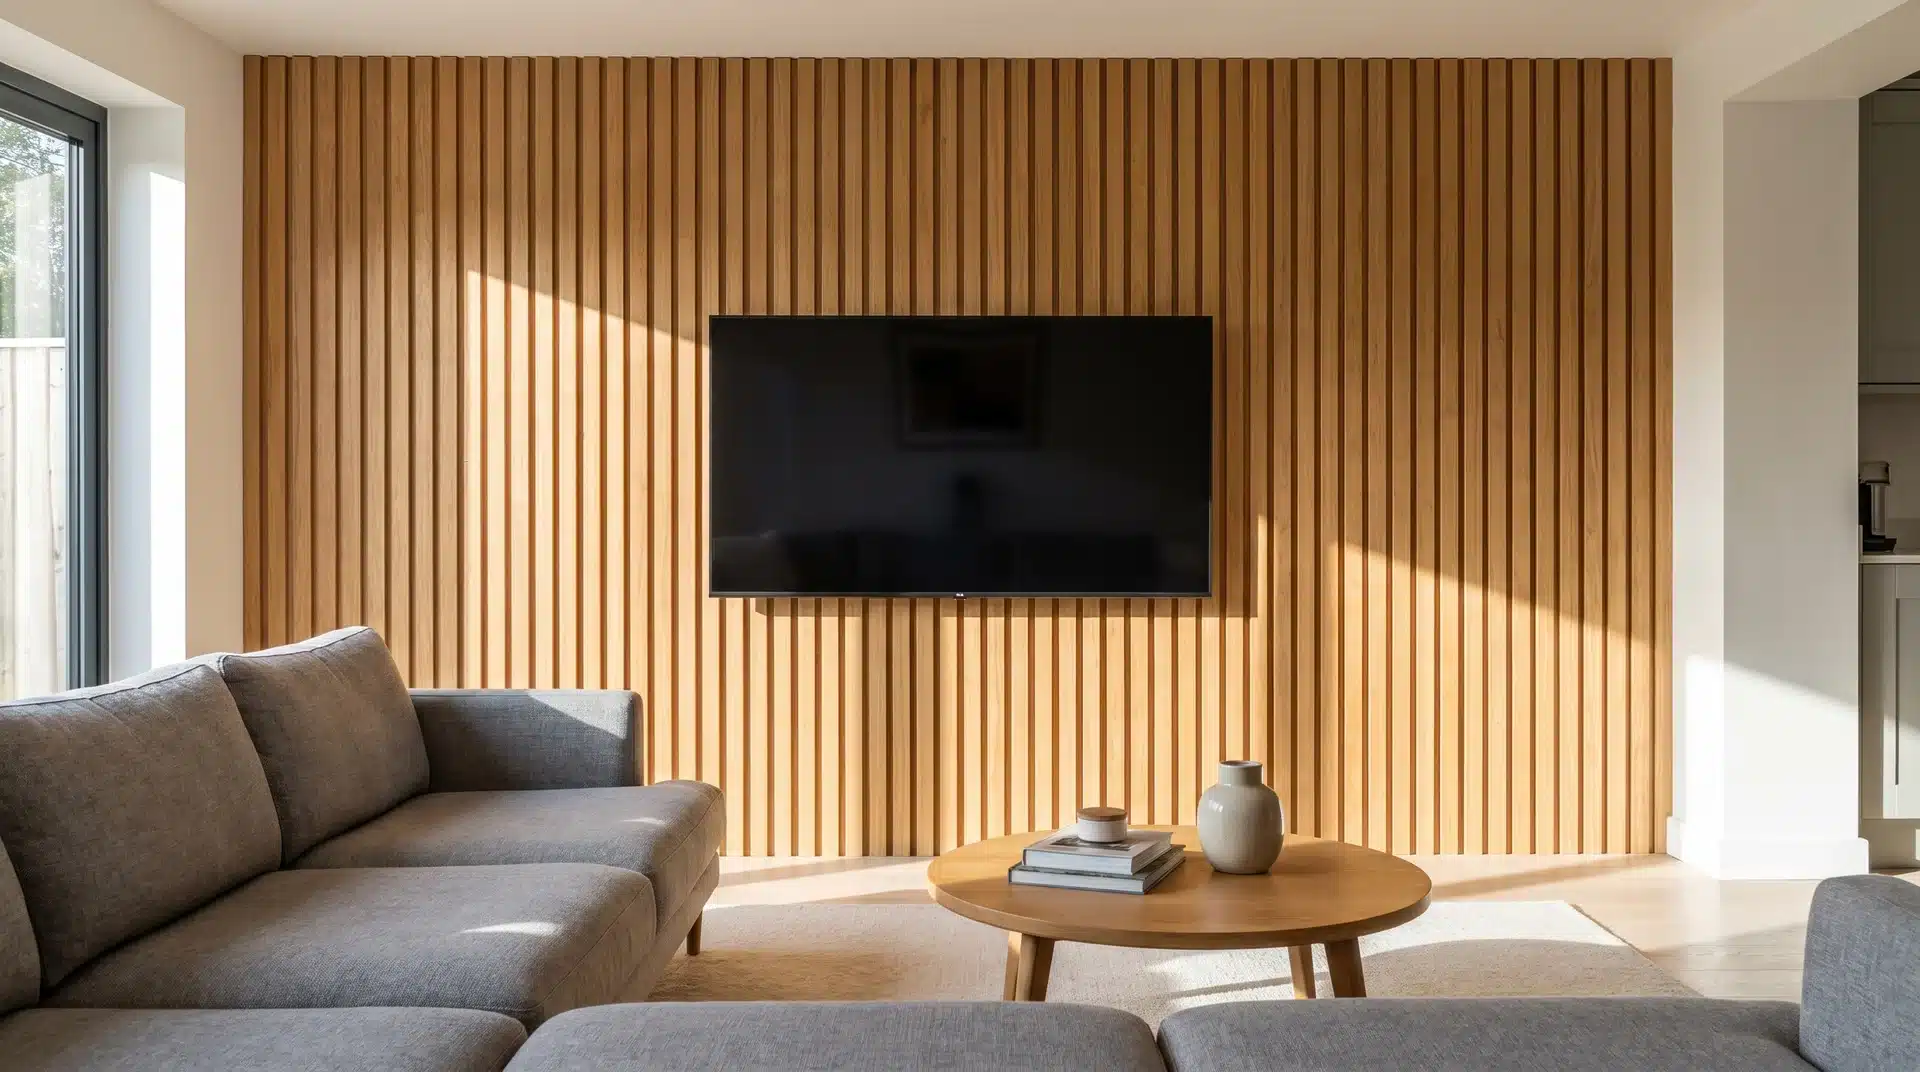
Timber or MDF slats (typically 20- 40 mm wide, spaced 15- 20 mm apart) run floor to ceiling behind the TV.
The gaps between slats create shadow lines that change throughout the day as light shifts.
Paint them in a warm neutral for subtlety or a deep green or navy for impact.
Slat panels are the most popular media wall paneling choice in the UK right now. You can buy pre-made panels (around £40-80 per square meter) or build them yourself from battens for roughly half the cost.
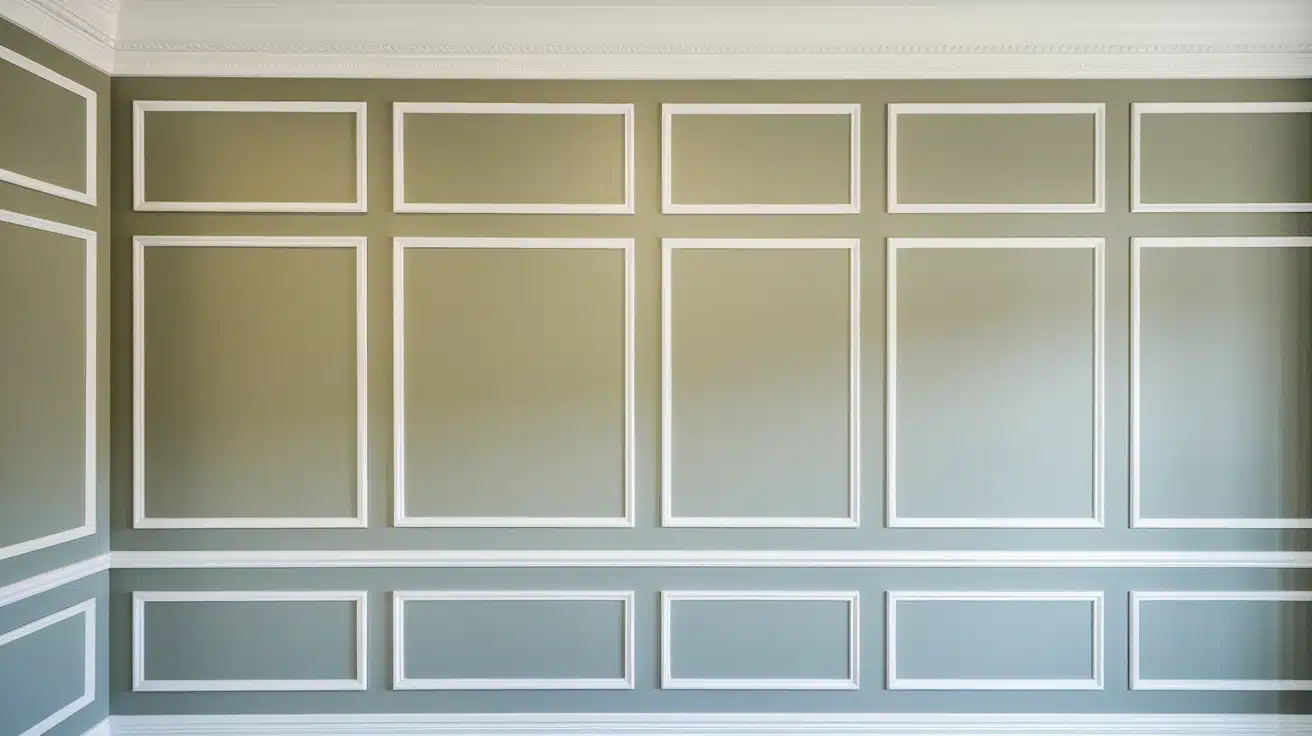
10. Shaker-Style Square Paneling
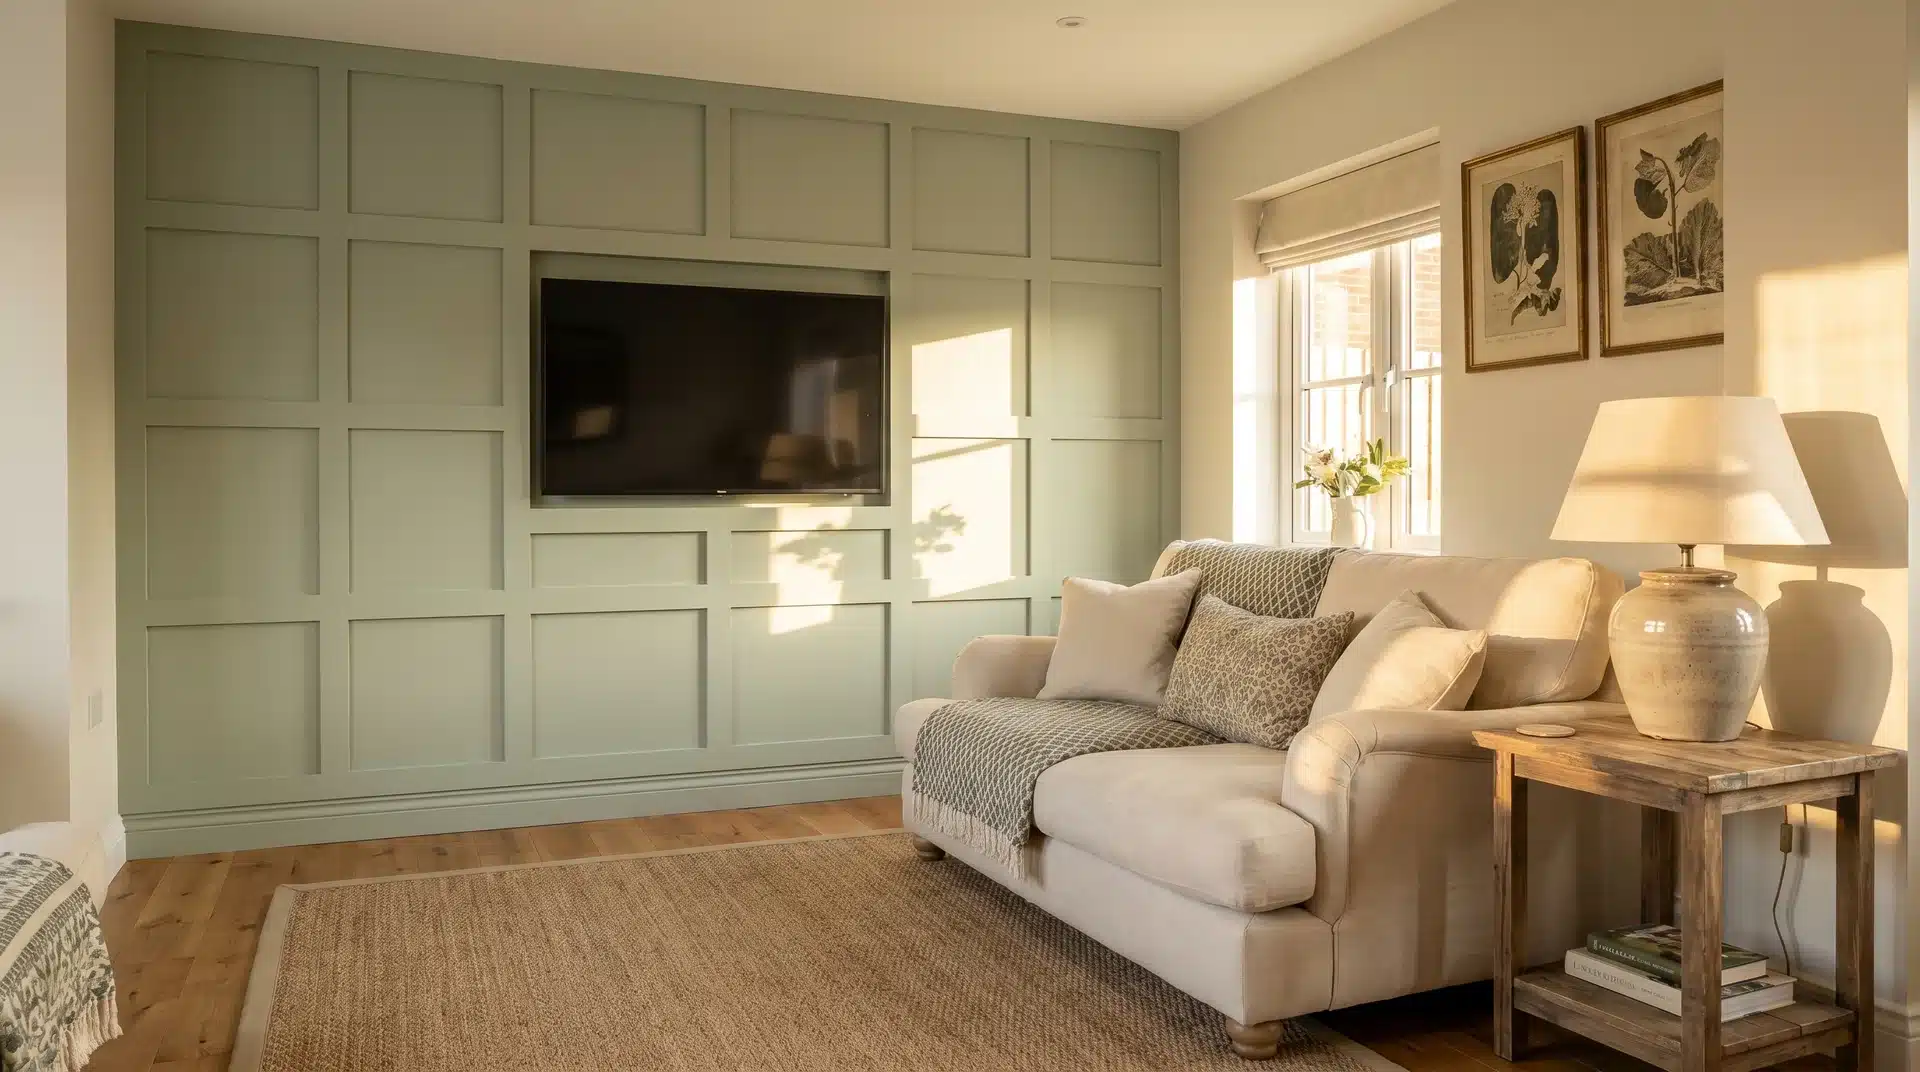
Square or rectangular moduling applied to the wall in a grid pattern gives a classic Shaker look. It works particularly well in living rooms that lean toward traditional or transitional styles.
Paint the paneling the same color as the surrounding walls for a tone-on-tone effect that adds dimension without contrast.
11. Fluted Panel Accent Wall
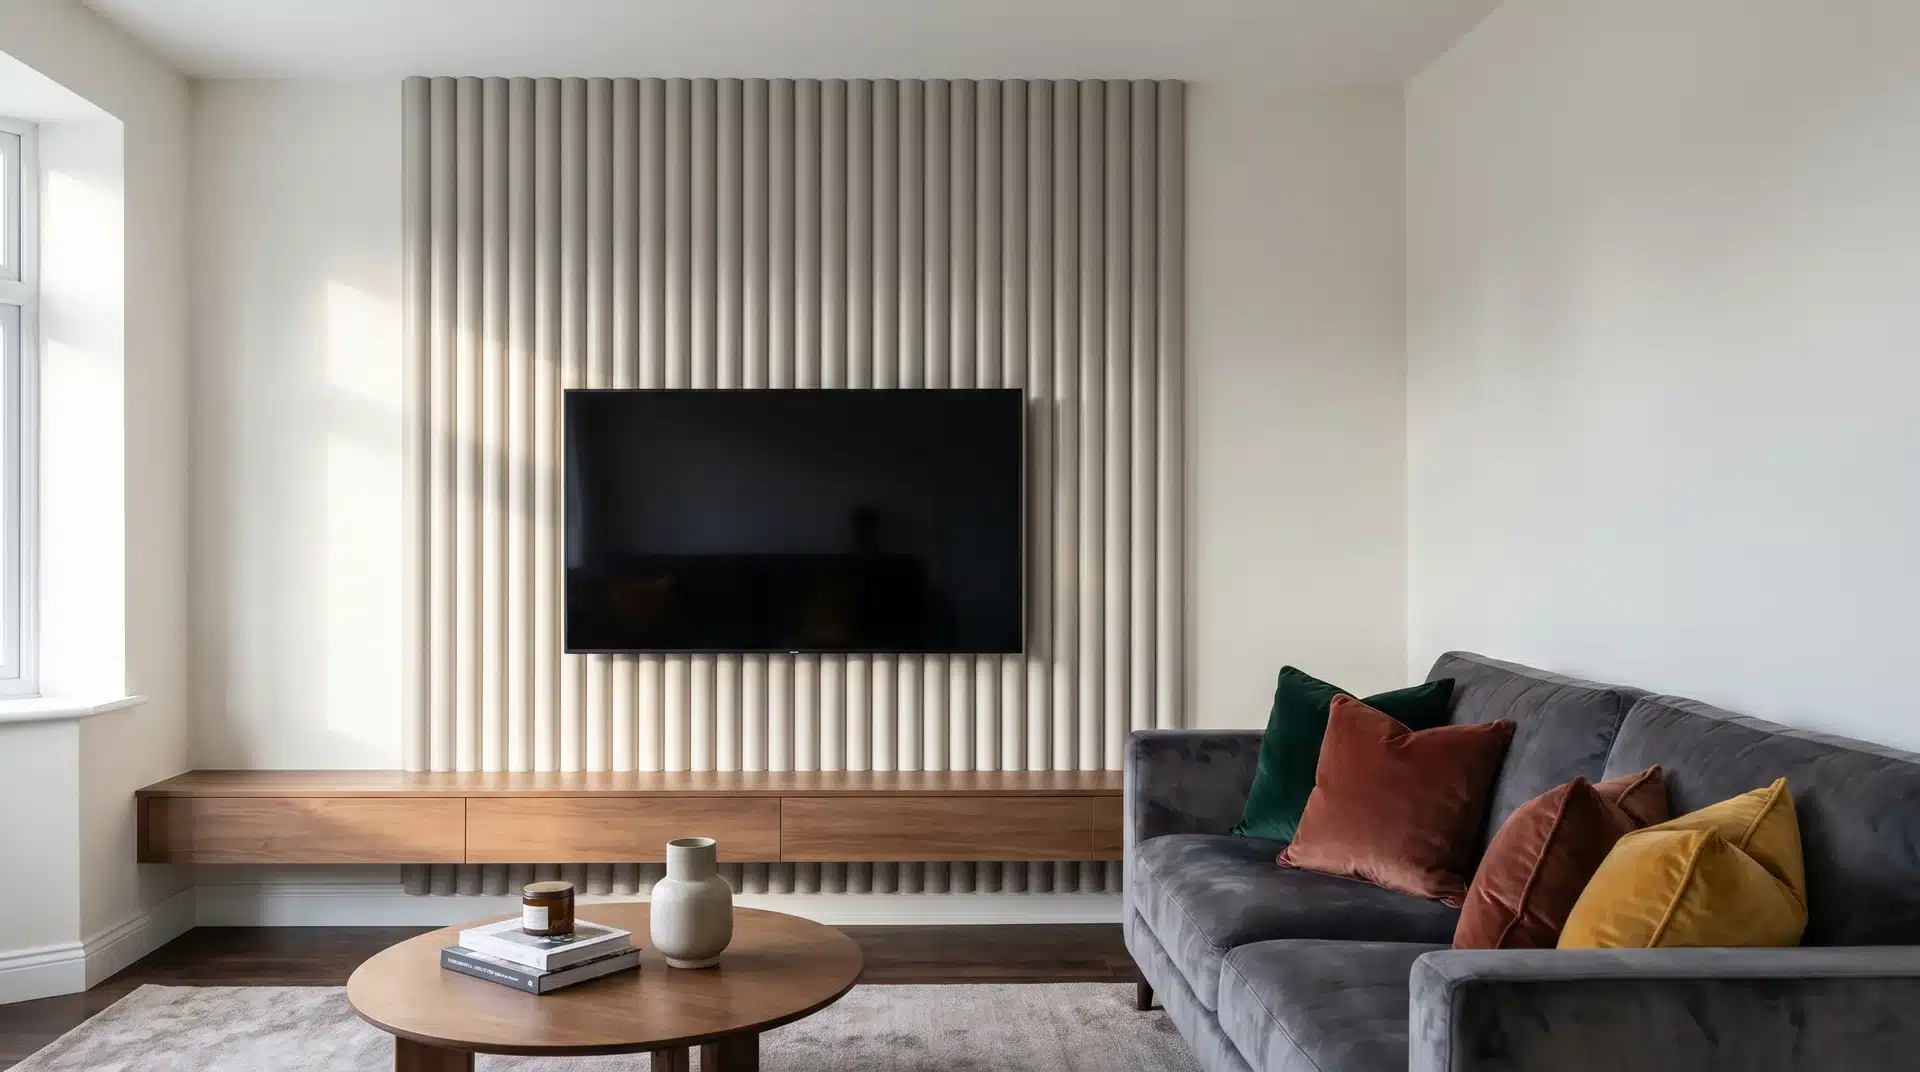
Fluted (ribbed) MDF panels have a rounded profile that catches light differently from flat slats.
They add a softer, more refined texture that suits contemporary and Art Deco-inspired spaces.
Mount them behind the TV section only, with plain walls on either side, so the panel becomes a defined zone.
12. Stone-Effect Cladding Panels
Lightweight stone-effect panels (polyurethane or plaster-based) give the look of a natural stone feature wall at a fraction of the weight and cost.
They’re particularly effective around fireplace media walls, where they create a hearth-like surround without structural changes.
These panels weigh around 3- 6 kg per square metre compared to 50kg+ for real stone, so they can go onto standard stud walls without reinforcement.
13. Full-Height Marble-Effect Porcelain Slab
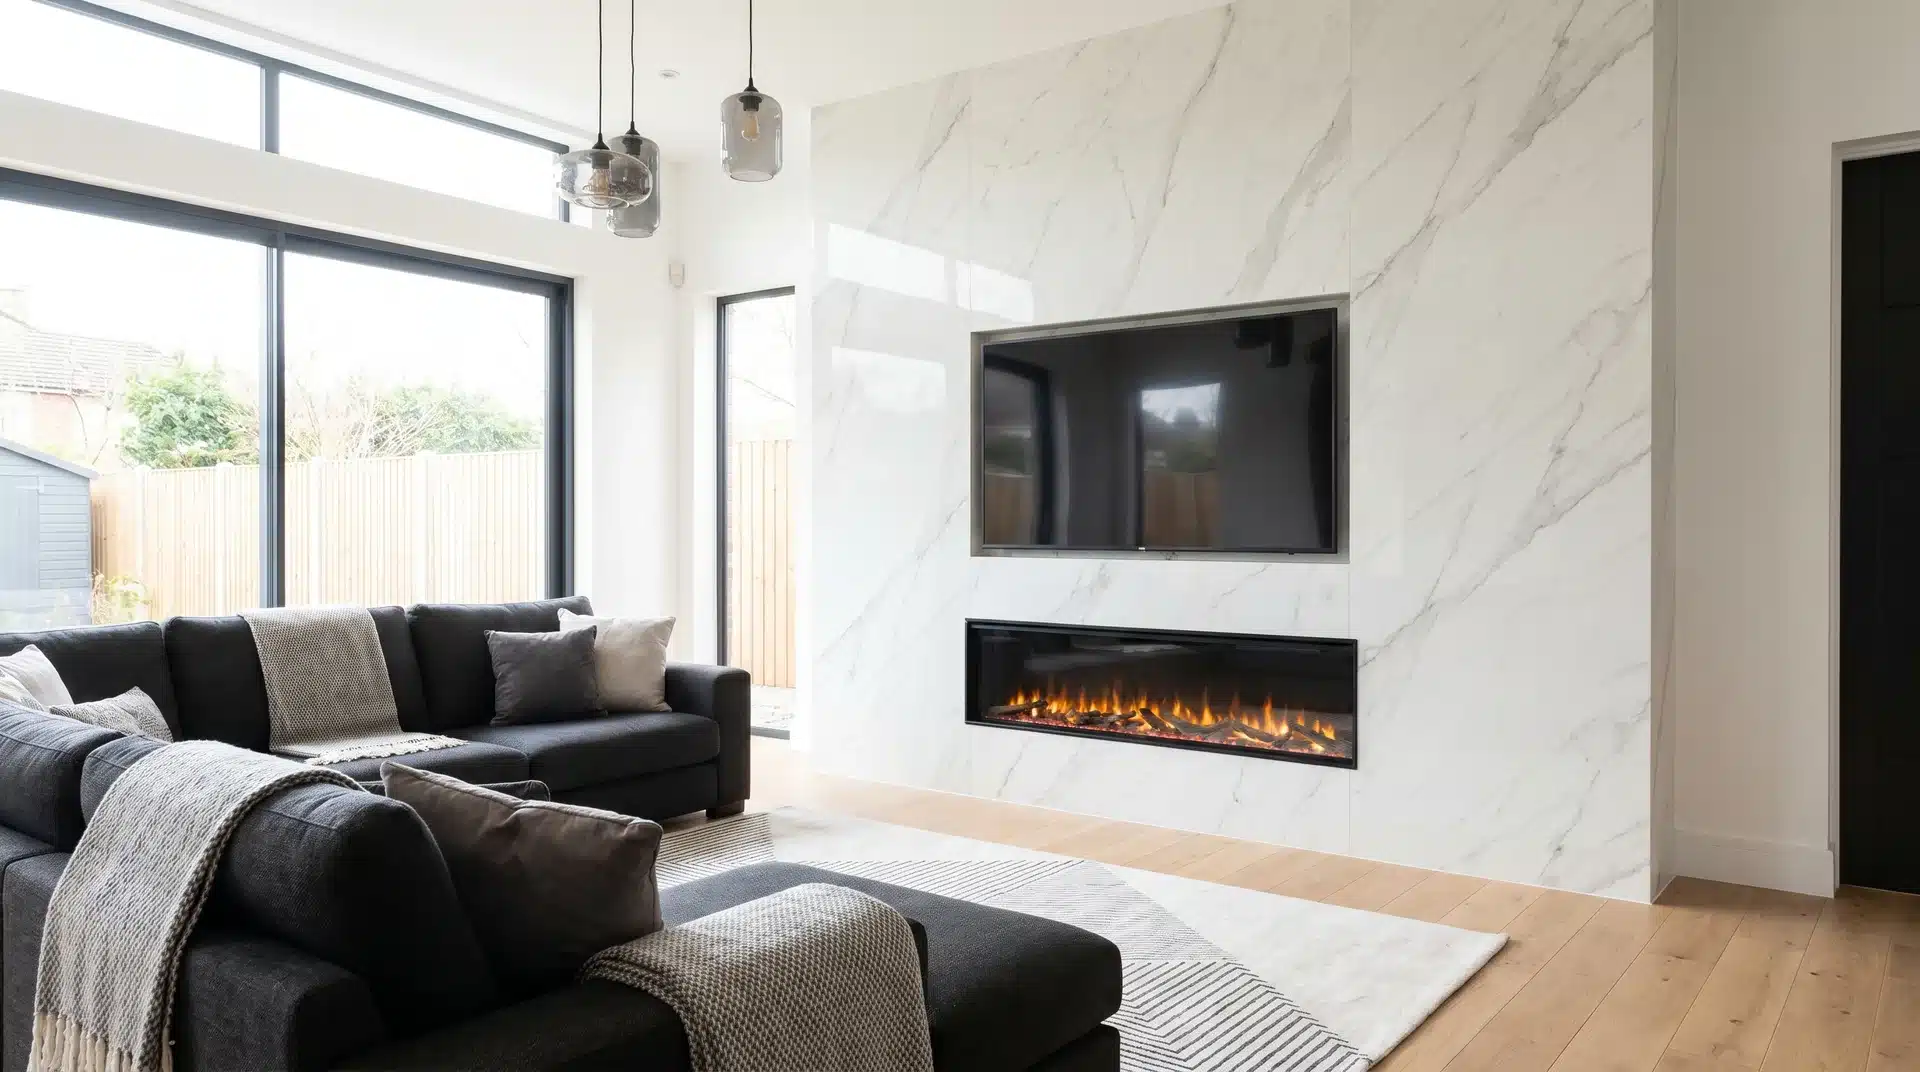
Large-format porcelain tiles (typically 1200x2400mm) in marble or concrete finishes create a seamless, premium-looking feature wall.
The near-zero grout lines mean the wall looks like a single slab. It’s the finish you see in high-end showrooms and new-build show homes.
Expect to pay £80-150 per square metre for the tiles, plus professional fitting. It’s not a DIY job because the slabs are heavy and fragile, but the result is a media wall that looks like it cost five figures.
Small Living Room Media Wall Ideas
Most UK living rooms measure 3-4 metres wide. A full-depth stud wall build-out in a room that size can feel like the wall is pushing toward you.
Here’s how to build a media wall in a smaller space without making the room feel tighter. The same principles of maximising compact spaces apply to shepherd’s hut interiors and other tiny living setups.
14. Shallow-Depth Build (Under 150mm)
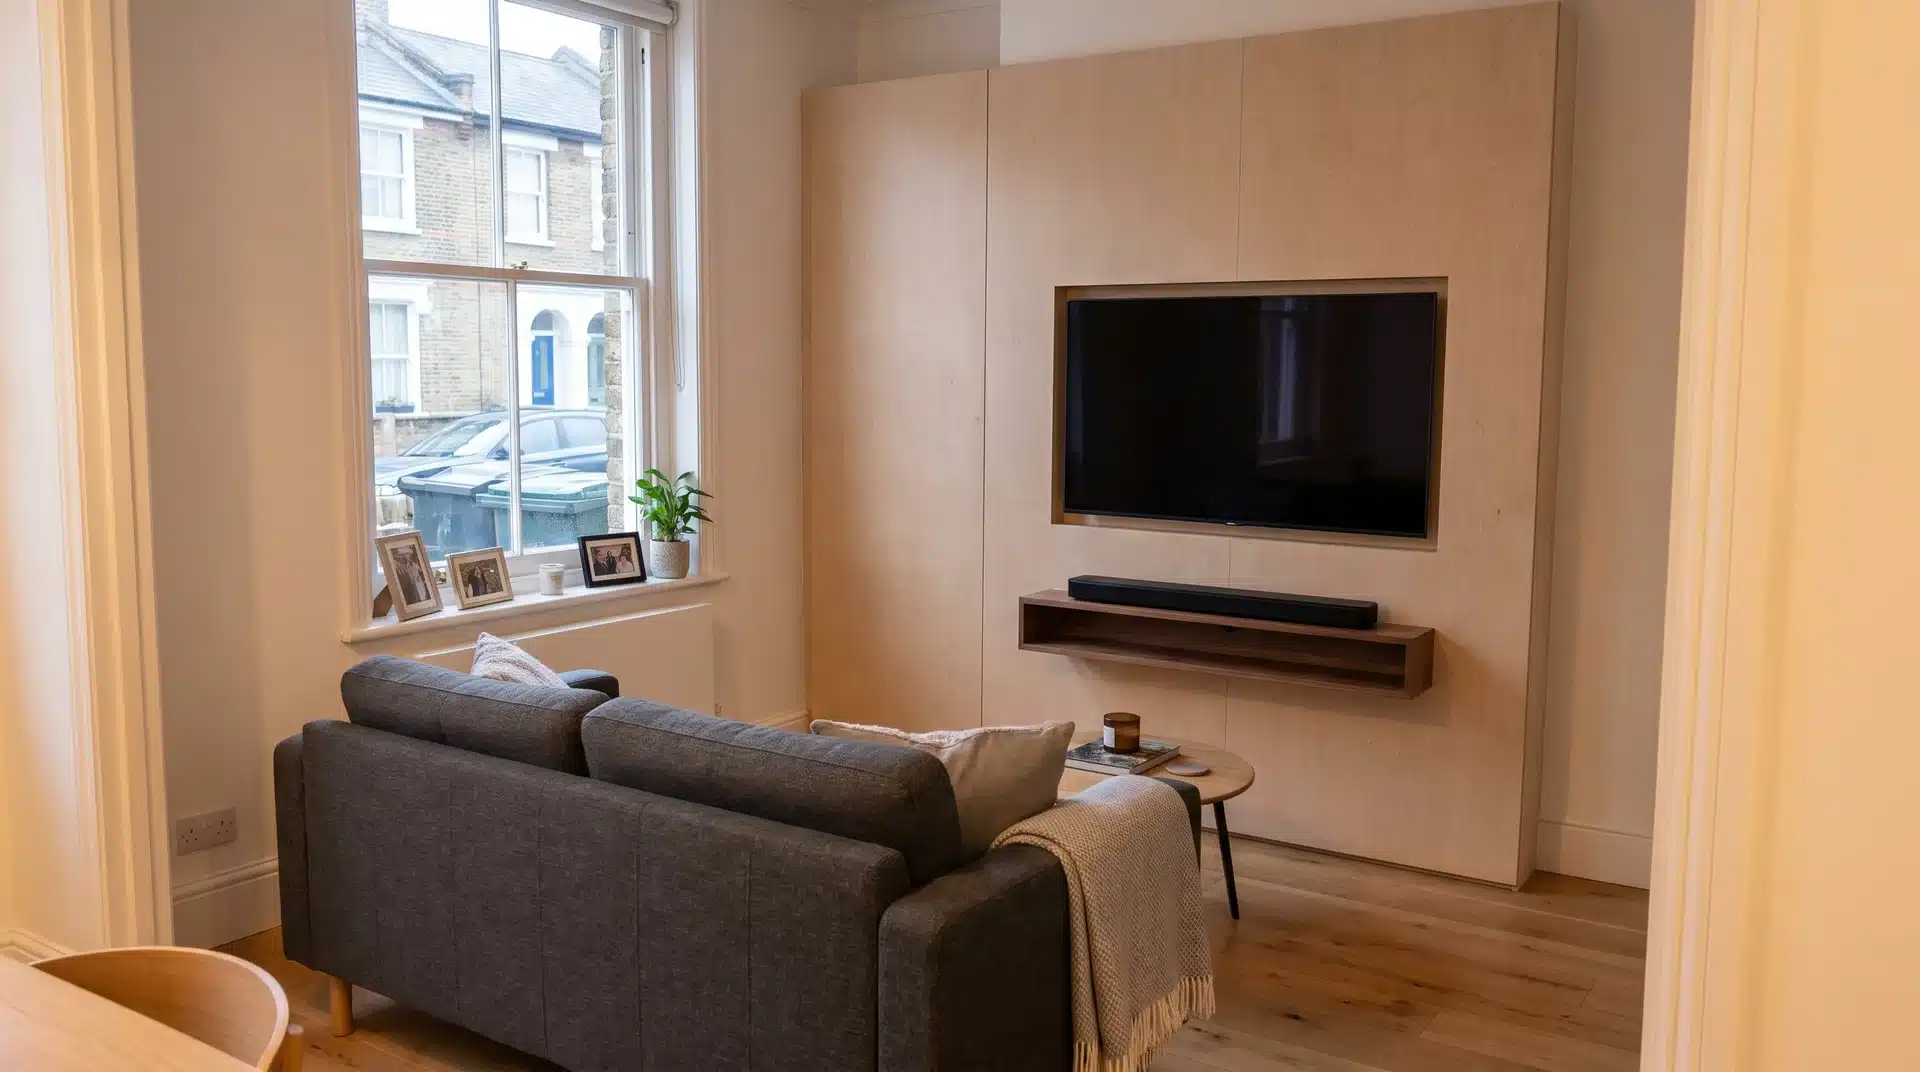
Skip the fire and build a minimal stud frame just deep enough to recess the TV and run cables.
At 100- 150 mm depth, the wall barely encroaches into the room, but you get a flush-mounted screen with zero visible cables. Add a floating shelf below for a soundbar.
This is the best approach for terraced houses, flats, and small new-build lounges where every centimetre of floor space counts. The same space-saving mindset applies to small hallway and landing areas throughout the home.
15. Floating Unit Media Wall
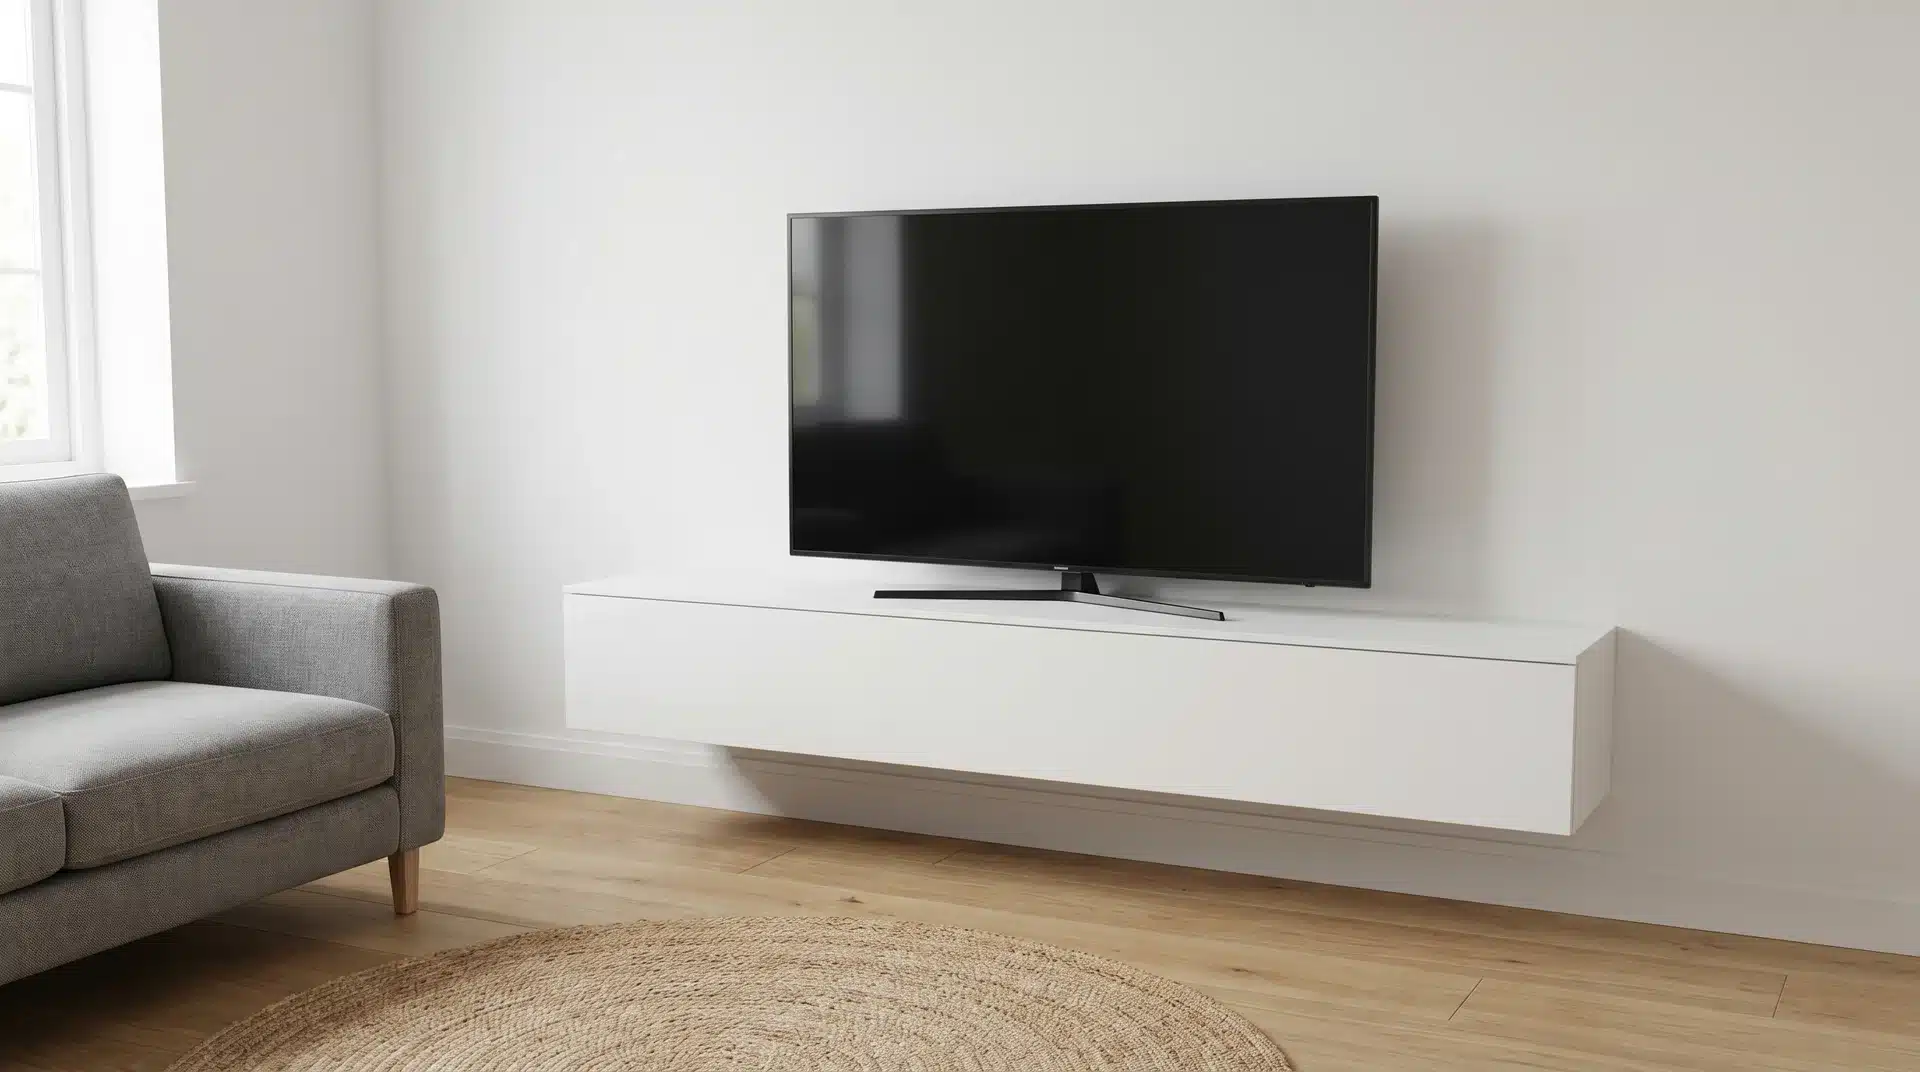
A wall-mounted floating unit (1500- 2000 mm wide, 300mm deep) houses the TV on top and conceals devices and cables inside.
The unit “floats” 200mm off the floor, creating a visual gap that makes the room feel lighter. No stud wall needed, just solid fixings into masonry or a timber frame.
16. Alcove Media Wall Using Existing Chimney Breast
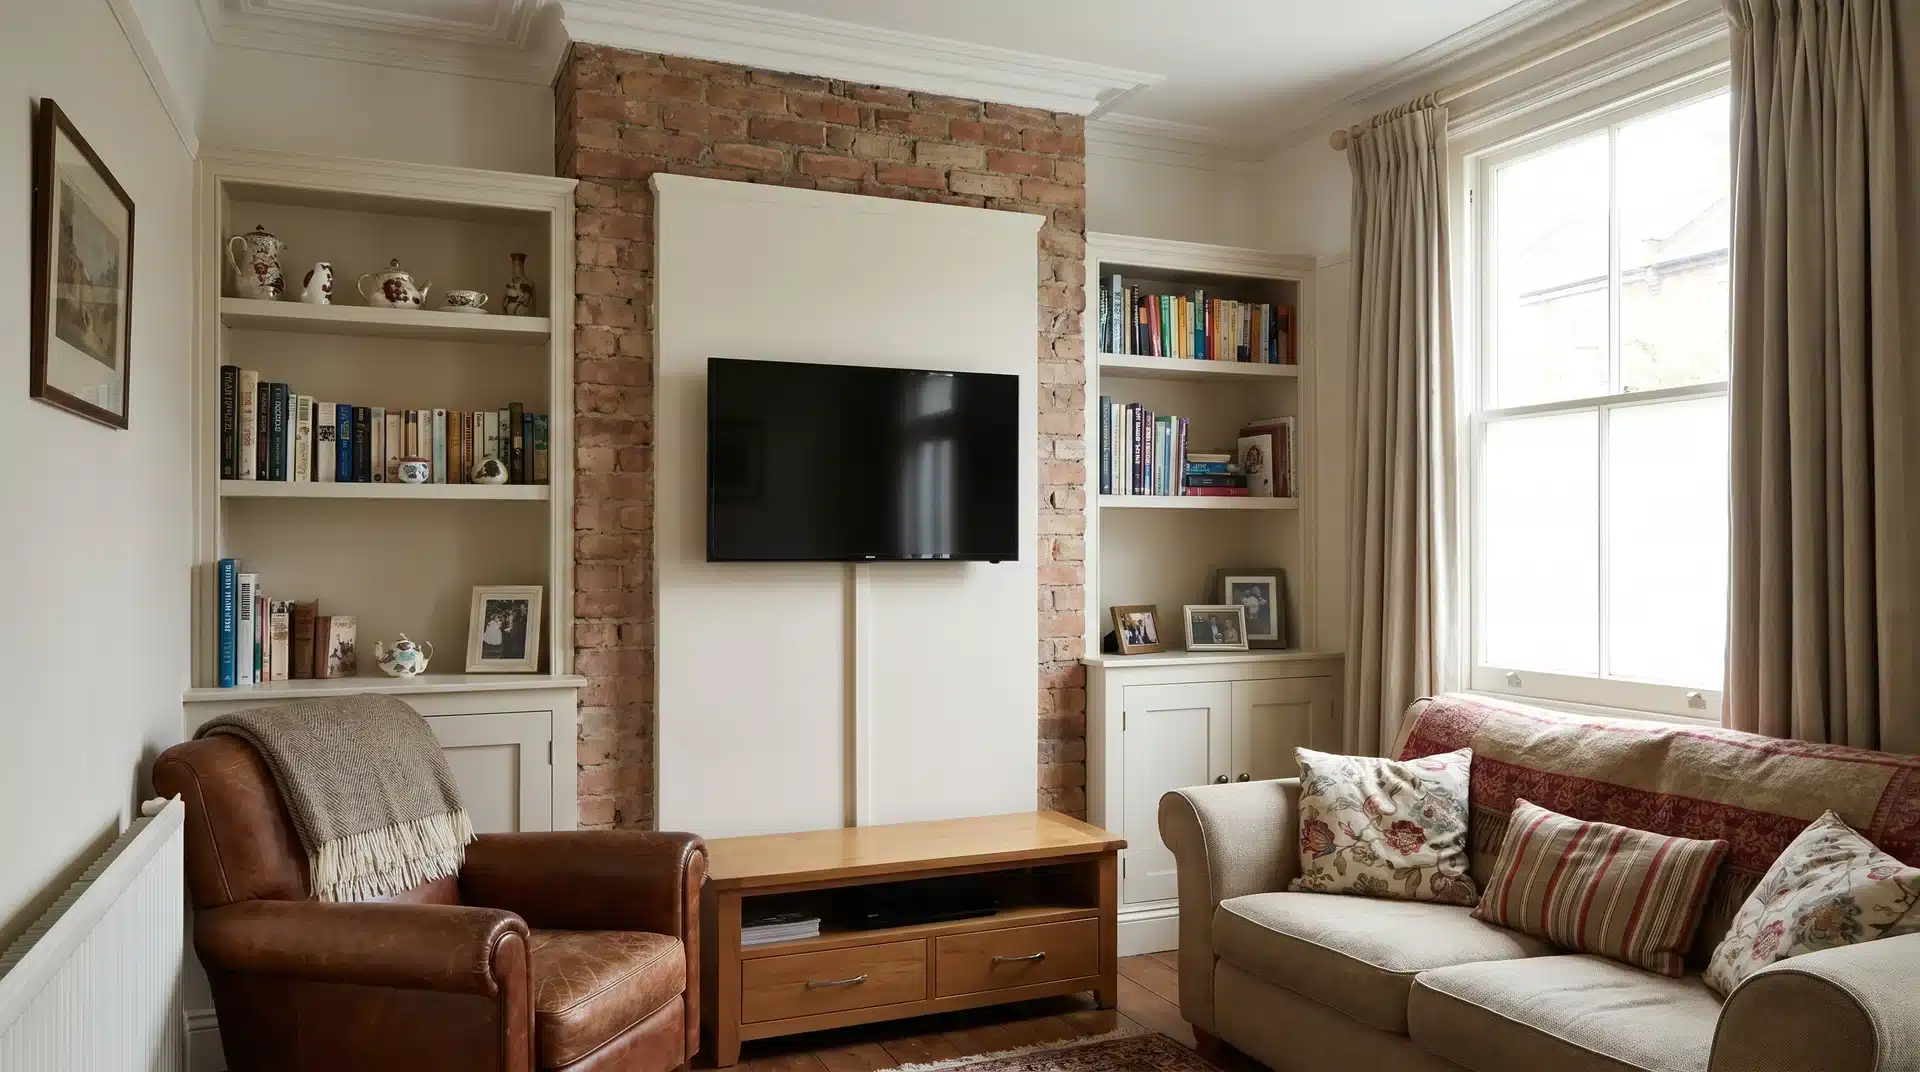
If your room has a chimney breast, don’t fight it. Mount the TV on the breast, run cables behind it via a surface-mounted channel or chased-in conduit, and build simple shelving into the alcoves on either side.
The chimney breast is your media wall. No build-out needed.
This is the fastest, cheapest media wall option for UK homes because the architecture does the heavy lifting for you.
The 300mm rule for small rooms: If your room is under 3.5 metres wide, keep the total wall projection under 300mm. Anything deeper and you’ll notice the room feels noticeably smaller. If you want a fireplace in a tight space, look at ultra-slim electric fires (130-180mm depth) designed specifically for shallow build-outs.
17. Half-Wall Media Divider
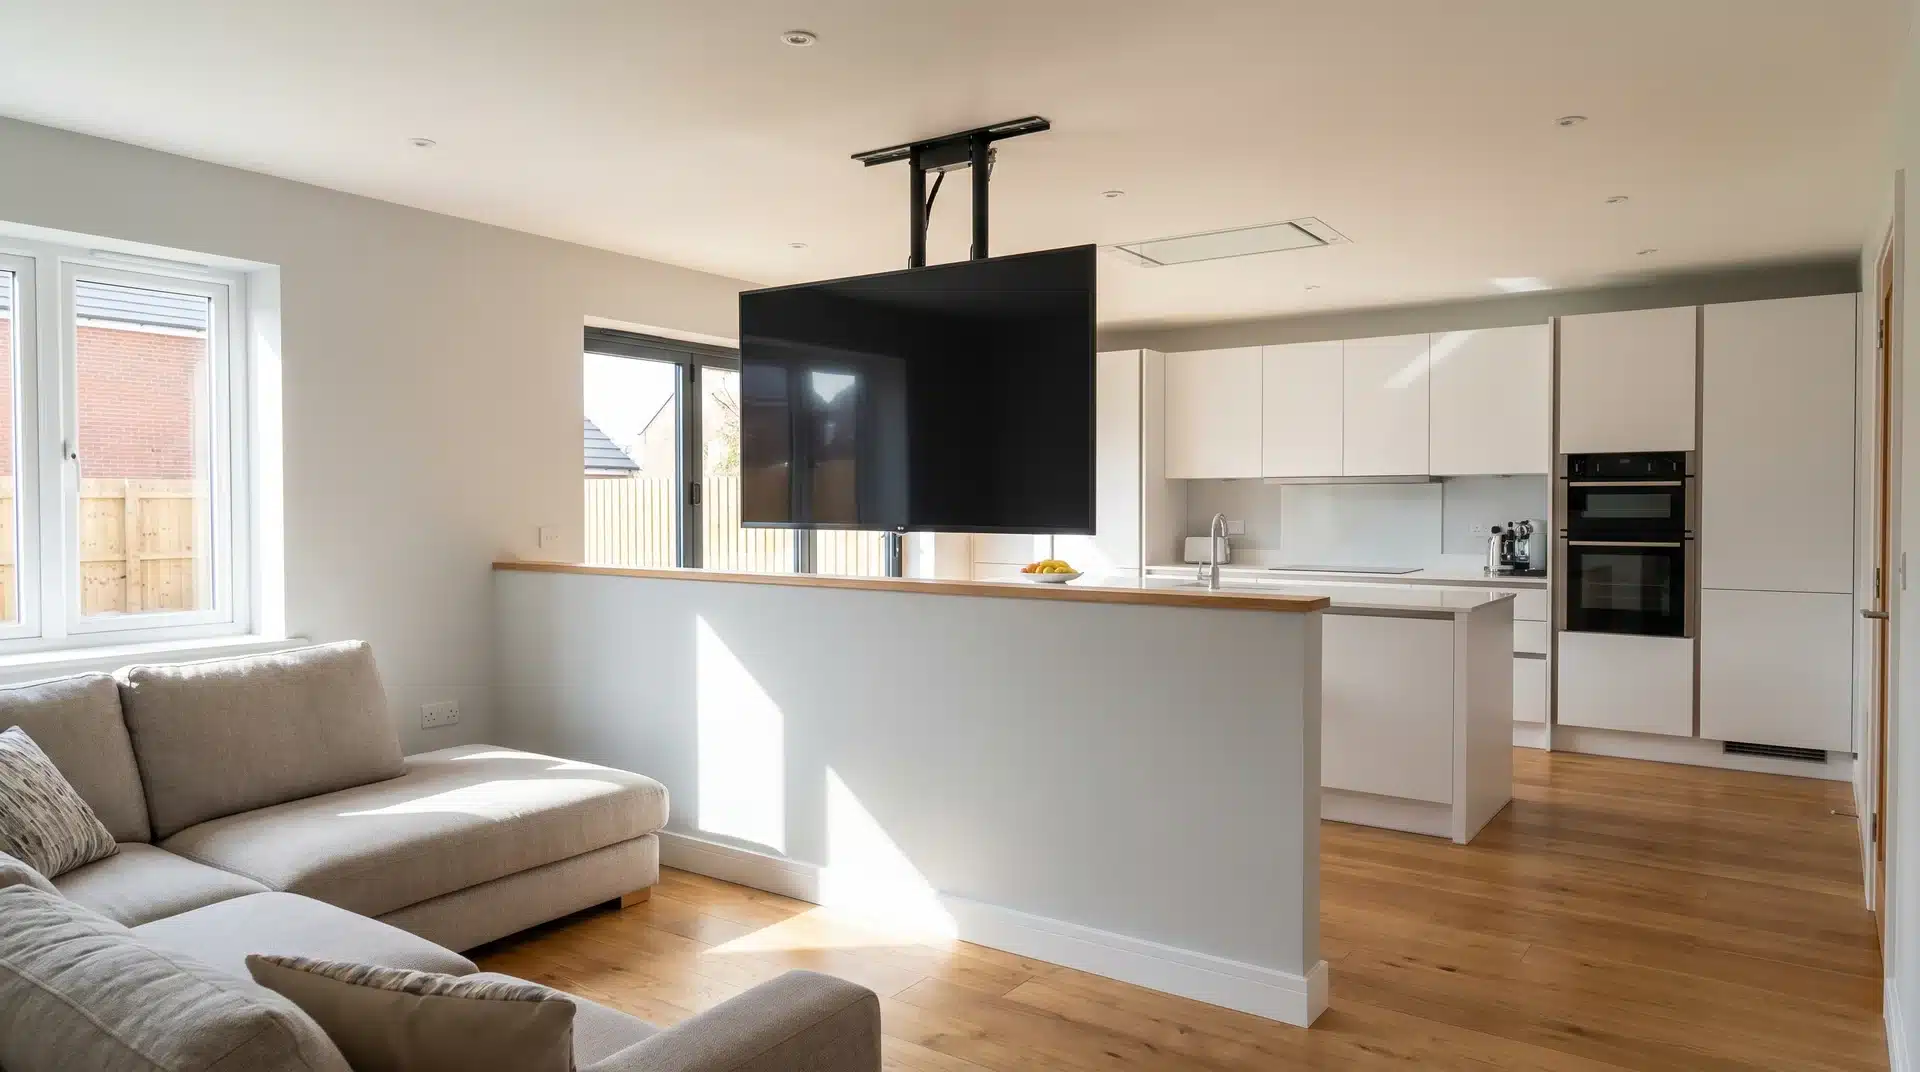
In open-plan kitchen-diners, a half-height stud wall (around 1200mm tall) doubles as a media wall on the living side and a breakfast bar or shelf on the kitchen side.
The TV sits on a bracket on top. It defines zones without blocking light or sightlines.
Modern Media Wall Ideas
Modern media walls in 2026 lean warm rather than cold. The all-grey-everything trend has faded. Expect natural tones, layered textures, and materials that feel inviting rather than clinical.
18. Warm Plaster Finish with Micro-Cement
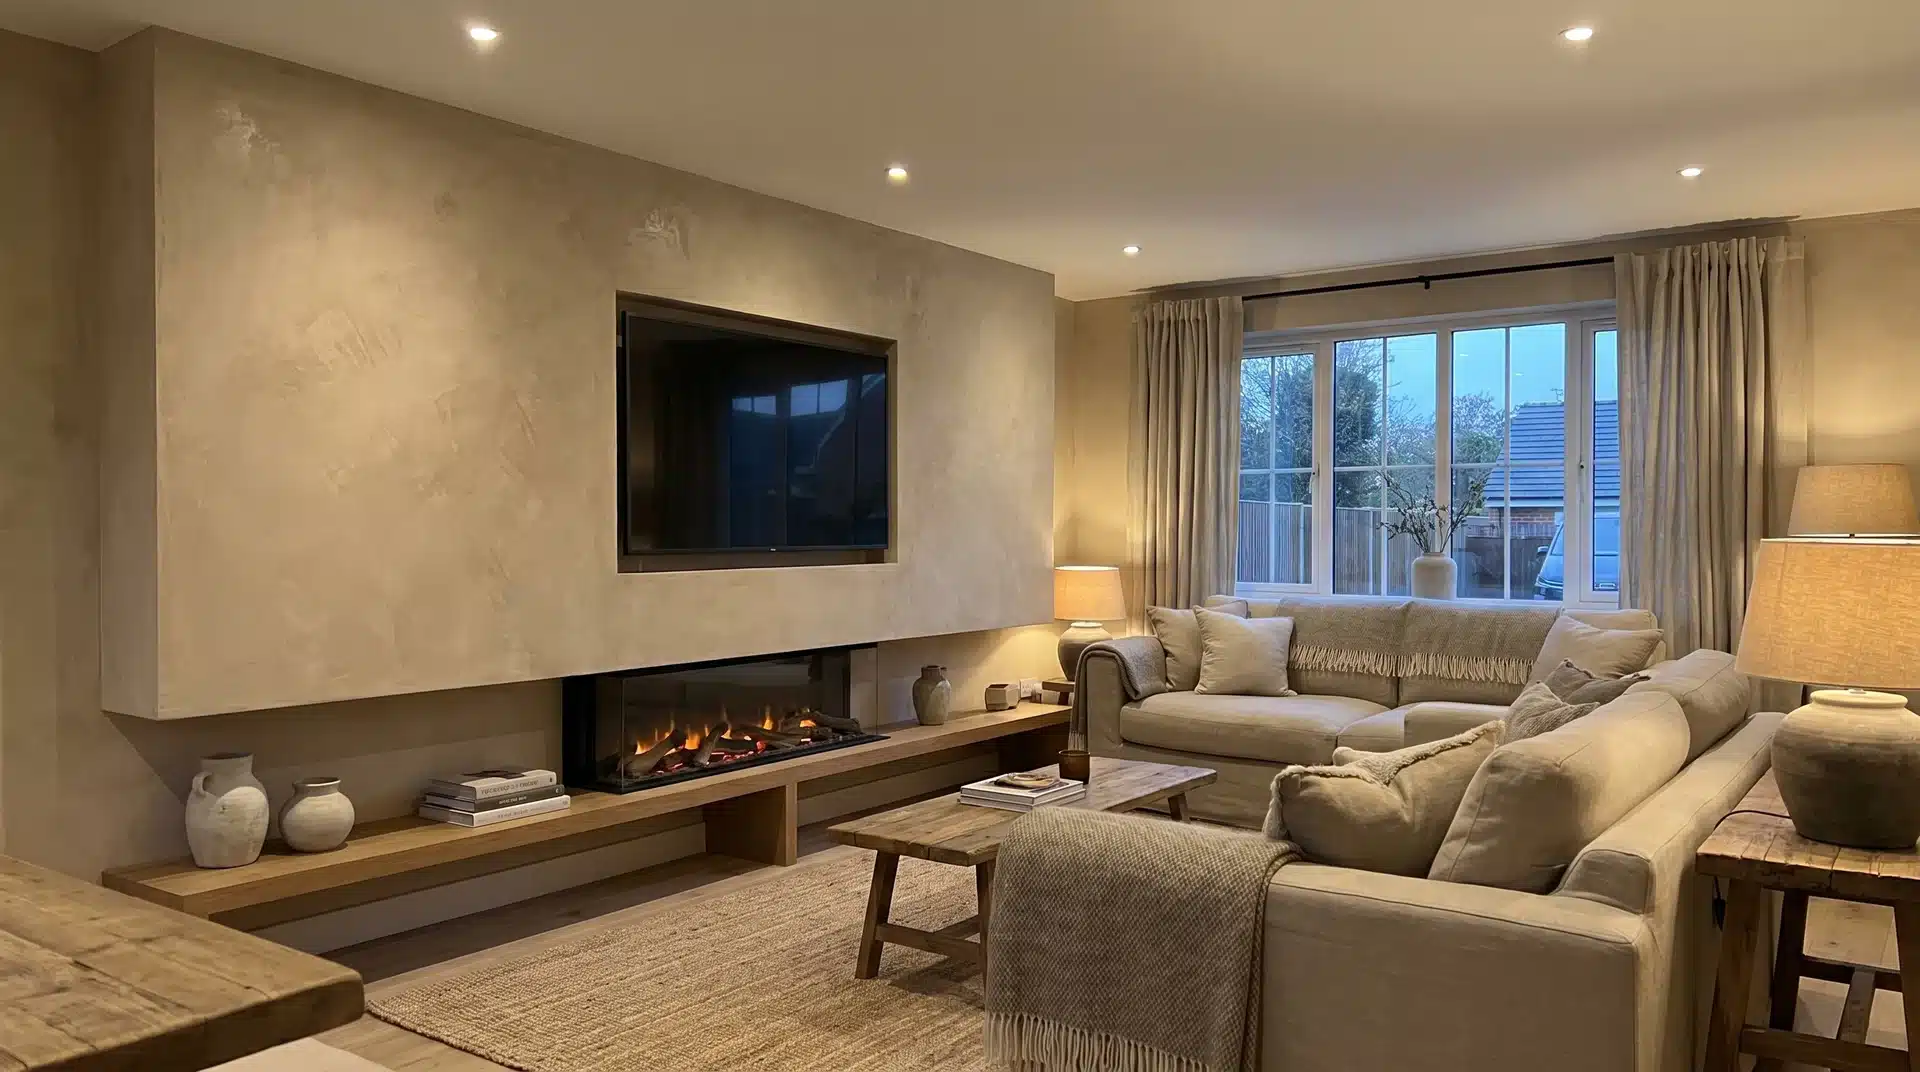
Micro-cement applied directly over plasterboard gives a smooth, slightly mottled finish with depth that flat paint can’t match.
In warm tones like oatmeal, mushroom, or soft clay, it creates a modern backdrop that feels organic and lived-in. The TV and fire sit within this textured surface.
19. Japandi Media Wall
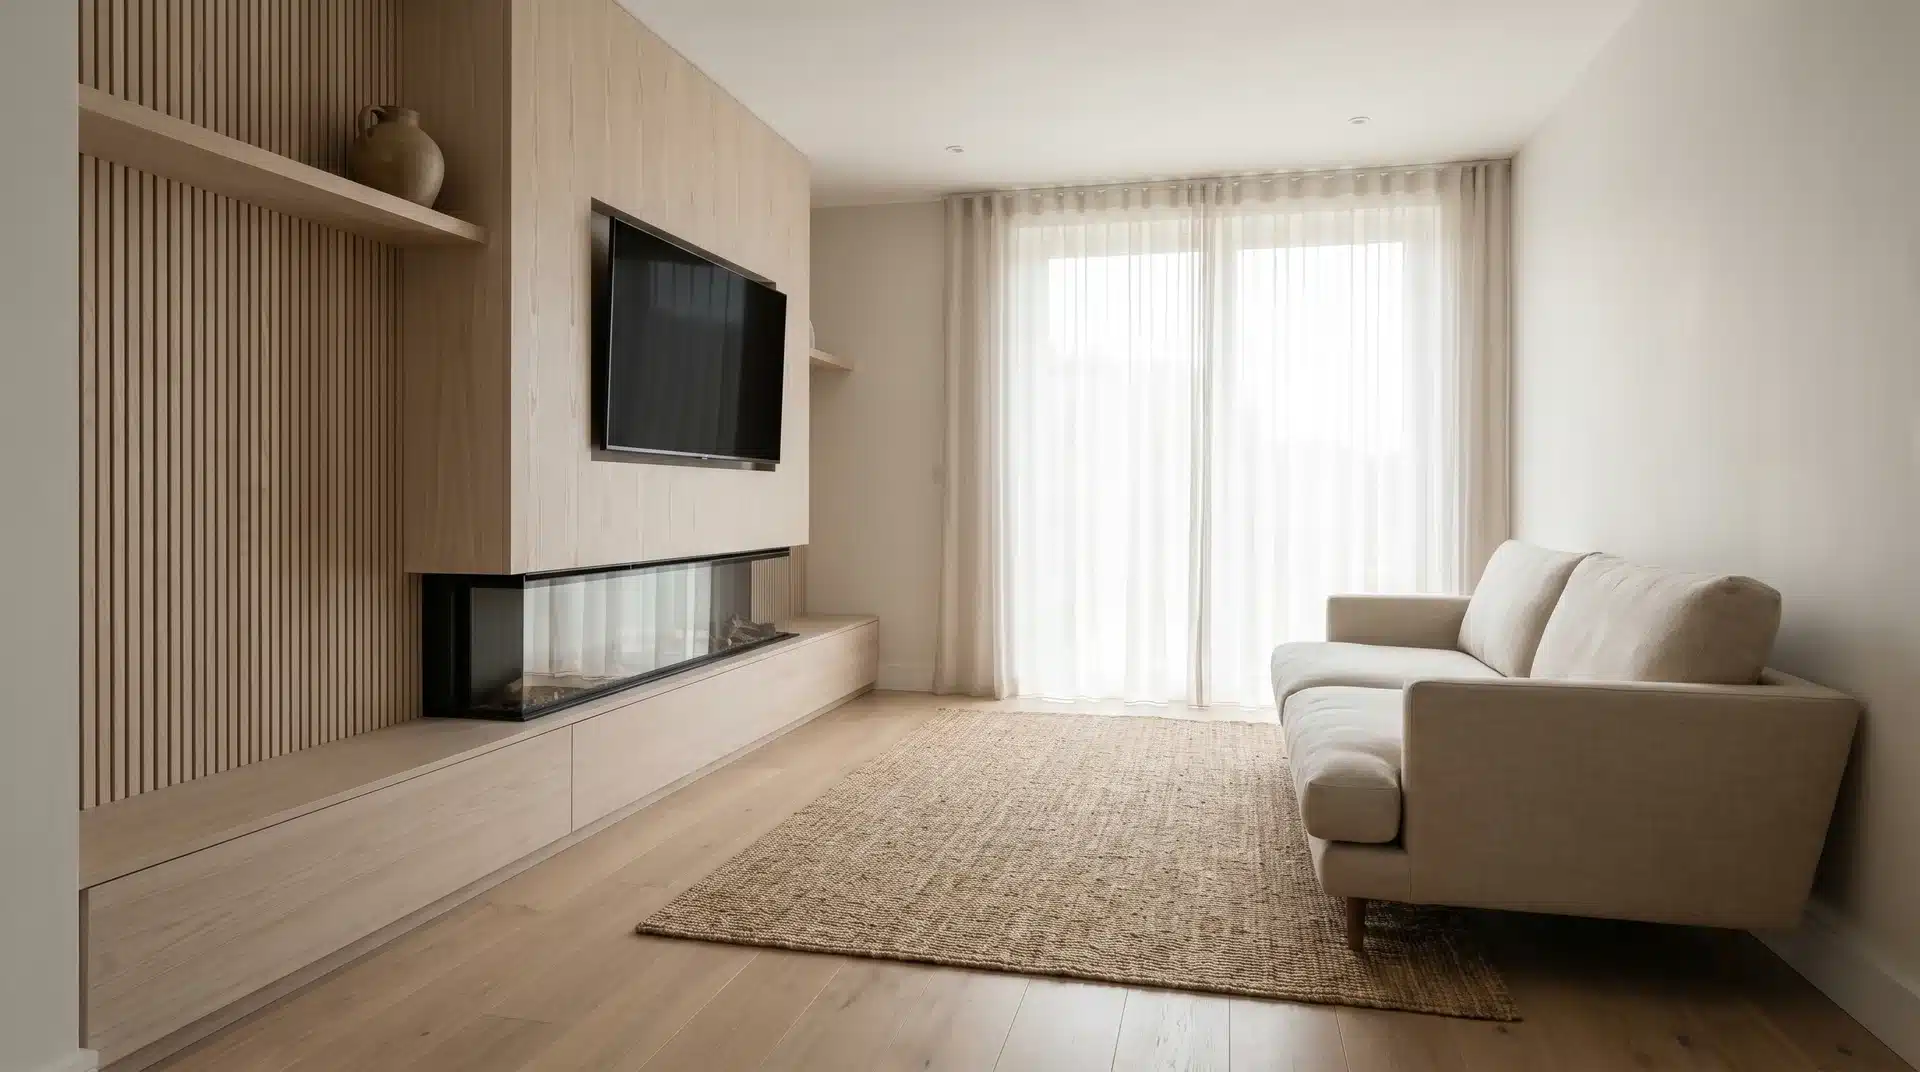
Light timber slats or ash-veneered panelling paired with a simple linear fire and no-fuss TV mounting.
The Japandi approach strips away decorative excess and lets materials, proportions and negative space do the work.
One or two carefully chosen objects on a floating shelf replace the usual clutter of ornaments.
20. All-Black Dramatic Media Wall
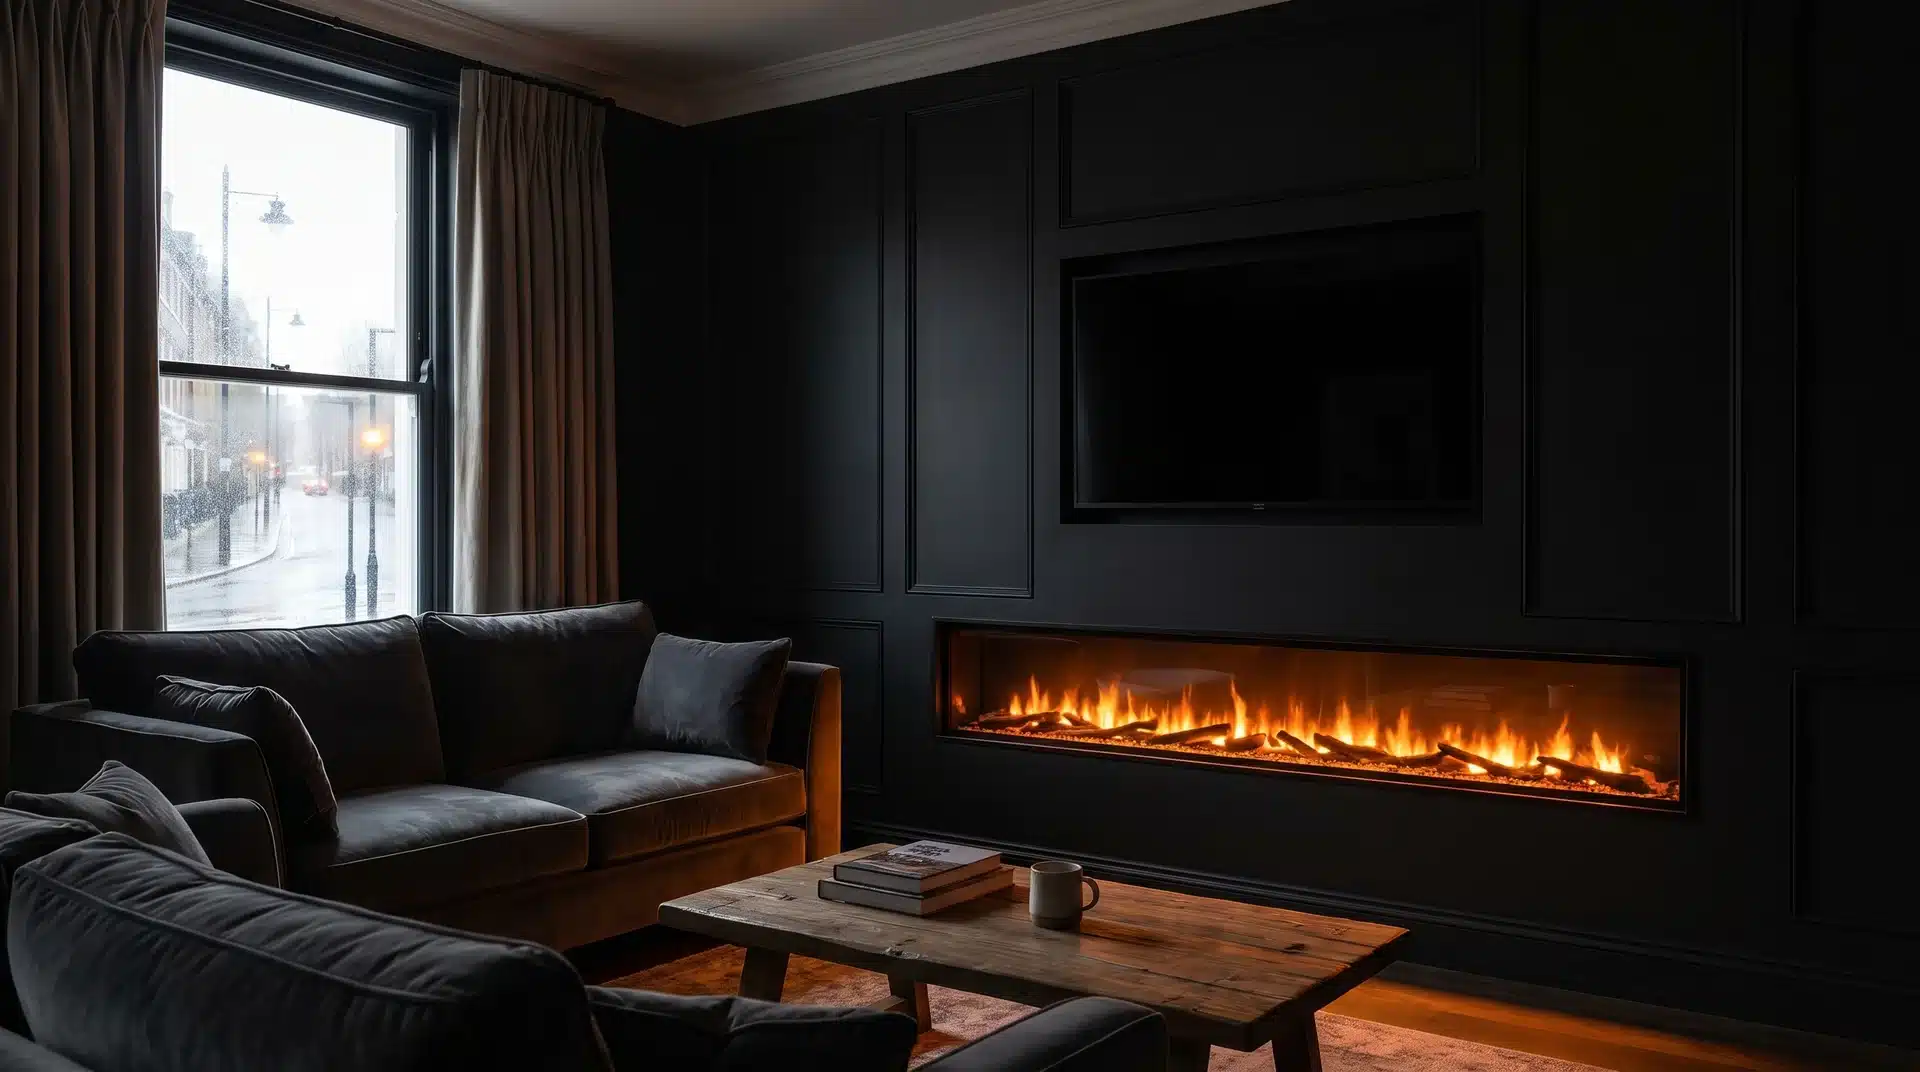
Matt black walls, a black-framed fire, and a TV that almost disappears when switched off. When the fire is lit, the flames become the only colour in the wall.
This works best in rooms with good ambient light from windows on adjacent walls, so the dark wall doesn’t make the space cave-like.
Use a matt finish rather than gloss. Glossy black panels show every fingerprint and dust particle, which defeats the sleek look you’re after.
LED Backlit Media Wall Ideas
21. Halo-Lit TV Recess
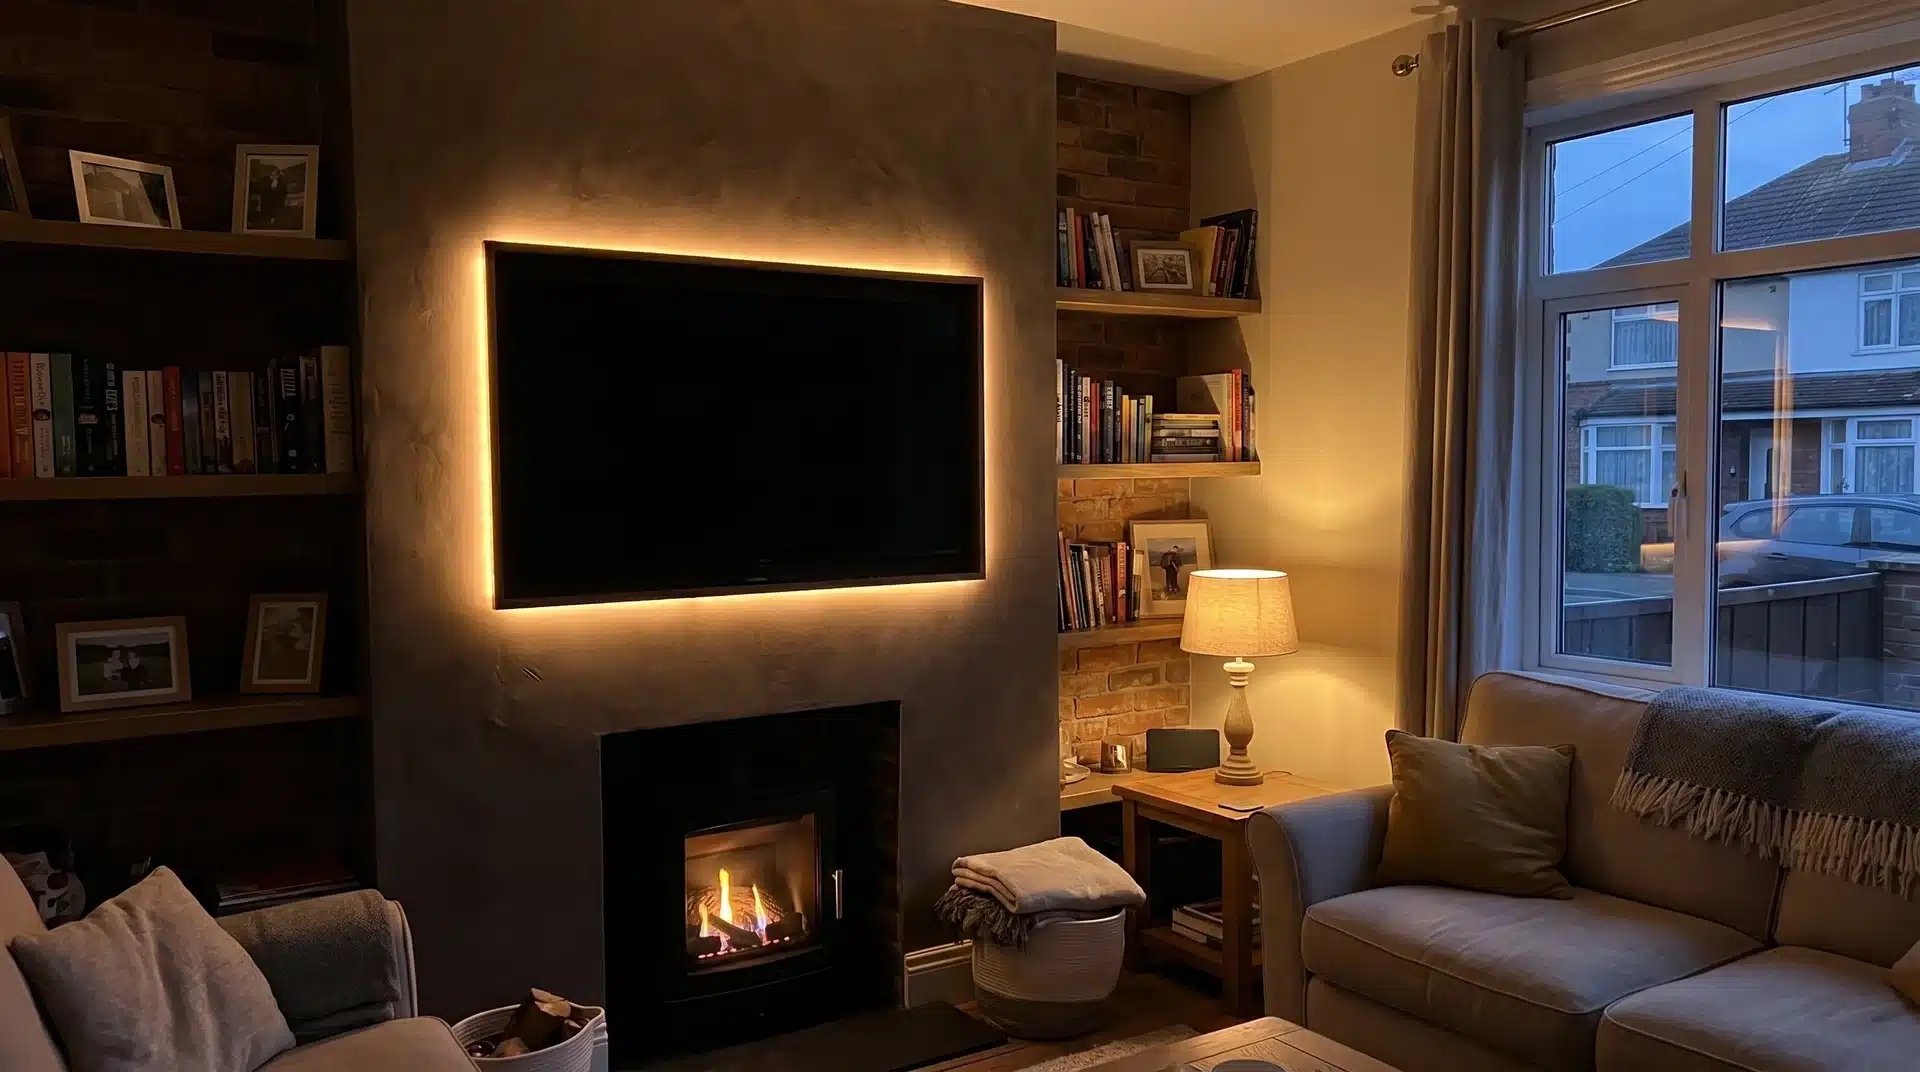
LED strip lighting behind the TV creates a halo glow around the screen, reducing eye strain during evening viewing and adding atmosphere. Warm white (2700-3000K) looks best in living rooms.
Cool white gives a more clinical feel that suits home cinemas but not relaxation spaces.
Smart LED strips (Philips Hue, Govee, or LIFX) let you adjust colour temperature and brightness from your phone.
Some sync with on-screen content, extending the picture’s ambient colours onto the wall behind. It’s a relatively inexpensive upgrade (£30-80 for a good strip kit) that makes a big visual difference.
22. Under-Shelf and Under-Unit Accent Lighting
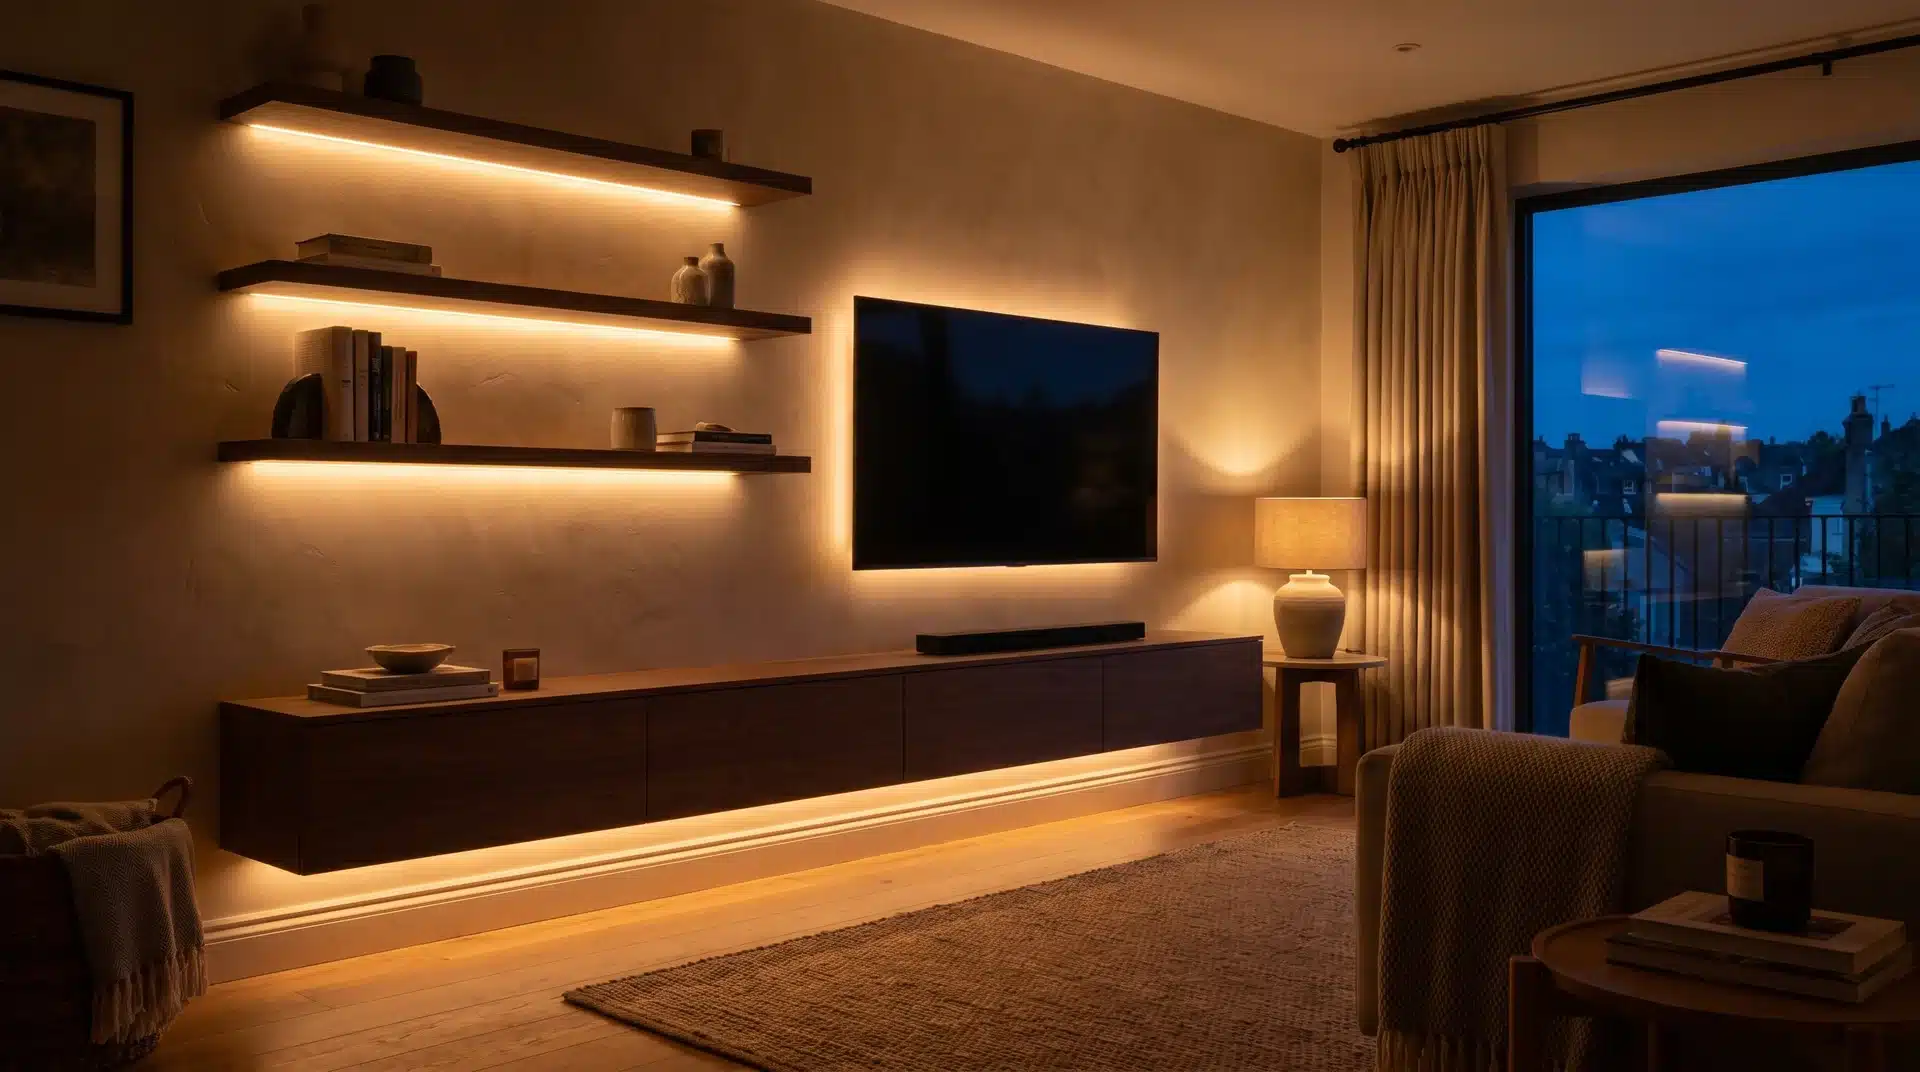
Warm LED strips beneath floating shelves or media units cast a soft downward glow that highlights the texture of the wall below.
Combined with the TV halo, this creates layers of light that make the wall feel three-dimensional after dark.
Avoid colour-changing RGB strips set to bright blue or purple. They looked fresh in 2019. In 2026, warm whites and soft ambers are what give a media wall that premium, restful feel.
23. Bold Wallpaper Feature Wall with Mounted TV
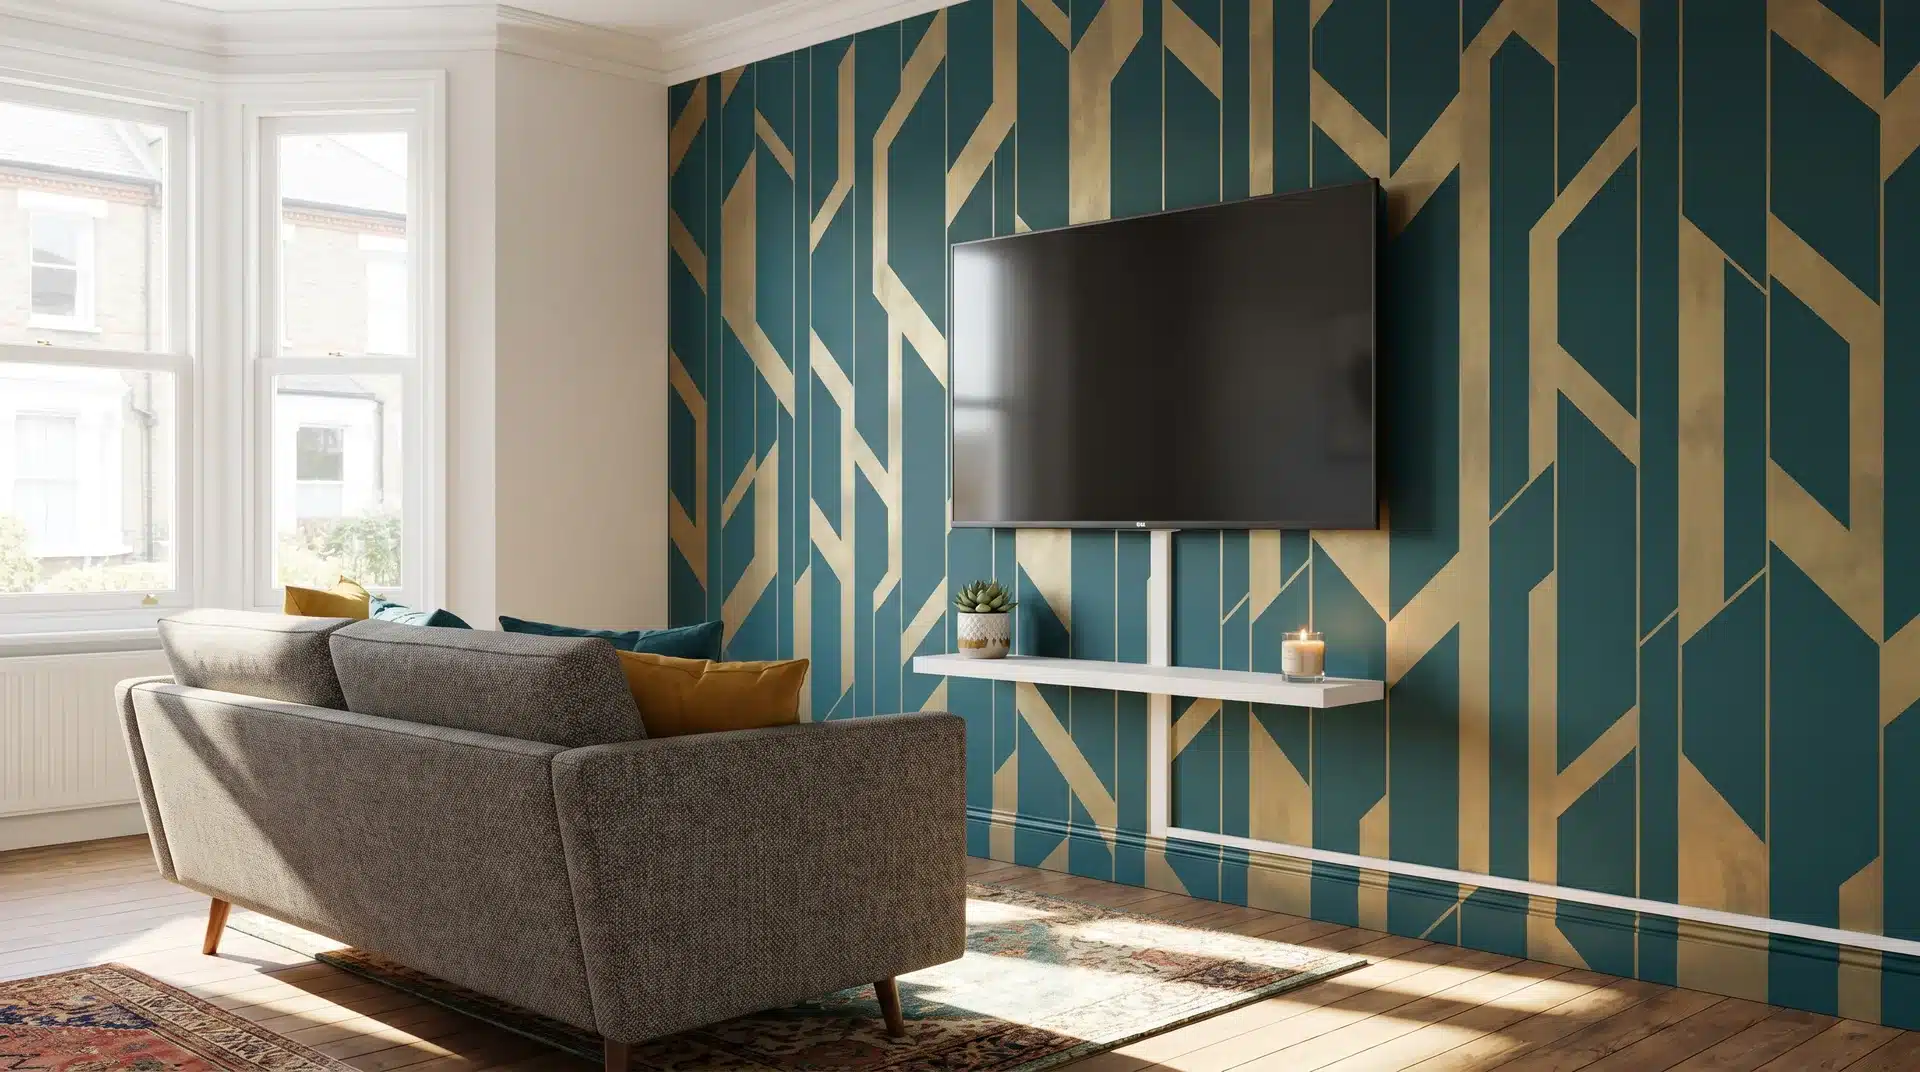
A statement wallpaper on a single wall creates a feature wall that naturally frames a wall-mounted TV.
Choose a design with enough pattern to add interest but not so busy that it competes with the screen. Large-scale geometric prints, subtle botanical patterns, and textured grasscloth work well.
Run cables through a surface-mounted D-line channel painted to match the wallpaper background colour, or chase them into the wall before papering.
A floating shelf below the TV in a complementary finish completes the look.
This is the simplest feature wall idea because it requires zero construction. Wallpaper, a bracket, and a cable solution.
You can do it in an afternoon. For a similar low-effort transformation on other walls, a staircase gallery wall follows the same logic of using what’s already there.
Which TV Size for Your Media Wall?
| Room Width | Recommended TV Size | Ideal Viewing Distance |
|---|---|---|
| Under 3m | 50-55 inches | 1.5-2.0m |
| 3-4m | 55-65 inches | 2.0-2.5m |
| 4-5m | 65-75 inches | 2.5-3.0m |
| Over 5m | 75-85 inches | 3.0-3.5m |
A 65-inch screen is the sweet spot for most UK living rooms. It’s large enough to be cinematic without overwhelming a 3-3.5 metre wide room.
Leave at least 150mm of space around the TV within any recess so the frame doesn’t look cramped.
Media Wall Costs in the UK
The biggest cost variable isn’t the TV or the fire. It’s the finish. A plasterboard media wall painted white costs a fraction of one clad in porcelain slabs or fitted with bespoke cabinetry.
Decide your finish before you start building, because the frame depth, blocking requirements, and budget all follow from that choice.
If energy efficiency matters to your household, it’s also worth understanding what your EPC rating actually costs you monthly before investing in a log burner versus electric setup.
| Build Type | Typical Cost Range | Timeframe |
|---|---|---|
| DIY stud wall + TV mount (no fire) | £200-£500 | 1-2 days |
| DIY stud wall + electric fire + TV | £600-£1,500 | 2-3 days |
| Professional build with electric fire | £1,500-£3,500 | 3-5 days |
| Professional build with log burner + flue | £3,000-£6,000 | 5-7 days |
| Premium finish (porcelain, bespoke joinery) | £4,000-£10,000+ | 1-2 weeks |
Five Mistakes That Ruin Media Walls
1. Mounting the TV too high
Your eye level when seated should hit the centre or upper third of the screen. In most UK homes with standard-height sofas, that puts the TV centre at about 1100-1200mm from the floor.
The single most common mistake is hanging it at eye level while standing, which means you spend every evening looking up. Your neck will tell you within a week.
2. Forgetting cable access
Once the wall is plastered and painted, you can’t add new cables without cutting into it. Run conduit or trunking during the build, even for cables you don’t need yet.
A couple of extra 25mm conduit runs cost almost nothing now and save major headaches later.
3. Skipping the noggins
The TV mount needs solid timber or plywood behind the plasterboard, not just standard studs at 600mm centres. Add horizontal noggins (cross-bracing) at the exact height of your bracket.
A 55-inch TV weighs around 15- 20 kg. A 75-inch can weigh 30- 40 kg. Plasterboard alone won’t hold that. Our media wall materials guide covers exactly which framing, boards, and fasteners you need.
4. Choosing the wrong fire depth
Electric fires range from 100 mm to 300 mm deep. If you buy the fire after building the wall, you might find it doesn’t fit the recess.
Buy the fire first, confirm its installation depth, then frame around those dimensions with 20mm clearance on each side.
5. Ignoring ventilation for electronics
Recessed TVs, AV receivers and gaming consoles generate heat. If they’re sealed inside a plasterboard box with no airflow, they overheat.
Leave the back of AV recesses open, or install a small vent panel at the top and bottom to allow passive convection.
Final Thoughts
A media wall works when the layout matches the room it sits in, not the other way around.
The builds that look best three years from now are the ones where someone measured twice, picked materials that age well, and resisted cramming in features the space couldn’t support.
Start with one constraint like room width, budget, or whether you want real flame or electric, and let that single decision filter out two-thirds of the options.
What’s left will be the shortlist that actually fits your home. The goal isn’t a showroom wall. It’s one you’ll enjoy sitting in front of every evening.
Frequently Asked Questions
Can I wallpaper over a finished media wall?
Yes. Apply wallpaper after plastering and priming. Avoid vinyl-backed papers directly above electric fires as heat can loosen adhesive over time.
Do media walls cause damp or condensation?
Only if built against an exterior wall without a vapour barrier. Add a DPM behind the frame on external walls to prevent trapped moisture.
Can I fit a soundbar inside the media wall?
Yes. Build a shallow open recess below the TV with enough clearance for the speaker to project sound. Avoid fully enclosing it.
Can I remove a media wall later without major damage?
Stud-wall builds can be dismantled and the original wall patched. Expect replastering and redecorating costs of around £300-£600 for the area.
What paint finish works best on a media wall?
Matt or eggshell. Matt hides imperfections and reduces screen glare. Eggshell adds subtle sheen and wipes clean more easily in busy households.
Are media walls suitable for listed buildings?
Freestanding media furniture works without consent. Any fixed structural alteration in a listed property typically needs Listed Building Consent from your local authority.
How do I stop my TV from overheating in a recess?
Leave 50mm clearance on all sides and keep the recess open-backed. For enclosed recesses, fit a passive ventilation grille at top and bottom.
Can a media wall be built on a stud partition wall?
Yes, but reinforce with extra noggins and use toggle fixings or mount directly into studs. A partition alone won’t support heavy TVs without backing.