Growing your potatoes can feel like a long wait. Most gardeners think it takes months to get from seed to plate.
But what if you could shrink that timeline from months to just a few weeks?
This guide will show you exactly how to speed up potato growth using proven techniques.
From selecting the right varieties to mastering pre-sprouting methods, these steps can significantly reduce your growing time.
You will also learn how to choose fast-growing varieties, prepare seed potatoes properly, warm the soil for quicker germination, use containers for better control, and harvest perfectly sized tubers in record time.
By the end, there are tips on avoiding common mistakes that slow down growth. Ready to enjoy fresh, creamy potatoes faster than ever before?
Selecting the Right Potato Variety
Different types of potatoes grow at different speeds, with maturity times ranging based on variety and growing conditions.
Weather conditions and soil temperature also influence how quickly your potato crop develops from planting to harvest.
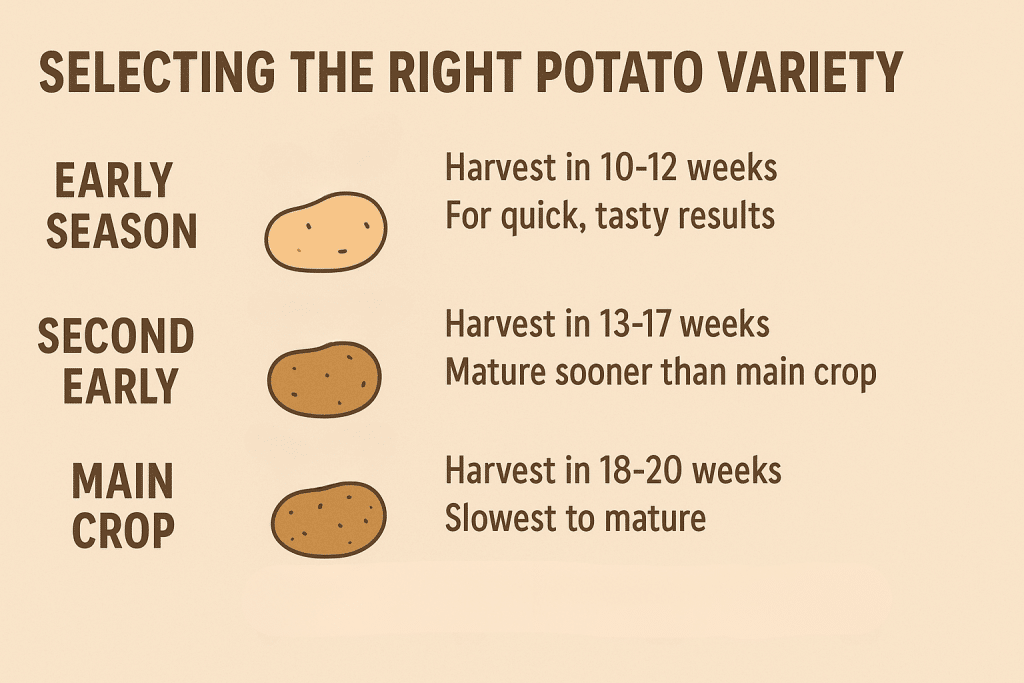
For the fastest results, choose varieties like Swift and Francis. Swift lives up to its name with rapid growth, while Francis delivers abundant crops despite being an early riser.
These quick-growing spuds also happen to be the tastiest, with a wonderful texture that’s smooth and almost creamy.
Early-season potatoes offer extra benefits beyond speed. They’re often ready well before diseases like blight become a problem.
Because they grow so fast, gardeners can even get two successive harvests in the same time it takes to produce just one crop of late-season varieties.
Step-by-Step Guide to Planting Potatoes
This section contains detailed instructions on growing potatoes using proven methods. Follow each step carefully to get a better and creamier harvest.
Tools and Materials Required
Getting started with fast potato growing requires some basic supplies. Here’s what you’ll need and why each item matters.
| Item | Purpose |
|---|---|
| Certified seed potatoes | Disease-free tubers that guarantee the strongest start and healthiest plants |
| Egg cartons | Keep seed potatoes stable during chitting so they don’t roll around |
| All-purpose potting mix | Provides the right growing medium for container potatoes when mixed with compost |
| Garden compost | Adds nutrition and improves soil structure for faster plant growth |
| Organic potato fertilizer | Supplies extra potassium and nitrogen to support rapid tuber development |
| Containers or raised beds | Allow better temperature control and drainage for speedier growth |
| Clear covers or greenhouse materials | Help warm the soil early in the season to create ideal growing conditions |
| Straw | Acts as insulation to keep the soil warm early on and cool during hot weather |
| Watering equipment | Ensures consistent moisture levels that are crucial for fast tuber formation |
Below are the proven steps to grow potatoes faster than traditional methods. Each step builds on the previous one to significantly speed up your harvest time.
Step 1: Seed Potatoes (Choosing and Preparing)
Start with certified seed potatoes from your local garden center rather than grocery store potatoes.
These are sold specifically for planting and are certified disease-free, which grocery store potatoes aren’t. This guarantees the strongest start and healthiest, most trouble-free plants.
Look for tubers that feel firm and show no signs of soft spots or damage.
Bonus tip: Certified seeds may cost a bit more than regular potatoes, but you’ll get much better results and faster growth.
Step 2: Chitting (Pre-Sprouting)
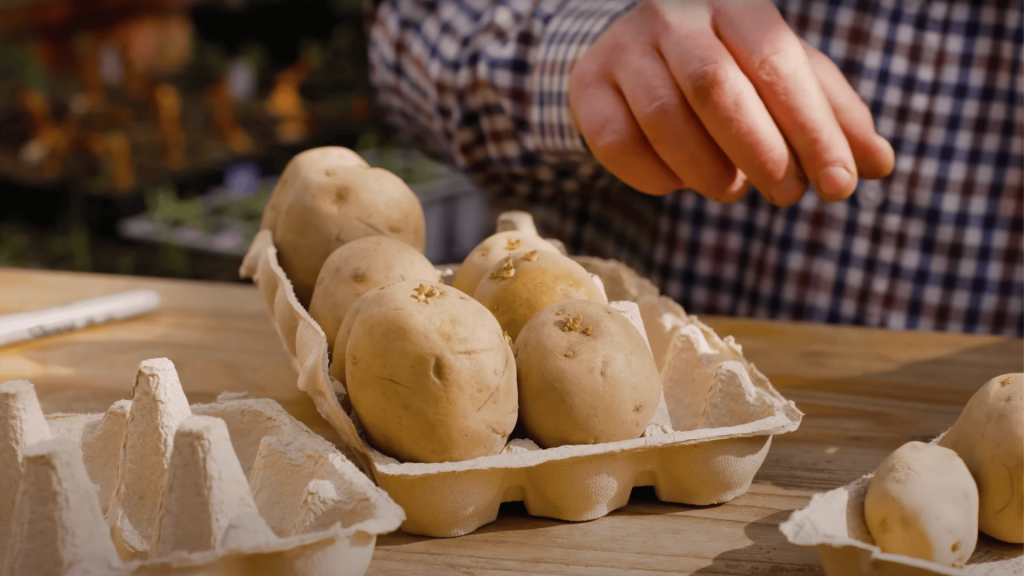
Chitting means pre-sprouting potatoes before planting, and it’s a great way to speed things up by giving you a head start of maybe a week or two.
Simply place seed potatoes in a bright, sunny space for a few weeks until they develop nice, fat, firm, and green shoots.
Use old egg cartons to keep seeds stable so they don’t roll around. Check each potato for the dimples where shoots will grow and position them with the majority of these facing upward.
The potatoes hit the rapidly warming ground running the moment they’re planted.
Bonus tip: When potatoes have a couple of shoots, you can cut them into chunks as long as each piece has a shoot. Do this a few days before planting so the cut has a chance to heal over.
Step 3: Preparing the Soil
Potatoes grow faster in warmer conditions, with soil temperature between 60-70 Fahrenheit (15-21 Celsius) being ideal.
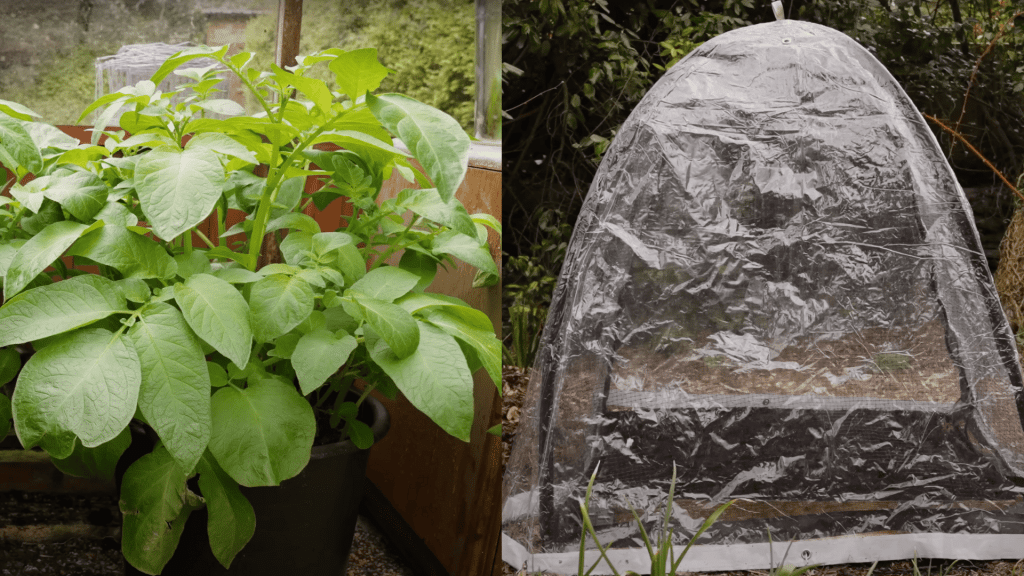
Pre-warm your soil by covering raised beds with clear covers for a few weeks – this acts like a greenhouse, trapping the sun’s rays and slowly raising the temperature inside.
Raised beds dry out and warm up quicker than the surrounding ground, giving perfect conditions for speedier spuds.
For container growing, bring potting mix and compost indoors to raise them to room temperature before planting.
Bonus tip: If bringing compost indoors isn’t practical, find somewhere cozy like a greenhouse, cold frame, or place an old window pane over the compost to trap warming rays.
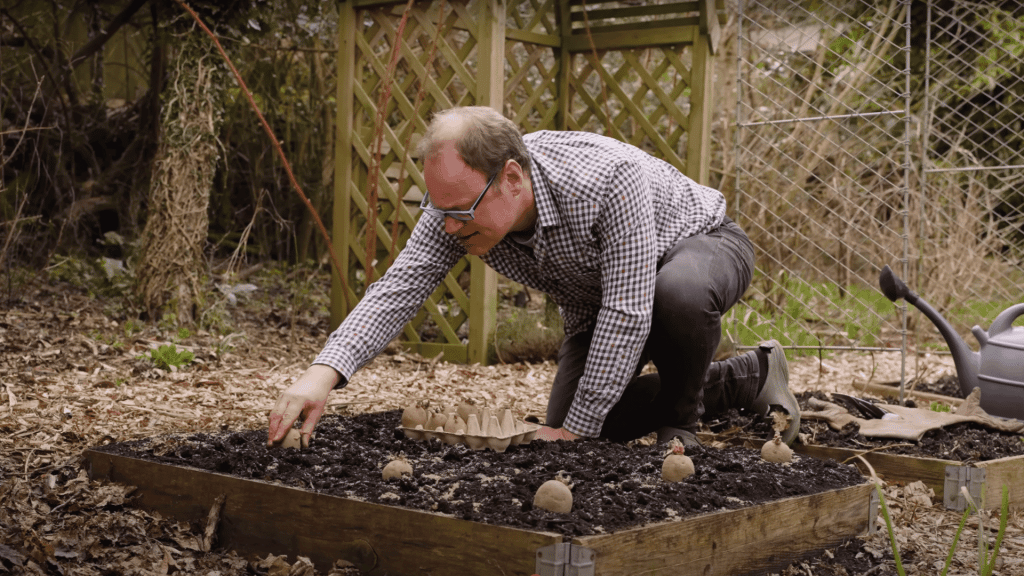
Step 4: Planting the Potatoes
Power up your potatoes by adding a good inch (3cm) of garden compost and a few handfuls of organic potato fertilizer to the soil.
This fertilizer is higher in potassium, which supports good tuber development, while the nitrogen encourages faster foliage growth for better sunlight absorption.
Plant potatoes about 16 inches (40cm) apart in both directions using block formation rather than long rows, this works better in smaller spaces. Make individual holes fairly deep for each seed potato and cover back over.
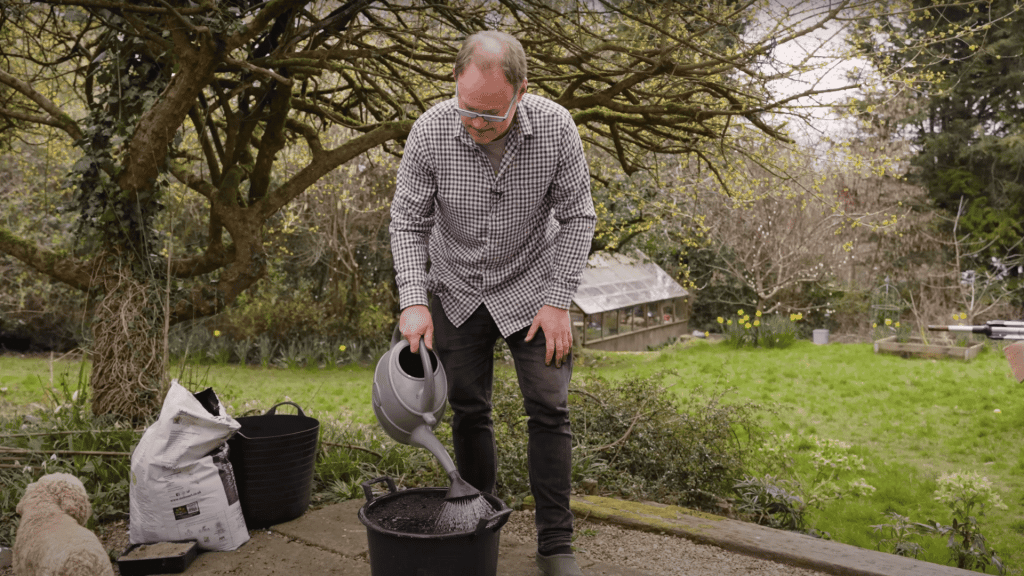
Bonus tip: Water everything in with pre-warmed water to avoid dragging down soil temperature, especially early in the season.
Step 5: Growing Potatoes in Containers
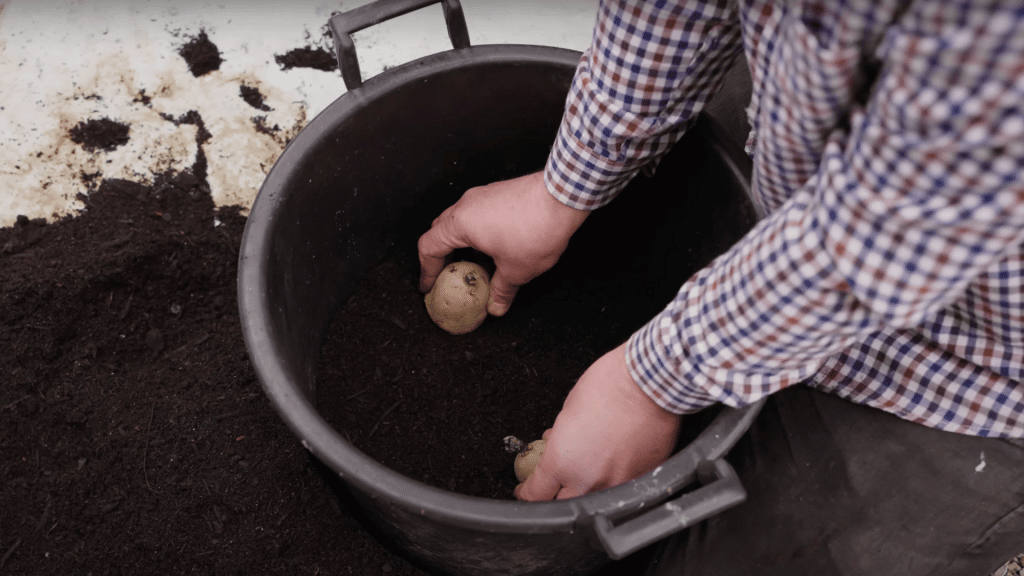
Use a 50/50 mix of all-purpose potting mix and compost, adding a handful of potato fertilizer for nutrition.
Place two seed potatoes in the container first, then cover with the mix until halfway full. Add two more potatoes at right angles to prevent them from growing into each other, then fill the container to the top.
There’s no need for gradual earthing up, just fill to the top at the start to save time.
Even potatoes at the bottom will find their way up. Mix the water with pre-warmed water and finish with a layer of straw on top.
Bonus tip: Straw’s open structure traps air effectively, helping insulate the mix to keep things warm early in the season, then keeping roots cool during hot summer weather.
Step 6: Maintenance and Growth Management
Keep all potatoes well watered, as consistent soil moisture is crucial for achieving the fastest growth possible.
For containers, water until moisture comes out of the drainage holes, then come back later to water again to be sure.
Manage temperature by keeping covers in place while it’s still cool to speed up the process. Later plantings may need shade netting over black containers to keep roots cool while leaves enjoy sunshine.
Never let the potting mix get so dry it shrinks away from the container walls.
Bonus tip: Add a layer of straw to bed-grown potatoes later on, just in case any developing tubers make their way to the surface to stop them going green.
Step 7: Harvesting Potatoes
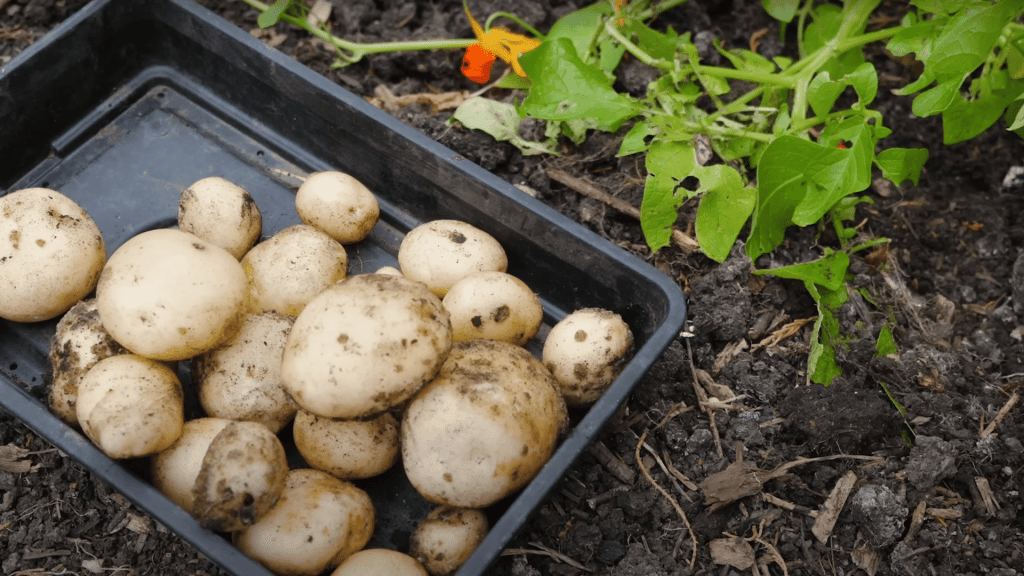
Check if potatoes are ready by popping a hand in and feeling the developing tubers at regular intervals. Once they’re the size of a hen’s egg or bigger, you’re good to harvest.
For bed-grown potatoes, dig them up carefully, while container potatoes can simply be tipped out onto a tarp to keep things tidy.
Break apart the potting mix and hunt for those exceptional tubers, as this is absolutely the best part of growing potatoes. The first potatoes of the season are the very best, just outstanding in flavor and texture.
Bonus tip: Gather them up and use them right away, as fresh really is best when it comes to early-season spuds.
Video Tutorial
Special thanks to GrowVeg for providing valuable insights in their video, which I referenced while creating this guide.
Common Mistakes to Avoid
Even experienced gardeners can make simple errors that slow down potato growth. Here are the most frequent mistakes and why they matter:
- Planting in shaded areas: Potatoes need at least 6 hours of full sun daily. Insufficient sunlight slows photosynthesis, leading to weaker plants and smaller yields.
- Using soil that’s too compact: Heavy, compacted soil restricts root and tuber expansion. Potatoes need loose, well-draining soil to grow freely and form large, healthy tubers.
- Neglecting to rotate crops: Growing potatoes in the same spot year after year increases the risk of soil-borne diseases and pests like wireworms or scab. Rotate with non-solanaceous crops each season.
- Over-fertilizing with nitrogen: Too much nitrogen encourages leafy growth at the expense of tubers. You’ll get lush plants but fewer and smaller potatoes. Balance with potassium-rich fertilizer.
- Delaying harvest after maturity: Leaving early potatoes in the soil too long after they’re ready can cause the skins to harden or the tubers to start sprouting, reducing flavor and shelf life.
Tips for Best Results
These proven techniques will help you get the fastest, most successful potato harvest possible while maximizing your crop yield and quality.
Follow these expert tips to cut weeks off your growing time and enjoy fresh potatoes sooner than you thought possible.
- Choose container colors wisely by avoiding black containers in hot weather, as they absorb too much heat. Use white containers or add shade netting to keep roots cool while leaves get full sun.
- Monitor tuber development by feeling around plants regularly. Harvest potatoes when they reach the size of a hen’s egg or larger for the perfect balance of flavor and quantity.
- Maintain soil nutrition with organic potato fertilizer high in potassium for tuber development, plus nitrogen for faster foliage growth that maximizes sunlight absorption.
- Test and adjust soil pH to between 5.0-6.0 for optimal potato growth. Slightly acidic soil helps prevent common diseases and allows better nutrient uptake for faster development.
Conclusion
Growing fast potatoes isn’t about waiting months anymore.
With the right varieties, proper chitting techniques, and smart temperature management, you can harvest creamy, delicious potatoes in just weeks instead of months.
The key lies in preparation from pre-sprouting seed potatoes to warming your soil and maintaining consistent moisture.
These simple steps transform what feels like a long growing process into an exciting, quick harvest that delivers better flavor than anything from the store.
Remember, fresh is best with early-season spuds. The first potatoes of the season are truly outstanding, and now you have all the tools to grow them successfully.
What’s your biggest challenge when growing potatoes?
Share your experiences or questions in the comments below. We’d love to help you get the fastest harvest possible!
Check out more practical guides and how-tos.
Frequently Asked Questions
What Months Do You Plant Potatoes?
Plant early varieties in March-April when the soil reaches 60°F (15°C). Second earlies go in April-May, and main crops in May-June.
Can You Eat Freshly Dug Potatoes?
Yes! Fresh is best with early-season spuds. Use them right away for outstanding flavor and creamy texture.
Do I Need to Mound My Potatoes?
No mounding needed for early varieties – they’re determinate and produce potatoes in a single layer. Just add straw to the tuber’s surface.