Poor ventilation in your home can lead to condensation, mold, and poor air quality, all of which affect your family’s daily comfort and health.
Installing trickle vents provides a simple yet effective solution to maintain fresh airflow without compromising security measures or fully opening windows.
These small ventilation devices enable controlled air exchange while maintaining your home’s security and energy efficiency throughout the year.
You can complete this installation project in under an hour with basic tools and our detailed step-by-step instructions.
This comprehensive guide will walk you through the entire process, from preparation to final touches, ensuring you achieve professional results every time while saving money on contractor fees.
Why Trickle Vents Are Essential for Your Home?
Trickle vents serve as your home’s breathing system, providing continuous background ventilation that prevents moisture buildup and maintains healthy indoor air quality.
Modern homes are built to be airtight for energy efficiency, but this can trap stale air and humidity inside.
Installing these vents helps regulate humidity levels naturally, reducing the risk of condensation on windows and walls.
They work silently in the background, allowing fresh air to enter while preventing drafts that can make rooms uncomfortable.
Most building regulations now require background ventilation in new constructions, making trickle vents a practical solution for compliance.
They also help prevent the formation of black mold, which thrives in poorly ventilated spaces.
Choose the Right Trickle Vent for Your Home
Different vent types serve specific needs; learn which one works best for your windows and ventilation requirements.
- Standard Trickle Vents: Basic residential vents measuring 8-12 inches in diameter, featuring adjustable airflow controls, designed to meet typical room ventilation needs.
- Acoustic Trickle Vents: Sound-dampening vents that reduce external noise while maintaining airflow, perfect for homes near busy roads or airports.
- Humidity-Controlled Vents: Smart vents that automatically adjust airflow based on moisture levels, opening wider when humidity rises and closing during dry conditions.
- Slot Vents: Narrow, discreet vents that fit into window frames with minimal visual impact while providing continuous background ventilation.
- Canopy Vents: Weather-resistant vents with protective covers that prevent rain entry while allowing unrestricted airflow in all conditions.
Trickle Vent Installation: Complete Step-by-Step Guide
Follow these four simple steps to install your trickle vent correctly and ensure optimal ventilation performance.
Tools and Materials Needed
| Tools Required | Materials Needed |
|---|---|
| Light pencil | Trickle vent kit |
| Ruler | Screws (included) |
| Screwdriver | Screw cover caps |
| Drill (if needed) | Window sash |
Step 1: Mark the External Position
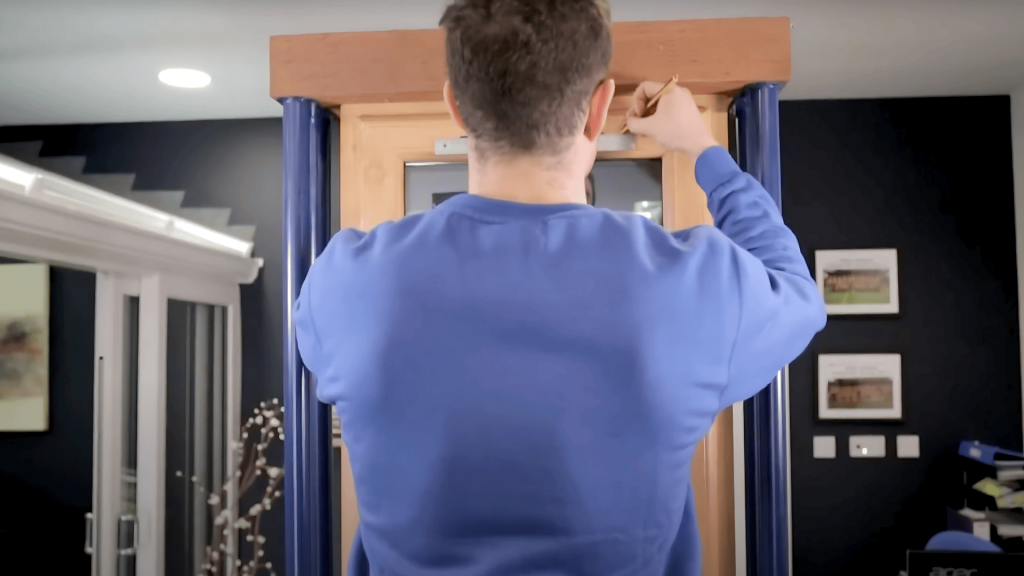
The first step requires careful measurement and marking to ensure your trickle vent sits perfectly aligned with the window frame. Proper positioning is crucial for both function and appearance.
Begin by examining your window sash to determine the optimal location for installation. The vent should sit flush against the frame without interfering with the window’s opening mechanism.
Materials Needed in This Step:
- Light pencil
- Ruler
- Trickle vent (for marking)
Instructions:
- Use a light pencil and ruler to mark the desired height for the outside piece
- Position the vent itself as a marker to identify the center spot
- Ensure the placement aligns correctly with the holes behind the frame
- Double-check measurements before proceeding to avoid mistakes
Step 2: Secure the External Vent
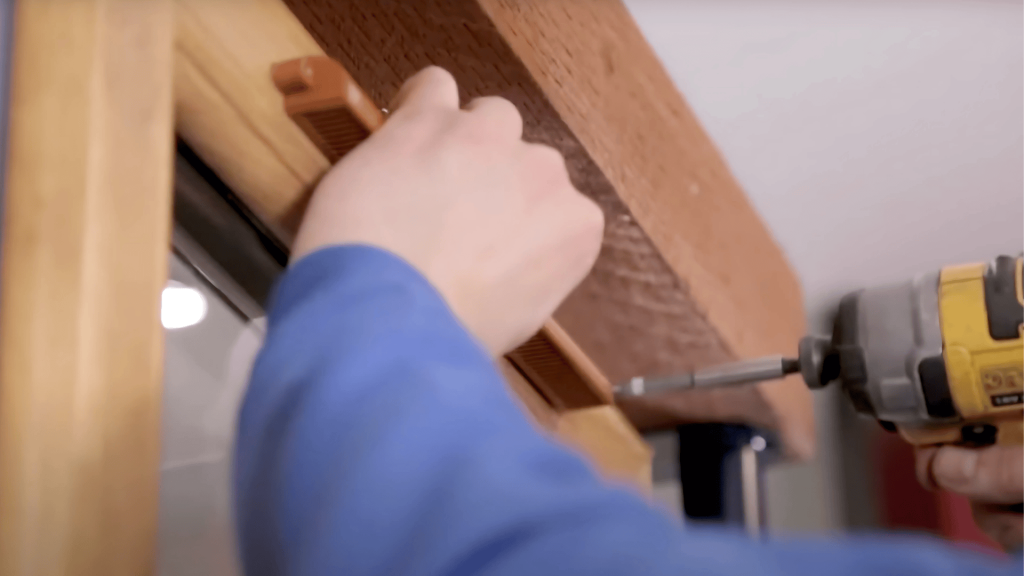
With your markings in place, you can now attach the external portion of the trickle vent. This step requires steady hands and attention to detail to ensure a secure fit.
The external component must be firmly fastened to prevent air leaks and ensure long-lasting performance. Take your time to avoid overtightening, which could damage the window frame.
Materials Needed in This Step:
- Screws (from kit)
- Screwdriver
- Screw cover caps
Instructions:
- Position the outside vent piece according to your markings
- Screw the external vent in place, ensuring it sits flush with the sash
- Check that all fastenings are secure but not overtightened
- Apply screw cover caps to conceal external fastenings for a clean finish that matches surrounding window hardware
Step 3: Install the Internal Component

The internal installation mirrors the external process but requires extra attention to alignment. Both components must work together to create an effective ventilation system.
Proper alignment between internal and external parts ensures optimal airflow and prevents any gaps that could compromise the vent’s effectiveness.
Materials Needed in This Step:
- Internal vent piece
- Screws (from kit)
- Screwdriver
Instructions:
- Move to the inside of the window and identify the correct placement
- Align the internal vent with the external component already installed
- Secure the vent against the internal profile using the provided screws
- Test the alignment by checking that both pieces line up perfectly
Step 4: Final Finishing Touches
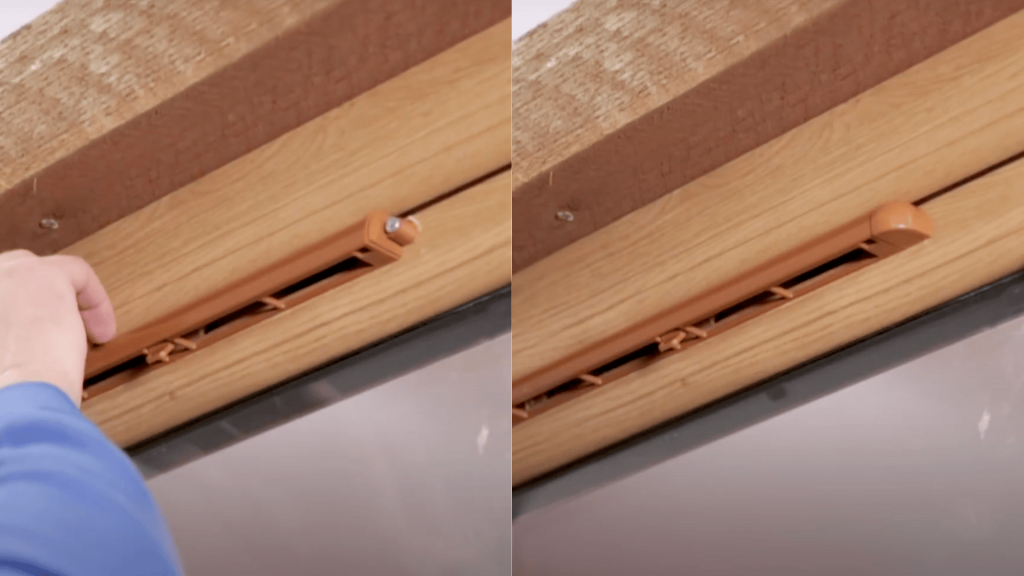
The final step involves adding the finishing touches that give your installation a professional appearance. These details make a significant difference in the overall look.
Cover caps not only improve aesthetics but also protect the screws from corrosion and dirt accumulation over time.
Materials Needed in This Step:
- Screw cover caps
- Cleaning cloth (if needed)
Instructions:
- Apply screw cover caps to both ends of the internal vent
- Ensure all caps sit flush and secure against the vent surface
- Clean any pencil marks or fingerprints from the installation area
- Test the vent operation to confirm everything functions correctly
Video Tutorial
Special thanks to Burbage Custom Windows for providing valuable insights in their video, which I referenced while creating this guide. Watch the video below to see exactly how to install a trickle vent from start to finish.
How to Maintain Your Trickle Vents Properly?

Regular maintenance ensures your vents function efficiently and extends their lifespan, providing years of reliable performance.
1. Regular Cleaning Schedule
Clean your trickle vents every three months to maintain optimal airflow and prevent blockages.
Use a soft brush or vacuum cleaner attachment to remove dust, pollen, and debris from the vent openings.
Blocked vents cannot function effectively and may cause condensation problems to return, defeating the purpose of installation.
2. Seasonal Adjustments
Adjust vent settings seasonally to match changing weather conditions and energy efficiency needs.
Open vents wider during the summer months for increased cooling and reduce airflow during winter to conserve energy.
Many vents feature adjustment sliders that enable fine-tuning without the need for tools, making seasonal adjustments quick and easy to manage.
3. Annual Inspections
Inspect mounting screws and seals annually to ensure everything remains secure and weatherproof.
Look for signs of wear, corrosion, or damage that could compromise performance or allow water penetration.
Early detection of problems enables simple repairs rather than complete replacements, saving time and money on maintenance costs.
4. Filter Replacement
Replace or clean internal filters every six months to maintain air quality and prevent system strain.
Dirty filters reduce airflow efficiency and can harbor bacteria, mold, or allergens that affect indoor air quality.
Most filters can be easily removed, washed with warm, soapy water, and reinstalled once they are completely dry.
5. Weather Seal Maintenance
Check rubber seals and gaskets twice yearly for cracks, hardening, or gaps that could allow drafts.
Replace damaged seals immediately to maintain energy efficiency and prevent water infiltration during storms.
Quality seals typically last 3-5 years but may require earlier replacement in harsh weather conditions or areas with high UV exposure.
Things to Avoid During Trickle Vent Installation
Prevent common mistakes that could damage your windows or compromise your vent’s performance with these important warnings.
| Common Mistakes | Why to Avoid | Better Alternative |
|---|---|---|
| Overtightening screws | Can crack window frames | Tighten until snug, then stop |
| Skipping measurements | Leads to misaligned vents | Always measure twice, install once |
| Ignoring manufacturer instructions | May void warranty | Follow the provided guidelines exactly |
| Installing during windy weather | Makes positioning difficult | Choose calm weather conditions |
| Using the wrong drill bit size | Creates loose or tight holes | Match bit size to screw diameter |
Conclusion
Installing trickle vents successfully improves your home’s air quality while preventing costly moisture damage and related health issues.
This straightforward project requires minimal tools and can be completed in less than an hour with proper preparation and focus.
Following each step carefully ensures professional results that will serve your home for years to come without problems.
Remember to maintain your vents regularly through cleaning and seasonal adjustments for optimal performance throughout all weather conditions.
With proper installation and care, trickle vents offer an efficient and quiet solution to modern home ventilation challenges.
Take your time during installation, and don’t hesitate to consult the manufacturer’s instructions if you encounter any uncertainties during the process.
Frequently Asked Questions
Can Trickle Vents Be Added To Existing Windows?
Yes, most existing windows can accommodate trickle vents through retrofitting; however, some older frames may require a professional assessment for compatibility.
How Much Does It Cost To Install Trickle Vents?
DIY installation costs £15-50 per vent for materials, while professional installation ranges from £80-150 per vent, including labor and parts.
What Are The New Rules For Trickle Vents?
Building regulations require background ventilation in new builds and major renovations, with trickle vents being the most common method of compliance for windows.