
Tired of mowing every weekend, watching brown patches spread across the yard, or dealing with muddy spots that never seem to grow grass?
Many homeowners find themselves stuck in an endless cycle of lawn maintenance that eats up time and money without delivering the results they want.
Artificial grass offers a practical solution that stays perfect year-round without the constant upkeep.
Modern synthetic turf has come a long way from the old Astroturf days, now featuring realistic textures and natural-looking fibers that feel comfortable underfoot.
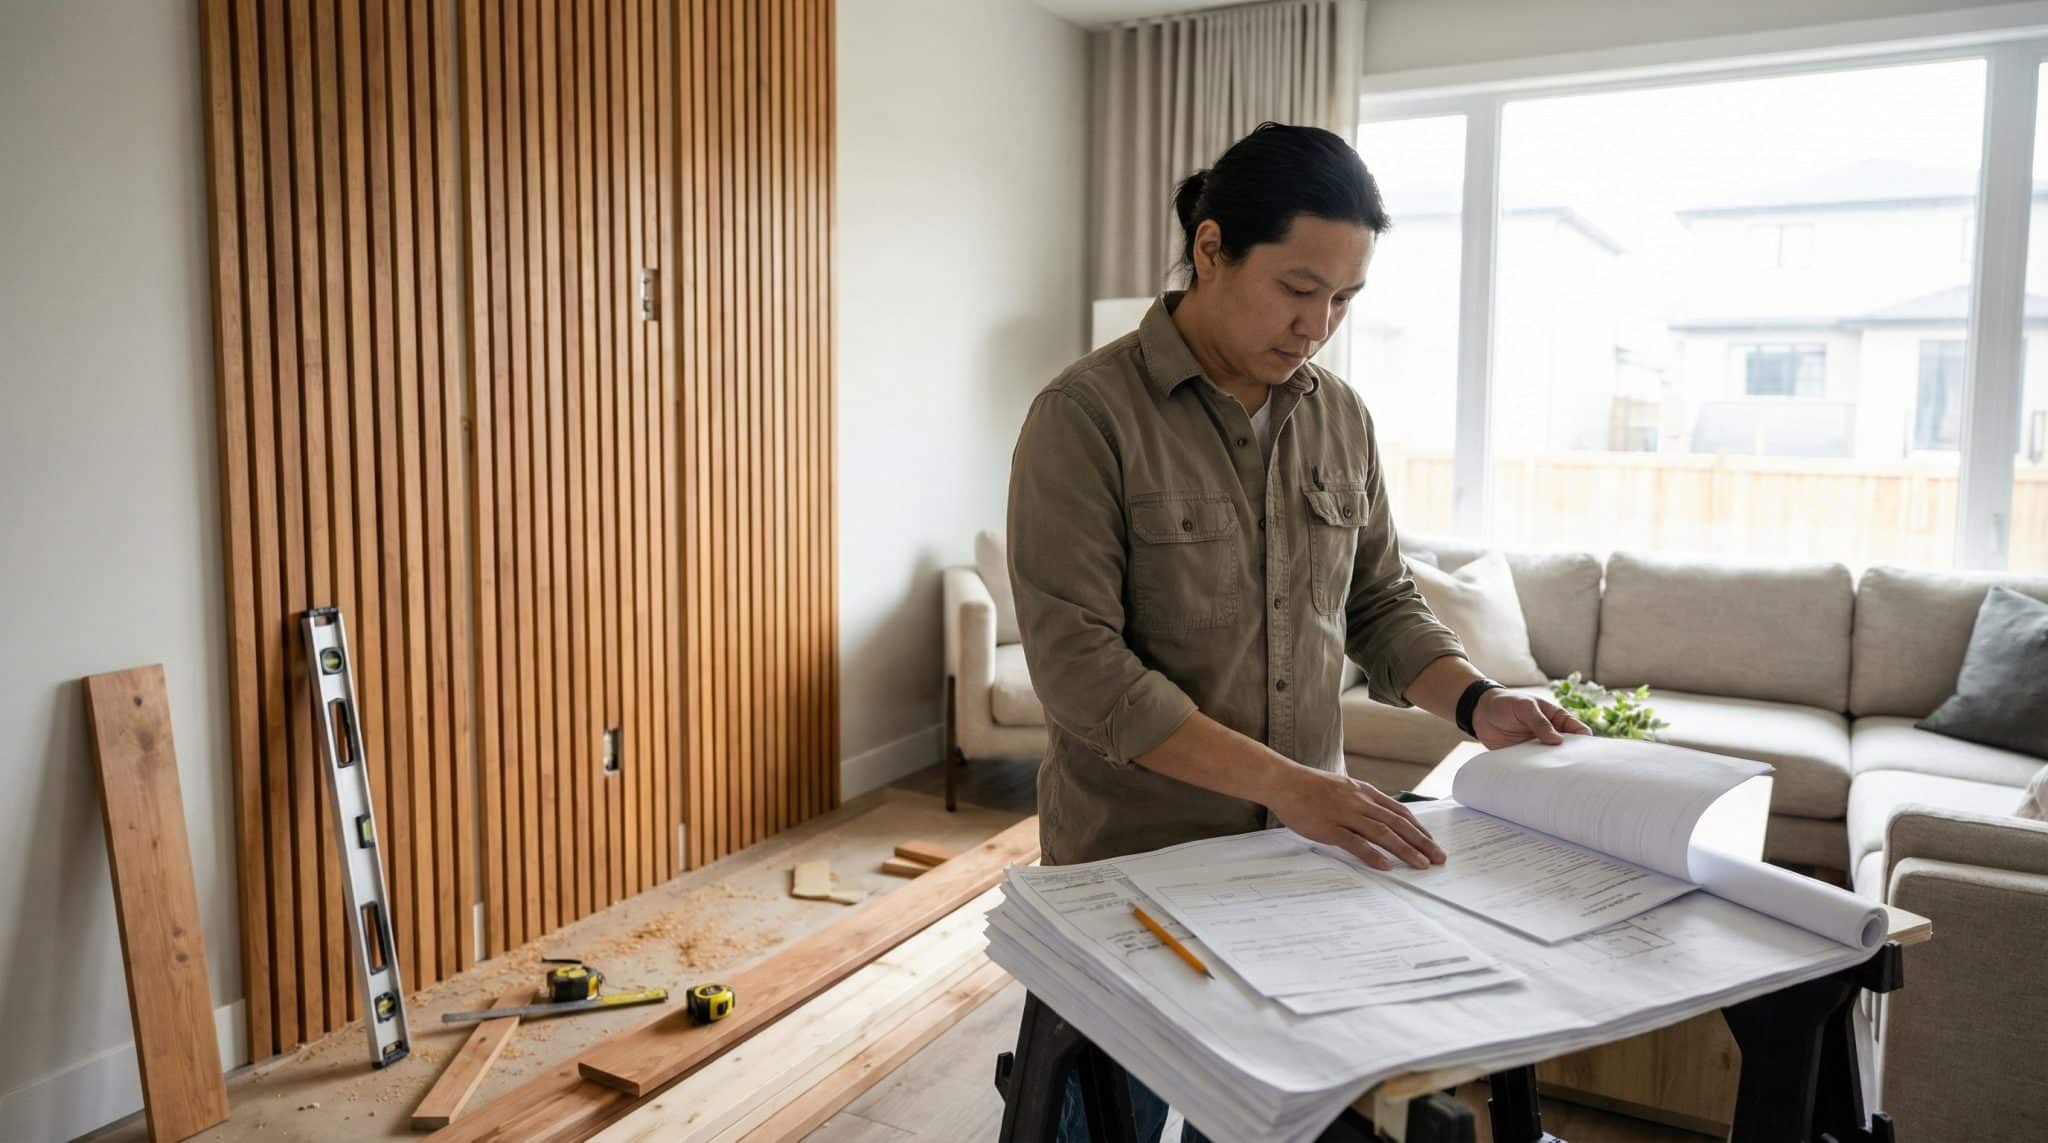
This guide walks through the complete process of installing artificial grass on soil, from initial preparation to final finishing touches.
Readers will learn proper soil preparation techniques, base installation methods, common mistakes that can ruin the project, and maintenance tips for long-lasting results.
Why Use Artificial Grass?
Modern homeowners are choosing artificial grass as a smart alternative to the endless cycle of watering, fertilizing, and mowing that comes with natural lawns.
Today’s artificial grass has come a long way, with manufacturers weaving dead bits of real grass into the fibers to create a realistic look and feel.
Unlike the old versions, modern artificial turf requires proper soil preparation and a well-built base to achieve that natural appearance and comfortable walking surface.
For homeowners tired of constant mowing, watering, and dealing with patchy or dying grass, artificial turf offers a practical solution that stays green year-round without the maintenance headaches of traditional lawns.
If you want to keep it looking fresh, here’s a guide on how to clean artificial grass.
Step-by-Step Guide to Laying Artificial Grass on Soil
This section provides detailed instructions for laying artificial grass on soil. Carefully following each step ensures smooth operation and a refined, tailored look.
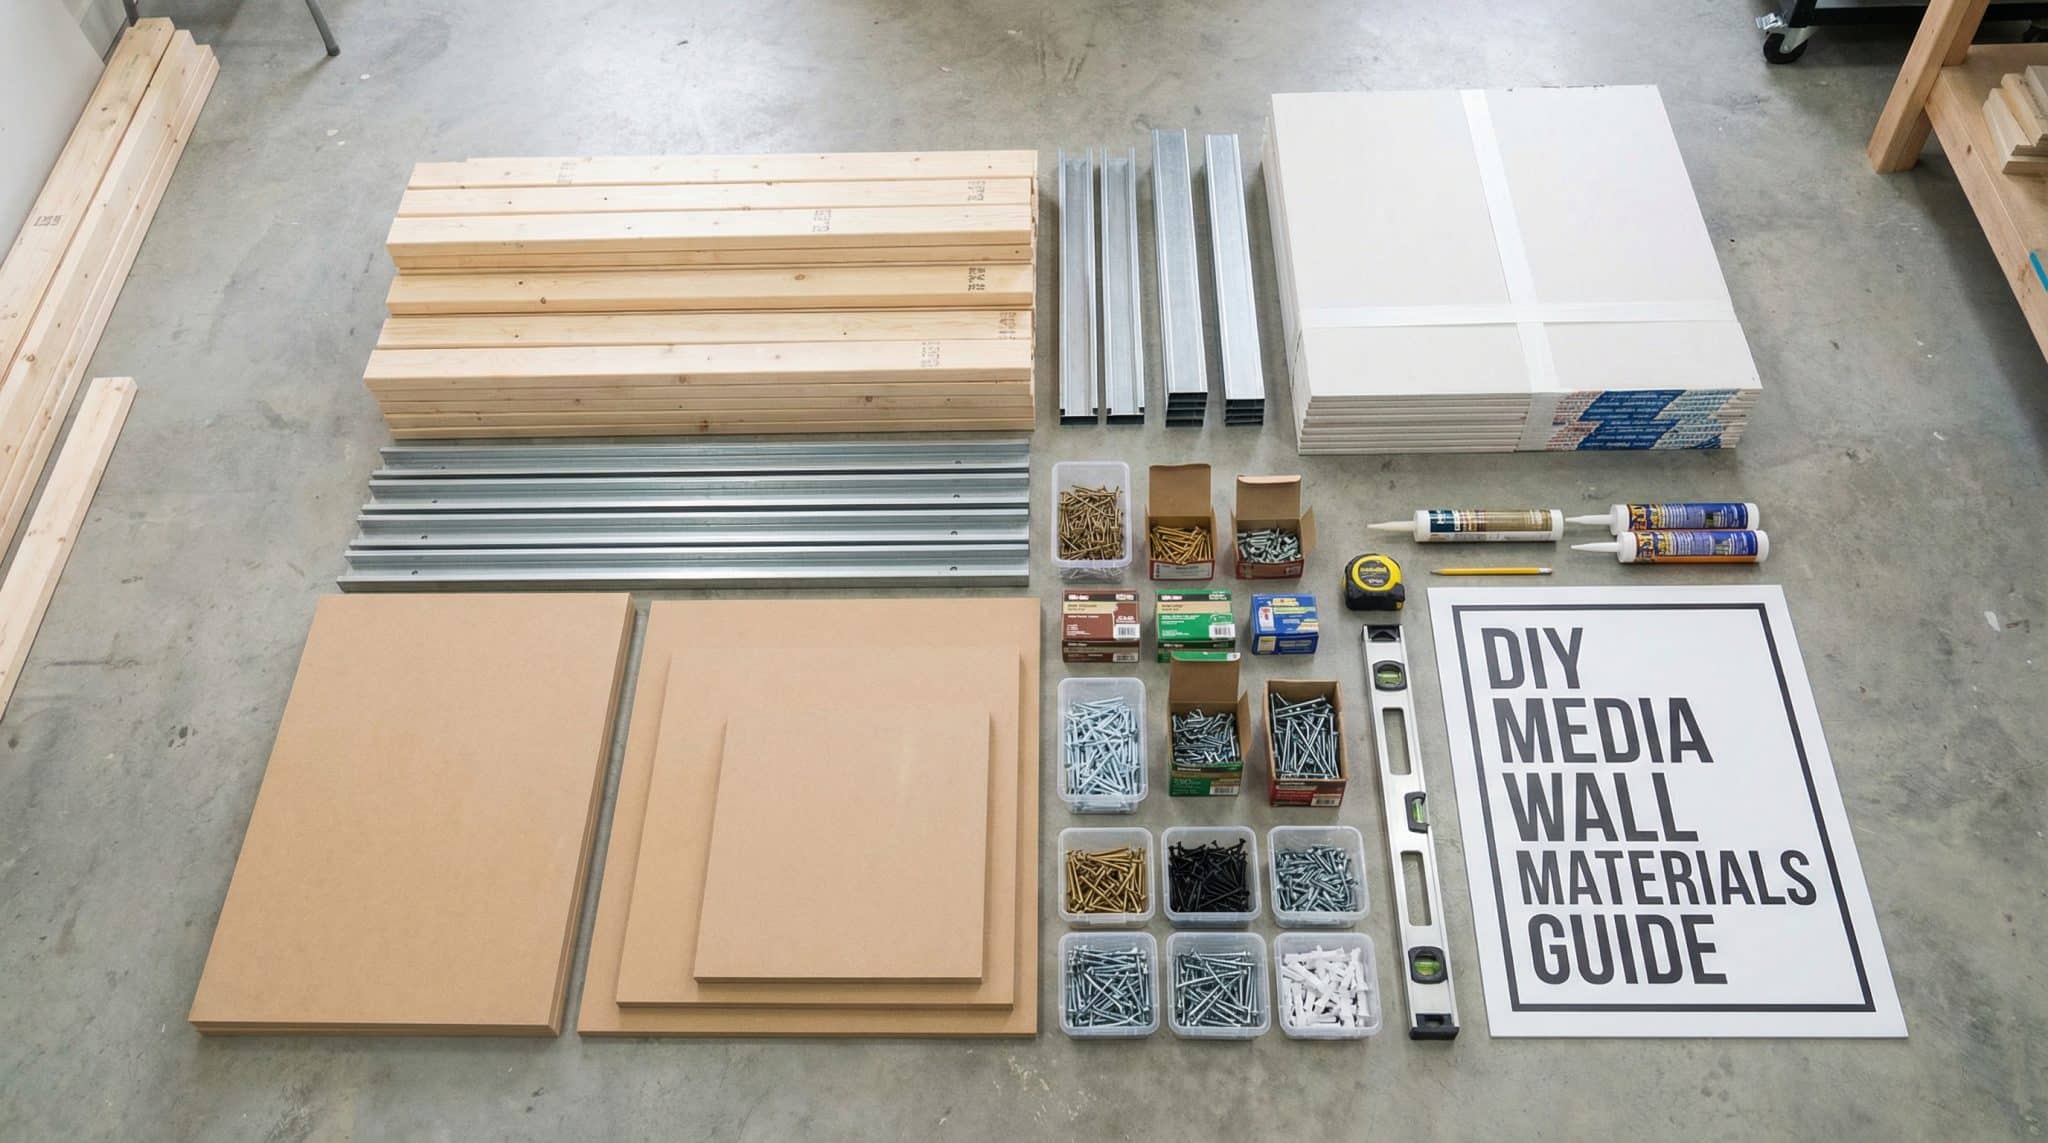
Tools Required
Having the right tools ready before starting will make the installation process much smoother. Here’s what you’ll need and why each item is important.
| Tool | Purpose |
|---|---|
| Shovel, rake, and wheelbarrow | Essential digging and moving tools for soil removal and material transport |
| Sod roller (manual or water-filled) | Compact the decomposed granite base to prevent settling later |
| Turf cutter/shears | Cuts and shapes the artificial grass to fit your specific layout |
| Broom or power brush | Works the sand infill deep into the grass fibers |
| Gloves, safety goggles | Protects hands and eyes during the installation process |
Materials Needed
Following is a list of the materials you’ll need in addition to the basic tools required for the job. Each one plays a key role in ensuring your artificial lawn looks great and lasts for years.
| Material | Purpose |
|---|---|
| Artificial grass (UV-resistant, realistic texture) | The primary turf material that will create your new lawn surface |
| Weed killer (like Roundup) | Kills existing grass and weeds completely before installation |
| Decomposed granite (¼ inch size) | Creates the compacted base layer for proper drainage and stability |
| Landscape fabric (commercial-grade) | Prevents weeds from growing up through the artificial turf |
| Six-inch galvanized nails or turf spikes | Secures the turf edges firmly to prevent lifting or shifting |
| Sand infill (silica sand) | Weighs down the turf and helps grass blades stand upright naturally |
Step 1: Kill Weeds and Remove Existing Grass
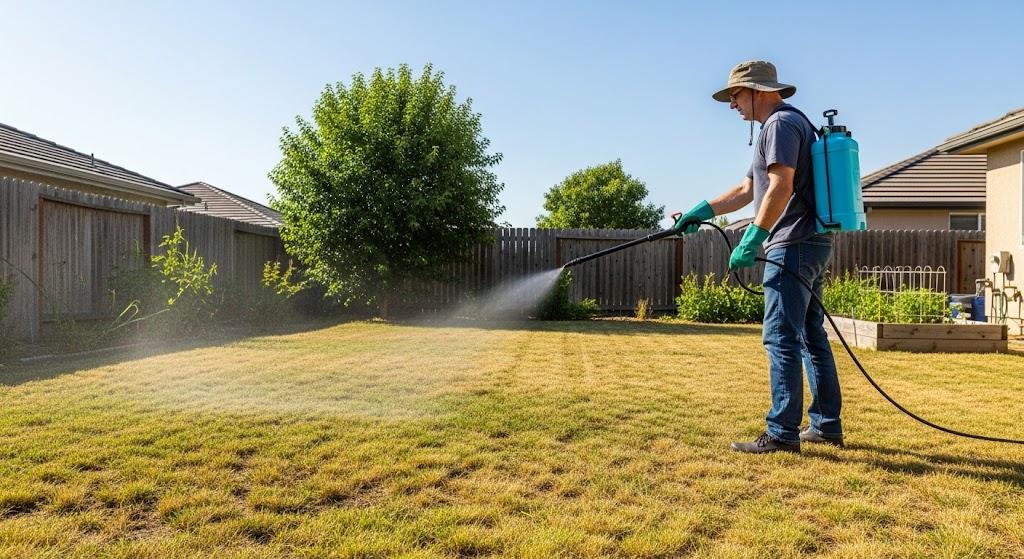
Before any installation can begin, all existing vegetation must be completely eliminated.
Apply weed killer like Roundup at least 2-3 times over several weeks, but only during warmer months when nighttime temperatures consistently stay above 65°F for the treatment to be effective.
Bonus tip: Wait until every bit of grass and weeds are completely dead before attempting removal, as any surviving roots can grow back through the new turf and ruin the installation.
Step 2: Excavate the Soil
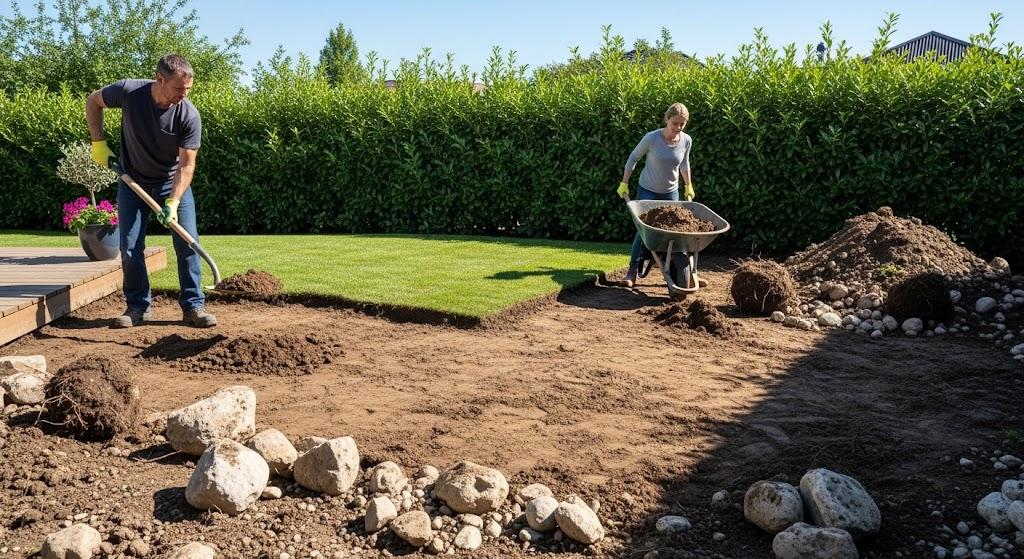
Once all the grass is dead and removed, it’s time to prepare the foundation by digging down 2-3 inches across the entire area.
This excavation step is critical because you need to remove every single root, piece of debris, and rock to create a clean slate for your base material.
Bonus tip: Make sure the excavated area has proper drainage by creating a slight slope away from structures, as standing water under artificial turf can cause problems later.
Step 3: Build a Solid Sub-Base
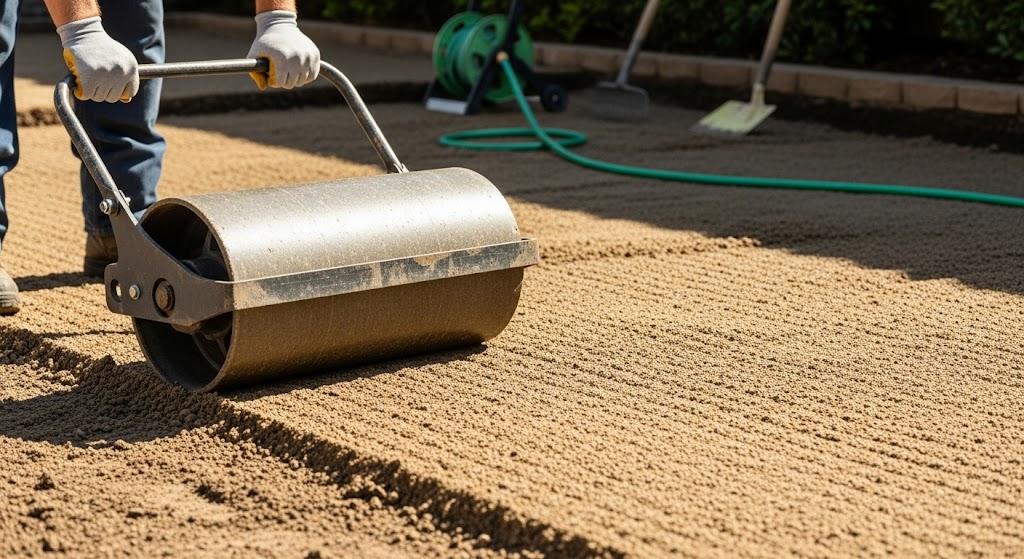
The sub-base is what gives your artificial turf its stability and proper feel underfoot.
Spread quarter-inch decomposed granite in 1-inch layers at a time, then wet each layer and compact it thoroughly with a sod roller to achieve good compaction before adding the next layer.
Continue this process of layering, wetting, and rolling until you reach the desired level that matches adjacent walkways or decks, ensuring you won’t have any tripping hazards when the installation is complete.
Bonus tip: Sub-base ensures you won’t have any tripping hazards when the installation is complete.
Step 4: Add the Weed Barrier
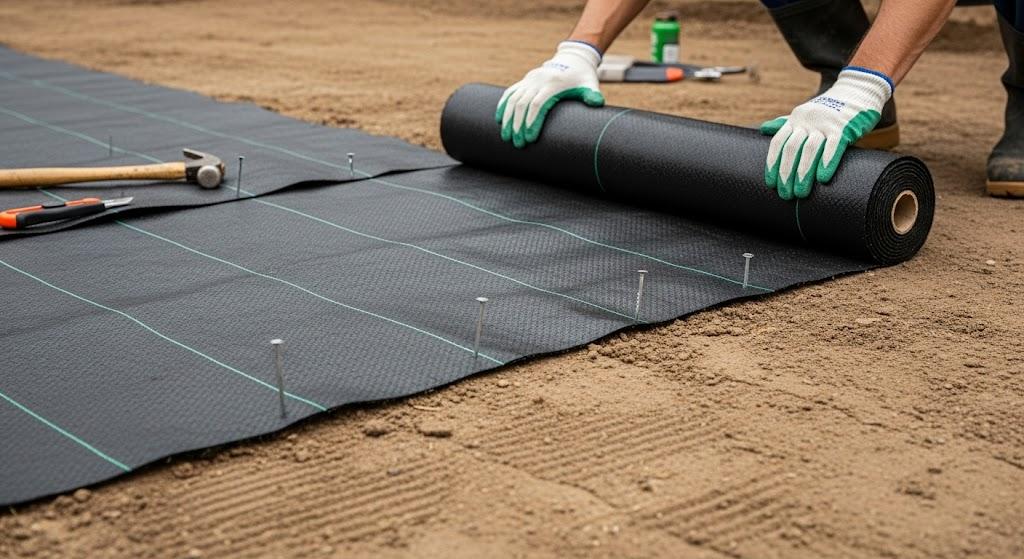
The weed fabric goes on top of your compacted sub-base, not below it, since you’ve just put down three inches of material that weeds could potentially grow into.
Use a good commercial-grade weed fabric in four-foot-wide rolls, overlapping each sheet by 4-6 inches to prevent any gaps where weeds might sneak through.
Secure the fabric in place with long nails or staples, but don’t worry about using too many since the turf will hold it down once installed.
Bonus Tip: Choose black weed fabric over white as it absorbs heat and helps kill any remaining weed seeds while being less visible through the turf.
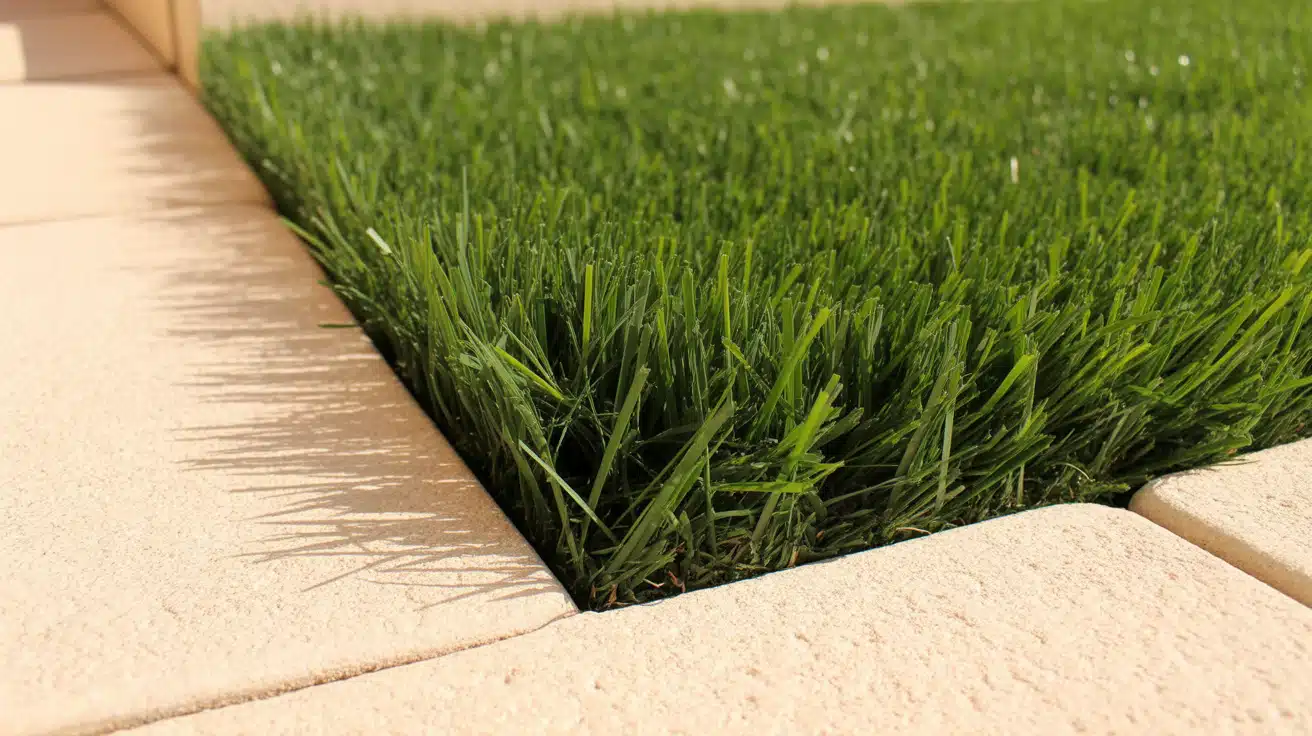
Step 5: Roll Out and Position the Turf
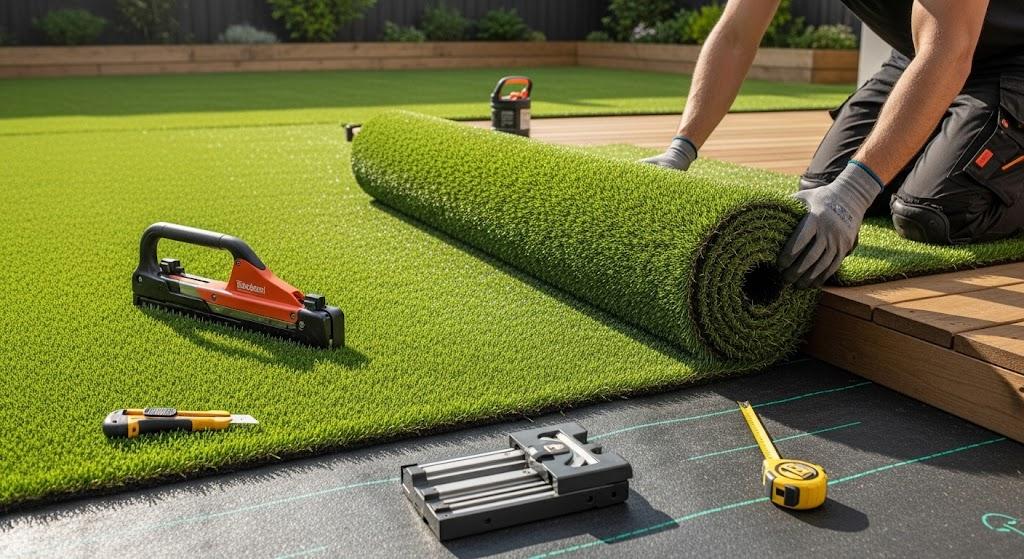
Roll out the artificial turf over your prepared area and let it settle for a few hours to relax and take its natural shape.
Pay attention to the grain and blade direction to ensure a consistent look across the entire installation, as misaligned sections will be noticeable and make the lawn appear artificial.
Roughly trim the edges to get close to your desired layout.
Bonus tip: Don’t worry about precision cuts yet since you’ll make final adjustments after the turf is properly positioned and secured.
Step 6: Trim and Shape the Edges

Using a big pair of shears, cut your desired shape without feeling pressured to follow any original pattern exactly. You just need to get close to create that natural look you’re after.
Leave a little excess material around corners and edges since it’s easier to trim away extra turf than to add it back, and you can always fine-tune the exact shape after the turf is nailed down and secured in its final position.
Bonus Tip: Cut from the backing side when possible. It’s easier to see the weave pattern and makes cleaner cuts than cutting through the grass blades.
Step 7: Secure the Turf Properly
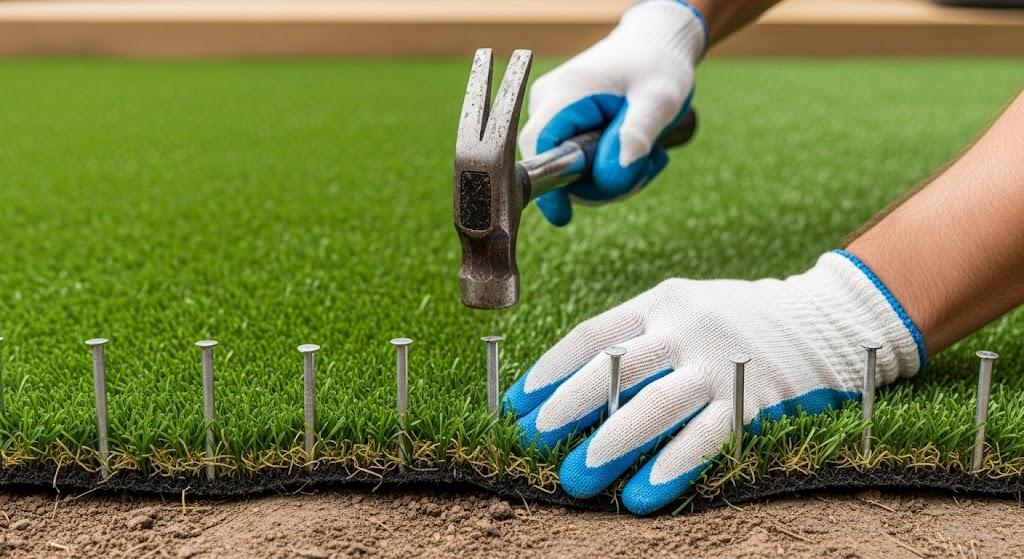
Start nailing at the corners and work your way along all edges, using 6-inch nails spaced every 4 inches to ensure the turf stays firmly in place.
The grass will naturally pull up and hide the nail heads once they’re hammered in, creating a clean finished look without visible hardware.
Bonus tip: Double-check that your turf alignment stays square to decks or other structures as you work your way around, since it’s much easier to make adjustments now than after everything is secured.
Step 8: Apply Silica Sand Infill
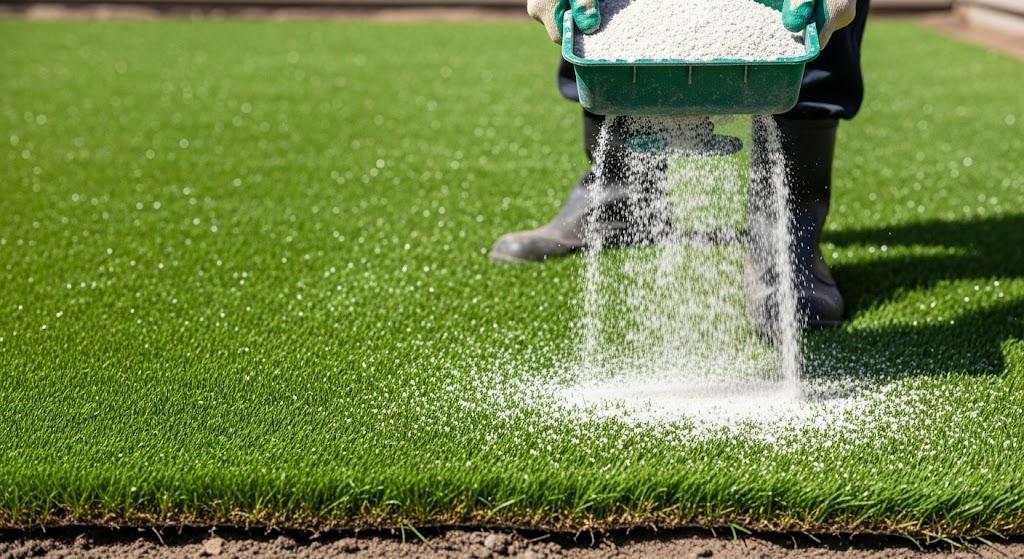
Apply silica sand at a rate of about 1.5 to 2 pounds per square foot, making several passes over the area to ensure even coverage across the entire installation.
Use a broom to sweep the sand deep into the grass fibers and work it down into all the joints, as this step is what really firms up the turf and gives it that natural feel underfoot.
Bonus tip: Once the sand is properly worked in, it helps the grass blades stand upright and look natural while adding crucial weight and stability to prevent the turf from shifting over time.
Step 9: Final Finishing and First Impressions
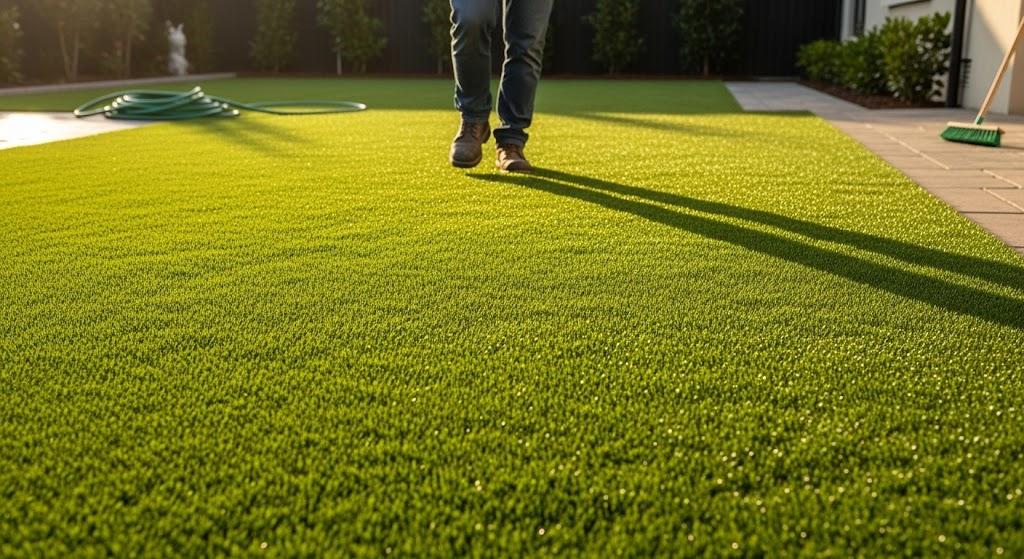
With the sand infill properly worked in, give the entire area a light hosing to settle any dust and help the sand settle into its final position.
Take time to scrutinize all seams and edges, looking for any areas that might need additional securing or trimming to maintain that natural appearance.
Bonus tip: Walk around the entire installation to test the feel and firmness underfoot, checking for any soft spots, gaps, or areas where the turf might feel uneven.
Video Tutorial
Special thanks to YurView for providing valuable insights in their video, which I referenced while creating this guide.
Common Mistakes to Avoid
Even experienced DIYers can encounter issues with artificial turf installation. These are the most common mistakes that can ruin your project and how to avoid them.
- Not Killing All Weeds or Grass – Rushing through weed elimination allows leftover roots to grow back and push through the new turf. Take time to ensure complete vegetation death before proceeding.
- Skipping the Sub-Base or Poor Compaction – Poor base preparation leads to uneven surfaces, drainage issues, and sagging areas. Compact each layer thoroughly for professional results.
- Incorrect Blade Direction – Misaligned grain direction makes seams obvious and creates an artificial appearance. Keep all turf sections running in the same direction for uniformity.
- Not Using Enough Infill – Insufficient silica sand causes grass blades to mat down and allows turf to shift underfoot. Apply 1.5-2 pounds per square foot for proper stability.
- Overlooking Edge Securement – Loose edges lift and curl over time, especially in high-traffic areas. Space nails every 4 inches along all edges for lasting security.
Maintenance Tips for Long-Term Beauty
One of the biggest advantages of artificial grass is how little upkeep it requires, but a few simple maintenance steps will keep it looking its best for years.
- Brush occasionally: Use a stiff broom or power brush every few weeks to keep the grass blades standing upright and maintain that natural appearance.
- Rinse regularly: A simple hose-down removes dust, pollen, and any pet residue that might accumulate on the surface.
- Clear debris: Use a leaf blower to quickly remove fallen leaves, twigs, and other debris that can make the turf look neglected.
- Top off sand infill: Check the sand levels every couple of years and add more silica sand if needed to keep the blades supported and the surface firm.
Final Thoughts
Installing artificial grass on soil might seem like a big project, but breaking it down into these manageable steps makes it doable for most homeowners.
The key to success lies in taking time with the preparation work—properly killing weeds, building a solid base, and carefully securing the edges.
These foundational steps determine whether the installation looks professional or amateur.
With proper installation, homeowners can expect their artificial lawn to provide 10-15 years of maintenance-free enjoyment.
No more weekend mowing sessions, no more brown patches during dry spells, and no more muddy paw prints tracked through the house.
Ready to start your own artificial grass project? Drop a comment below sharing your biggest concern about the installation process.