
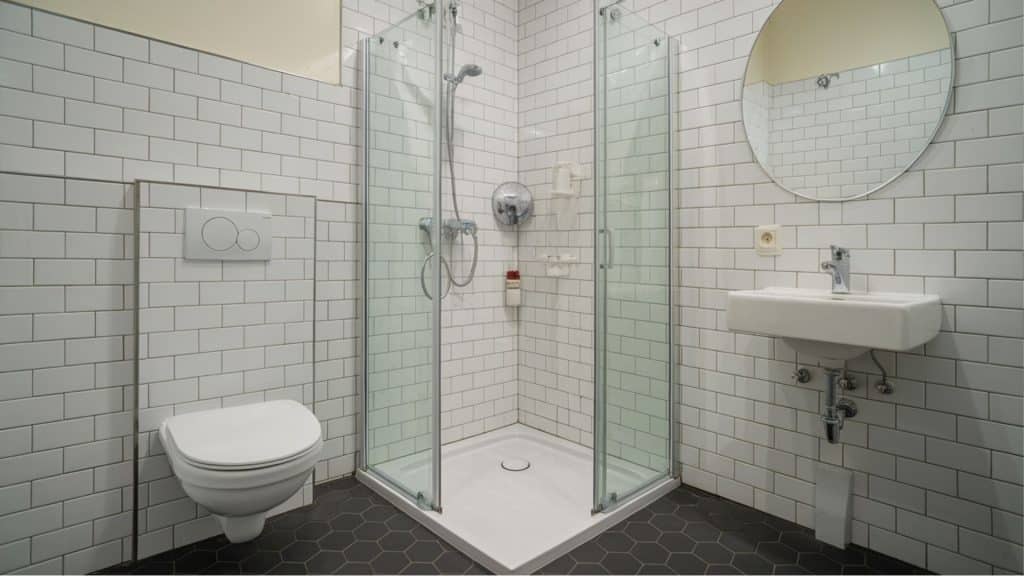
Small bathrooms often feel cramped and outdated. Traditional shower enclosures eat up floor space, create cleaning headaches, and make tight rooms feel even smaller.
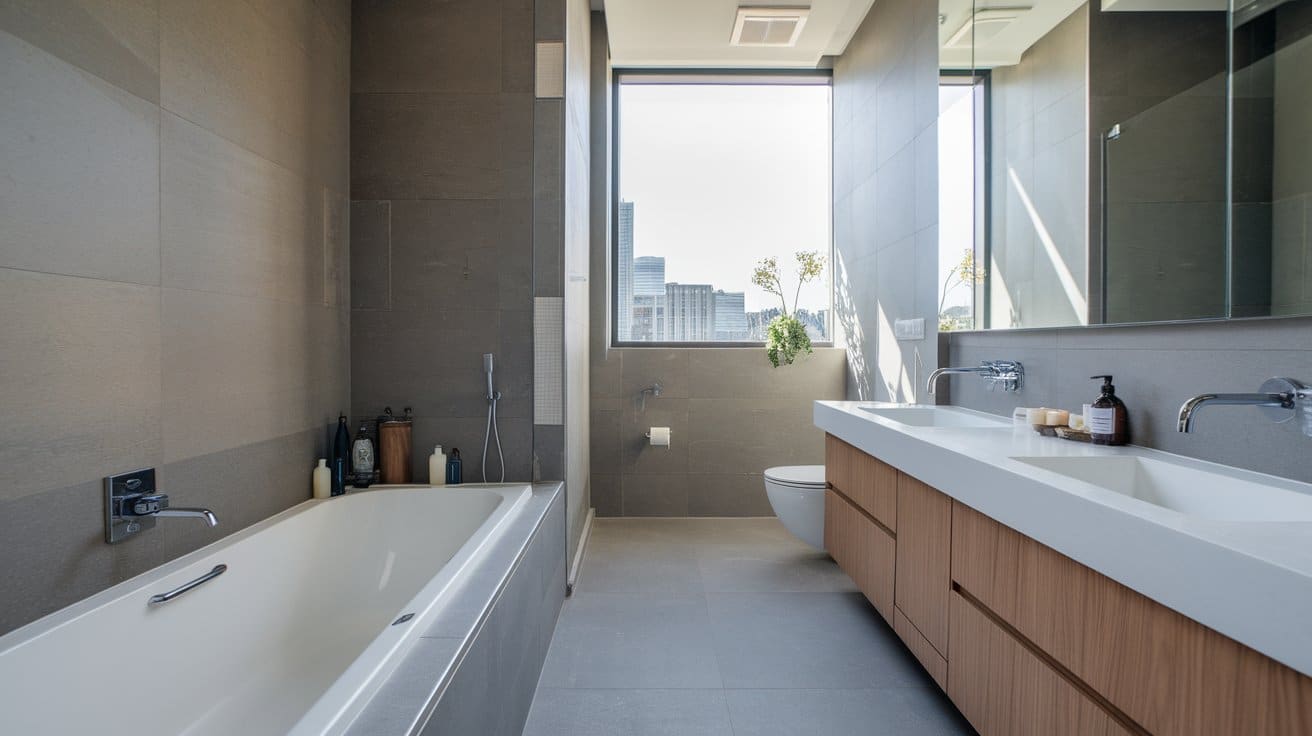
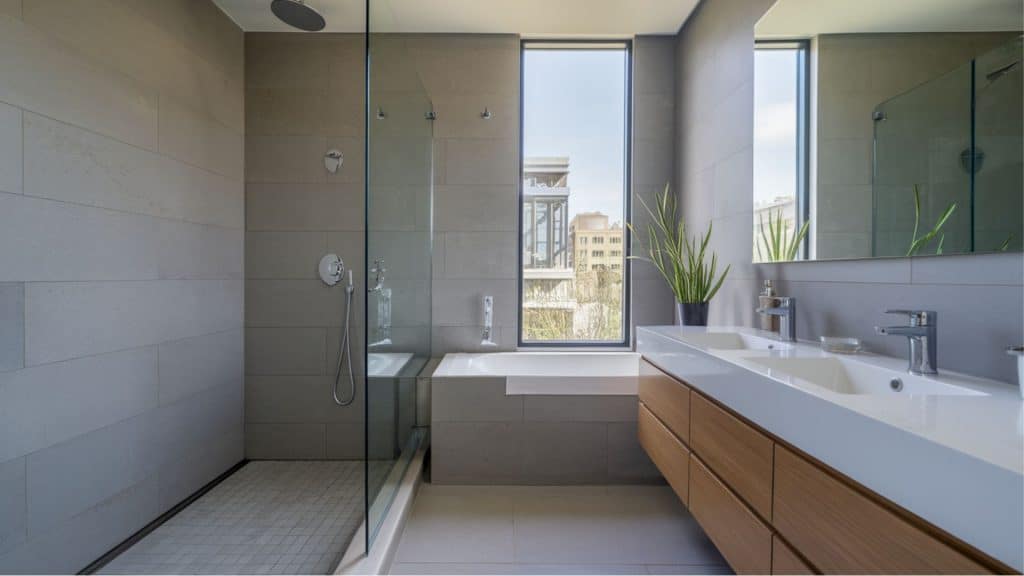
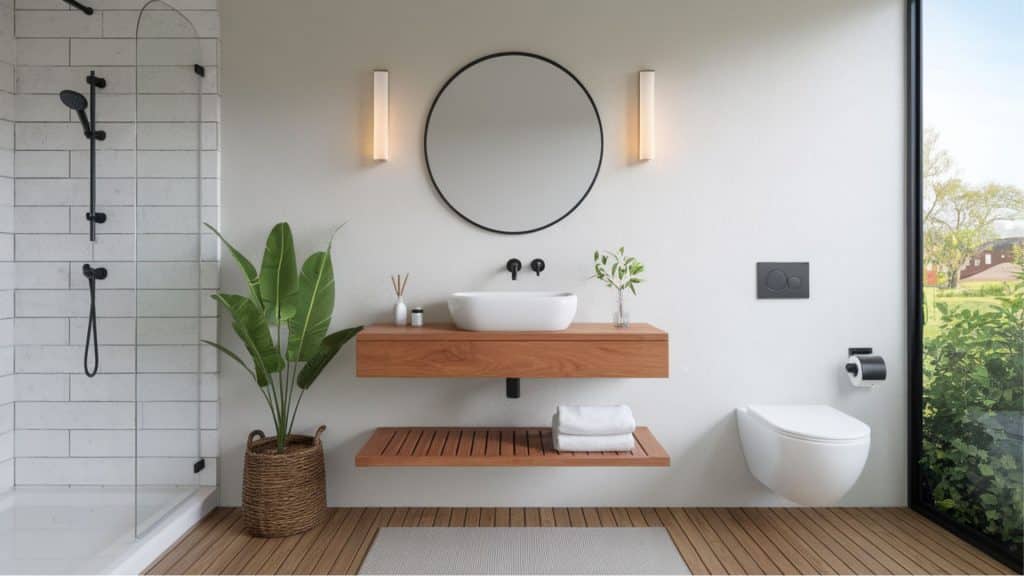
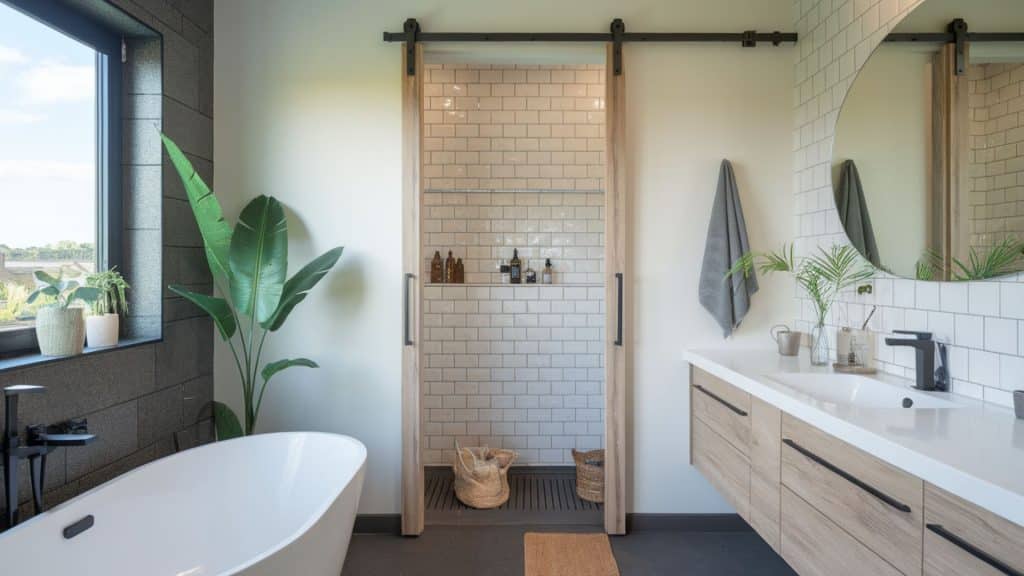
A wet room changes everything. This open-floor design removes bulky shower trays and glass panels, creating a modern space that feels twice as big. Even rooms under 50 square feet can transform into functional, spa-like bathrooms.
This guide walks you through practical ideas for designing your small wet room. You’ll learn how to choose the right layout, pick materials that last, avoid costly mistakes, and work within your budget.
Whether you’re renovating a tiny apartment bathroom or converting awkward under-stair space, these tips help you maximize every inch.
What Is a Small Wet Room?
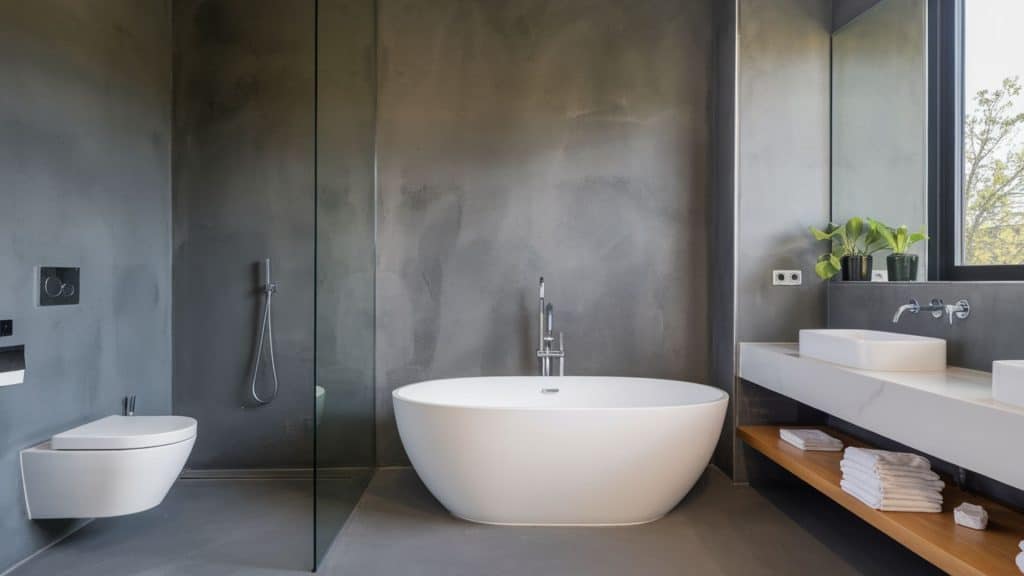
A wet room is a fully waterproofed bathroom in which the shower area is level with the rest of the floor. There’s no raised tray or bulky enclosure. Everything flows together in one open space.
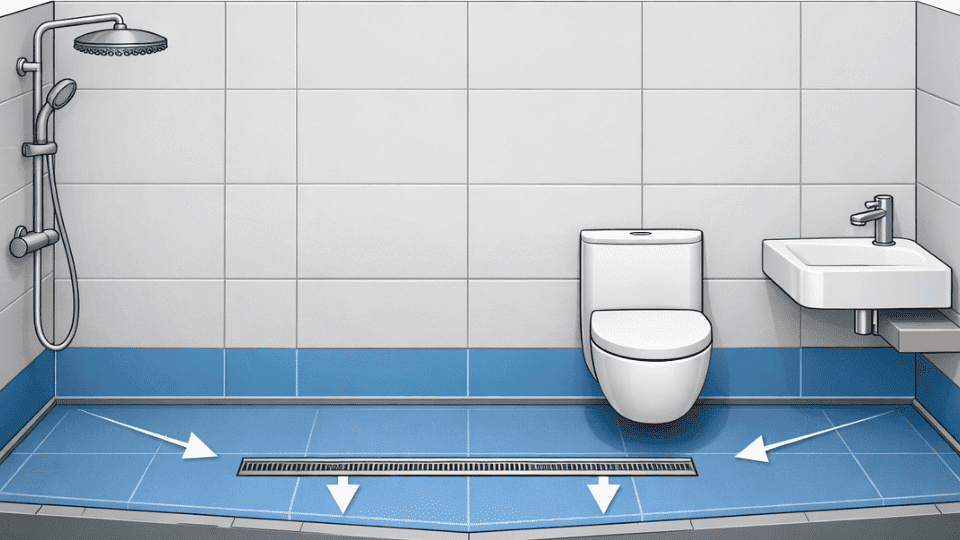
Water drains through a built-in floor system designed to handle moisture throughout the room. The floor slopes gently toward a drain, so water never pools in unwanted areas.
A small wet room usually measures between 20 and 50 square feet. Even tinier spaces can work if you get the drainage and waterproofing right.
Because the whole room is waterproof, you can place your toilet, sink, and shower wherever they fit best. You’re not stuck working around a shower enclosure or glass panels.
This style works well in small homes, apartments, or basement bathrooms. It removes visual clutter and creates a clean, modern look that doesn’t feel cramped.
Benefits of a Small Wet Room Design
A well-planned wet room brings real advantages when working with limited square footage. These benefits improve daily comfort and maximize your space.
- Maximizes floor space: Removing bulky shower trays and frames opens up the room instantly without changing the actual footprint.
- Creates an open feel: The level floor keeps sightlines clear from wall to wall with no barriers breaking up the view.
- Simplifies cleaning: Fewer corners, crevices, and joints mean less scrubbing. You can wipe down surfaces quickly without working around multiple fixtures.
- Improves accessibility: Children, elderly guests, and anyone with mobility concerns can move around safely. The flat floor removes tripping risks completely.
Steps for Planning a Functional Small Wet Room
Planning a wet room requires careful consideration before any work begins. Follow these six steps to ensure your project runs smoothly and delivers lasting results.
Step 1: Determine Proper Drain Location and Type
Choose a linear or central drain based on your room’s shape. Linear drains work best in narrow spaces along one wall. Central drains suit square layouts. Position drains as close to the shower stream as possible for efficient water flow.
Step 2: Create the Correct Floor Slope
Slope your floor at least 1/4 inch per foot toward the drain. Building codes require the drain sit at least 2 inches below the highest floor point. This gentle gradient ensures water flows properly and doesn’t pool anywhere.
Step 3: Apply Full Waterproofing to All Surfaces
Use KERDI membrane, liquid coatings, or tanking systems on floors, walls, and ceilings. Every surface that might be exposed to moisture needs waterproofing, not just the shower zone. This prevents leaks into your home’s structure and costly future repairs.
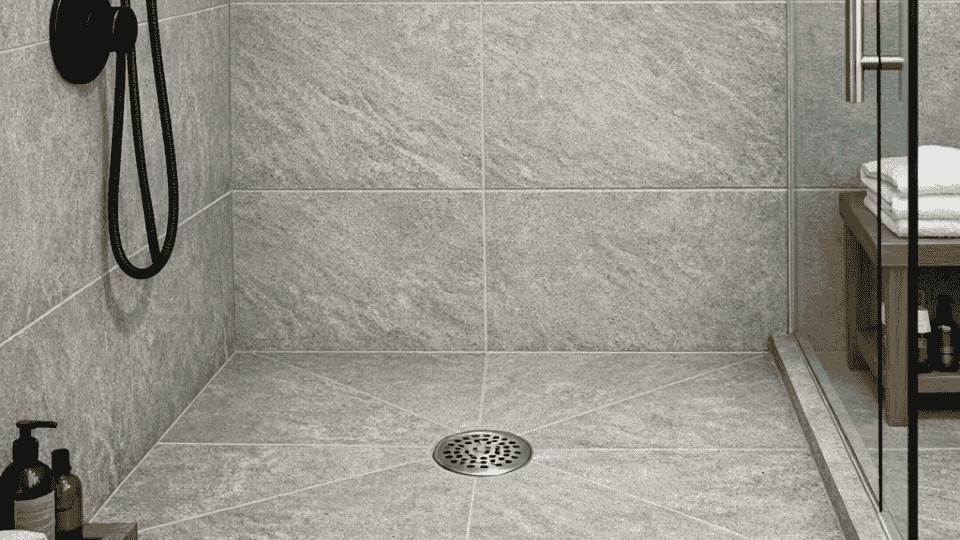
Step 4: Choose Slip-Resistant Flooring Materials
Select non-slip tiles rated R10 or higher for safety when wet. Natural stone, textured porcelain, or vinyl work well. Extra grout lines in smaller tiles, like river rock, increase traction. Avoid smooth, glossy floor tiles that become dangerously slippery.
Step 5: Plan Zoning with Glass Partitions or Half Walls
Decide whether you want a fully open layout or divided wet and dry zones. Glass partitions keep the toilet and vanity areas drier without blocking sightlines. Half-height walls contain a shower splash while maintaining an open feel.
Step 6: Install Adequate Ventilation and Heating
Calculate required extraction rates based on room size. Rooms under 40 square feet need fans rated at a minimum of 15 liters per second. Consider adding underfloor heating to speed drying and reduce slip risks. Proper airflow prevents mold and mildew growth.
23 Clever Small Wet Room Ideas
These ideas combine layout planning, style choices, lighting, storage, and materials. Use them to create a functional wet room that fits your space and meets your needs.
1. Assess Your Space Wisely
Measure the room from wall to wall, noting ceiling height and sloped areas. Check door swing directions and current plumbing locations. Mark electrical outlets and windows for accurate planning.
2. Choose a Layout That Fits the Room Shape
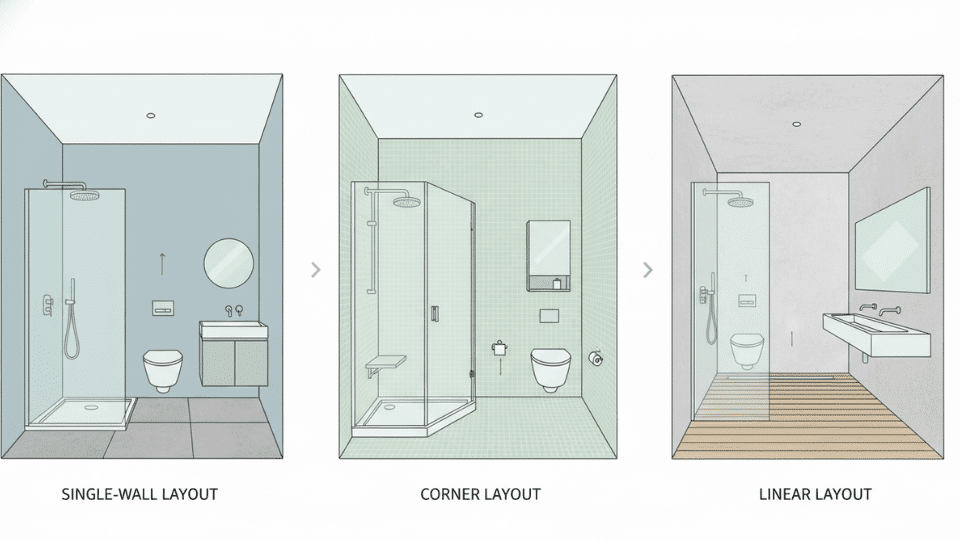
Pick a single-wall, corner, or linear layout based on your dimensions. The right setup ensures fixtures don’t block movement or crowd walkways. Plan how people enter and exit comfortably.
3. Position the Drain for Efficient Water Flow
Place the drain where water naturally flows based on the floor slope. Correct positioning prevents pooling in corners or near doorways. The floor should slope gently at 1-2 degrees toward the drain.
4. Use High-Quality Waterproof Materials
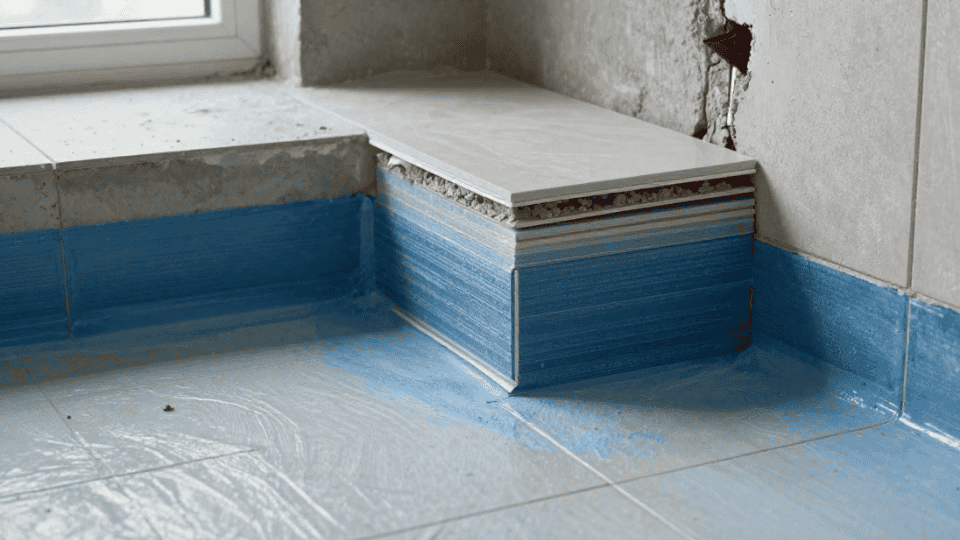
A strong tanking system protects walls and floors from moisture damage. This waterproof layer sits beneath tiles and stops water from seeping through to structural elements. Never skip this crucial step.
5. Improve Ventilation for Moisture Control
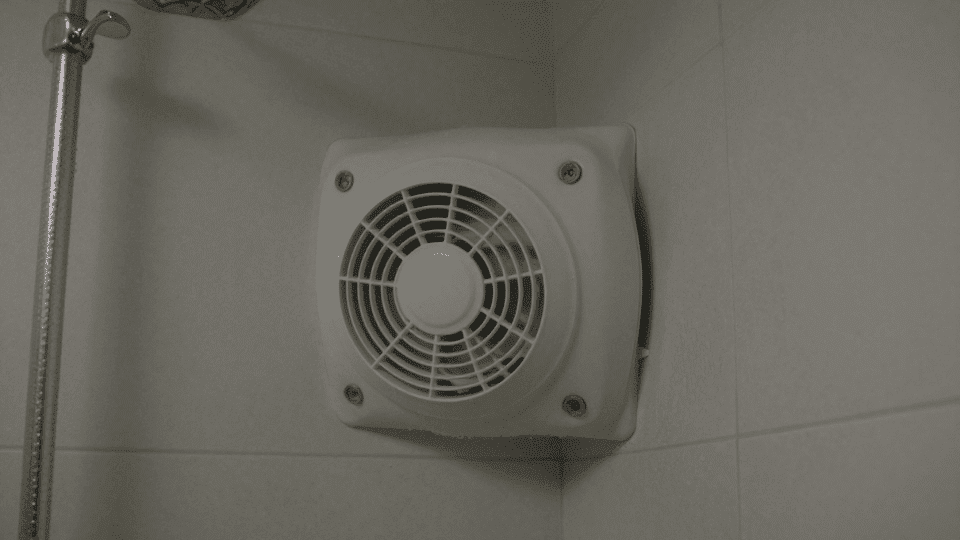
Install a reliable extractor fan rated for your room size. Good airflow stops mold growth on grout lines and keeps surfaces dry between uses. Position the fan near the shower area.
6. Plan Lighting for Safety and Ambiance
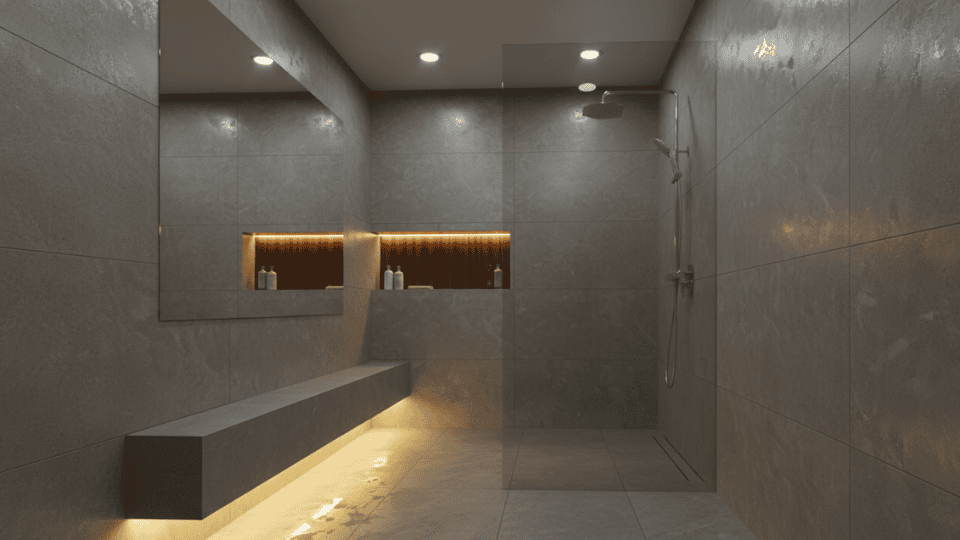
Use moisture-rated lights that meet IP65 bathroom safety standards. Bright overhead fixtures help with grooming tasks, while softer, dimmable lights create a relaxing mood for evening showers and baths.
7. Use a Single-Level, Open Layout
Keep the floor seamless from wall to wall without raised shower trays or step-ups. This approach makes the room feel bigger and removes tripping points. It’s safer for all users.
8. Add Houseplants for Natural Humidity-Loving Greenery
Place moisture-loving plants like ferns, orchids, or pothos on shelves or window sills. The steam from showers keeps them vibrant without extra watering. They naturally bring life and color to sterile-looking spaces.
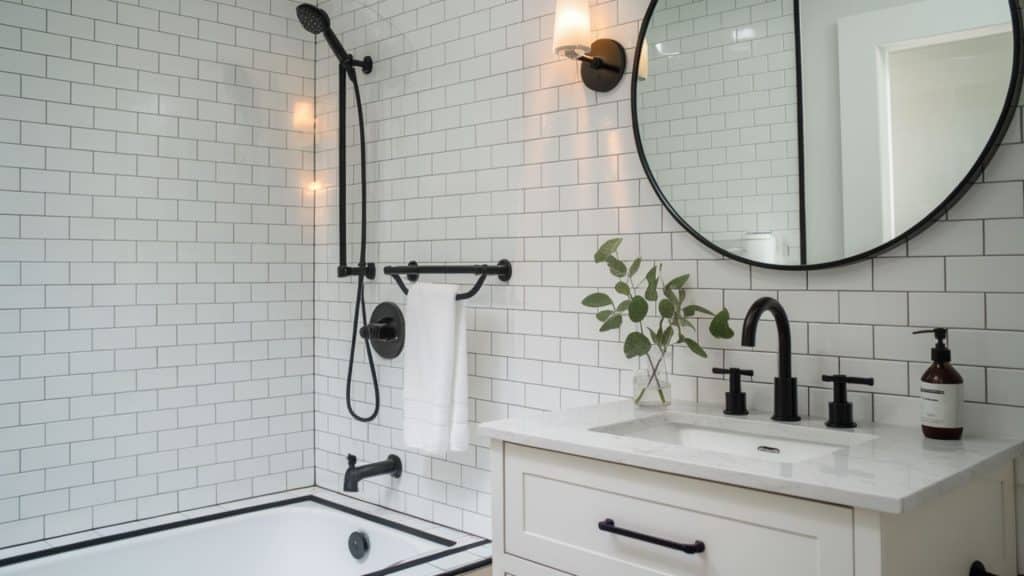
9. Install a Rainfall Showerhead
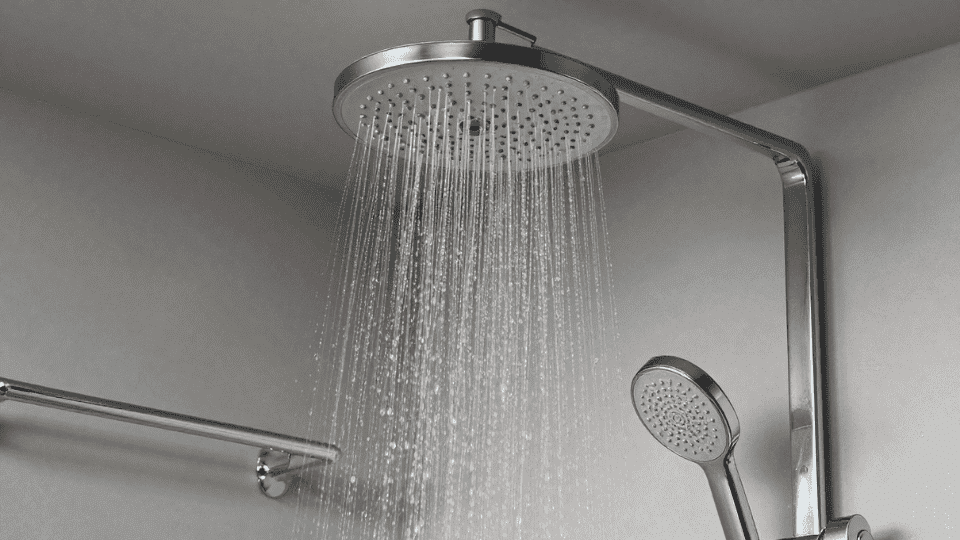
Mount a large overhead rainfall showerhead for a spa-like showering experience. These fixtures distribute water evenly and feel luxurious in small spaces. Pair with a handheld wand for added functionality and versatility.
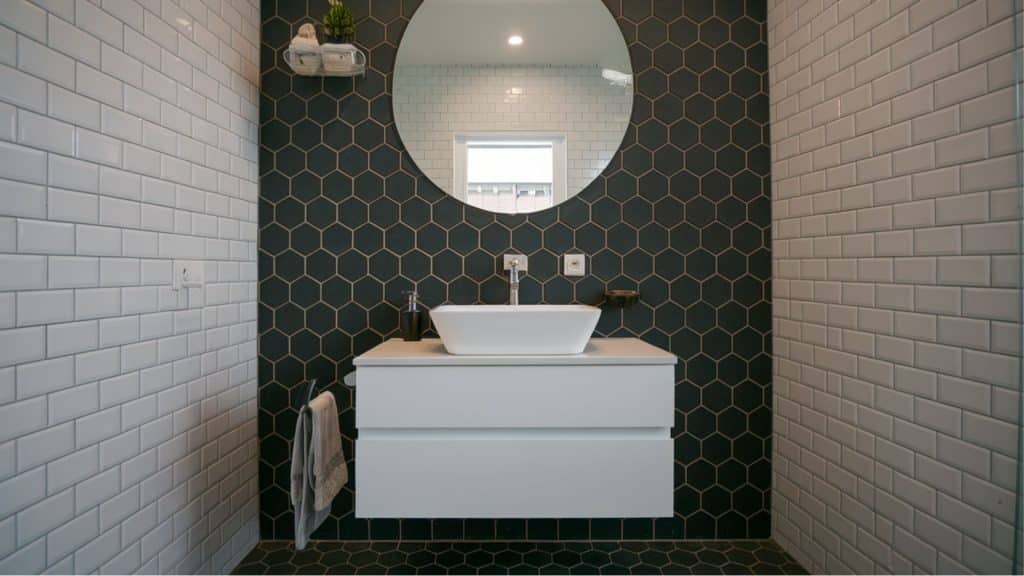
10. Use Statement Patterned Tiles on One Wall
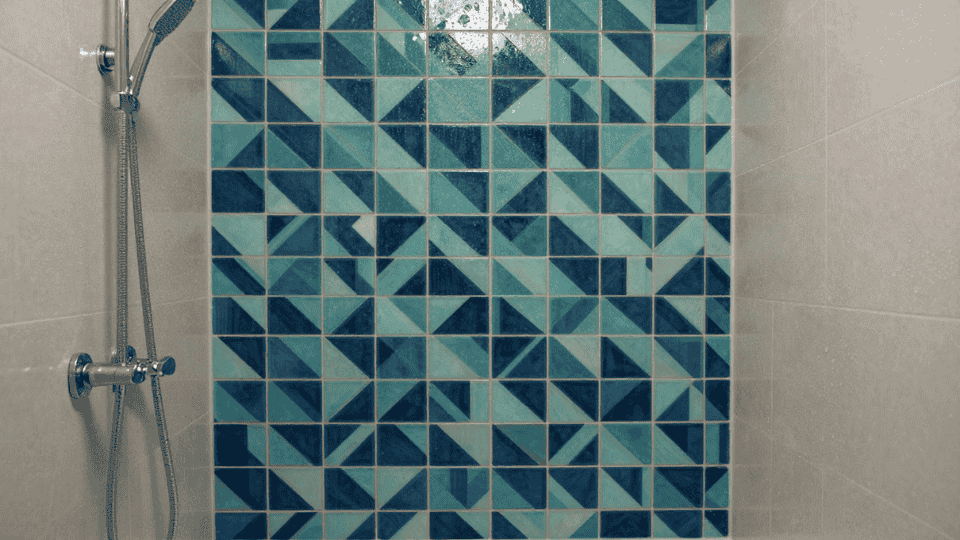
Create a bold accent wall with geometric, Moroccan, or colorful patterned tiles. Keep the remaining walls neutral to avoid overwhelming the space. This adds personality without making the room feel busy or cluttered.
11. Install Wall-Mounted Fixtures
Floating toilets and sinks instantly free up floor space and create a more open feel. They make cleaning easier since there’s no base to scrub around. The floor underneath stays cleaner.
12. Add a Fold-Down Shower Seat
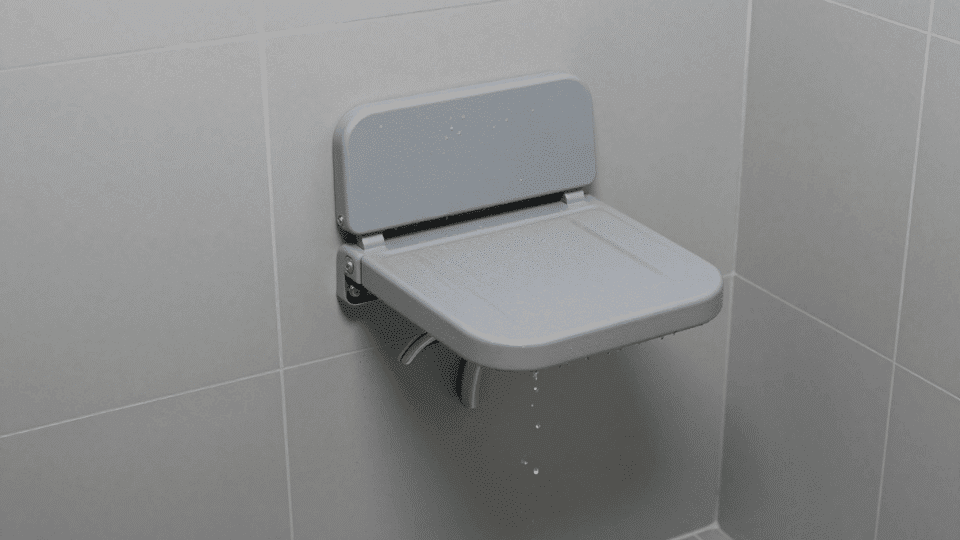
Install a wall-mounted folding seat that flips up when not in use. This provides seating for shaving or those with mobility needs. Choose models rated for 300+ pounds that mount securely to studs.
13. Choose Large-Format Tiles
Bigger tiles mean fewer grout lines across walls and floors, creating a cleaner look. They reduce places where dirt and mildew build up over time. Large tiles make small rooms appear more spacious.
14. Incorporate Natural Stone for Texture
Use slate, river rock, or limestone tiles to add organic texture. Natural stone provides excellent slip resistance when wet from shower use. The earthy look creates a calming, spa-like atmosphere in tight quarters.
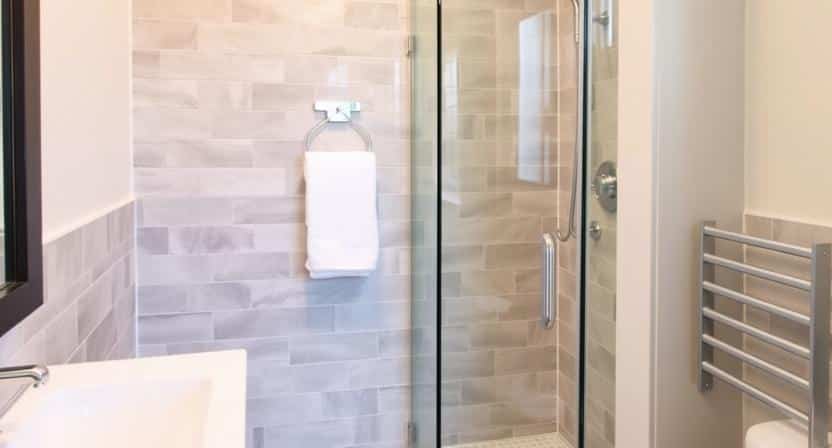
15. Use Frameless Glass Screens
Frameless glass keeps sightlines completely open between the shower and toilet areas. It blocks water spray without making the room feel divided or boxed in. Clear glass maintains the airy feeling.
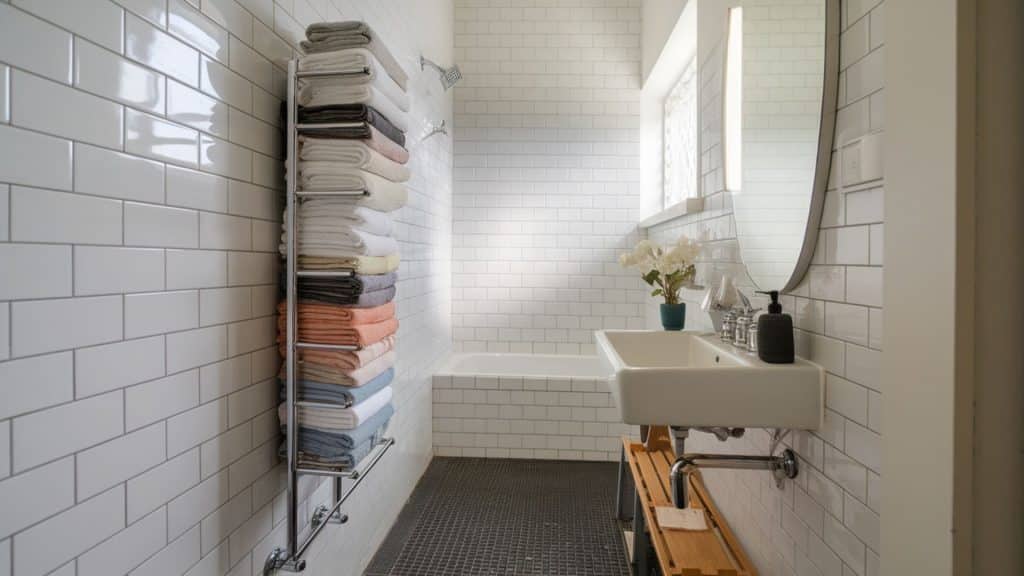
16. Install Heated Towel Rails
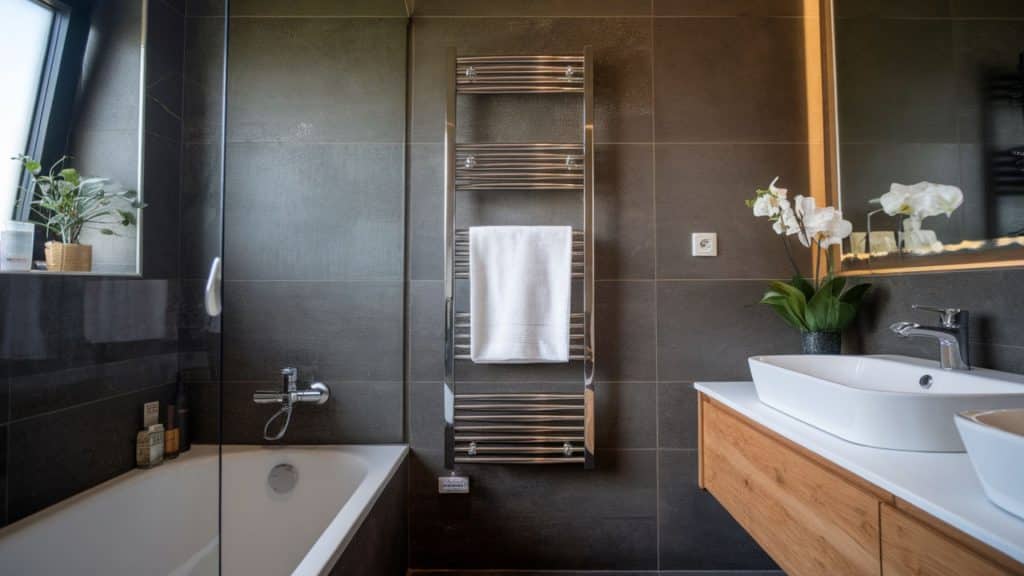
Mount a chrome or brass heated towel rack on the wall. This keeps towels warm and dry in the humid environment. It prevents musty odors and adds a touch of luxury to the space.
17. Maximize Vertical Storage
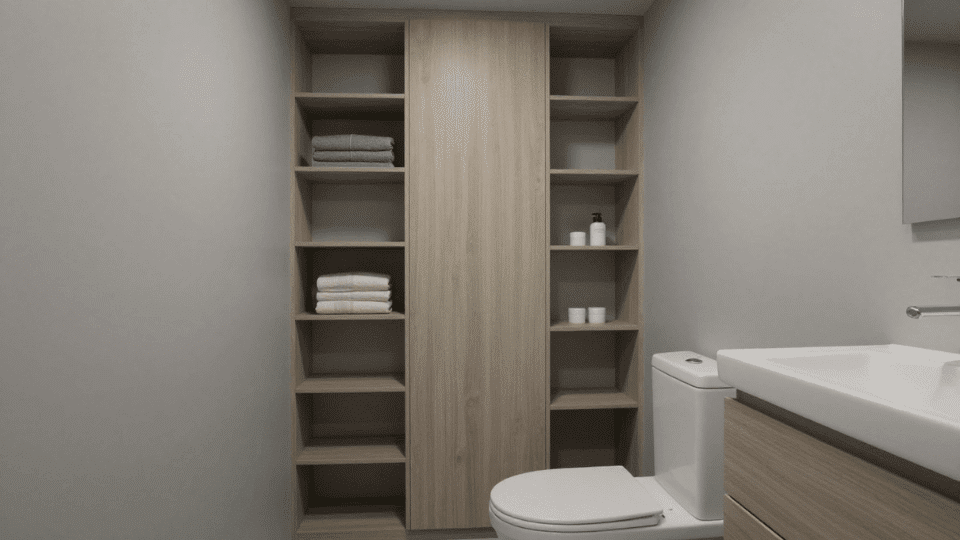
Tall cabinets or open shelving make better use of wall height when you lack horizontal space. Install shelves above the toilet or beside the sink. This stores more without blocking movement.
18. Add Recessed Shower Niches
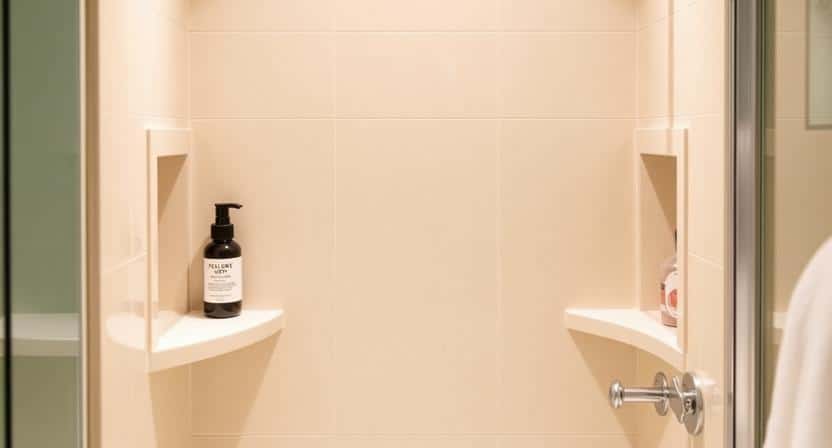
Built-in niches keep toiletries and soap off floors and counters. They sit flush with the wall, so they don’t take up valuable space. Install them at shoulder height for easy reach.
19. Choose Light, Reflective Colors
Soft neutrals, whites, and pale grays brighten small spaces by bouncing light around the room. They make walls feel farther apart and ceilings higher. Glossy finishes enhance this reflective effect.
20. Install a Handheld Showerhead with Slide Bar
Add a handheld wand on an adjustable slide bar alongside the main showerhead. This provides flexibility for all users, including children, the elderly, and wheelchair users. It also makes cleaning the shower walls easier.
21. Try a Corner Shower Layout
Position the shower in one corner to maximize usable floor space elsewhere in the room. This works exceptionally well in narrow bathrooms or tight footprints where every inch truly counts.
22. Use Mixed Materials for Visual Interest
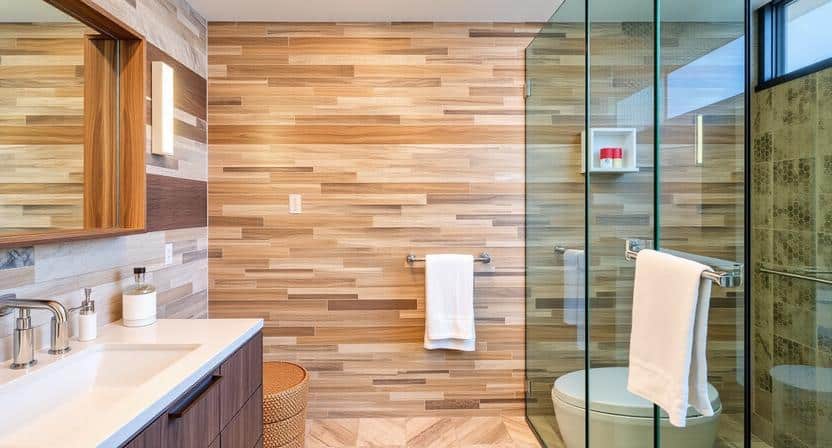
Combine wood accents with stone tiles and glass to create texture and depth. The contrast between materials defines different zones without physical barriers. This approach adds warmth to modern minimalist designs.
23. Add a Freestanding Tub in the Wet Zone
Place a compact freestanding bathtub within the waterproofed wet room area. This creates a dual-purpose space without needing separate shower and tub rooms. Position it near a window for a luxury hotel feel.
Mistakes to Avoid When Designing a Small Wet Room
Even small planning errors can create big problems in a wet room. Here are the most common mistakes to watch out for when designing your space.
- Poor Drainage Slope: If the floor isn’t sloped properly, water will pool in corners or near doorways, creating standing water and increasing the risk of slips and mold.
- Weak Waterproofing: Inadequate waterproofing allows water to seep into walls and floors, leading to rot and mold, which can potentially result in expensive repairs.
- Slippery Tiles: Glossy tiles become dangerously slippery when wet, posing a significant fall risk, especially for children and elderly users.
- Oversized Fixtures: Large toilets and sinks take up too much room in small wet rooms, making the space feel cramped and blocking movement.
- Poor Ventilation: A lack of proper airflow leads to steam buildup, condensation, and mold growth, which damage surfaces and degrade air quality.
- Bad Lighting Placement: Poorly positioned lighting creates dark spots and shadows during grooming tasks, making the room feel smaller and less inviting.
Conclusion
A small wet room design offers the perfect solution for tight bathroom spaces. The open layout maximizes floor area, simplifies cleaning, and creates a modern look that works in homes of any size.
Start by assessing your space and choosing a layout that fits your room’s shape. Focus on quality waterproofing and proper drainage before anything else.
Pick compact fixtures, use large tiles, and add good ventilation to keep the space functional and mold-free.
Remember that even small wet room ideas can make a big impact. The right materials and smart planning turn cramped bathrooms into comfortable, stylish spaces.
Ready to start your project? Measure your bathroom, set a realistic budget, and tackle waterproofing first. Have questions about your specific space? Drop them in the comments below.