I used to struggle with cutting artificial grass, watching it fray and split every time I tried. The edges looked terrible, and I wasted expensive material on failed attempts.
After ruining two pieces, I realized most people make the same mistakes I did. We use the wrong tools and rush the cutting process without proper preparation or planning.
The difference between clean cuts and messy ones comes down to technique and patience. When you cut artificial grass correctly, edges stay neat and the material lasts much longer without fraying.
I’ll show you exactly how to cut artificial grass without damaging it. These simple methods utilize tools you likely already have at home, saving you both time and money.
Why You Need to Cut Artificial Grass?
Most artificial grass comes in standard roll sizes that rarely match your exact space perfectly. Standard rolls are typically 12-15 feet wide, but your lawn area might require completely different dimensions to fit properly.
You’ll encounter various obstacles and irregular shapes in most yards. Gardens, walkways, flower beds, and existing landscape features create angles and curves that need precise cutting for a professional finish.
When you skip proper cutting techniques, several problems arise:
- Visible gaps – Poor cuts create spaces that collect dirt and debris
- Wasted material – Incorrect measurements lead to unusable scraps
- Unprofessional look – Rough edges and poor seams stand out immediately
- Higher costs – Buying multiple pieces instead of cutting one roll efficiently
- Installation issues – Poorly cut pieces don’t lay flat or join properly
Taking time to cut correctly saves money and creates a clean, professional appearance that lasts longer.
How to Cut Artificial Grass Like a Pro?
Proper preparation prevents costly mistakes and ensures clean, professional cuts. Taking time to set up correctly saves material and reduces errors significantly.
| Preparation Step | What to Do | Why It Matters |
|---|---|---|
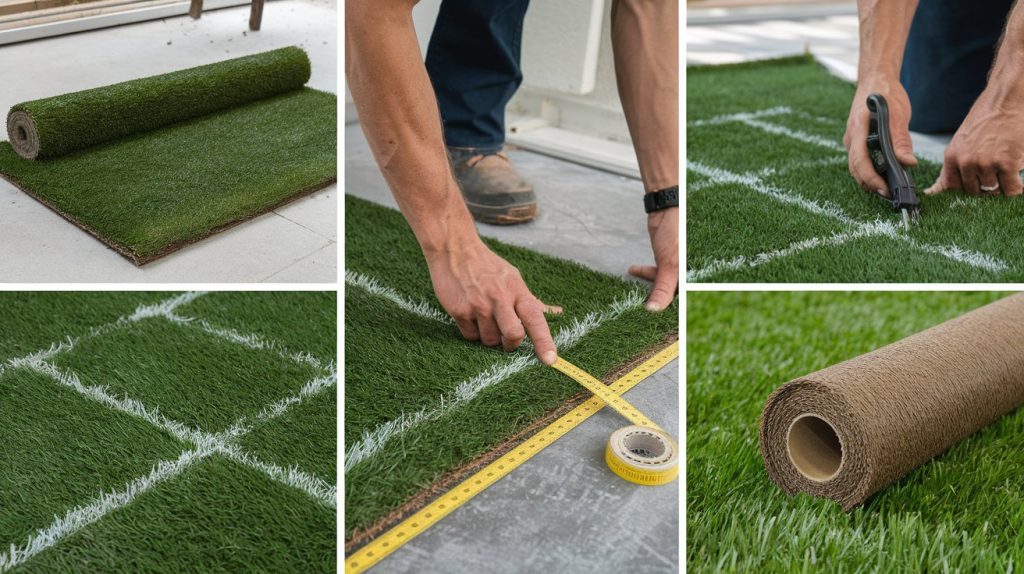
| Laying Out the Grass Flat | Roll out the grass completely on a flat, clean surface, such as a driveway. Remove wrinkles by smoothing with your hands. | Let the grass sit for 30 minutes to relax the backing and prevent uneven cuts. |
| Measuring and Marking | Measure the installation area twice and write the dimensions on paper. Mark the backing side with chalk or a washable marker. | Double-checking prevents confusion and ensures accurate, straight cutting lines. |
| Allowing Extra Material | Add 2-3 inches extra to each measurement for the final trimming buffer. | Extra material allows for adjustments and provides repair pieces; however, you can’t add back cut material. |
Tools Needed to Cut Artificial Grass
Having the right tools makes cutting artificial grass much easier and cleaner. Most of these items are common household tools you probably already own.
| Tool | Purpose | Why You Need It |
|---|---|---|
| Sharp utility knife | Main cutting tool | Creates clean, precise cuts |
| Measuring tape | Accurate measurements | Prevents cutting mistakes |
| Chalk or marker | Marking cut lines | Shows exactly where to cut |
| Straight edge/ruler | Guide for straight cuts | Ensures even, professional lines |
| Scissors (heavy-duty) | Detailed work and curves | Better control for intricate shapes |
| Work gloves | Hand protection | Prevents cuts from sharp tools |
| Flat surface | Cutting base | Provides a stable cutting platform |
Step-by-Step Methods for Every Shape
Follow these three essential cutting techniques to handle any artificial grass installation project with confidence and precision.
How to Cut in A Straight Line?
Straight cuts are the foundation of a professional-looking artificial grass installation. Using the right technique prevents jagged edges and ensures pieces fit together perfectly.
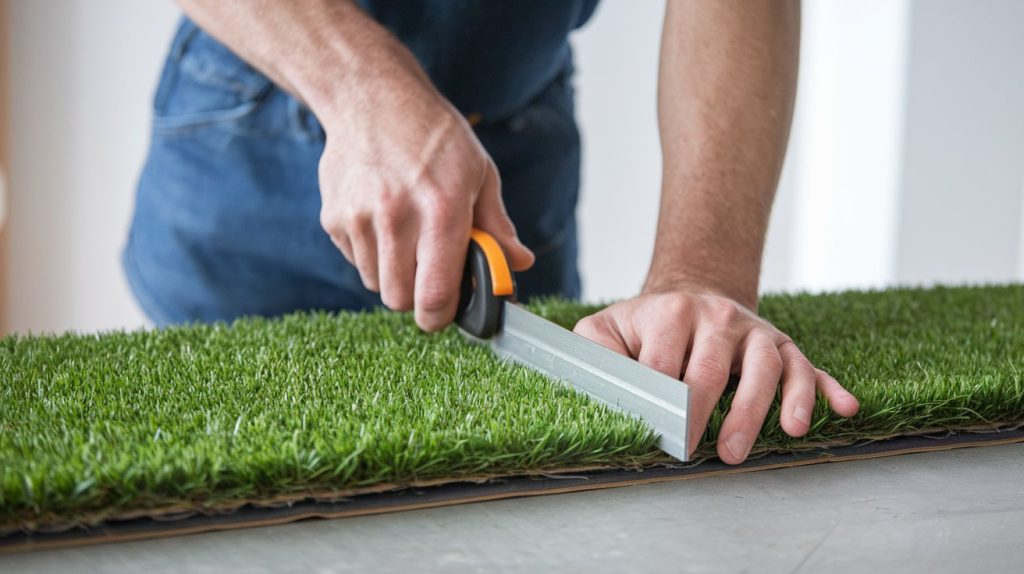
Step 1: Place your straight edge or ruler along the marked line on the backing side. Hold it firmly in place to prevent movement during the cutting process.
Step 2: Position your sharp utility knife at the starting point with a fresh blade. Keep the knife perpendicular to the grass surface for clean edges.
Step 3: Cut in one smooth, continuous motion from start to finish. Apply steady, even pressure and avoid stopping mid-cut to prevent jagged lines.
Step 4: Check your cut line immediately and trim any rough spots. Replace your blade if it begins to pull or tear the material.
How to Cut Around Curves and Odd Shapes?
Curved cuts require more patience and different techniques than straight lines. The key is making small, controlled cuts that follow your marked curve smoothly.
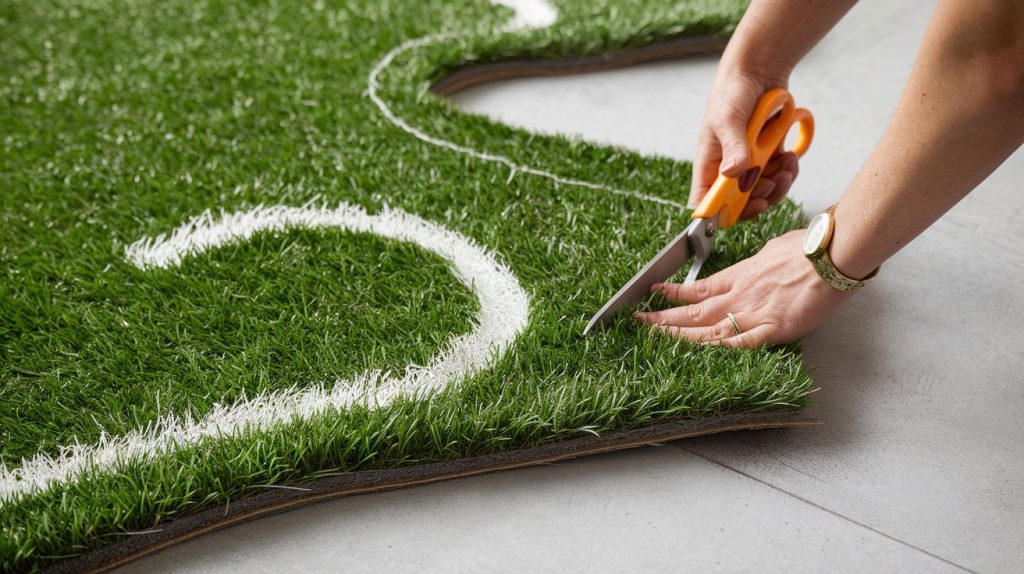
Step 1: Mark your curved line clearly on the backing using chalk or a marker. Make the line bold enough to see easily while cutting.
Step 2: Use sharp scissors instead of a utility knife for better control on curves. Heavy-duty fabric scissors work best for this type of cutting.
Step 3: Start cutting at one end of the curve and make small snips. Follow the marked line closely, turning the grass as you cut rather than forcing the scissors.
Step 4: Take your time with tight curves and corners. Make several small cuts instead of trying to cut the entire curve in one motion.
Step 5: Smooth out any rough spots with your scissors after completing the curve. Check that the cut edge matches your intended shape before moving on.
How to Cut Around Trees and Obstacles?
Cutting around obstacles, such as trees, posts, and fixtures, requires careful planning and precise measurements. These cuts are often the most challenging part of any artificial grass installation.
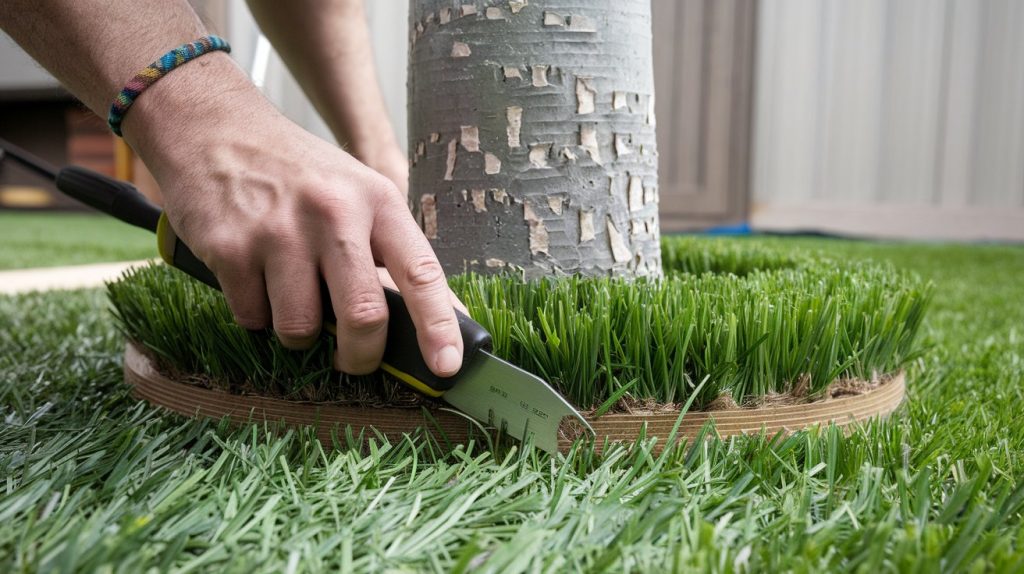
Step 1: Measure the obstacle’s diameter and location from multiple reference points. Write down these measurements and double-check them before cutting.
Step 2: Create a paper template of the obstacle shape first. This helps you visualize the cut and reduces mistakes on expensive grass material.
Step 3: Transfer the template measurements to the grass backing using chalk. Mark the center point and draw the shape around it.
Step 4: Make relief cuts from the edge of the grass to your marked circle. These straight cuts allow the grass to fit around the obstacle.
Step 5: Cut the circular or shaped opening slightly smaller than measured. You can always trim more material for a perfect fit during installation.
Step 6: Test fit the piece around the actual obstacle before final installation. Make small adjustments as needed for a snug fit.
Common Mistakes when Cutting Artificial Grass
Even experienced installers make cutting errors that waste material and time. Learning from these common mistakes saves you money and frustration during your project.
- Never cut from the grass side – Always cut from the backing to prevent visible damage to fibers and maintain a professional appearance. Cutting from the top creates rough, frayed edges that are impossible to hide.
- Don’t rush your measurements – Measure twice, cut once to avoid pieces that are too small for your installation area. Taking extra time with measurements prevents wasting expensive material on unusable pieces.
- Don’t cut in cold weather – Cold temperatures make the backing brittle and prone to cracking during cutting. Work in temperatures above 50°F for best results and flexibility.
- Never force cuts through thick backing – Make multiple light passes instead of one heavy cut to prevent jagged edges. Forcing the blade creates uneven cuts and can break your cutting tool.
- Don’t ignore grain direction – Cut with the grain when possible to prevent fraying and maintain fiber integrity. Against-the-grain cuts create rough edges that look unprofessional.
Essential Cleaning Tips when You Cut Artificial Grass
Proper cleanup and maintenance after cutting ensure your artificial grass looks professional and lasts longer. Taking care of cut edges prevents fraying and keeps your installation looking fresh for years.
- Remove all grass clippings and debris from the cutting area immediately after finishing each section. Leftover debris can become embedded in the grass fibers, creating maintenance problems later.
- Inspect all cut edges carefully for rough spots or loose fibers that need trimming with scissors. Small imperfections now become bigger problems once the grass is installed and harder to access.
- Gently brush cut edges with a stiff brush to remove loose backing material and prevent future shedding. This step ensures clean edges that won’t continue dropping small pieces over time.
- Store leftover pieces properly in a dry, flat location, rolled loosely for future repairs or touch-ups. Proper storage prevents the backing from cracking and keeps pieces usable for years.
- Clean your cutting tools thoroughly and store them safely to prevent rust and damage between uses. Well-maintained tools perform better and last longer for future projects.
Conclusion
I’ve learned that cutting artificial grass correctly makes the difference between a professional and amateur installation.
Taking time to measure twice and cut once saves both money and frustration. Proper preparation and sharp tools create clean edges that last for years without fraying or deterioration.
Most cutting problems come from rushing the process or using the wrong tools. When you follow these steps carefully, your artificial grass fits perfectly around any obstacle or shape.
Remember that practice makes perfect when it comes to cutting artificial grass. Begin with minor test cuts on scrap material before undertaking your main installation project for optimal results.
Frequently Asked Questions
What Is the Best Tool to Cut Synthetic Grass With?
Sharp utility knives work best for cutting artificial grass. Use fresh blades and cut slowly around curves to prevent gaps and rough edges.
What Is the Best Way to Edge Artificial Grass?
Use wood or composite edging for secure borders. Paver edges and roll-top metal edging also work well for creating clean, professional perimeters.
Will a Stanley Knife Cut Artificial Grass?
Yes, Stanley knives work well for cutting artificial grass. Use a curved blade for best results, or try large, sharp scissors as an alternative cutting tool.