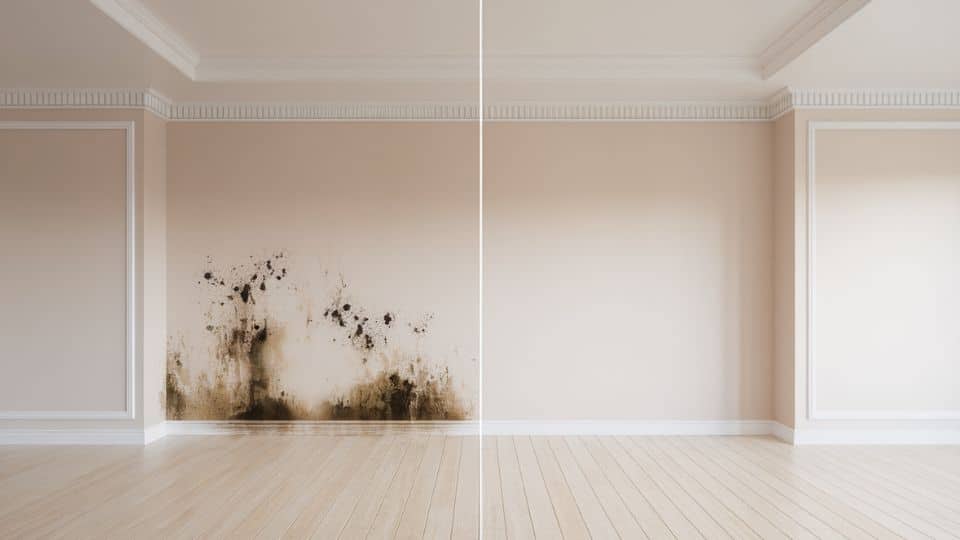

That dark patch spreading across your bathroom ceiling isn’t just ugly, it’s black mould releasing toxic spores into your home.
Every breath risks triggering coughs, worsening asthma, and harming children and elderly relatives. Thousands of UK households face this daily.
Left untreated, mould spreads rapidly across walls, behind furniture, and into hidden spaces. It compromises air quality, damages property, and endangers vulnerable family members. Most assume they need expensive professionals or harsh chemicals.
Most small to moderate mould problems can be eliminated at home for under £30 using white vinegar and hydrogen peroxide.
This guide shows you how to identify causes, remove mould safely, and prevent recurrence, protecting your family without breaking the bank.
How to Identify Black Mold in Your Home
Black mould (Stachybotrys chartarum) appears as dark greenish-black patches with a slimy or fuzzy texture when wet. Unlike regular mildew, it penetrates porous surfaces and produces a distinctive musty, earthy odor.
Knowing where black mould typically grows and what causes it helps you target prevention efforts more effectively.
Common locations and causes:
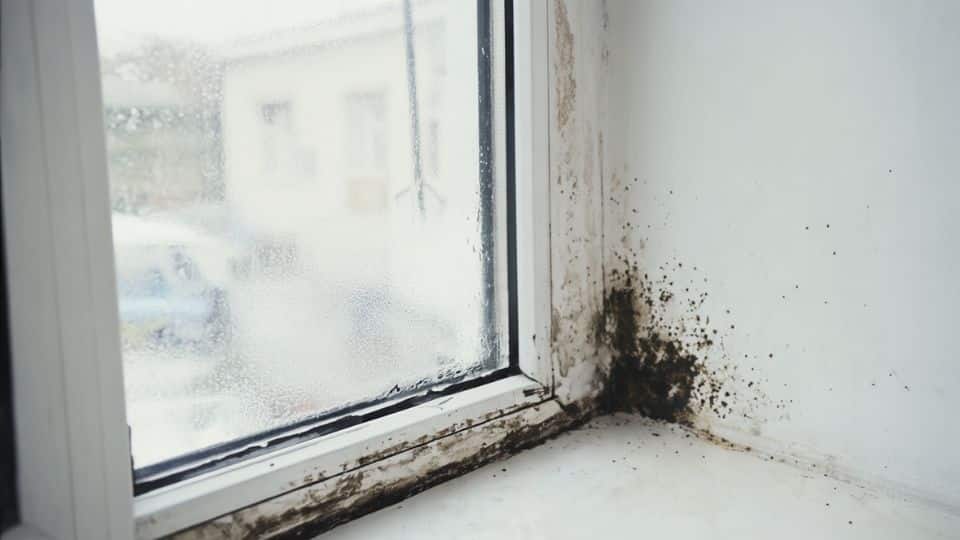
- Thrives where humidity exceeds 60% in poorly ventilated spaces like bathrooms, around window frames, behind furniture on cold walls, and near leaking pipes
- Caused by excess moisture from leaks, poor ventilation, trapping humidity, condensation when warm air meets cold surfaces, and water damage from flooding
- UK homes are particularly vulnerable during winter, when heating creates indoor moisture without adequate airflow
Warning signs: Musty odours, visible dark patches, increased condensation, and worsening respiratory symptoms indicate the presence of mould, requiring immediate attention.
Once you’ve identified black mould, the next step is to gather materials and remove it safely.
How to Get Rid of Black Mould?
Proper preparation and the right approach make all the difference when tackling black mould. Here’s what you need and how to remove it safely.
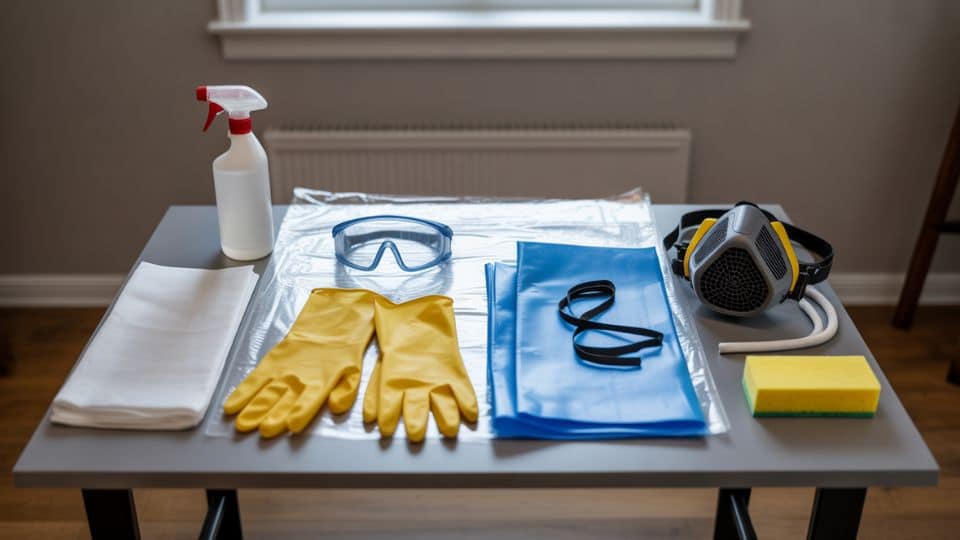
Materials Required
Having the right equipment protects your health and makes the cleaning process safer, more effective, and overall more efficient.
| Category | Items Needed |
|---|---|
| Protective Gear | N95 respirator mask, nitrile gloves, safety goggles, long sleeves, and covered clothing |
| Cleaning Supplies | Buckets, microfibre cloths, scrub brush, spray bottles, plastic bin bags |
| Natural Cleaning Agents | White vinegar, hydrogen peroxide 3%, baking soda, tea tree oil |
| Optional Tools | Dehumidifier, ventilation fan, plastic sheeting |
With your materials ready, follow these five steps to safely and effectively remove black mould from your home.
Step 1: Identify and Fix the Moisture Source
This is critical for preventing mould from returning after you clean it. Check for leaks in pipes, radiators, or roofs. Look for condensation due to poor ventilation and repair issues, and address them immediately.
Step 2: Apply Your Chosen Cleaner
Different surfaces need different approaches for effective mould removal. Non-porous surfaces (tiles, glass): Spray undiluted white vinegar, leave 30-60 minutes. Porous surfaces (unsealed grout): Make a baking soda paste, apply it, and leave it on for 10-15 minutes.
Step 3: Scrub and Remove Visible Mould
Work methodically to remove all visible mould without spreading spores. Use moderate pressure with your scrub brush, starting from the edges and moving toward the centre. Wipe removed mould with disposable cloths and seal them in plastic bags immediately.
Step 4: Rinse and Dry Completely
Proper drying prevents rapid regrowth and ensures mould doesn’t return. Wipe with clean water to remove any cleaner residue; rinse thoroughly with baking soda. Use fans, dehumidifiers, and open windows. Allow 24-48 hours before replacing furniture.
Step 5: Dispose of Contaminated Materials Safely
Proper disposal prevents cross-contamination and protects household members from exposure. Seal all used materials in plastic bags and dispose in external bins immediately. Launder protective clothing separately at 60°C minimum.
Following proper safety protocols protects you and your household members throughout the entire cleaning process effectively.
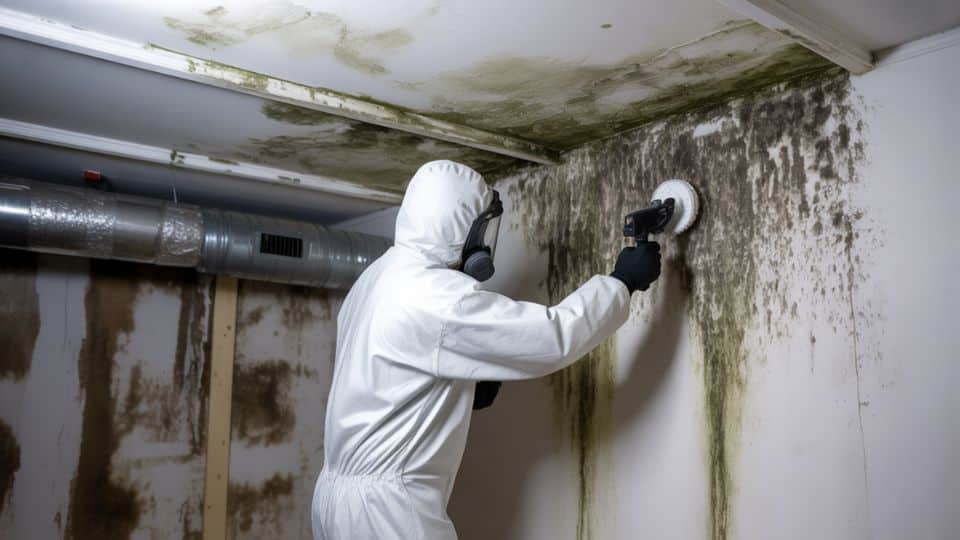
Safety Precautions Against Black Moulds
Before starting the removal process, it’s crucial to understand and follow these safety guidelines to protect yourself and your household.
-
Ventilation and Isolation:- Open windows in the affected room, but keep internal doors closed to prevent spore spread.
-
When NOT to DIY:- Growth exceeding one square metre, recurring mould after thorough cleaning, HVAC contamination, households with immunocompromised residents, or structural dampness/water damage.
-
Avoiding Chemical Reactions:- Never mix cleaners, vinegar, and bleach, as they create toxic chlorine gas. Use one product at a time.
-
Protecting Vulnerable People:- Remove children, elderly residents, pregnant women, and pets during cleaning. Keep them away until the area is completely dry and ventilated for at least 24 hours.
Choosing the right cleaning solution makes mould removal more effective and helps avoid harsh chemical exposure indoors.
Best Cleaners to Remove Black Mould
Both natural and chemical solutions effectively remove mould. Choose based on severity, surface type, and your household needs.
Natural Cleaners
- White Vinegar: Spray undiluted, wait 1 hour. Best for tiles, hard surfaces, general use
- Hydrogen Peroxide 3%: Spray, wait 10 min, scrub. Best for bathrooms, grout, porous materials
- Baking Soda: Mix 2 tbsp with 500ml water. Best for delicate surfaces, odour removal
- Tea Tree Oil: 1 tsp per cup of water, don’t rinse. Best for prevention, ongoing protection
- Borax: Mix half a cup with 1L of hot water. Best for wood, drywall
Chemical Cleaners
- Bleach: 1 cup + 1 gallon water (ventilate well). Best for non-porous surfaces only
- Commercial Mould Removers: Follow manufacturer instructions. Best for stubborn, recurring mould
- Ammonia: Mix equal parts with water. Best for hard surfaces like glass and tiles
Pro tip: Start with white vinegar or hydrogen peroxide.
If mould returns after two applications, escalate to borax or chemical options. Never mix bleach with vinegar or ammonia this creates toxic fumes. Always test cleaners on hidden areas first.
Successfully removing mould is only half the solution; preventing its return requires ongoing moisture control measures.
How to Prevent Black Mould?
Prevention is the most effective strategy for keeping your home mould-free. By controlling moisture and maintaining proper conditions, you can stop black mould before it starts.
Prevention Strategies by Room
Each room requires specific preventive measures based on typical sources of moisture and ventilation needs.
Bathrooms:
- Run extractor fans during showers, continue for twenty minutes after, squeegee walls dry
- Keep bathroom doors open when unused, repair leaking taps immediately, always
- Replace worn silicone sealant before mould penetrates surfaces, and improve airflow constantly
Kitchens:
- Use cooker hoods when boiling or steaming food, wipe surfaces dry after use, and check pipes quarterly
- Clean refrigerator door seals monthly, ensure dishwasher seals are intact, and fix any leaks the same day.
- Open windows during cooking, keep the sink area dry always, and install moisture sensors under sinks
Bedrooms:
- Position furniture ten centimetres away from walls, wipe window condensation daily, and open windows for circulation
- Use silica gel packets in wardrobes, leave doors slightly open periodically, and prevent any stagnant air
- Check behind furniture monthly for dampness, ensure proper heating throughout winter, and maintain adequate room ventilation
Basements & Attics:
- Install dehumidifiers, maintaining thirty to fifty percent humidity, keep stored items elevated, and check for leaks
- Ensure proper drainage around foundations, insulate pipes to prevent condensation, and inspect roof spaces annually before winter.
- Keep air circulating constantly, address musty odours immediately when detected, and maintain the temperature above 15 degrees Celsius
Essential Prevention Habits
Control Humidity: Use dehumidifiers in damp rooms, avoid drying laundry indoors without ventilation, and use pan lids when cooking to reduce steam.
Improve Ventilation: Open windows daily for 10-15 minutes, use trickle vents in window frames, and ensure air bricks remain unblocked.
Regular Maintenance: Inspect roof spaces annually, clear gutters twice yearly, check plumbing connections quarterly, and address musty odours immediately.
Quick Response: Wipe condensation within hours, fix leaks same day, dry spills immediately, and handle any moisture within 24-48 hours.
Temperature Control: Keep the indoor temperature consistently above 15°C, properly insulate external walls, and avoid creating warm, humid pockets without airflow.
Some mould situations exceed DIY capabilities and require professional assessment, equipment, and remediation services for safety.
DIY vs Professional Mould Removal: When to Call Experts
Knowing when to handle mould yourself versus hiring professionals helps you make safe, cost-effective decisions for your home.
DIY vs Professional Mould Removal: When to Call Experts
Knowing when to handle mould yourself versus hiring professionals helps you make safe, cost-effective decisions for your home.
| Situation | DIY | Professional |
|---|---|---|
| Mould Size | Under 1 square metre | Over 1 square metre |
| Location | Surface mould on walls, tiles, grout | HVAC system, behind walls, structural |
| Recurrence | First occurrence, easily accessible | Keeps returning despite cleaning |
| Water Damage | Minor condensation, small leaks | Flooding, burst pipes, structural dampness |
| Household Members | Healthy adults only | Immunocompromised, young children, elderly |
| Cost | £10-30 for supplies | £200-10,000+ depending on severity |
Hidden Costs of Delaying Treatment
Ignoring mould costs more in the long term: NHS visits for respiratory issues, property damage repairs (£500-5,000+), reduced property value, higher energy bills due to dampness, and potential invalidation of insurance claims.
Insurance Coverage
Most home insurance doesn’t cover mould removal unless caused by burst pipes or storm damage. Gradual dampness and condensation-related mould typically aren’t covered, making prevention and early intervention crucial for avoiding out-of-pocket expenses.
With all this information in hand, you’re now equipped to tackle black mould safely and effectively.
Conclusion
Black mould becomes manageable with the right approach. Identify moisture sources, gather protective equipment, and use natural cleaners like white vinegar or hydrogen peroxide.
Follow these steps: first, fix any dampness, apply the cleaner generously, scrub thoroughly, dry the surfaces completely, and dispose of materials in sealed bags. Always wear an N95 mask, gloves, and goggles whilst maintaining ventilation. Never mix products.
Prevention is crucial to maintaining 30-50% humidity, ensuring airflow in bathrooms and kitchens, checking for leaks, and addressing wet areas within 24 hours.
For extensive growth, seek professional help. Act promptly, stay consistent with prevention, and protect your family’s respiratory health for years to come.
Have you successfully tackled black mould? Share your experience below to help others facing similar challenges!