
Ever walked into a room and felt something was missing? Plain walls can make even the nicest spaces feel unfinished.
You know that feeling when you see those Instagram-worthy rooms with gorgeous textured walls and wonder how much it would cost to hire someone.
Here’s a secret: you can create that same professional look yourself in just one weekend. Wall paneling isn’t just for fancy Victorian homes anymore.
It’s become the go-to solution for homeowners who want to add instant character without breaking the bank.
What if I told you the tools are probably already in your garage? With some basic materials and the right technique, you can alter any ordinary wall into a stunning focal point.
This guide will show you exactly how to panel a wall, step by step, so that you can achieve the designer look you’ve been craving.
What is Wall Paneling?
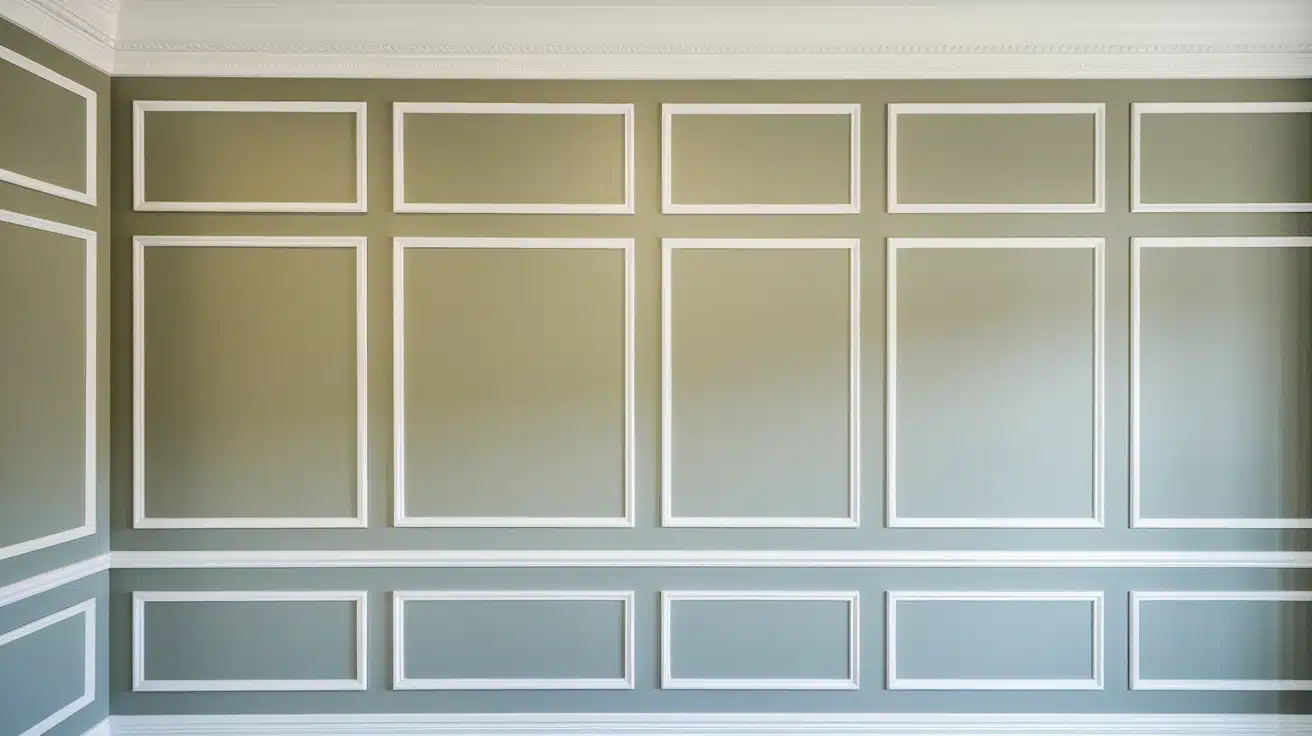
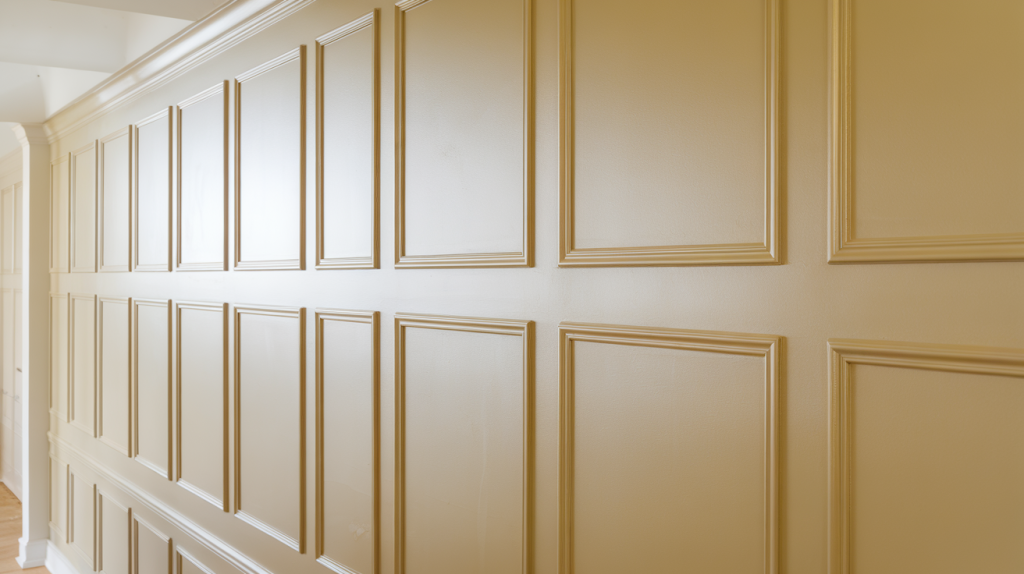
Wall paneling is a design technique that involves adding wood, MDF, or other materials to your walls. These panels create texture and visual interest in any room.
Think of it as giving your walls a fresh new look. Instead of plain painted surfaces, you get depth and character. Panels can run vertically, horizontally, or in geometric patterns.
The most popular styles include:
- Board and batten – vertical strips with narrow boards covering the seams
- Wainscoting – panels that cover the lower portion of walls
- Shiplap – horizontal boards with slight gaps between them
- Raised panels – traditional squares or rectangles that stick out from the wall
Why do people love wall paneling? It instantly makes rooms feel more finished and upscale. You can use real wood for a classic look or opt for budget-friendly alternatives, such as MDF or peel-and-stick options.
Wall paneling works well in any room, including bedrooms, living rooms, dining areas, and even bathrooms. It’s a simple way to add style without major construction work.
The best part? You don’t need professional skills to install most types of wall panels. With basic tools and some patience, you can transform your space in a weekend.
How to Add Panels to the Wall?
Getting started with wall paneling doesn’t have to be complicated. The key is proper preparation and having the right tools ready. Most homeowners can complete this project in one weekend.
Gather Your Materials
| Category | Items Needed | Purpose |
|---|---|---|
| Main Tools | Timber/MDF strips, Saw, Drill, Screws, Wall plugs | Core installation equipment |
| Adhesive | No nail glue | Secure panels without visible fixings |
| Leveling | Spirit level | Ensure a straight, professional installation |
| Measuring | Measuring tape, Pencil | Accurate measurements and marking |
| Safety | Safety glasses, a Dust mask | Protect yourself during cutting and drilling |
Step 1: Measure Your Wall
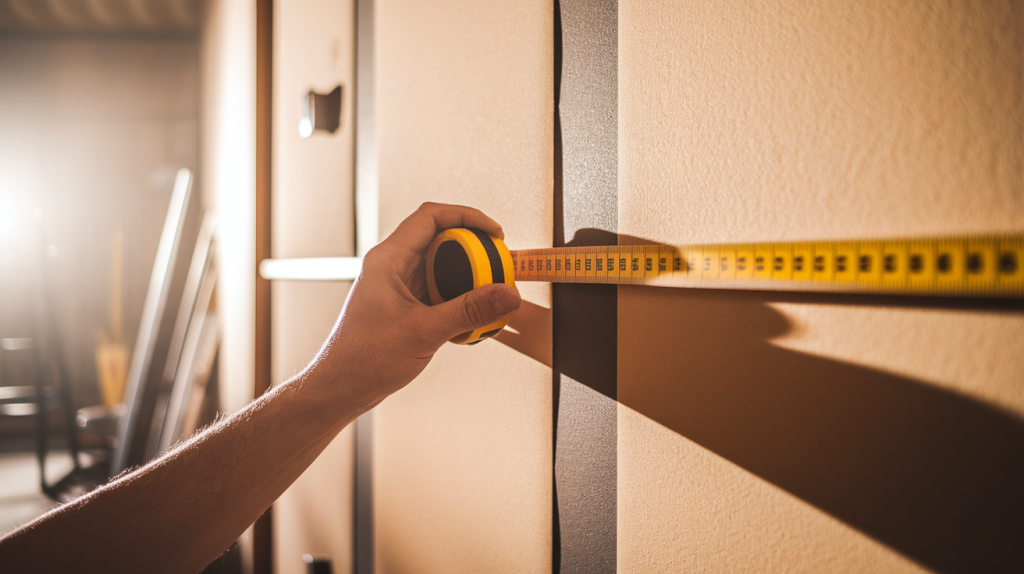
Accurate measurements are the foundation of professional-looking panels. Start by measuring the total width of your wall from one corner to the other. Write this number down clearly.
Next, decide how many panels you want across your wall. Most people choose between 5 and 8 panels for a standard wall. More panels create a busier look, while fewer panels convey a more modern feel.
Here’s how to calculate panel spacing:
- Measure total wall width (example: 3.5 meters)
- Choose panel width (example: 47mm each)
- Calculate: Total panels × panel width = total panel space
- Subtract panel space from wall width = remaining space for gaps
- Divide the remaining space by the number of gaps needed
Pro tip: Use a calculator app on your phone for quick math. Double-check your measurements before buying materials.
Step 2: Cut the Panels to Size
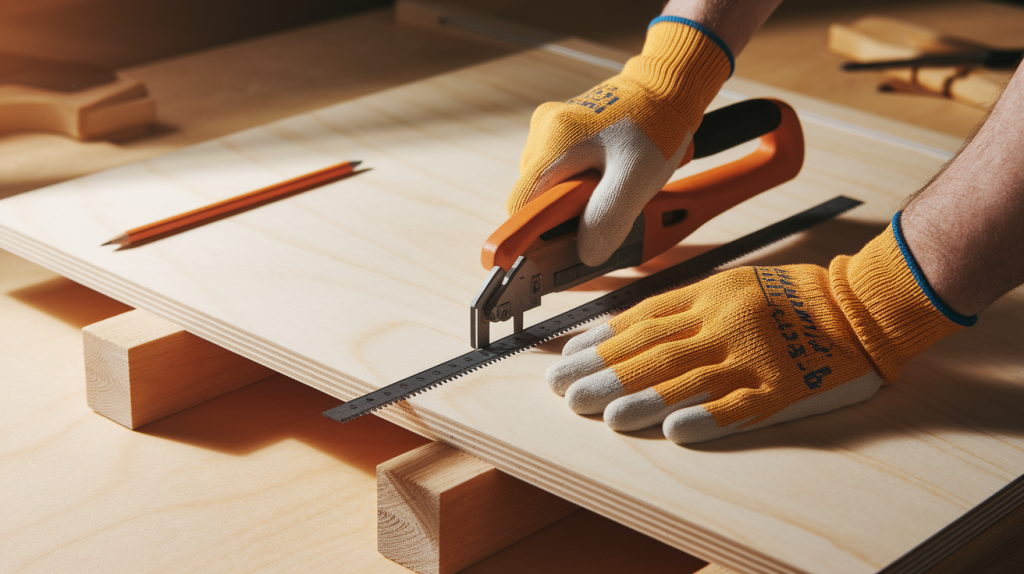
Cutting panels to the correct length ensures a perfect fit. Measure from floor to ceiling, then subtract 5mm for the adjustment room. Skirting boards later cover this slight gap.
Safety comes first when cutting. Wear safety glasses and work in a well-ventilated area. Mark your cutting line clearly with a pencil and ruler.
Cutting tips for clean results:
- Use a fine-tooth saw for smooth edges
- Cut slowly to avoid splintering
- Support both sides of the panel while cutting
- Sand-cut edges lightly for a professional finish
Pro tip: Cut one panel first and test-fit it on your wall. Use this as a template to cut the remaining panels, ensuring they’re all identical.
Step 3: Prepare the Wall
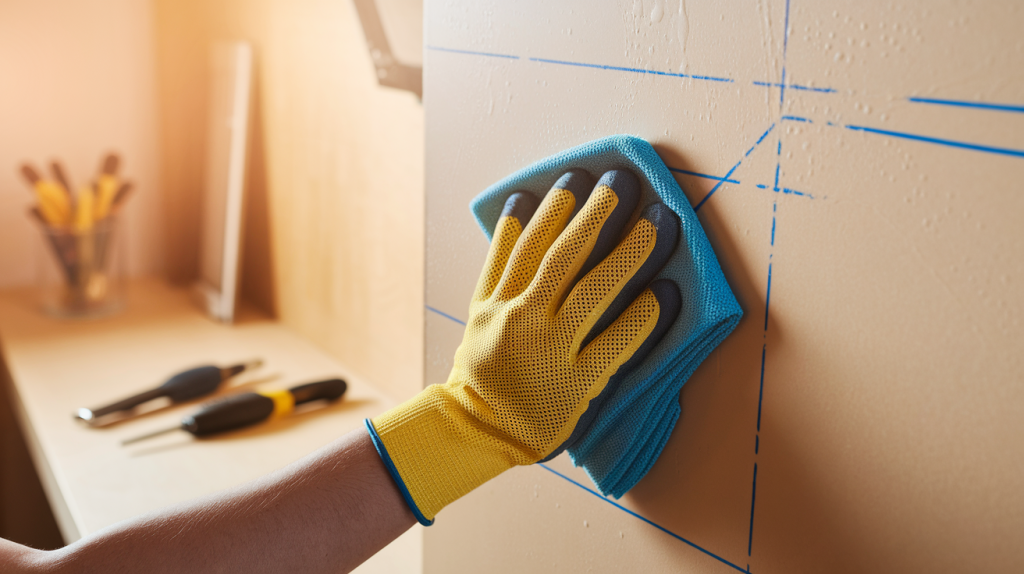
A clean, level wall makes installation much easier. Remove any nails, screws, or wall decorations first. Fill holes with filler and let dry completely.
Check if your wall is level using a spirit level. Most walls have slight irregularities. Mark any problem areas with a pencil – you’ll need extra attention here during installation.
Wall preparation checklist:
- Clean the surface with a damp cloth
- Mark the stud locations (if applicable)
- Draw light pencil lines where each panel will go
- Check electrical outlets and plan around them
Pro tip: Take a photo of your marked wall before you start the installation. This helps you remember panel positions if the marks get rubbed off during work.
Step 4: Apply Glue and Attach Panels
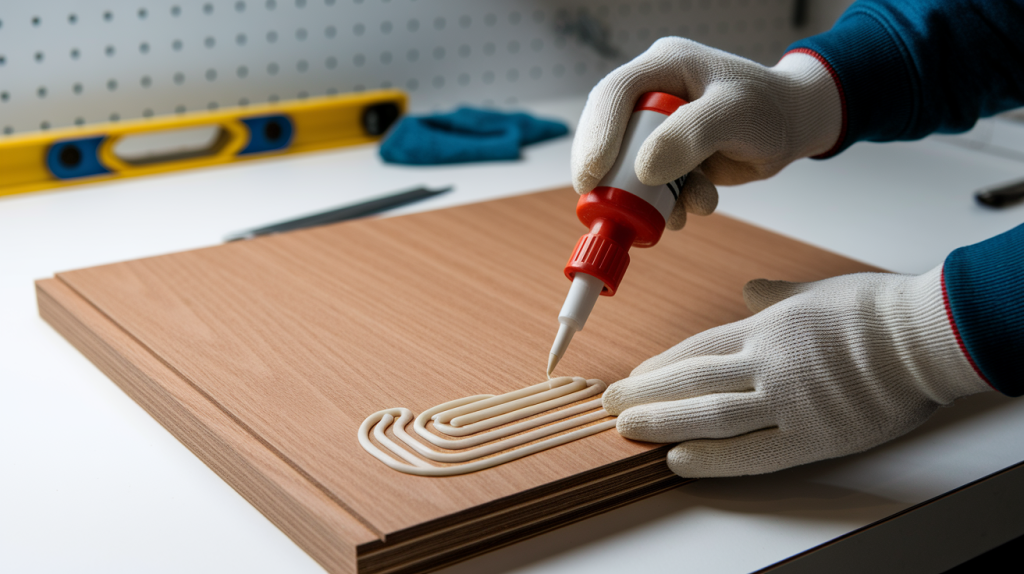
No nails or glue create a strong, invisible bond. Apply glue in zigzag patterns across the back of each panel. Use sparingly – excessive glue can squeeze out and create a mess.
Position your first panel carefully. You only get one chance to place it correctly. Press firmly against the wall for 30 seconds to activate the adhesive bond.
Gluing technique for best results:
- Start from one end of the wall and work across
- Keep panels straight using your spirit level
- Wipe away excess glue immediately with a damp cloth
- Support heavy panels with temporary props while the glue sets
Pro tip: Have a helper hold panels in position while you check they’re level. Two people make this job much faster and more accurate.
Step 5: Drill Panels for Extra Hold
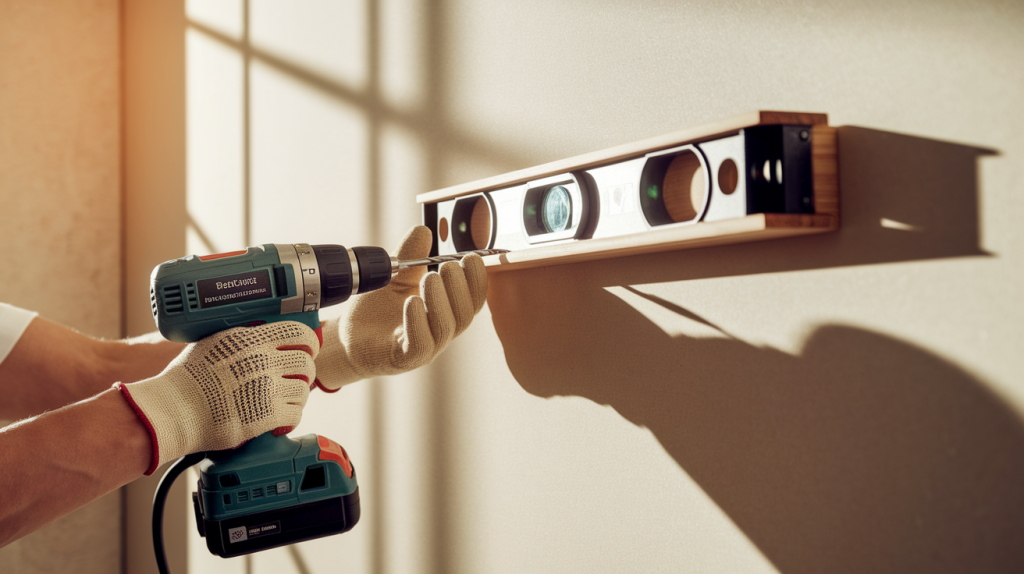
Screws provide extra security, especially on uneven walls. Use screws that are long enough to penetrate the panel and extend into the wall by at least 25mm.
Drill pilot holes first to prevent wood splitting. Place screws near the top and bottom of each panel. For tall panels, add a screw in the middle too.
Drilling guidelines for strong fixing:
- Use appropriate wall plugs for your wall type
- Countersink screw heads slightly below the surface
- Space screws evenly for balanced support
- Check panels stay level after each screw
Pro tip: Use a drill bit slightly smaller than your screw diameter for pilot holes. This prevents cracking while ensuring a tight fit.
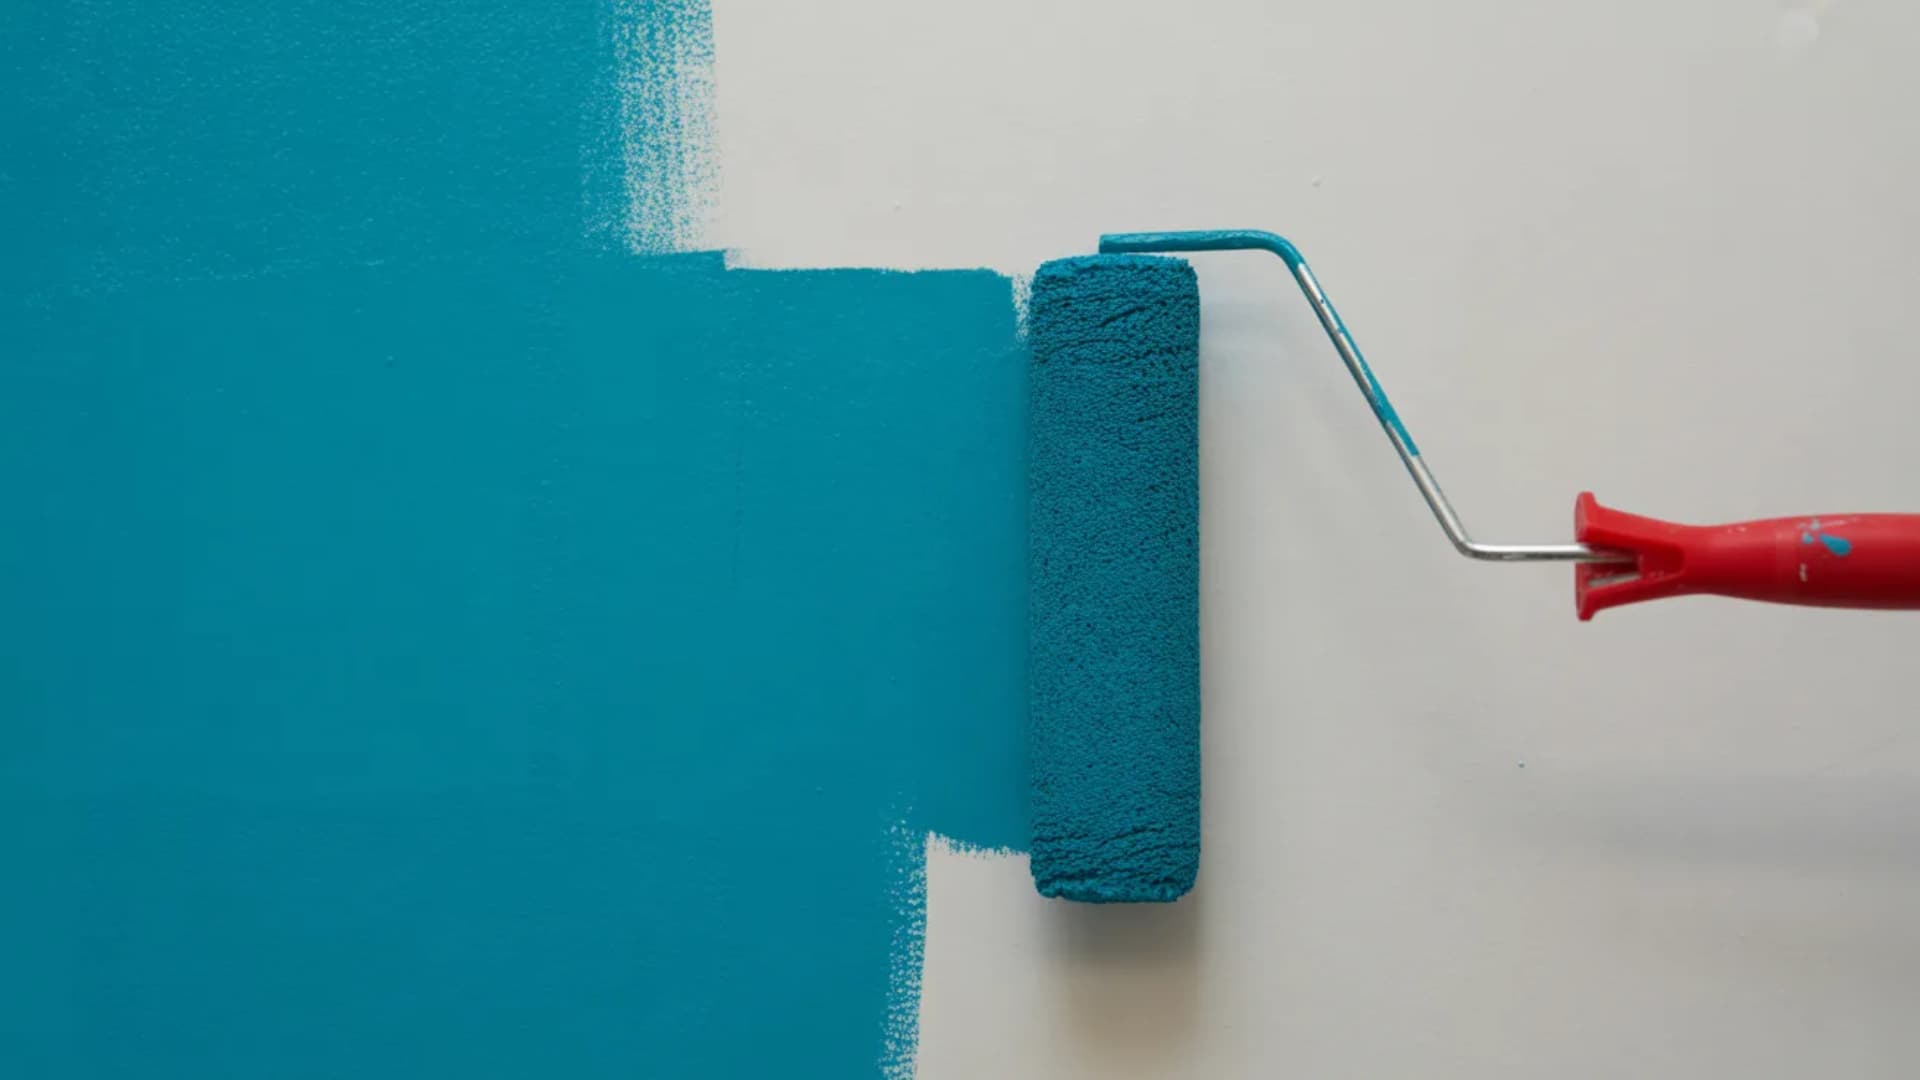
Step 6: Paint and Finish
Proper finishing makes your panels look professionally installed. Start with a primer coat to seal the wood and enhance the paint’s adhesion. Let the primer dry completely before painting.
Fill screw holes with wood filler before priming. Sand filler smooths when dry. This creates an invisible repair that disappears under the paint.
Painting steps for perfect results:
- Use high-quality brushes for a smooth finish
- Apply thin coats rather than one thick coat
- Paint in the same direction as the wood grain
- Allow proper drying time between coats
Pro tip: Use painter’s tape on adjacent walls to protect them from paint splashes. Remove tape while paint is still slightly wet for clean edges.
Common Challenges of Wall Panelling
Wall paneling projects often hit snags that can frustrate even experienced DIYers. The good news is that most problems have simple solutions. Understanding these challenges before you begin helps you plan more effectively.
Don’t let small obstacles stop your progress. Most installation issues come from rushing the preparation stage. Taking time to assess your wall first prevents bigger problems later.
Here are the most common challenges homeowners face and proven solutions that work:
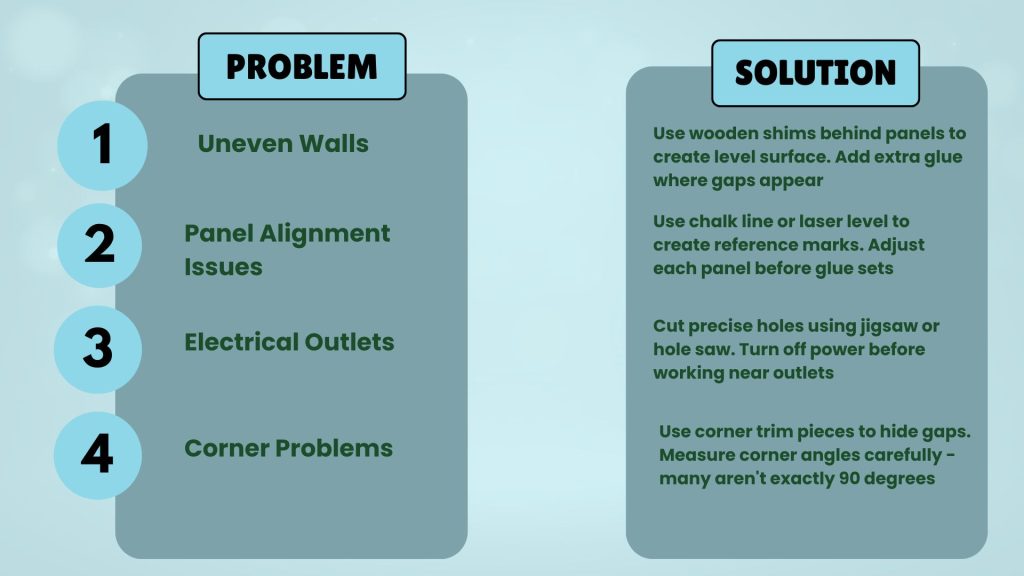
Most panel problems happen during the first few installations. Once you get the technique right, the remaining panels go much faster.
Final Thoughts
Learning how to panel a wall changes any room from ordinary to impressive. You now have all the steps needed to create beautiful wall panels yourself. From understanding what wall paneling is to handling tricky installation challenges, this guide covers everything.
The key to success lies in careful planning and taking your time. Measure twice, cut once, and take your time with the preparation steps. Even if you hit bumps along the way, remember that most problems have simple fixes.
Your new paneled walls will add character and value to your home. Friends and family will be impressed by your DIY skills. The satisfaction of completing this project yourself makes it even more rewarding.
Ready to start your wall paneling project? Grab your measuring tape and begin planning your wall change today. What room will you panel first?
Frequently Asked Questions
What is the Cheapest Way to Panel a Wall?
Use MDF strips with no-nail glue. Skip expensive hardwood. Buy pre-cut lengths to avoid saw rental costs—paint instead of staining saves money.
How Do You Create Wooden Panel Wall Decor?
Mount decorative wooden panels as accent walls. Choose interesting patterns, such as geometric or herringbone. Use contrasting colors to create visual impact and style.
Is it Better to Glue or Nail Paneling?
Use both together. Glue creates invisible bonds, and screws add extra strength. Glue alone works for lightweight panels on smooth walls only.