
Laminate flooring is one of the easiest floors to lay yourself. The planks click together, so you skip nails, staples, and glue. Most rooms take a single weekend.
A few mistakes can ruin the job, though. Skip the moisture check and planks can swell.
Skipping the expansion gap can cause the floor to buckle, while rushing the layout may leave the last row too narrow.
This blog shows you how to lay laminate flooring: prep the subfloor, lay the underlay, cut around doors and pipes, and fix gaps or squeaks if they show up.
Can You Lay Laminate Flooring Yourself?
Yes, you can lay laminate flooring yourself with patience and the right tools. Below are the two main features that make laminate flooring easier to install yourself.
- Planks: Laminate planks float over the subfloor without nails, staples, or adhesive.
- Click-Lock System: Each plank clicks securely into the next, making installation beginner-friendly.
Professional help may be better for stairs, complex layouts, radiant heating, or damaged subfloors.
Laminate is also unsuitable for full bathrooms and standing-water areas because wet-room designs require fully waterproof materials.
Always follow the manufacturer’s instructions for acclimation, underlay, and expansion gaps. A bedroom may take an afternoon, while larger or more complex projects need extra time.
Tools and Materials You’ll Need
Before you start, gather your tools and materials. Missing one item mid-job can stall the whole project.
| Tools | Materials |
|---|---|
| Tape measure, pencil, square | Laminate planks and underlay |
| Utility knife, moisture meter | Vapor barrier and flooring tape |
| Jigsaw or laminate cutter | Transition profiles and molding |
| Tapping block, pull bar, mallet | Spacers and pipe covers |
| Pry bar, drill, hole saw | Approved sealant |
Note: Tools, underlay, expansion gaps, and moisture rules vary by product. Keep your installation sheet and warranty terms close by, and check them before each step, not just before you start.
How to Lay Laminate Flooring Step by Step
The right method can make laying laminate flooring easier, cleaner, and more accurate throughout the process.
Step 1: Remove the Trim and Prepare Doorways
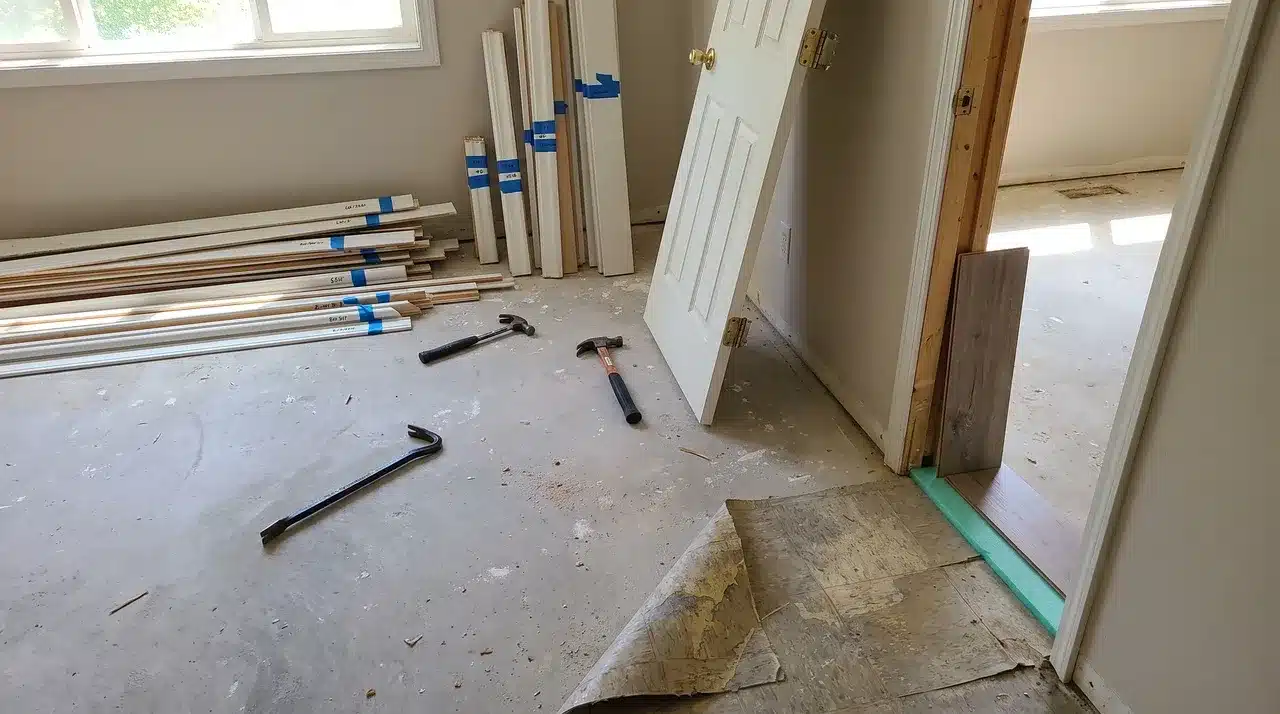
Clear the room of furniture, then remove baseboards, quarter-round, and door trim with a pry bar. Label each piece to match its wall later.
Take off doors that swing inward, plus threshold strips and vent covers. Check the existing floor: firm, flat tile or vinyl can often stay, but damaged flooring should come out.
Measure door clearance, adding laminate and underlay thickness, then undercut jambs and casing, using a plank and underlay as a height guide.
Step 2: Clean and Repair the Subfloor
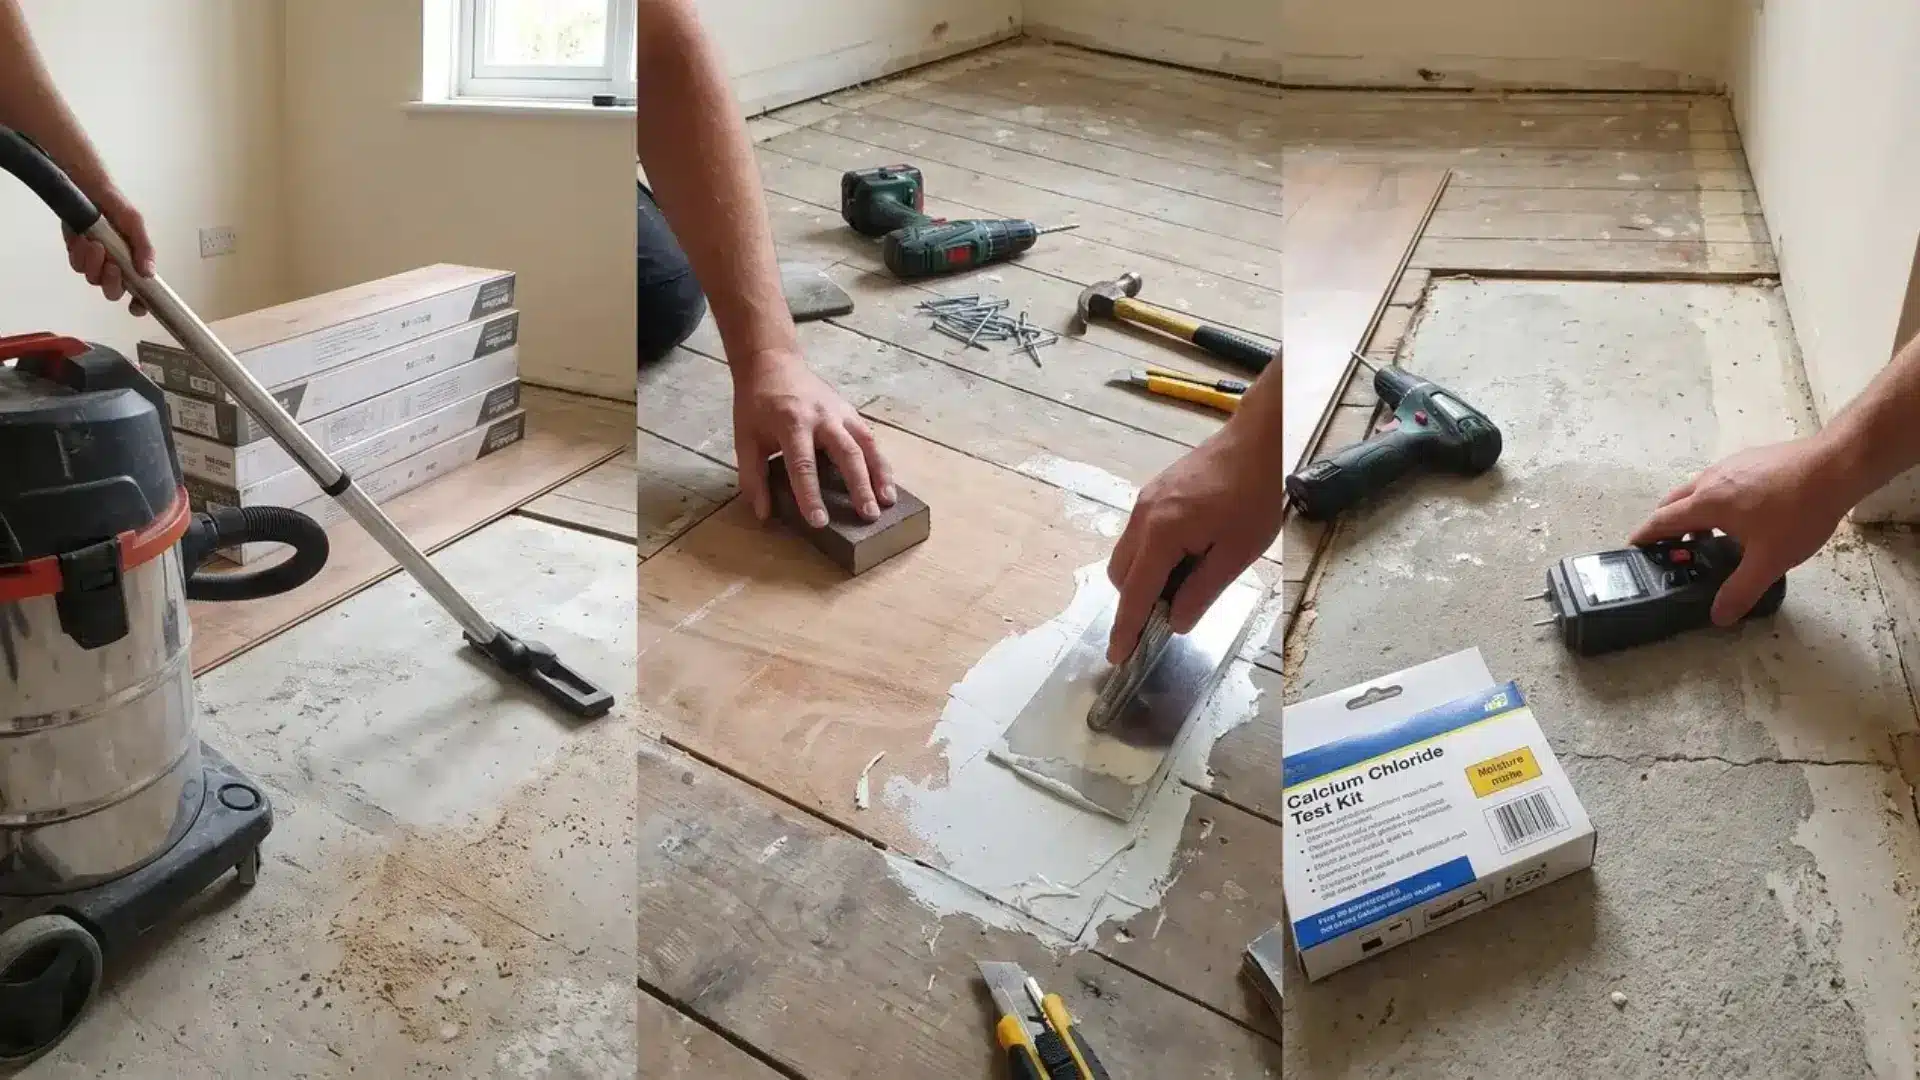
Vacuum the whole floor, then confirm it’s clean, dry, firm, flat, and sound. Screw down loose boards, sand high spots, and fill low spots with a filler.
On concrete, test moisture with a calcium chloride test or meter, and let new slabs cure first. On wood, fix squeaks and set raised nails or screws below the surface.
Over tile or vinyl, check that the surface is bonded. Don’t sand or drill flooring made before the 1980s until it’s tested for asbestos.
Let unopened laminate acclimate flat in the room for at least 48 hours.
Step 3: Install the Moisture Barrier if Required
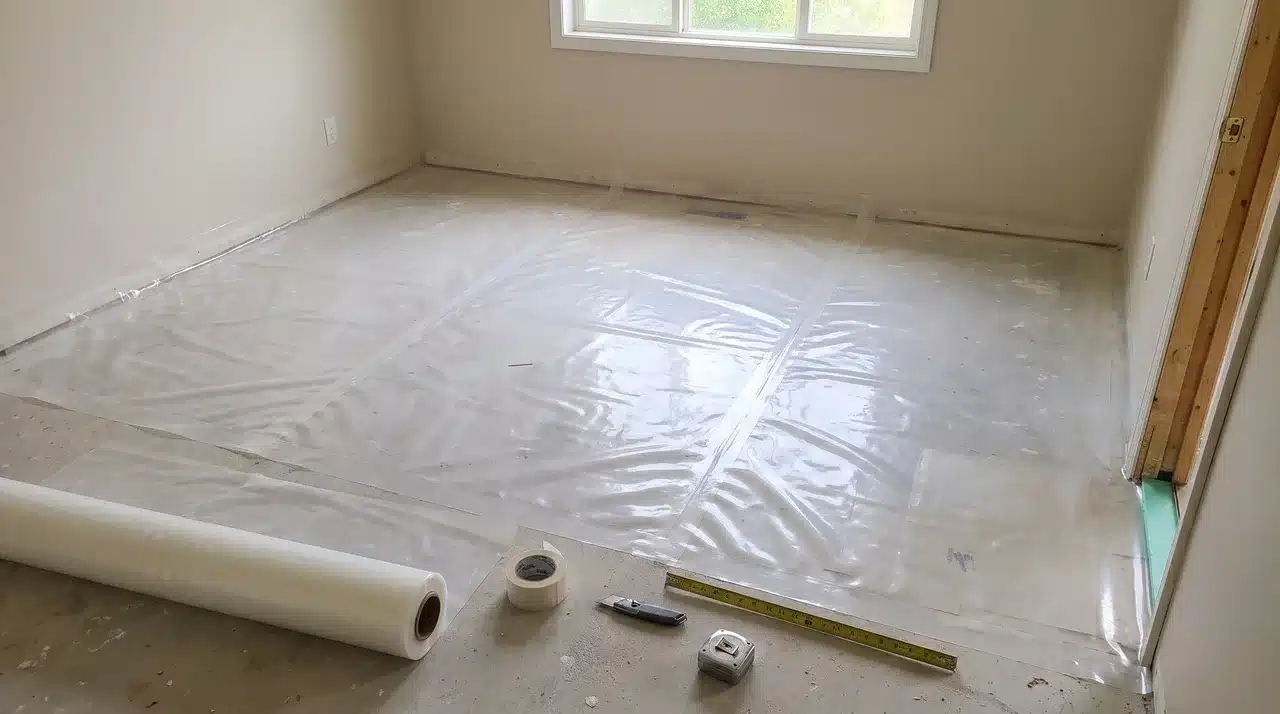
Check your instructions to see if a separate moisture barrier is required, since some underlay already includes one.
Roll out the barrier with the correct side facing up, based on the product label, and overlap the seams as instructed. Tape each seam to keep the barrier sealed.
Some products call for the barrier to run partway up the wall, behind the baseboard line. Follow your flooring instructions for the exact method, since this detail varies by brand.
Step 4: Lay the Underlay
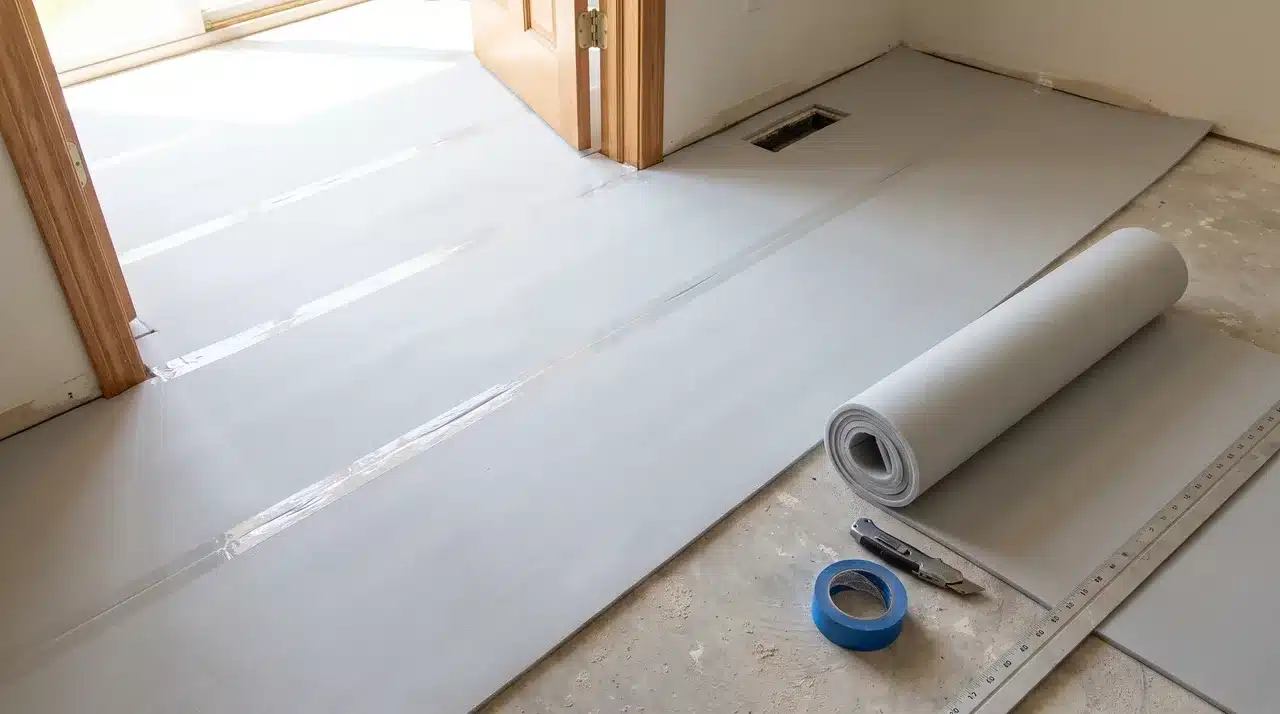
Roll out the underlay in the same direction as your planned plank layout, unless the packaging says otherwise.
Butt the edges together without a gap or an overlap, unless your instructions call for one, and tape the seams so the pad doesn’t shift underfoot.
Trim around doorways, vents, and corners as you go. Only unroll a small section ahead of where you’re actively laying planks, so the pad stays clean and undamaged while you work through the room.
Step 5: Set the Expansion Spacers
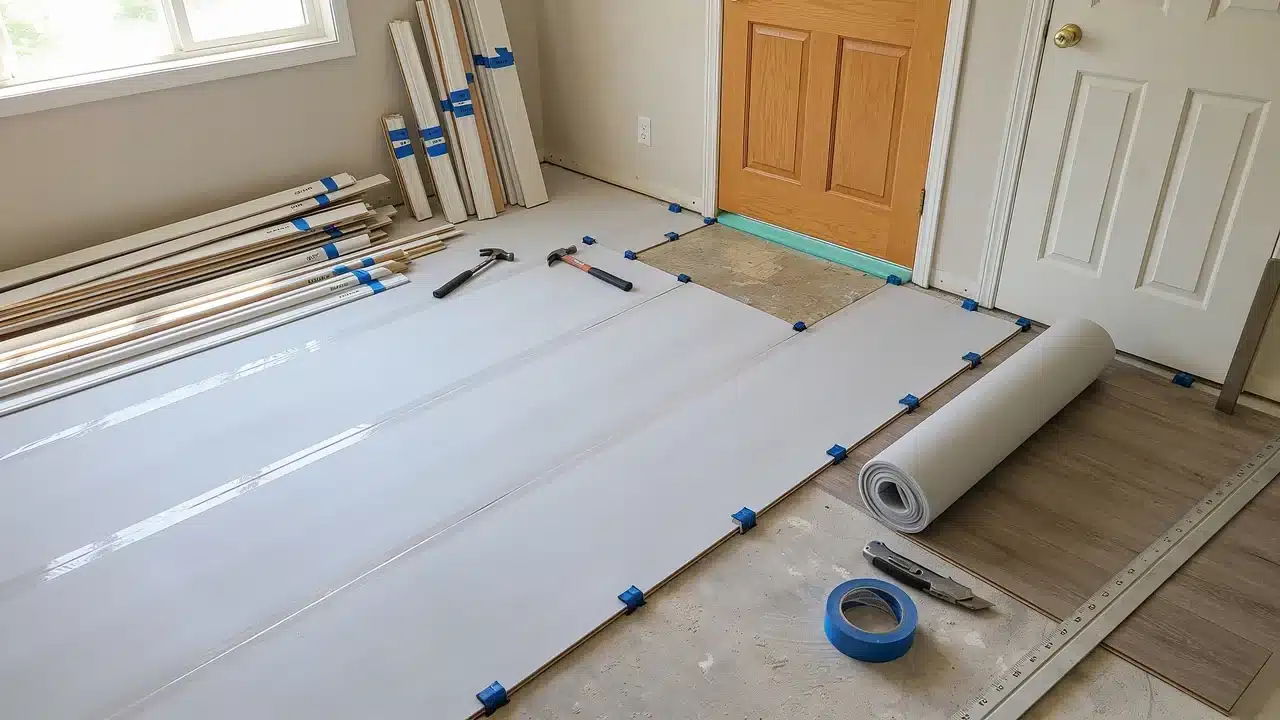
A floating laminate floor needs room to expand and contract with the seasons. Place spacers between your first row of planks and every wall, door frame, threshold, pipe, and column.
Many laminate products call for a gap somewhere between 5/16 and 3/8 inch, but this isn’t universal, so check your flooring instructions for the exact size before placing a single spacer.
Leave the same gap around fixed cabinets and kitchen islands too, so the floor can move on every side.
Step 6: Lay the First Row
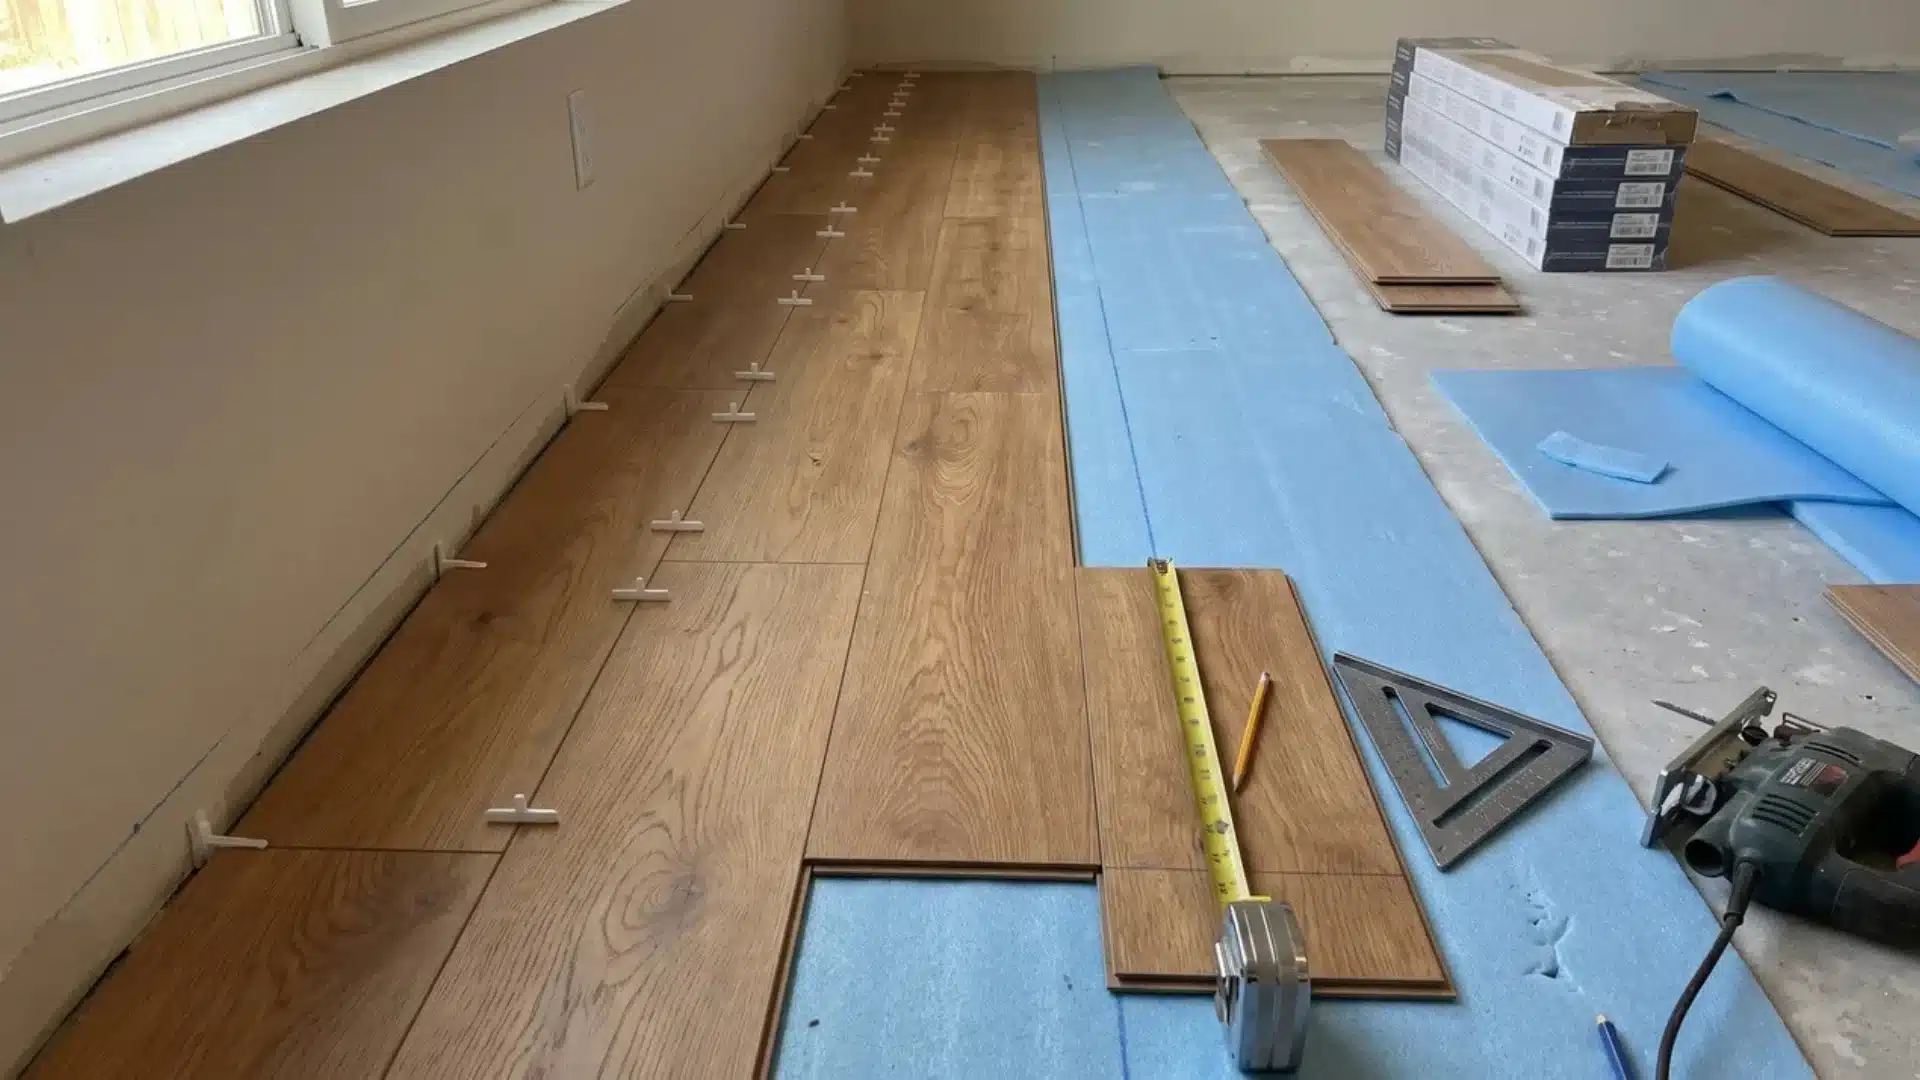
Place the first plank with its grooved edge toward the wall, spacers in place. Some manufacturers ask you to trim off the tongue on this row, so check your instructions.
Connect the short end joints as you move down the wall, keeping the row straight against your reference line.
Measure and cut the final plank to fit, subtracting the expansion gap from your measurement. Avoid ending the row with a piece shorter than about eight inches, since it loosens faster.
Step 7: Stagger the Plank Joints
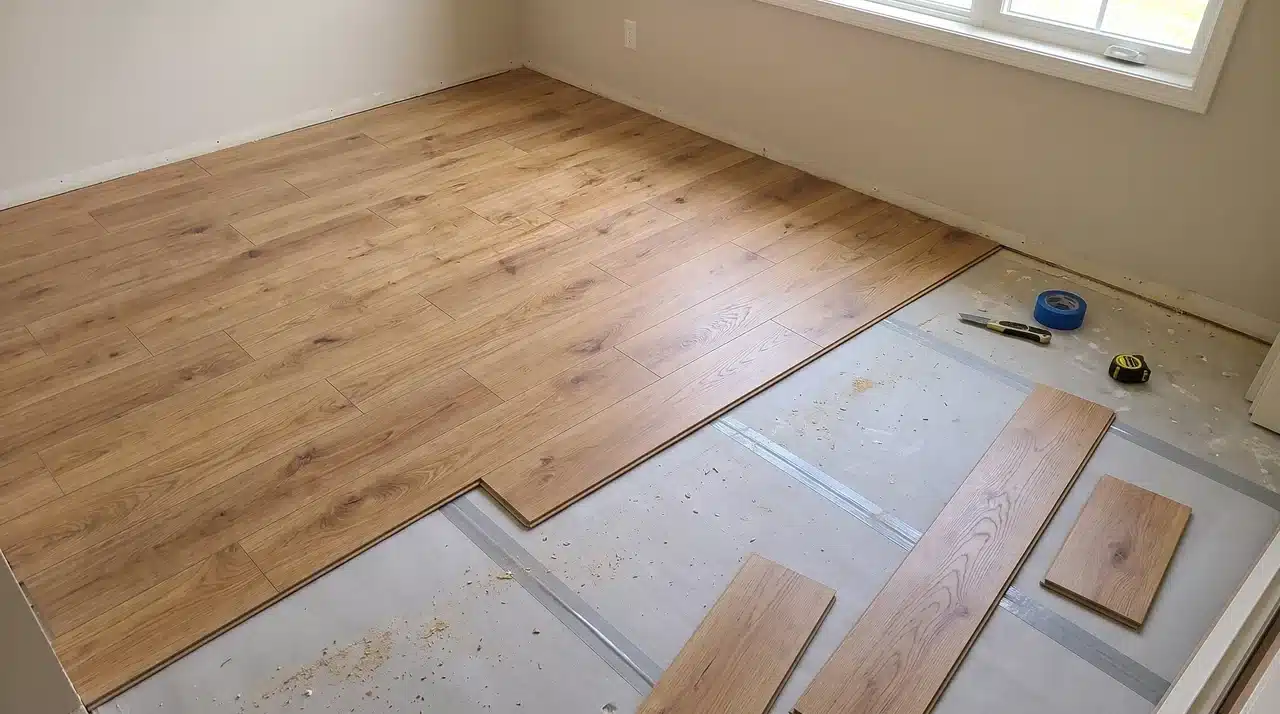
End joints in one row should never line up with the joints in the row next to it. Most manufacturers call for a minimum stagger of about 8 to 12 inches.
Though your instructions may specify a different number. Use the offcut from the end of one row to start the next, if it meets that minimum length.
Avoid a repeating pattern where every third row lines up, and mix in planks from different boxes as you go and install the remaining rows.
Step 8: Cut Around Door Frames, Pipes, and Vents
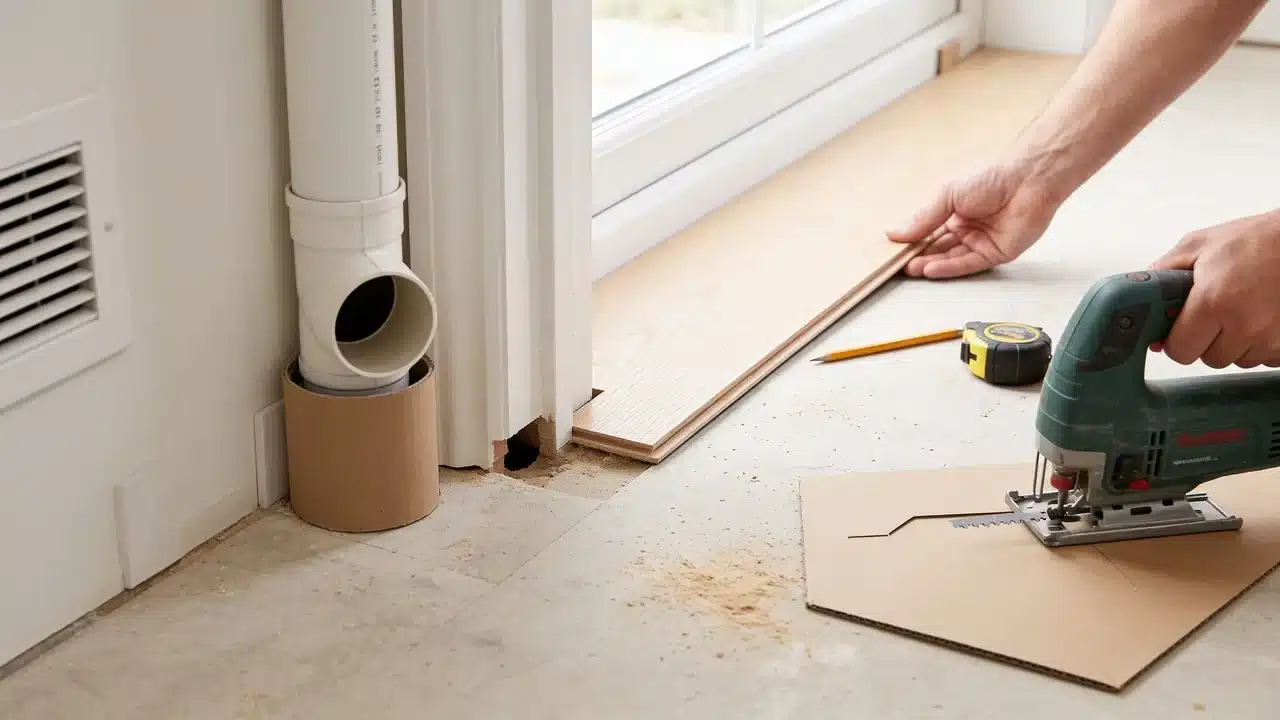
Around door frames, slide a cut plank under the undercut casing, keeping the correct expansion gap against the frame, not just the wall.
Around pipes, measure the pipe’s position from two nearby walls, mark the plank, drill a hole larger than the pipe, then cut the marked section; a pipe cover hides the gap.
For vents and corners, cut a cardboard template for shaped cuts, trace it onto the plank, then cut with a jigsaw for a close fit.
Step 9: Fit the Last Row
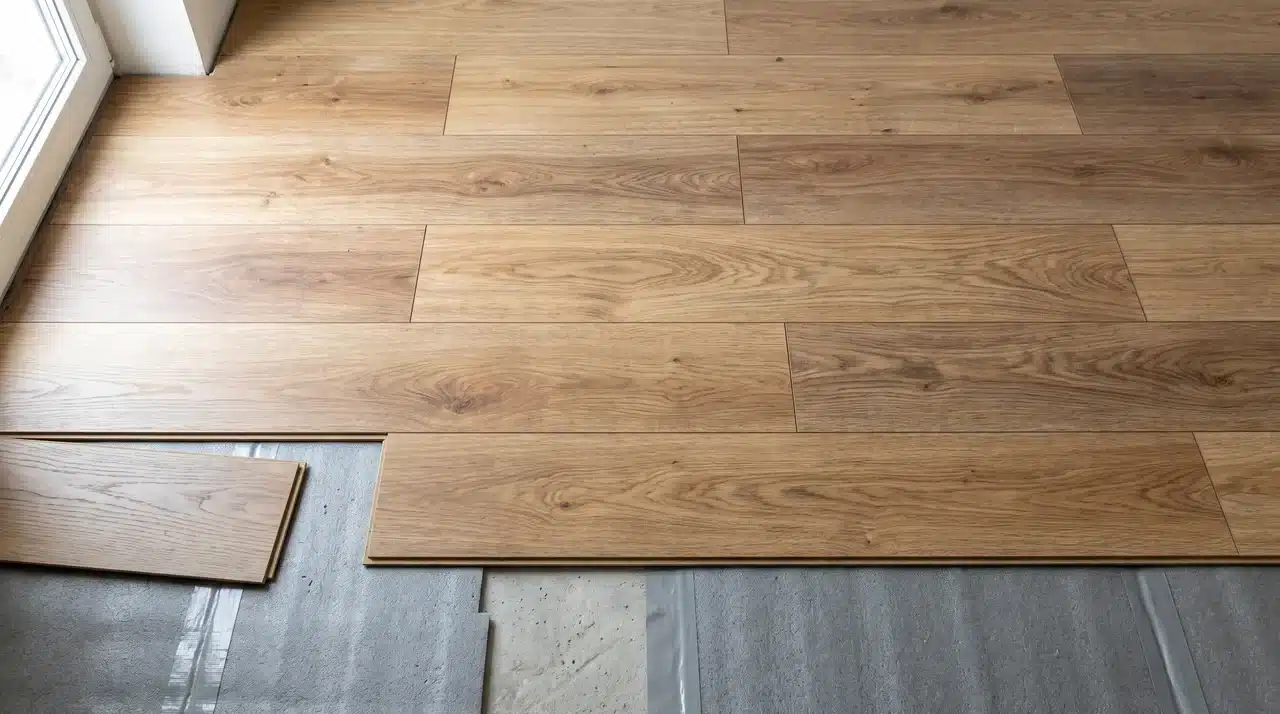
Measure the remaining space at several points along the wall, since walls are rarely straight.
Scribe bowed walls, cut the last-row planks to fit, and maintain the expansion gap.
Use a pull bar to snap these planks into place, since there’s no room for a tapping block, and work to avoid chipping the edge.
Step 10: Add Transitions, Baseboards, and Finishing Trim
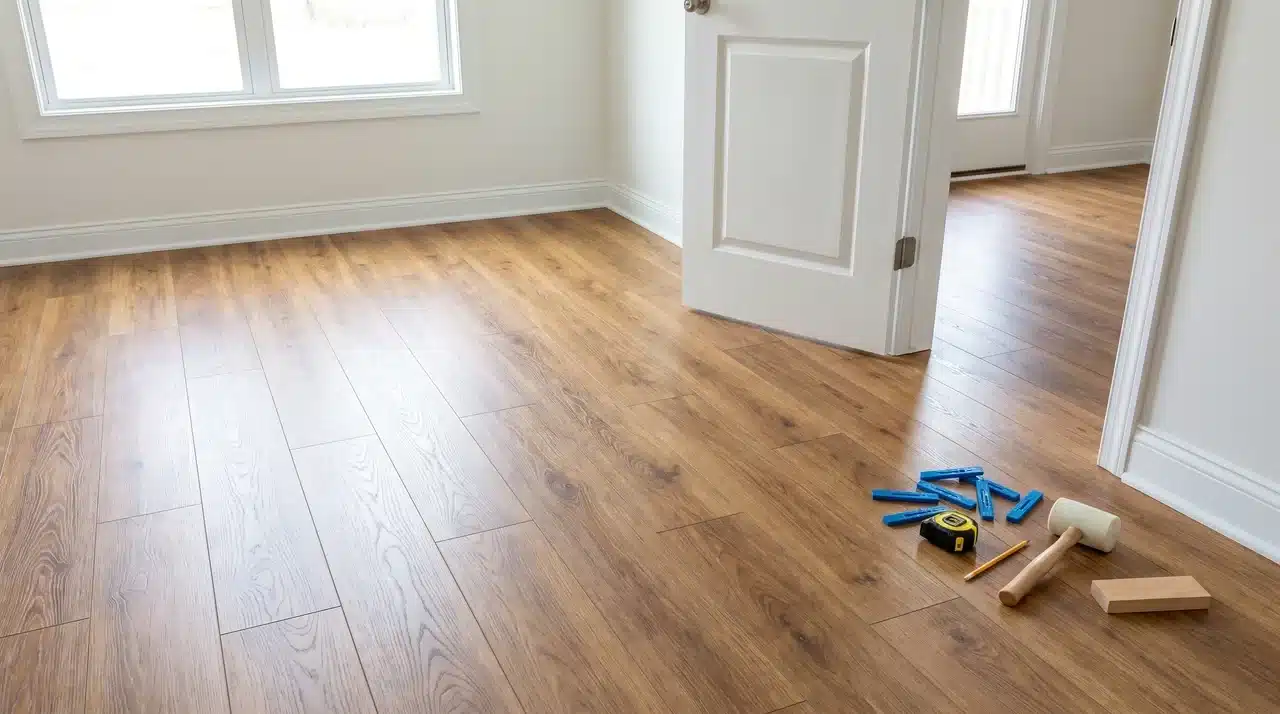
Remove all your spacers once the floor is fully installed. Install transition strips in doorways and at the edge of any room where the laminate meets another flooring type.
Reattach baseboards and quarter-round to the wall itself, using nails or adhesive that don’t pass through the laminate, so the floating floor can still move under the trim.
Reinstall doors and floor vent covers last, and in a water-resistant installation, use only the sealant your manufacturer approves around the room’s perimeter.
How to Deal With Tricky Corners and Cuts
Taking the time to measure carefully and do a dry fit can really help make those tricky cuts much smoother, while also helping you save on wood. It’s a simple step that can make your project go much more smoothly!
- Inside Corners: Copy the shape with a profile gauge, transfer it to the plank, and cut with a jigsaw.
- Outside Corners: Measure both walls, connect the marks, and cut along the combined line.
- Closets and Alcoves: Maintain the expansion gap and avoid ending with a narrow plank.
- Stairs and Pipes: Use stair-nose trim on steps and drill oversized holes around pipes.
- Dry Fit First: Test each cut before locking the plank into position.
How to Fix Gaps, Lifting, or Uneven Planks
Most laminate flooring problems trace back to one of a few root causes. Use this table to narrow down what’s likely going wrong.
| Problem | Likely Cause | Recommended Check |
|---|---|---|
| Gaps between planks | Incomplete locking, or restricted movement | Inspect joints and check perimeter clearance |
| Floor lifting or buckling | Missing expansion space, or a trapped floor | Check walls, cabinets, and transitions |
| Hollow sound underfoot | Underlay or subfloor issue | Confirm compatibility and check subfloor flatness |
| Squeaking | Loose subfloor, or trapped debris | Inspect the base and the locking joints |
| Chipped edges | Excess force or a poor cutting method | Replace the damaged board, and review your cutting technique |
| Uneven joints | Subfloor variation, or a damaged lock | Check flatness, and inspect plank condition |
If the same problem keeps showing up as you work, stop and find the cause before you keep going. Fixing one bad row is much easier than tearing out an entire finished floor.
When to Hire a Professional Installer
Hire an installer if the subfloor has serious moisture damage or structural problems, the kind of issue that often traces back to subsidence.
The same applies if older flooring may contain asbestos. Complex angles, curves, or a staircase also call for expert hands.
So does one continuous run across several rooms. Underfloor heating adds another layer of risk. Tight door and appliance clearance does too, since mistakes there get costly.
Apartment sound-control rules are another reason to call a pro. So are doubts about meeting your warranty’s requirements.
A professional installer carries the cost of their own mistakes. That cost can be worth paying.
Wrapping It Up
A solid laminate floor comes down to a few basics: a dry, flat subfloor, the right underlay, and a steady expansion gap around the room.
Get those right, and the rest is patience: measure twice, cut carefully, and lock each row into place.
Now you know how to lay laminate flooring that stays flat and tight for years. Have a question about your project?
Drop it in the comments and tell us how your install turned out.
Frequently Asked Questions
How Should Laminate Flooring Be Installed For Beginners?
Start with a small, square room first. Always prepare the subfloor, add underlay, and follow the manufacturer’s instructions step by step, without rushing any stage.
What Are The Biggest Laminate Flooring Mistakes?
Skipping moisture testing, ignoring expansion gaps, and using the wrong underlay type all top the list. Rushing the layout often causes a thin final row.
Do You Have To Cut The Tongue Of The First Row Of Laminate?
Often, yes. Many manufacturers ask installers to trim the tongue off the first row’s wall-facing edge before installation. Always check your own product instructions first.
How Do You Stagger Laminate Flooring For Beginners?
Start each new row with a plank at least 8 to 12 inches shorter than the last one. This keeps end joints from lining up.
What Is The Correct Pattern To Lay Laminate Flooring?
There’s no single required pattern. Most installers run planks parallel to the longest wall, stagger joints, and mix plank colors from several boxes.