
I’ve watched freshly rendered walls fail quietly. They crack, bubble, or drop off when everything looked fine.
Nine times out of ten, the problem is not the render but the setup: drywall, incorrect scratch lines, or too much water in the mix.
Small choices made fast come back to bite you later. This blog shows you how to render a wall step by step, from prep to the final sponge finish.
You’ll learn wavy scratch lines, the raking light test, why lime matters, and what aircrete blocks need.
When the setup is done correctly, the finished surface can stay strong and look good for decades with only minimal ongoing maintenance.
What Does it Mean to Render a Wall?
Rendering a wall means applying a cement-based mix, usually with sand and often lime, directly to the exterior of a wall.
It protects brickwork from the weather, adds a clean, uniform finish, and stops moisture from getting in.
Here is what to know before starting:
- Rendering coats the outside of a wall with a protective cement-based mix.
- Rendering is an exterior process. For interior walls, dry lining walls is a faster, cleaner alternative to render, and if you want a decorative interior finish instead, wall panelling is worth a look too.
Rendering an exterior wall does four things:
- Protects brickwork from rain, wind, and frost.
- Reduces moisture getting into solid walls.
- Improves the wall’s thermal performance.
- Gives a clean, uniform look over uneven or mixed-color brickwork.
Tools and Material Checklist
Gather everything before starting, as missing materials or unsuitable substitutes can affect the strength and quality of the finished render.
|
Tools |
Materials |
|---|---|
|
Steel plastering trowel |
Plastering sand |
|
Hawk |
OPC cement |
|
Scratch comb |
Hydrated lime |
|
Metal straight edge |
Clean water |
|
Europane Darby |
PVA bonding agent or SBR primer |
|
Sponge float |
Corner beads and stop beads |
|
Spirit level |
Alkaline-resistant fiberglass mesh |
|
Paddle mixer or cement mixer |
— |
|
Scaffolding or tower scaffold |
— |
How to Render a Wall Step-By-Step
Rendering a wall takes careful preparation, the right mix, and steady application. Follow these steps to create a smooth, durable finish that lasts.
Step 1: Apply the Scratch Coat
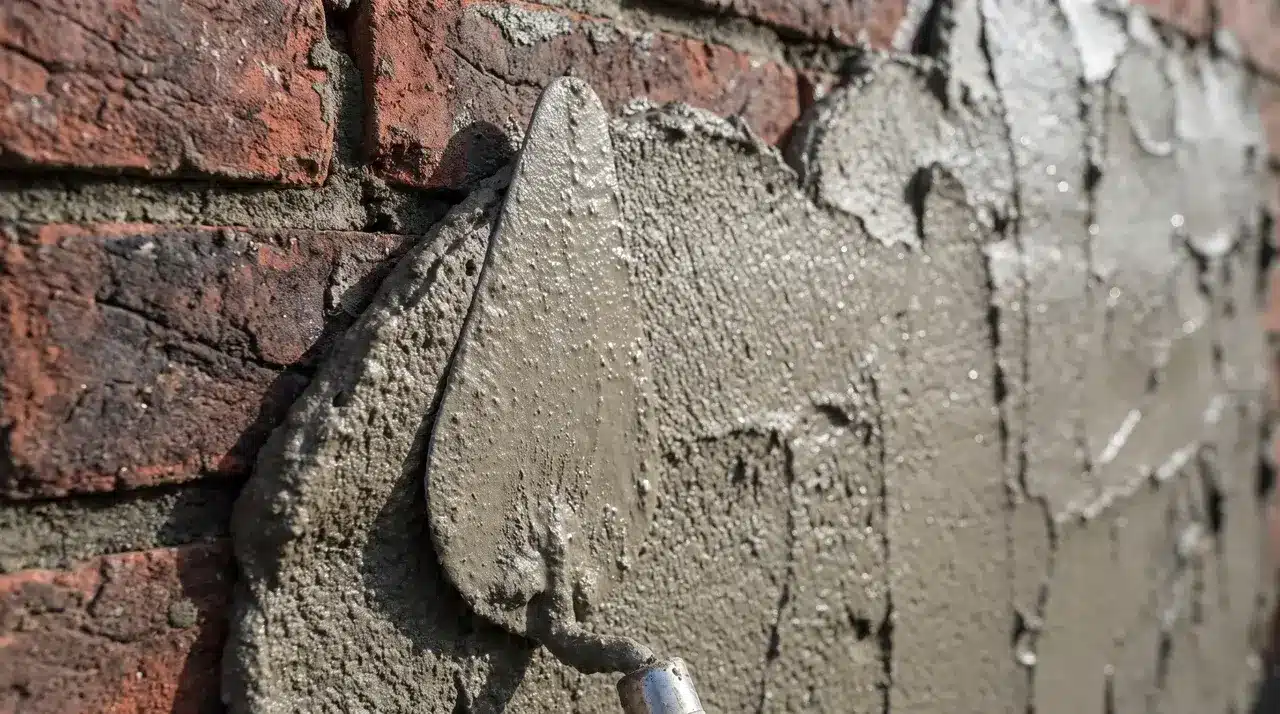
The scratch coat is the foundation of the whole process. Get it flat and at the right thickness on the wall. Everything that follows depends on this layer being done right.
- Load the hawk. Apply render with firm upward strokes, pressing hard into the damp wall.
- Work from the bottom up. Hold the hawk underneath to catch any falling material.
- Target 10–12mm thickness across the surface.
- Never overwork the render after applying it. Too much trowelling brings fine material to the surface. This weakens the layer and causes adhesion problems later.
Raking light check: Flat matters as much as smooth. Low-angle sunlight hits the finished wall and shows every bump. Time spent flattening the scratch coat now pays off on the top coat.
Step 2: Rule off and Check for High Spots
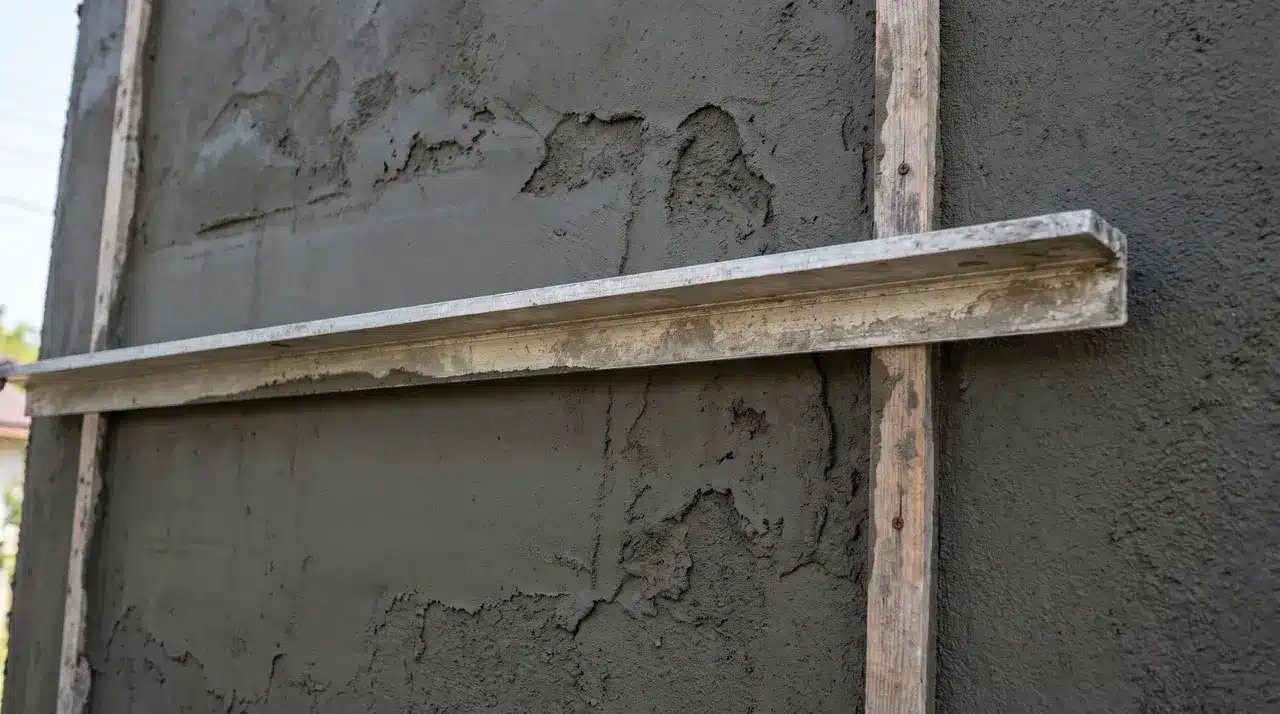
Once the render is on the wall, run a metal straight edge across it. This removes the high spots and shows you where the hollows are. Do not skip this leveling step.
- Draw the straight edge across the wall with a gentle sawing motion, resting on the battens or beads.
- Low spots show up as gaps where the straight edge lifts off the surface.
- Fill hollows with fresh render and rule off again. Repeat until the surface is flat.
Pro tip: A serrated tool dragged across the surface takes off high points and marks low spots at the same time. Quicker than checking with your eye alone.
Step 3: Scratch the Surface the Right Way
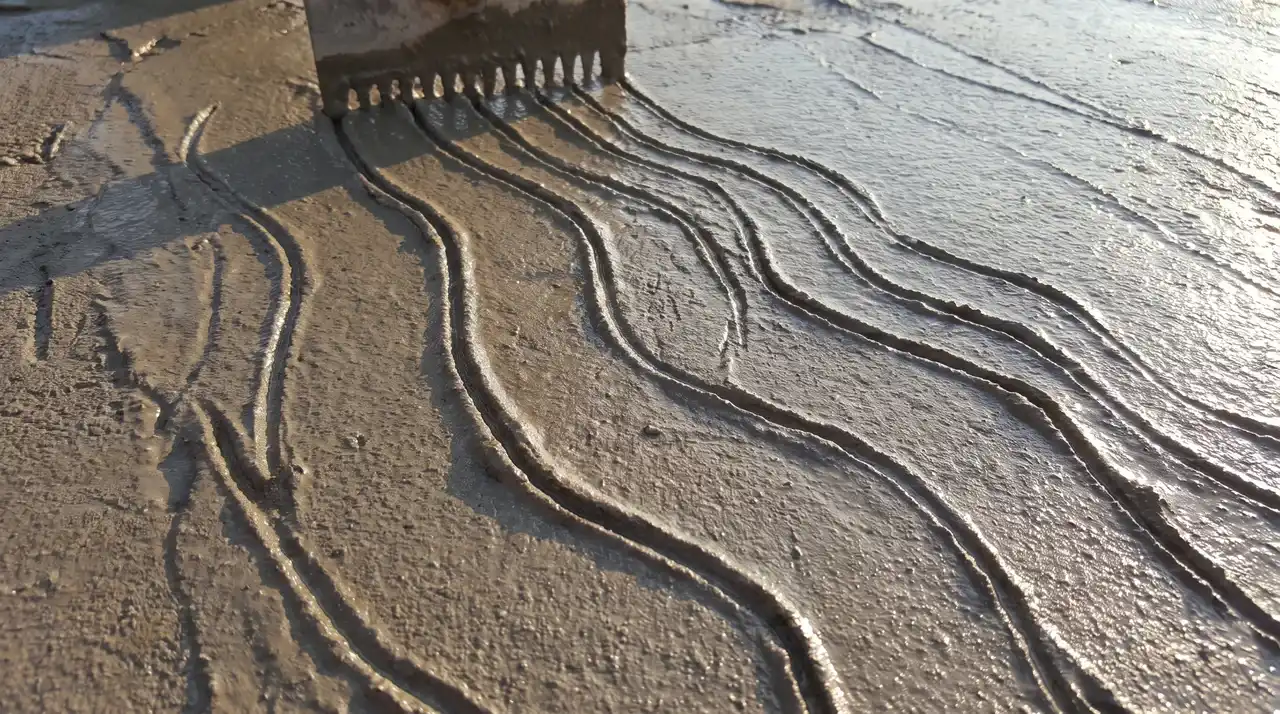
The scratch lines you cut into the first coat are what the top coat bonds to. Get this wrong, and the topcoat will crack away from the basecoat beneath.
- Drag a scratch comb across the surface while the coat is still wet.
- Do not use straight horizontal lines. Render shrinks as it cures. Straight horizontal lines resist shrinkage in only one direction. This can lead to vertical cracks in the topcoat.
- Use wavy, irregular lines. They resist shrinkage in multiple directions and stop vertical cracking. I use wavy lines every time, even on small patch jobs. It takes seconds longer and saves a callback.
- This is even more important on aircrete blocks.H+H, maker of Celcon aircrete blocks, specifically advises wavy scratch lines over straight ones to stop this cracking.
- Leave the scratch coat to cure. Minimum 24 hours. Three to five days gives the best bond.
Step 4: Apply the Top Coat
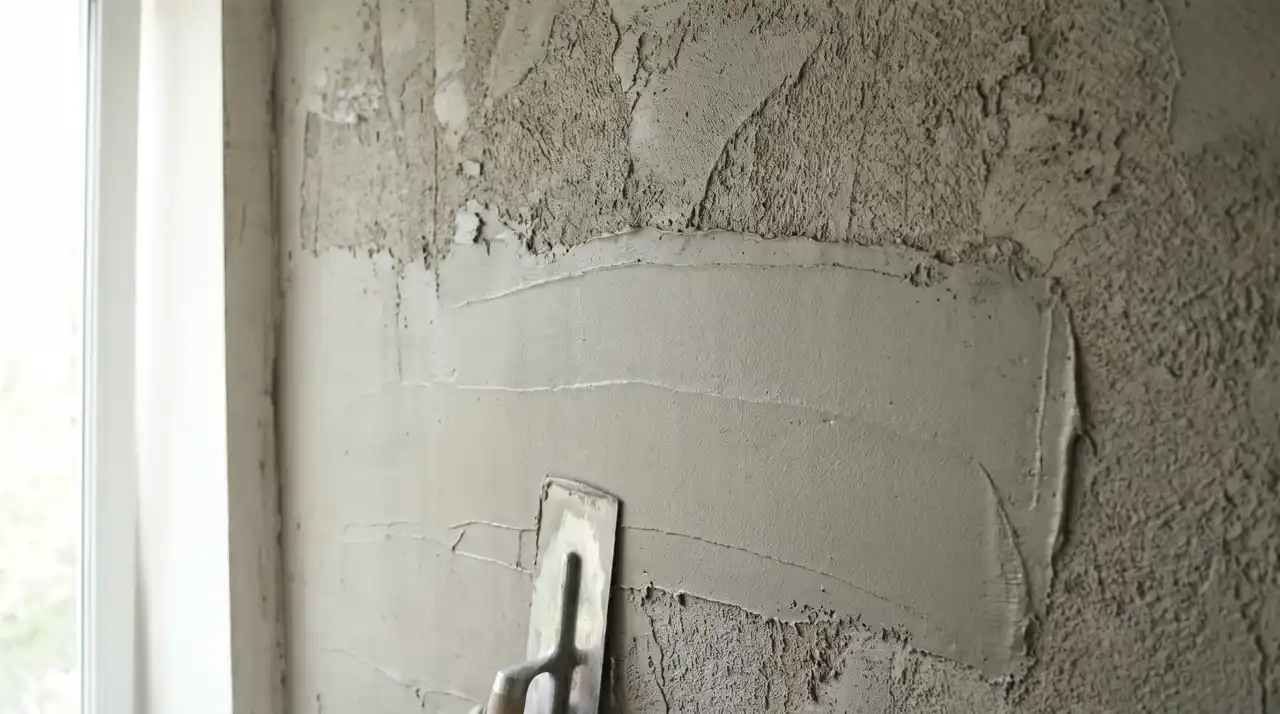
The top coat is the one people judge you by. If the scratch coat is flat and properly cured, this coat should go on cleanly with little need for correction.
- Skipping this step causes adhesion failure. Surface moisture problems during application are among the most common reasons a finish coat lifts or bubbles later
- Apply with the same technique as the scratch coat. Firm upward strokes, pressing into the surface.
- Target 6–8mm thickness. Keep it even across the wall.
- Run the straight edge or Europane Darby across the surface to find and remove high spots.
Europane Darby tip: Wait until the render has firmed up before using it. It should feel solid when pressed but not leave a dent. Used too soon, it pulls material off the surface.
Step 5: Float and Sponge the Surface
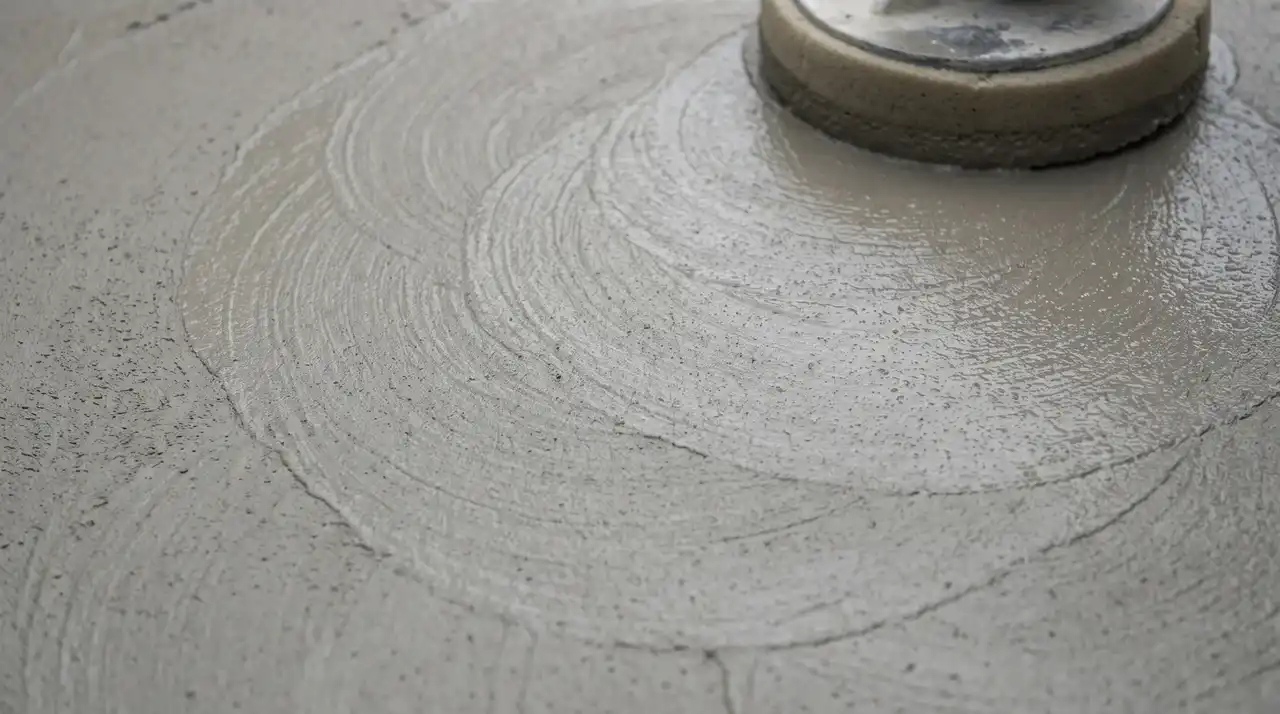
These are the two final steps of rendering. Both depend on good timing. Do them too soon, and you will create bumps that are clearly visible in sunlight. Timing matters more here than anywhere else.
Floating:
- Once the render is firm to the touch, use a sponge float in circular motions.
- This closes the surface, fills small hollows, and removes remaining high spots.
- Mist the surface with water if the render is drying too fast while you work.
Sponging:
- Run a damp sponge across the finished surface in smooth, even passes.
- This closes small gaps and gives a clean, uniform result.
- Rinse the sponge frequently. A gritty sponge scratches the surface instead of closing it.
Types of Render: Which One Does Your Wall Need?
Older solid-wall homes need lime render, while modern walls suit sand and cement. Choose monocouche for full-house projects and acrylic for insulated boards.
Choosing the wrong type can cause dampness and cracking within months of the process being done
|
Render Type |
Best For |
|---|---|
|
Sand and cement |
Modern walls, garden walls, garages |
|
Lime |
Pre-1920s solid-wall buildings |
|
Silicone |
Contemporary homes, low maintenance |
|
Monocouche |
Full house re-renders |
|
Acrylic |
Dry climates, over-insulated boards |
Once you’ve chosen your render type and it’s fully cured, the next step is finishing. Learning how to paint a rendered wall correctly protects the surface and extends its lifespan.
What to Do After Rendering
The render is on the wall. The process is not finished yet. Curing, maintenance, and the right next steps all affect how long your render lasts. Here is what to do once the top coat goes on.
- Curing: Keep freshly rendered walls damp for 5 to 7 days with light spraying. This slows surface drying and prevents shrinkage cracking. Do this daily in warm or dry weather. I’ve skipped this step exactly once. The cracks that followed taught me not to again.
- Painting: Allow at least four weeks of full curing before painting your freshly rendered wall. Use breathable exterior masonry paint and spray paints.
- Hairline cracks after drying: Small cracks as the render settles are normal. A lime-based mix reduces this. Fill with flexible exterior filler and repaint once dry.
Note: Large cracks, hollow sections that tap loose, signs of subsidence in the wall, or render on a building with active damp should be assessed by a specialist before any further DIY work.
Common Rendering Mistakes to Avoid
Most rendering problems trace back to a small number of avoidable mistakes. They rarely show up immediately.
They often appear months later as cracks, hollow-sounding sections, or render pulling away from the wall.
- No mesh on aircrete blocks: Cracking is near-certain without alkaline-resistant mesh set into the base coat.
- Wrong mix strength for the background: A scratch coat stronger than the blocks beneath it dries and moves at a different rate, which is what actually drives most of the cracking, hollow sounds, and callbacks on this list.
- Working in direct sunlight or high heat: Render dries from the outside in before it can cure properly, leaving a weak, crazed surface. Work in shade or during cooler parts of the day.
- Skipping movement joints: A wall without joints has nowhere to absorb expansion and contraction, so the render cracks instead. This matters most on aircrete and around openings like windows.
- Galvanized beads used outdoors: They rust over time, and the rust stains and weakens the render around them. Use stainless steel or PVC beads on any exterior job.
Final Thoughts
A rendered wall done right lasts 20 to 30 years. Done wrong, it fails within months. In my experience, the difference is never the big steps.
It’s the details most guides skip: too much water in the mix, straight scratch lines, skipping the pre-wetting on a dry day.
These small misses pull a wall apart long after it looks finished. Rendering is a real skill, but it’s one you can learn in a day or two.
Follow the mix ratios here, take your time on the scratch coat, and the top coat will follow cleanly.
Frequently Asked Questions
What do You Put on Walls Before Rendering?
Clean the surface, rake out mortar joints, fix render beads, and apply a PVA bonding agent or SBR primer on smooth or low-absorption surfaces.
What is the Best Render Mix for Beginners?
One part cement, one part lime, and five parts sharp sand. The lime makes the mix easier to spread and far more forgiving.
Why Does Render Need Two Coats, and Can You Skip to One?
One coat lacks the strength to last, so two coats are standard. The exception is monocouche render, made specifically for single-coat use.
How Much Does It Cost to Render a Wall?
Expect roughly £30 to £60 per square meter for professional rendering in the UK, depending on render type, wall condition, and location.
Can You Render a Wall in Cold or Wet Weather?
No. Render needs dry, frost-free conditions above around 5°C to cure properly. Rain or frost within 24 hours can ruin the finish.