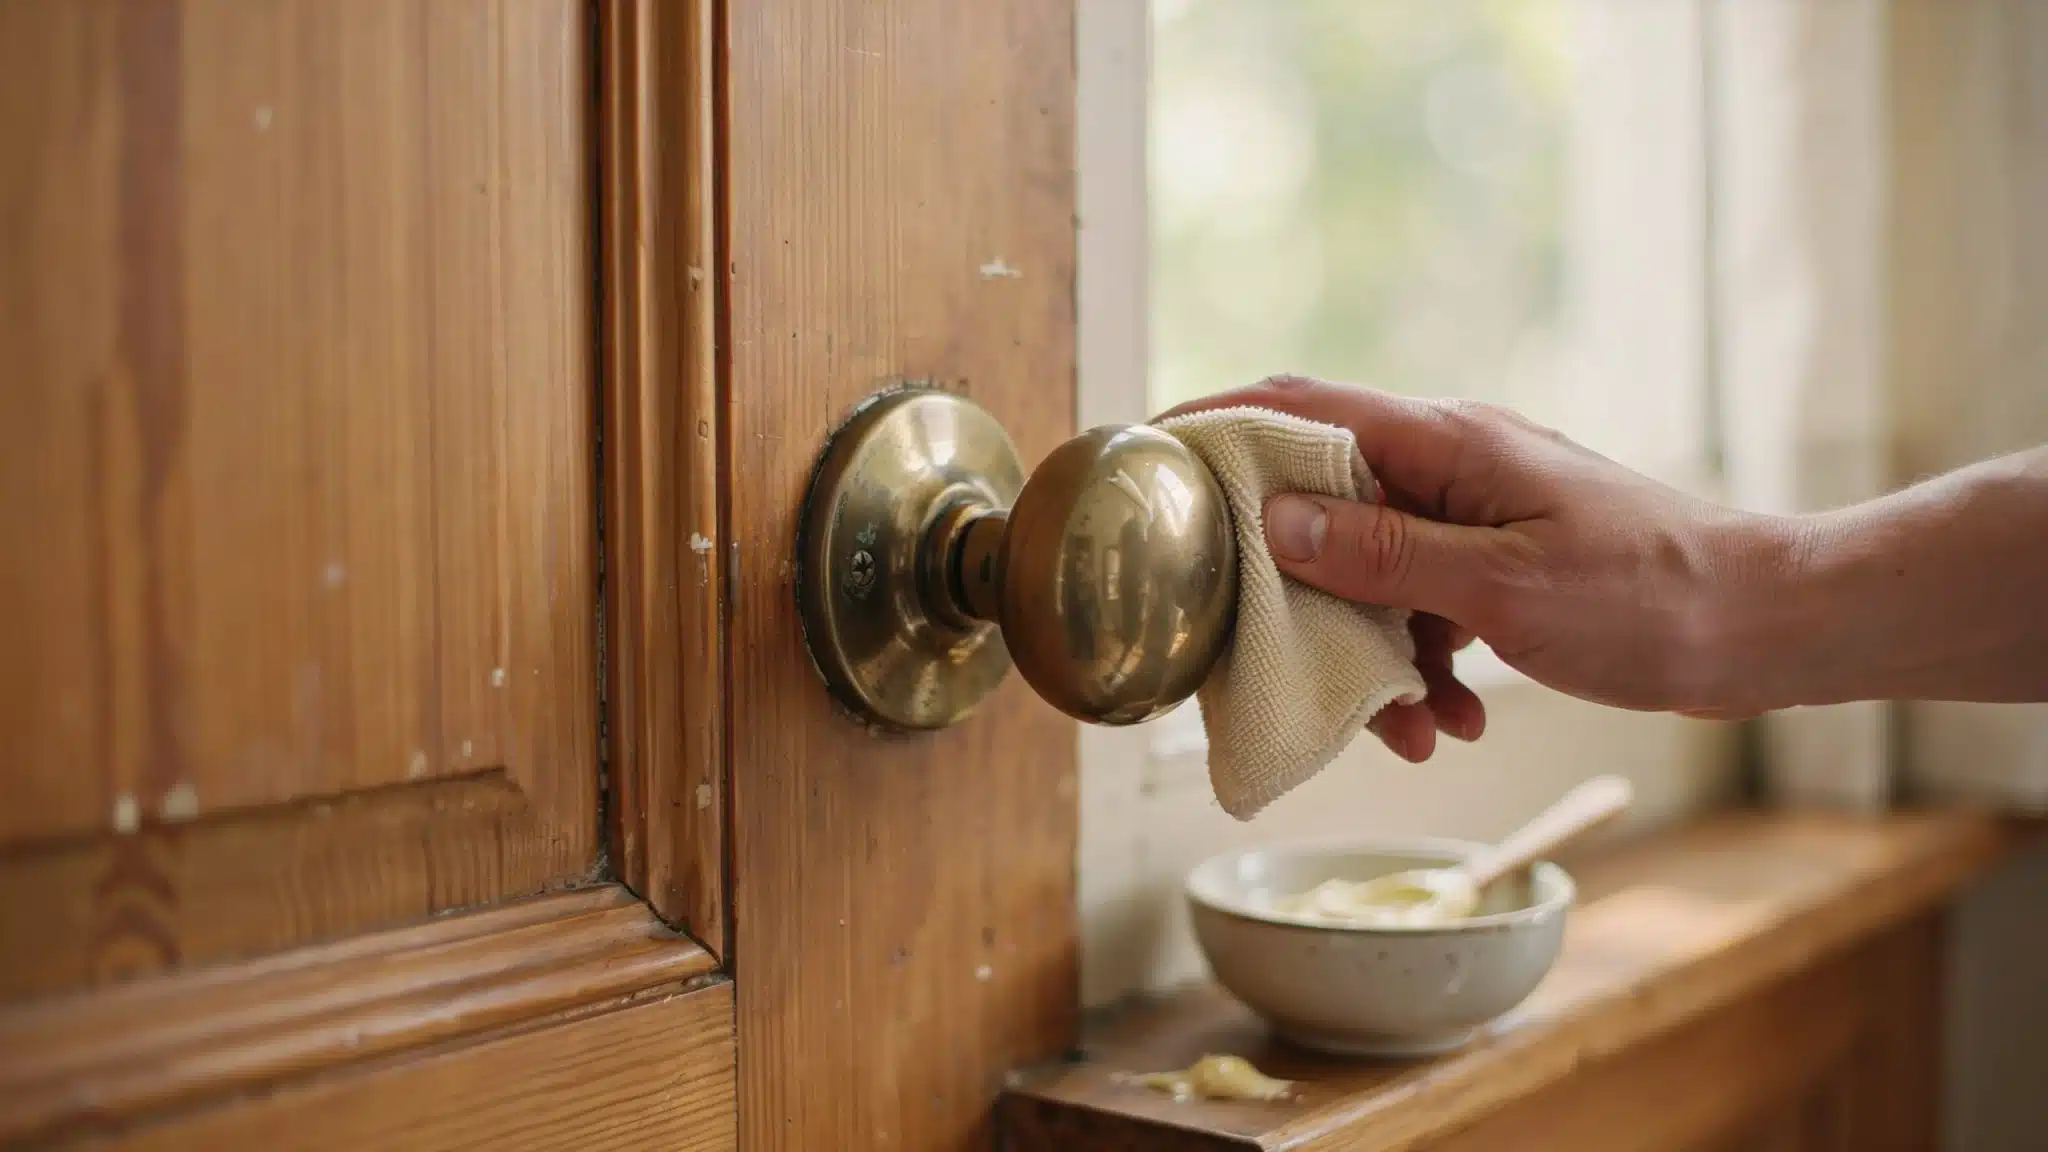

My grandmother had an old brass doorknob on her front door. It was heavy, warm to the touch, and the color of late-afternoon sun.
When she passed it on to me, years of use had left it dark and dull, and I had no idea how to bring it back.
I tried wiping it with a damp cloth. Nothing happened. I tried a dry cloth. Still nothing. Then I started learning how to clean brass at home, and everything changed.
That doorknob now sits on my office door, and it glows every time the light catches it. Brass shows up in doorknobs, cabinet handles, lamps, chandeliers, and decorative pieces all over the home.
It brings warmth, lasts for years, and suits almost any style. But brass tarnishes over time, and that dull layer is not permanent.
This post walks through five simple ways to polish brass and bring back its shine.
5 Effective Ways to Clean Brass
After years of polishing everything from vintage doorknobs to family heirlooms, these are my top five favorite brass-cleaning methods, simple, reliable, and gentle on the metal.
1. Vinegar, Salt, and Flour Paste

This is the most popular DIY method for cleaning brass at home, and for good reason. It works well on moderately tarnished pieces.
What you need:
- 1 teaspoon salt
- 1/2 cup white vinegar
- Enough flour to make a thick paste (roughly 1/4 cup)
How to use it:
- Mix salt into vinegar until it dissolves.
- Stir in flour until you get a thick, spreadable paste.
- Apply the paste to the brass piece with a soft cloth or your fingers.
- Let it sit for 10 minutes.
- Rinse thoroughly with warm water.
- Dry completely with a clean cloth.
The acid in the vinegar breaks down tarnish. The salt acts as a mild abrasive. The flour holds everything in place so it does not run off. This method works great on handles, candlesticks, and decorative objects.
2. Lemon and Baking Soda

This method is gentler than the vinegar paste and works well for light tarnish or more sensitive pieces.
What you need:
- 1/2 lemon
- 1–2 teaspoons baking soda
How to use it:
- Sprinkle baking soda directly onto the cut lemon.
- Rub the lemon onto the tarnished brass in small circles.
- Let the juice and baking soda work on the surface for 3 to 5 minutes.
- Rinse with warm water.
- Dry right away with a soft cloth.
The citric acid in the lemon lifts tarnish. The baking soda neutralizes and gently scrubs. It smells fresh, too. I use this one on smaller hardware pieces where I want more control.
3. Ketchup or Tomato Paste
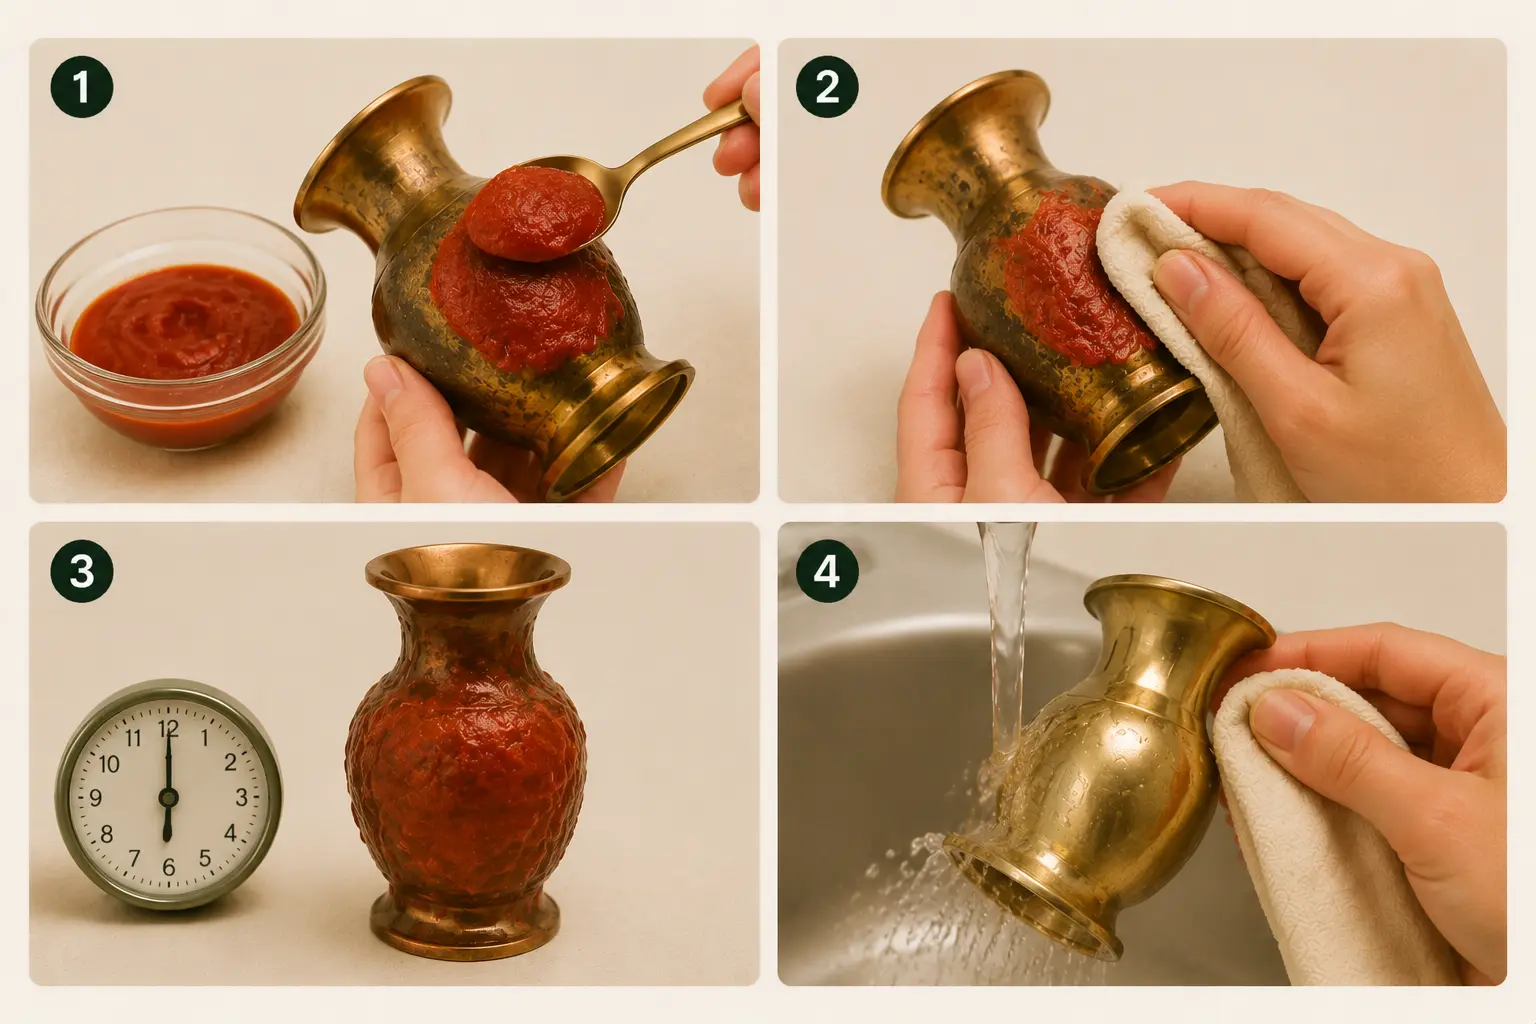
This sounds odd, but it genuinely works. Tomatoes contain mild acids that break down tarnish without scratching the surface.
How to use it:
- Apply a layer of plain ketchup or tomato paste to the tarnished area.
- Rub gently with a soft cloth.
- Let it sit for up to 30 minutes on heavier tarnish.
- Rinse well and dry completely.
This method is great for oddly shaped pieces because ketchup coats irregular surfaces easily. It is also completely safe to use around kids and pets.
My cousin laughed when I told him about it. He stopped laughing after he tried it on his old brass cabinet hardware.
4. Toothpaste Method
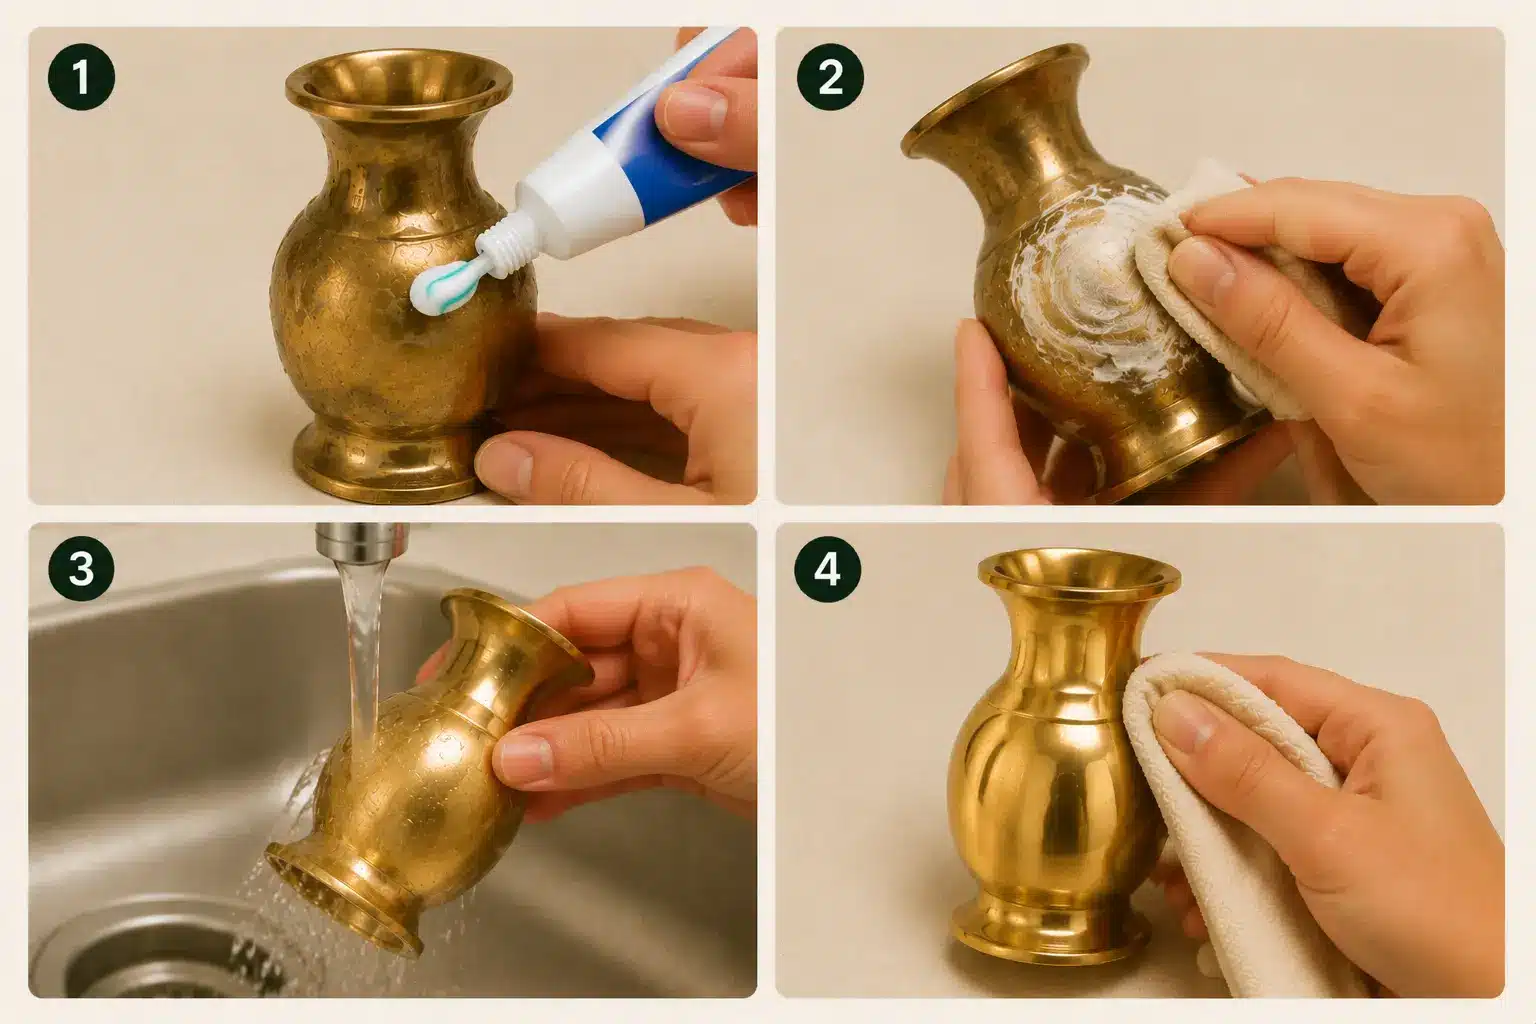
Toothpaste works as a mild polish for small brass items like keyrings, small figurines, or jewelry clasps. Use plain white toothpaste, not a gel formula.
How to use it:
- Apply a small amount of toothpaste directly to the brass.
- Rub in circular motions with a soft cloth or an old toothbrush.
- Rinse with warm water.
- Dry immediately.
This works best for spot cleaning or very small areas. Do not use it on large pieces, as it takes a long time to cover enough surface area.
5. Commercial Brass Polish
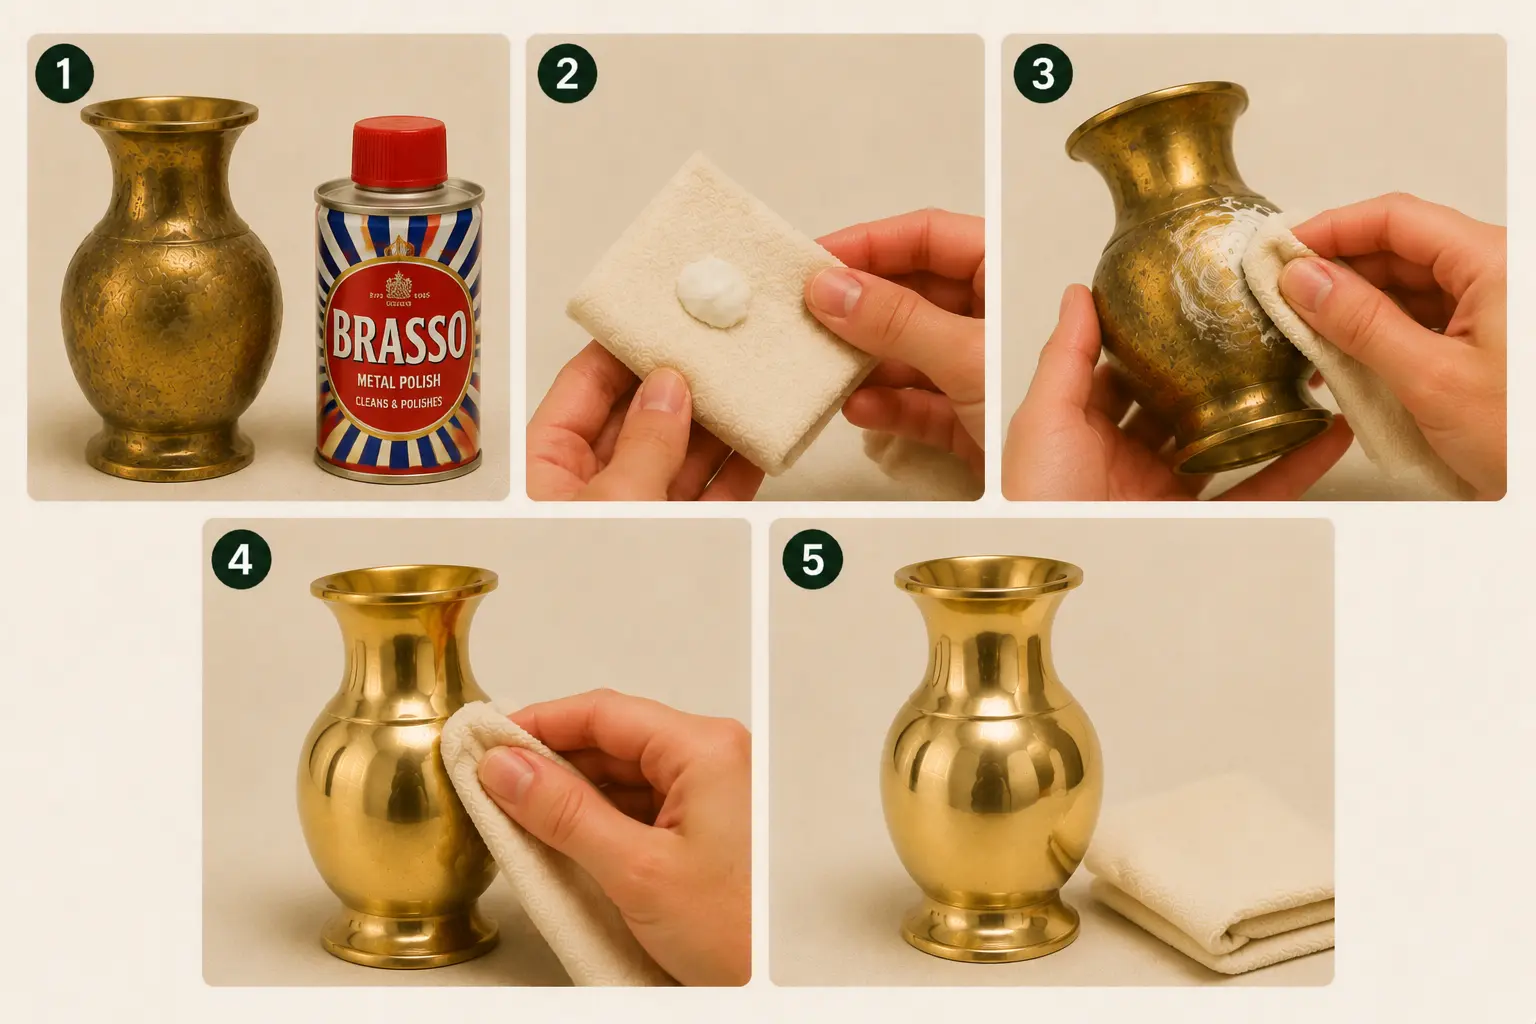
For heavy tarnish or pieces that have not been cleaned in years, a commercial brass polish gives you the strongest result. Products like Brasso or Flitz are widely available and safe for solid brass.
How to use it:
- Read the product instructions before you start.
- Apply a small amount of polish to a clean cloth.
- Rub onto the brass using firm, circular motions.
- Buff off with a second clean cloth.
- Repeat if the tarnish is heavy.
Commercial polish contains chemical agents that dissolve oxidation faster than any DIY method. Use it in a well-ventilated area. Wear gloves to protect your skin.
Important: Do not use commercial brass polish on lacquered brass. It will damage the protective coating. See the tip on lacquered vs solid brass in the FAQ section below.
Polishing and Buffing: Restore the Shine
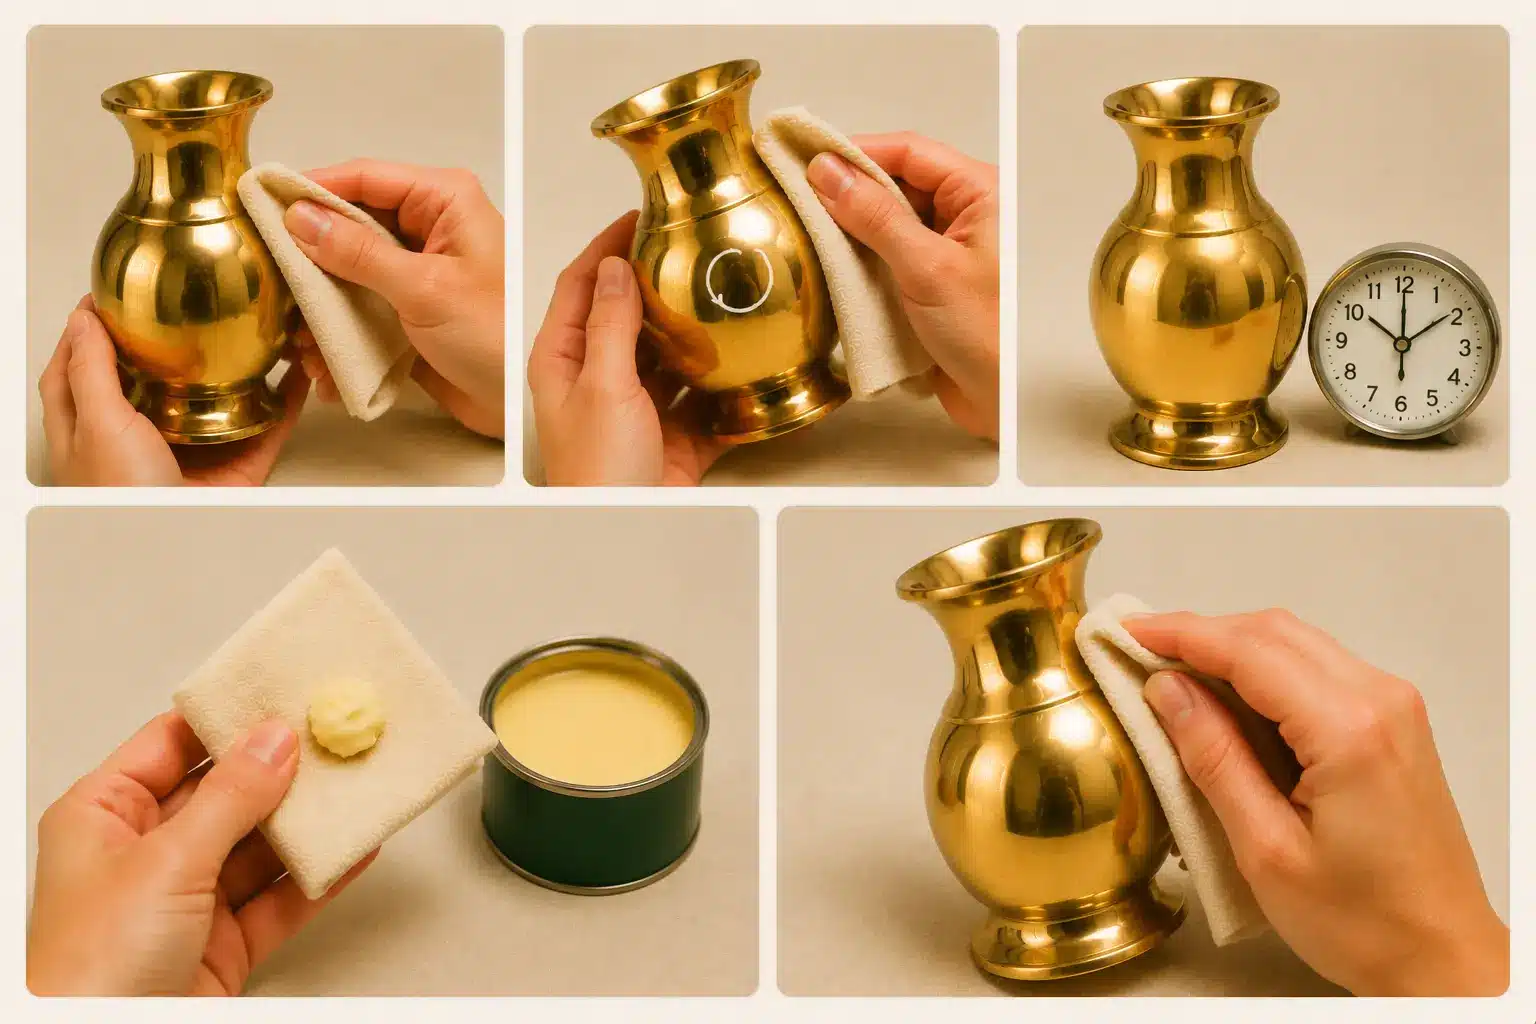
This is the final step in any cleaning process. Polishing and buffing bring out the shine after you remove tarnish.
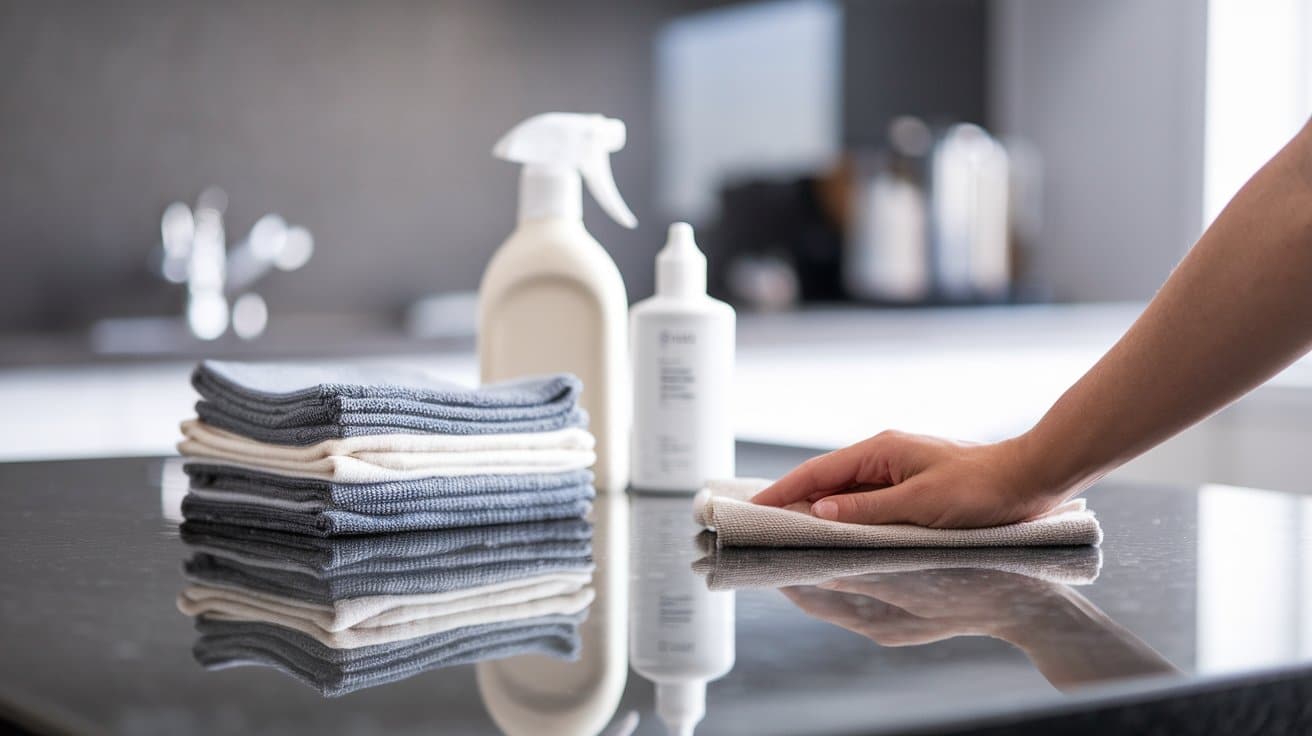
What you need:
- A clean, dry microfiber cloth or a soft cotton cloth
- Optional: brass-safe wax or metal sealant
How to use it:
- After cleaning and drying, take a fresh dry cloth.
- Buff the surface in small circles using moderate pressure.
- Keep going until the shine comes through.
- For longer-lasting results, apply a thin coat of car wax or paste wax made for metals.
- Buff again after the wax dries.
This step does two things. First, it brings out the full shine. Second, the wax creates a thin barrier between the brass and the air, which slows future tarnishing. It is worth the extra few minutes.
Understanding Brass Patina and Tarnish
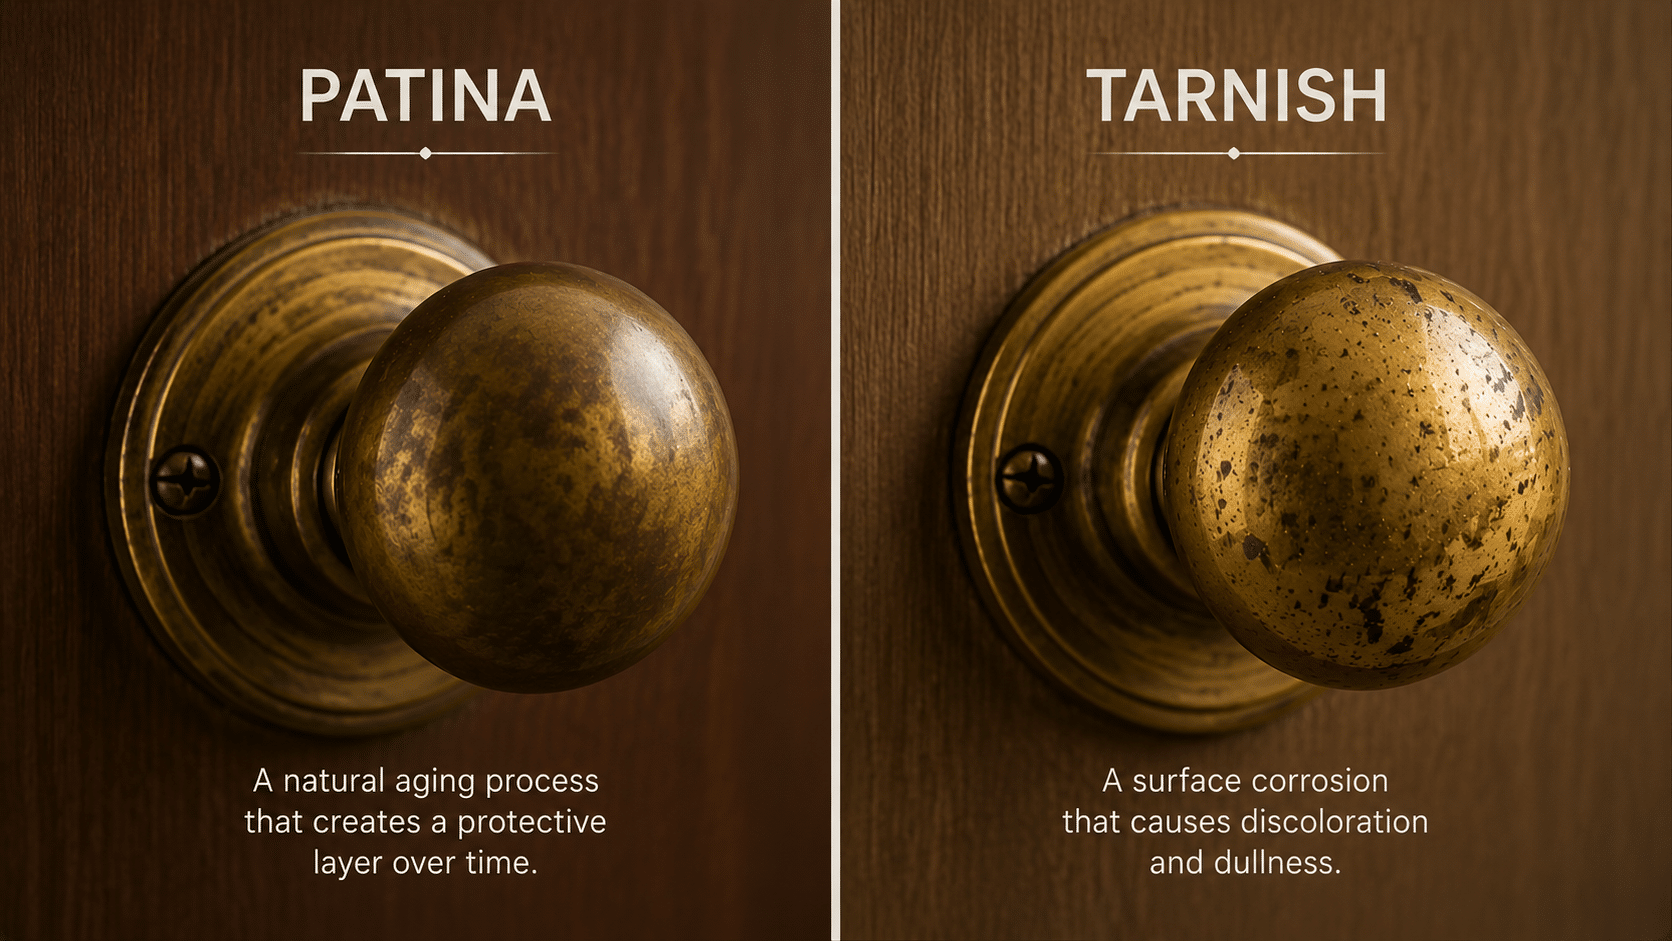
What Causes Brass Patina?
Patina forms slowly from long-term exposure to air, moisture, salts, and environmental pollutants (notably sulfur compounds and chlorides).
These reactions alter the surface chemistry and create stable, often warm brown, green, or bluish layers that develop over years.
Patina gives brass an aged, characterful appearance and is usually preserved on antiques and decorative pieces.
What Causes Brass Tarnish?
Tarnish is a faster surface discoloration caused by oxidation when brass meets oxygen, humidity, skin oils (fingerprints), or aggressive household chemicals (bleach, ammonia).
It appears as a dull, dark, or chalky film that sits on the surface and typically comes off with gentle cleaning.
Patina vs Tarnish:
| Patina | Tarnish |
| Warm, brownish-gold tones that develop slowly over years or decades | Dull, dark, or chalky buildup that looks like dirt. |
| Often desirable to collectors and antique owners | Undesirable when cleaning, usually removed. |
| Can increase or preserve an antique’s value | Removing it usually improves appearance without harming value. |
| Avoid aggressive cleaning; consult an expert for valuable pieces | Try a gentle cleaning method and observe results before progressing. |
Tips for Maintaining Brass Between Cleanings
You do not have to deep clean your brass every month. With a few simple habits and a little regular care, you can keep it looking good much longer and slow down the buildup before it becomes a bigger job.
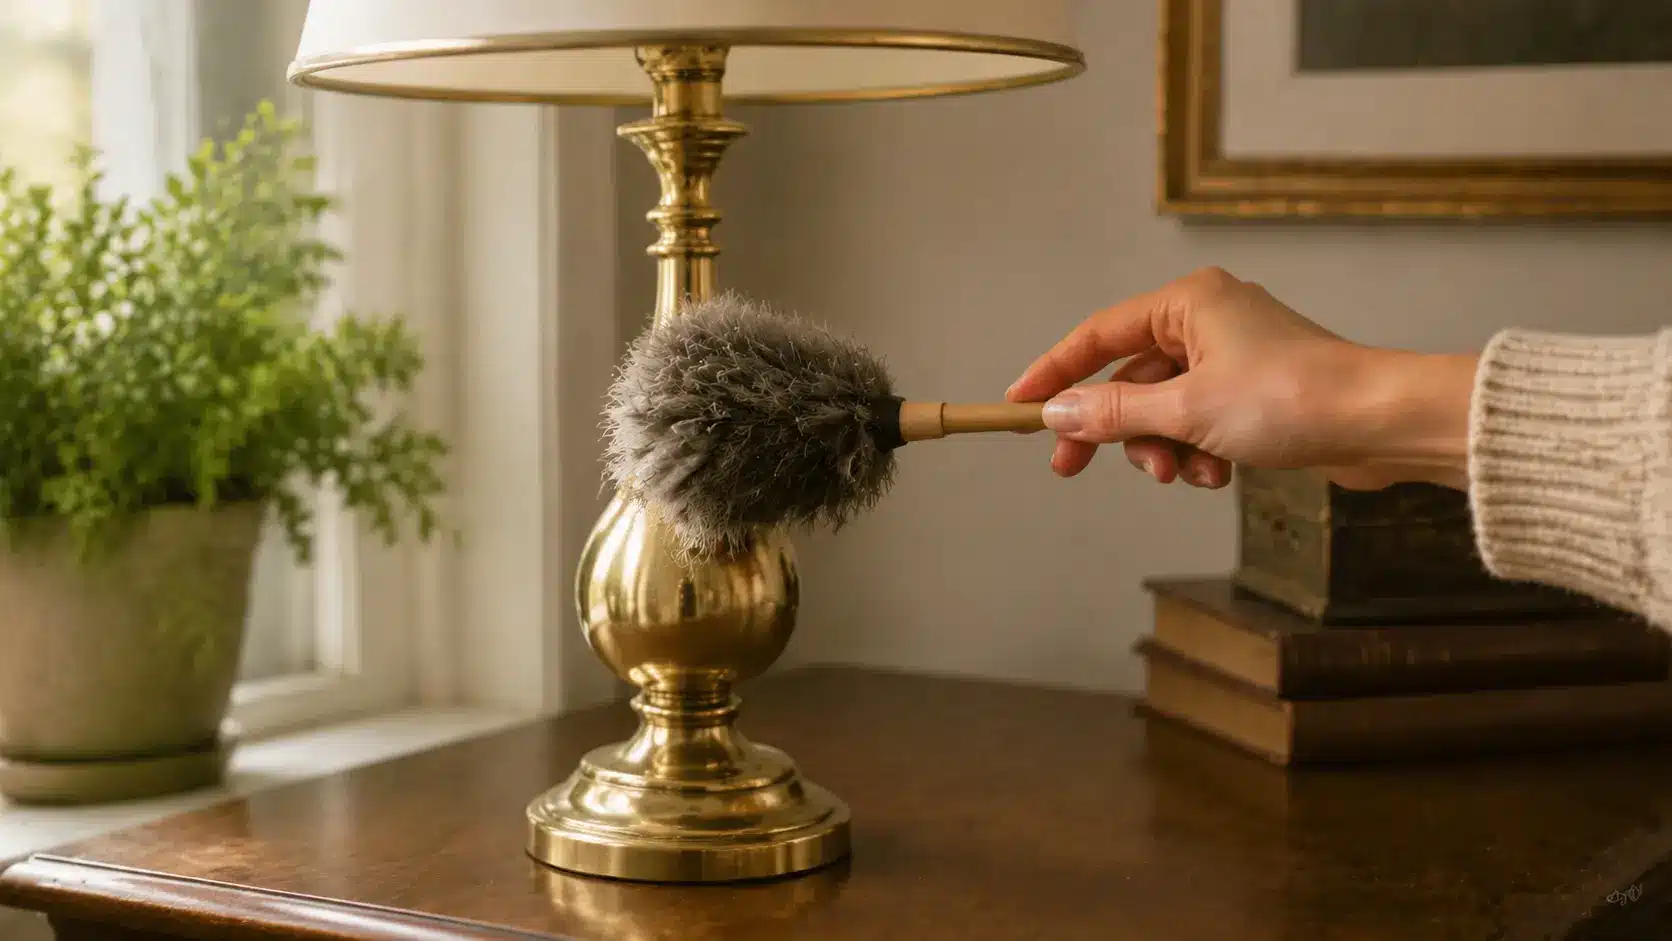
- Dust regularly: Use a soft, dry cloth to wipe down brass pieces once a week. Dust and grime build up quickly and accelerate tarnishing.
- Dry after contact with water: If your brass handles or faucets get wet, wipe them dry right away.
- Skip harsh cleaners: Bleach, ammonia, and abrasive scrubbing pads damage brass. Stick to soft cloths and mild products.
- Handle with clean hands: Natural oils and acids from your skin leave marks on brass. When handling a decorative piece, wash your hands first or wear thin cotton gloves.
- Apply a protective coating. A thin layer of paste wax or lacquer slows oxidation. Reapply once or twice a year, depending on how much the piece is handled.
What to Avoid?
A few common products can do more harm than good when cleaning brass, especially if you want to protect the finish and keep it looking good for years.
- Avoid bleach and ammonia: Both bleach and ammonia are highly reactive and can permanently damage the surface of brass. Using them may cause the metal to look dull, discolored, or uneven. Always stick to mild, safe cleaning solutions to preserve shine.
- Skip abrasive pads and harsh scrubbing tools: Steel wool, rough brushes, or scouring pads can scratch the brass surface and strip away its natural patina. Gentle materials like soft cloths or microfiber are safer and maintain the character and longevity of your brass pieces.
- Do not leave acidic cleaners on too long: Vinegar, lemon juice, or other acidic solutions work quickly to remove tarnish, but leaving them on the brass for extended periods can erode the surface. Apply briefly, then rinse thoroughly to prevent damage.
- Avoid strong brass polish on lacquered pieces: Brass with a protective lacquer coating should not be treated with harsh commercial polishes. These can dull or damage the protective layer, leading to uneven shine and potential long-term harm to the finish.
Conclusion
That grandmother’s doorknob taught me an important lesson: cleaning brass isn’t about special tools or expensive products; it’s about patience and choosing the right method for the job.
Start gently. A little lemon juice and baking soda can work wonders on pieces that have sat untouched for years. Only move to stronger methods if needed, and always rinse thoroughly and dry completely when finished.
The reward is worth it. Polished brass catches the light in a way nothing else does, adding warmth to a room and highlighting the character of old pieces.
Do you have a brass item that needs attention? Try one of these methods this weekend, and if you have a favorite trick I haven’t covered, share it in the comments; I’d love to hear what works for you.
Frequently Asked Questions
How do I tell if my brass is lacquered or unlacquered?
Lacquered brass looks glossy and resists fingerprints; unlacquered has a warmer sheen and darkens over time. Test an inconspicuous spot: if bright metal shows under a tiny scratch, it’s unlacquered.
Can I use olive oil or mineral oil on brass after cleaning?
Yes. After polishing, rub a tiny amount of olive or mineral oil into the brass and buff it in. Use paste wax or a metal sealant for a more durable, long-lasting barrier.
What’s the best way to clean brass in a bathroom without speeding up tarnish?
Rinse with warm water daily and wipe off soap. For periodic cleaning, mist with 50% white vinegar and 50% water, wait no longer than two minutes, rinse, and buff dry. Avoid harsh cleaners and abrasive pads.
How do I clean engraved or textured brass without scratching it?
Wash with warm water and a few drops of dish soap. Gently work into crevices with a soft microfiber cloth or soft-bristled toothbrush, rinse thoroughly under cool water, and pat dry with a lint-free cloth.