
Growing tomatoes in containers seems simple until your plants start wilting, producing tiny fruit, or dying unexpectedly.
Most gardeners believe that any pot will suffice, but the size of the container has a direct impact on the success of your harvest.
The right pot size can double your tomato yield while preventing common problems such as root rot, nutrient deficiency, and plant stress. When your plants have proper growing space, you’ll spend less time watering and troubleshooting.
You’ll learn which containers work best for determinate versus indeterminate plants, proper soil selection, and feeding schedules that keep your tomatoes thriving from seedling to harvest.
Get ready to grow healthier, more productive container tomatoes this season.
When Can You Plant Tomatoes?
Plant tomato seedlings outdoors about 2 weeks after the last expected spring frost date or when temperatures stay in the mid-50°F range both day and night. Soil temperatures should reach 65-70°F for successful transplanting, and the soil should be at least 60°F with all danger of frost passed.
Regional Planting Times
- Northern US (Zones 3-5): Late May to early June
- Central US (Zones 6-7): April to May
- Southern US (Zones 8-10): March to April
Best Pot Size for Tomatoes
Find the ideal pot size for cultivating healthy, productive tomato plants, ensuring sufficient space for root development and optimal growth.
| Tomato Type | Minimum Size | Optimal Size | Pot Depth | Best For |
|---|---|---|---|---|
| Cherry (Bush) | 5 gallons | 7-10 gallons | 12 inches | Small spaces, beginners |
| Determinate (Bush) | 5 gallons | 10 gallons | 12-14 inches | Patios, limited space |
| Indeterminate (Vining) | 10 gallons | 15-20 gallons | 18-24 inches | Maximum yield |
| Large Beefsteak | 15 gallons | 20+ gallons | 20-24 inches | Big tomatoes, experienced growers |
Minimum vs. Optimal Pot Size?
Minimum sizes keep plants alive but limit growth. Your tomatoes will be smaller and fewer in number. Plants may wilt faster in hot weather.
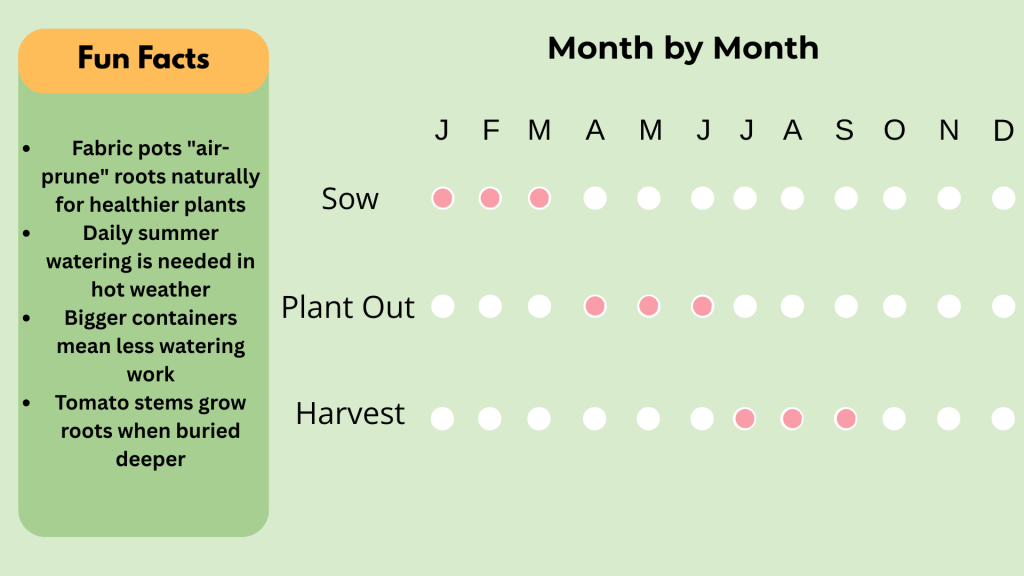
Optimal sizes let roots spread freely, keeping plants healthier and producing more fruit. Watering becomes less frequent because the soil holds more moisture.
Undersized containers cause several problems:
- Roots become crowded and bound
- Plants dry out quickly in the summer heat
- Nutrient deficiency shows up faster
- Lower fruit production overall
- Plants may stop growing early
Types of Containers for Growing Tomatoes
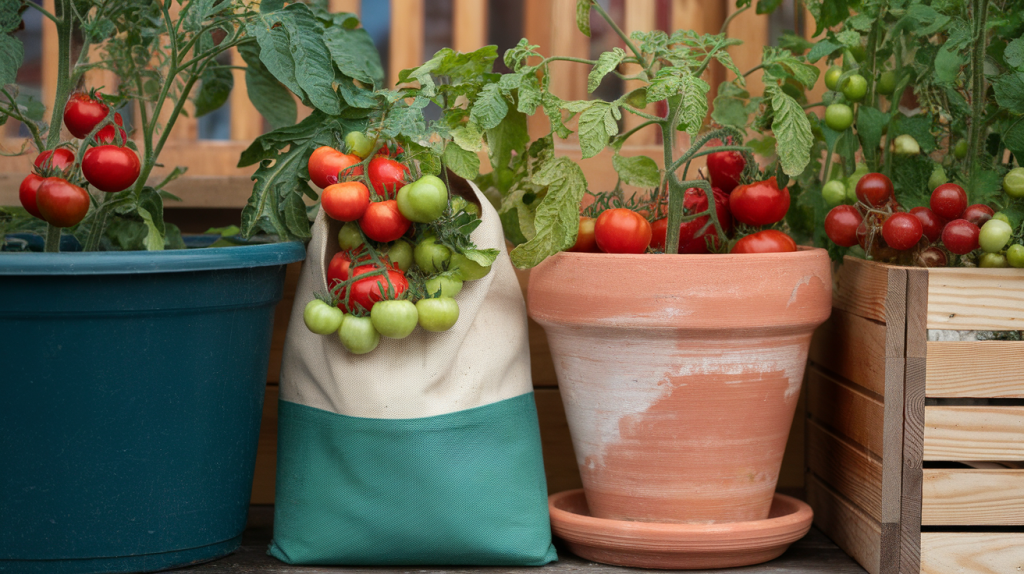
Choosing the correct container is crucial for healthy tomato growth. This guide explores various container options to help you maximize your yield and ensure your tomatoes thrive.
1. Plastic Pots
Come in many grades and styles. Food-grade plastic works best for vegetables. Dark colors absorb heat and can cook roots in the summer sun. Light-colored or white plastic reflects heat, keeping the soil cooler.
Heavy-duty plastic lasts 3-5 years with proper care and maintenance—cheap, thin plastic cracks after one season.
2. Fabric Grow Bags
Use breathable material that lets air flow through. Roots hit the fabric and stop growing instead of circling. This creates more feeder roots for better nutrient uptake.
The fabric also prevents overwatering since excess water drains out easily. Most bags last 2-3 seasons before wearing out.
3. Terracotta and Clay Pots
Terracotta and clay pots are porous materials that “breathe” naturally. Water evaporates through the walls, cooling the soil but requiring more frequent watering.
Unglazed clay works better than glazed clay because it allows more airflow. These pots are prone to cracking in freeze-thaw cycles. They work best in mild climates.
4. Wooden Containers
Provide excellent insulation against temperature swings. Cedar, redwood, and teak naturally resist rot without the need for chemical treatments. Pine and other softwoods need protective coatings to last.
Wood containers improve with age as they develop a natural patina. To extend their life, line with plastic, but punch drainage holes through both layers.
| Material | Pros | Cons | Best For |
|---|---|---|---|
| Plastic | Lightweight, retains moisture, affordable, and many sizes | Can overheat in the sun, less attractive | Beginners, budget-conscious gardeners |
| Fabric | Air pruning, foldable, prevent root binding, good drainage | Dries out faster, shorter lifespan | Experienced growers, root health focus |
| Terracotta | Attractive, breathable, stable weight | Heavy, breaks easily, and dries out quickly | Decorative gardens, cooler climates |
| Wood | Insulates roots, natural look, long-lasting | Heavy, expensive, and can rot over time | Permanent setups, cold climates |
Pot Shape & Drainage: What Works Best?
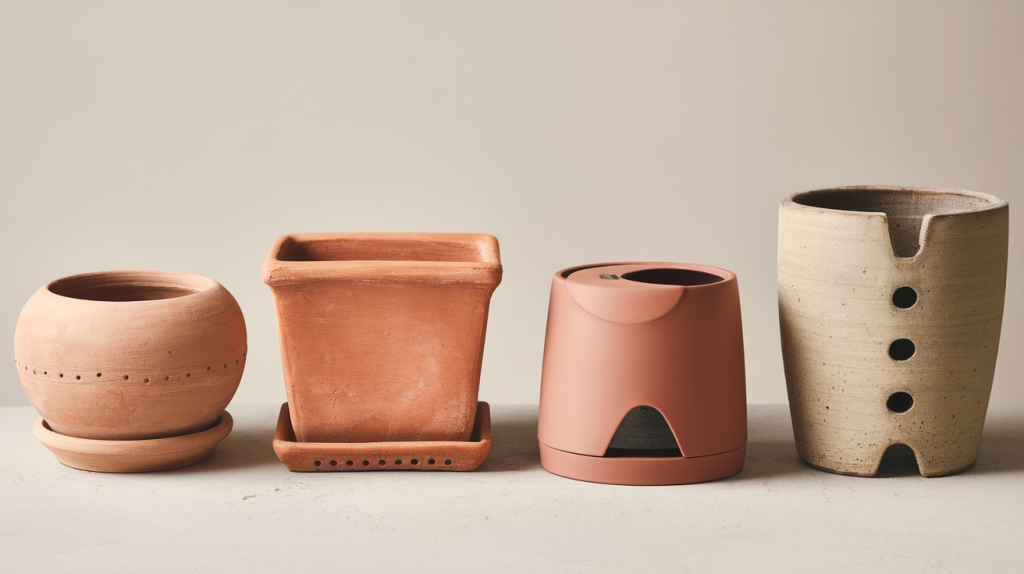
Examine how different pot shapes affect drainage and root growth, helping you choose the best container for thriving tomato plants.
- Round pots give roots the most natural growing space, and water is distributed evenly around the plant. Most standard sizes come in round shapes.
- Square containers fit together nicely and save space. They hold slightly more soil than round pots of similar width, making them great for balcony gardens with limited room.
- Self-watering pots have built-in water reservoirs. They significantly reduce daily watering needs, making them perfect for busy gardeners or vacation periods.
- Root space matters more than shape. Deep containers beat wide, shallow ones for tomatoes. Roots grow down first, then spread outward.
- Drainage holes are crucial for healthy tomato growth. Without them, water sits at the bottom and causes root rot. Drill extra holes if needed.
Proper Drainage Setup
- At least 6-8 holes in the bottom
- Holes should be ½ inch wide minimum
- Add gravel or broken pottery for better flow
- Raise pots on blocks to improve drainage
- Never let pots sit in standing water
Growing Tomatoes in Pots: A Step-by-Step Guide

Follow this detailed step-by-step guide to successfully grow tomatoes in pots, from choosing the correct container to harvesting your first crop.
Step 1: Choose the Right Container and Soil
Never use garden soil in containers because it becomes too heavy and doesn’t drain well. Choose pots that are at least 5 gallons for small varieties and 10 gallons for large ones, ensuring they have drainage holes.
Buy quality potting mix labeled “container” or “potting soil” that stays light and fluffy. You can also make your own by mixing equal parts potting soil, compost, and perlite with a handful of worm castings.
Step 2: Find the Perfect Location and Set Up Support
Place containers where they get 6-8 hours of direct sunlight daily, with morning sun being most important for drying dew and preventing disease.
Set up 6-foot-tall stakes for small varieties or 5-foot-tall cages when transplanting, not later than when the roots might be damaged. Fill containers with potting mix, leaving 2 inches of space at the top for watering.
Plant tomatoes deep by burying 2/3 of the stem to help them grow strong, healthy root systems.
Step 3: Start Your Watering Routine
Check soil moisture every day in summer by sticking your finger 2 inches into the soil and watering when the top feels dry.
Water thoroughly until it runs out of the drainage holes to ensure roots receive moisture at all depths, rather than just watering the surface.
Container plants dry out much faster than garden plants, so you might need to water them twice daily during hot weather. Always water slowly and deeply, rather than quickly, to prevent shallow watering that can create weak root systems.
Step 4: Begin Feeding Your Plants
Feed young plants with a balanced fertilizer (10-10-10) every 2 weeks for the first month to help them grow strong stems and leaves.
Choose between organic fertilizers, such as fish emulsion, that release nutrients slowly or slow-release pellets that last 3-4 months with a single application.
Always water plants before and after fertilizing to prevent root burn, and never fertilize completely dry soil. Container plants require more frequent feeding than garden plants because nutrients are washed out through the drainage holes with each watering.
Step 5: Support Growing Plants
Tie plants loosely with soft cloth strips every 12 inches as they grow taller, checking the ties weekly and adjusting them as the stems become thicker.
Remove suckers (shoots growing between the main stem and branches) when they’re small to focus energy on fruit production.
Prune lower leaves that touch the soil to prevent disease and remove any yellow or diseased leaves immediately. Good support and pruning help plants stay healthy and produce more tomatoes throughout the growing season.
Step 6: Switch to Fruit-Focused Feeding
Change to high-potassium fertilizer (5-10-10) at week 5 and feed weekly to help with fruit development rather than leaf growth.
Stop using nitrogen-heavy feeds once flowering starts, as excessive nitrogen can result in numerous leaves but few tomatoes.
Watch for nutrient problems, such as yellow lower leaves (indicating a nitrogen deficiency), brown leaf tips (resulting from overwatering or a potassium shortage), or pale new growth (signaling an iron deficiency). Use liquid fertilizer for quick fixes when problems appear, and consider foliar feeding by spraying leaves for faster absorption.
Step 7: Harvest and Maintain
Pick tomatoes when they start changing color, as they’ll continue to ripen indoors and taste better than overripe ones left on the vine.
Harvest daily once fruit starts ripening to encourage the plant to keep producing more tomatoes throughout the season. Continue your regular watering and feeding schedule until the first frost kills the plants in cold climates.
With proper care, tomato plants can keep producing fresh fruit for several months, especially in warm climate areas.
Tomato Feeding Guide & Deficiency Solutions

Learn the essential feeding schedule for tomatoes and learn how to address common nutrient deficiencies for robust plant growth and optimal yield.
Best Feeding Schedule
- Weeks 1-4: Balanced fertilizer (10-10-10) every 2 weeks
- Week 5-harvest: High-potassium fertilizer (5-10-10) Weekly
- Stop nitrogen-heavy feeds once flowering starts
Nutrient Deficiency Signs
- Yellow lower leaves: Not enough nitrogen
- Purple leaf edges: Phosphorus deficiency
- Brown leaf tips: Potassium shortage or overwatering
- Pale new growth: Iron deficiency from poor drainage
- Slow growth overall: Multiple nutrient problems
Quick fix solutions: Use liquid fertilizer for fast results. Foliar feeding (spraying leaves) is more effective than soil application. Always water before and after fertilizing to prevent root burn.
Tomato Potting: Tips & Pitfalls
Successful tomato potting requires the proper techniques and careful attention to detail. This guide covers essential tips and common pitfalls to help you grow healthy, productive tomato plants.
Expert Tips for Potted Tomatoes
- Companion planting in pots to maximize space and health.
- Pruning techniques to improve airflow and boost yields.
- Safely reusing containers for multiple growing seasons.
- Choosing the right pot size: a minimum of 5 gallons for determinate varieties.
- Installing proper support systems early in the growing season.
Common Mistakes to Avoid
- Overcrowding plants in pots that are too small.
- Using the wrong potting mix that retains too much water or lacks nutrients.
- Ignoring drainage needs leads to root rot and plant death.
- Forgetting to fertilize regularly throughout the growing season.
- Placing pots in areas with insufficient sunlight exposure.
Final Thoughts
Container size can make or break your tomato-growing success. Determinate varieties thrive in 5-gallon pots, while indeterminate plants need 10-15 gallons for maximum production.
The right pot size prevents root binding, reduces watering stress, and boosts overall harvest. Remember the key factors: Choose breathable materials, such as natural fabrics or high-quality plastics.
Use light, well-draining potting mix instead of garden soil. Feed regularly, as container plants require more nutrients than those grown in the ground.
Your container tomato’s win depends on these basics: proper pot size, daily watering, and 6-8 hours of sunlight.
Ready to start your container tomato garden? Select a pot size based on your tomato variety, gather a high-quality potting mix, and start growing.
What’s your biggest challenge with growing tomatoes in pots? Share your questions in the comments section below.