Are your potato plants ready for harvest, or are you digging too early? Many home gardeners struggle with timing their potato harvest perfectly.
Dig too soon, and you’ll get small, immature tubers. Wait too long, and your potatoes might rot in the ground or develop thick, tough skins.
But what if you could tell exactly when your potatoes are at their peak? Knowing the right harvest time means bigger yields, better flavor, and potatoes that store longer. The good news is that potato plants give clear signals when they’re ready.
This guide will show you the exact signs to look for – from plant appearance to soil testing methods. You’ll learn how to time your harvest for optimal size and quality and receive tips for proper storage.
Ready to master potato harvesting? Let’s start with the telltale signs your spuds are ready to dig.
Potato Growth Stages: Everything You Need to Know
Understanding potato growth helps you time your harvest perfectly. Potato plants go through four distinct stages that directly affect when you should dig up your crop. The journey begins with sprouting and vegetative growth, during which seeds develop into fully foliated green plants.
This stage typically lasts 4-6 weeks, during which plants focus on building strong stems and leaves. Next comes tuber initiation, when tiny baby potatoes begin forming underground. You won’t see these small tubers yet, but the plant begins shifting its energy from leaf to root development.
- Monitor foliage health – Healthy green leaves indicate active tuber growth
- Check soil moisture – Consistent watering during tuber formation boosts yield
- Watch for flower buds – Blooming signals the start of serious tuber development
The third stage is tuber bulking, where your potatoes rapidly increase in size. This is when most of the final potato weight develops over 4-8 weeks. Finally, maturation occurs as potato skins harden and become thick enough for storage.
The plant’s foliage starts turning yellow and dying back – your clearest signal that harvest time approaches. Understanding these stages means you can predict harvest timing and maximize both size and storage quality of your potato crop.
Types of Potatoes and Their Harvest Times
Different potato types have vastly different growing periods, which directly affects when you can expect to dig them up.
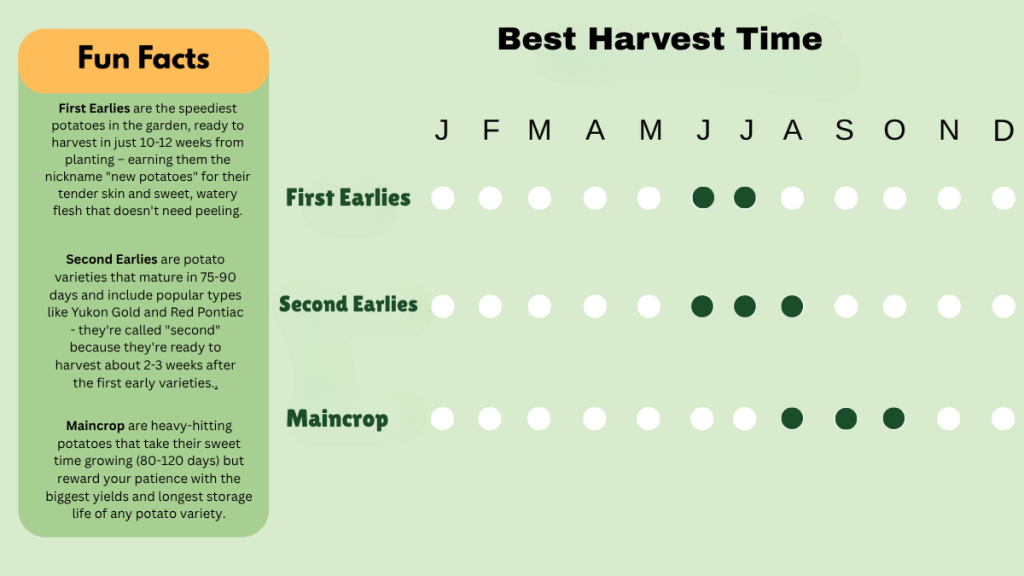
First earlies are your quickest option, perfect for gardeners who want fresh potatoes by early summer. These varieties focus on speed rather than storage, giving you tender new potatoes in just 10-12 weeks.
Second, early varieties bridge the gap between quick harvest and better yield. They take slightly longer but produce more potatoes per plant than first earlier.
Maincrop potatoes require patience but deliver the biggest harvest. These varieties are bred for maximum yield and long-term storage, making them ideal for winter food supplies.
Planning your potato garden around these timelines helps you enjoy fresh potatoes throughout the growing season. Plant a mix of all three types for continuous harvest from early summer through fall.
Signs That Potatoes Are Ready to Harvest
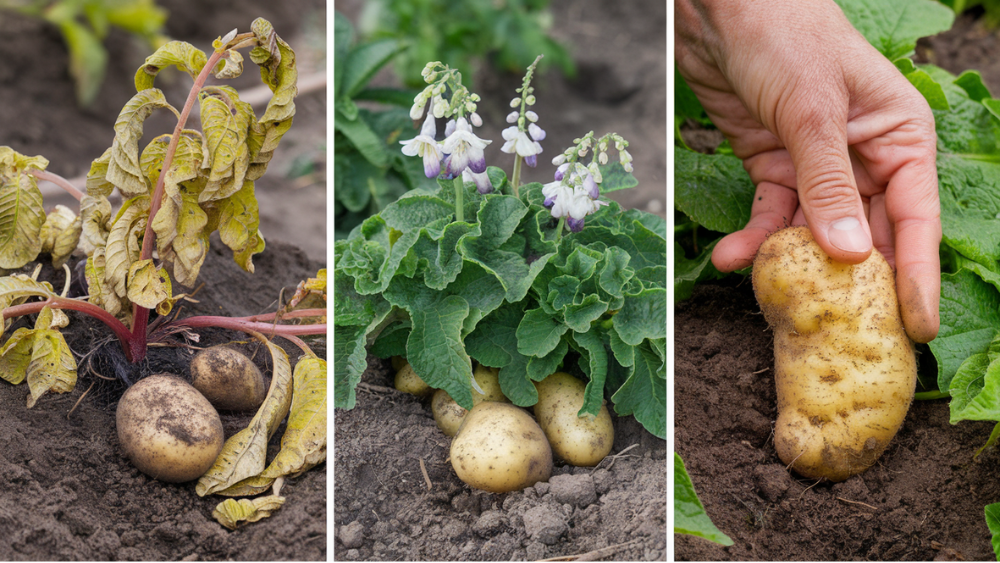
1. Foliage Dieback: Your Primary Harvest Signal
Yellow, wilting leaves are your most reliable indicator of a harvest. When potato plants finish growing, their green foliage naturally begins to die back. This yellowing process indicates that energy has ceased to flow to the tubers, and they’ve reached full size.
- Wait for 50-75% foliage dieback before harvesting for maximum potato size.
- Early varieties may show dieback sooner than maincrop potatoes.
- Don’t panic if leaves die suddenly – the disease can cause rapid dieback, but potatoes are often still good.
2. Flowering: A Helpful But Not Essential Sign
The appearance of flowers varies significantly between potato varieties. Some plants produce white, pink, or purple blooms, while others never flower at all. When flowers do appear, they indicate tuber formation has begun underneath the soil.
- Don’t rely solely on flowering for harvest timing since many modern varieties produce few or no flowers.
- Flowers typically appear 8-10 weeks after planting, when tubers begin to form.
- Missing flowers doesn’t mean missing potatoes – focus on foliage health instead.
3. Skin Firmness: The Final Quality Check
Mature potatoes develop thick, firm skins that protect them during storage. Before harvesting your entire crop, dig up one test potato and rub the skin with your thumb.
- Firm skins that resist rubbing indicate proper maturity and better storage potential.
- Easily scraped skins mean wait another 1-2 weeks for better development.
- Test multiple potatoes from different plants to get an accurate reading of crop readiness.
Harvesting Techniques: Master These Methods
Different digging approaches are more effective for various soil types. Master these techniques to minimize potato damage during harvest.
1. Fork Method: The Standard Approach
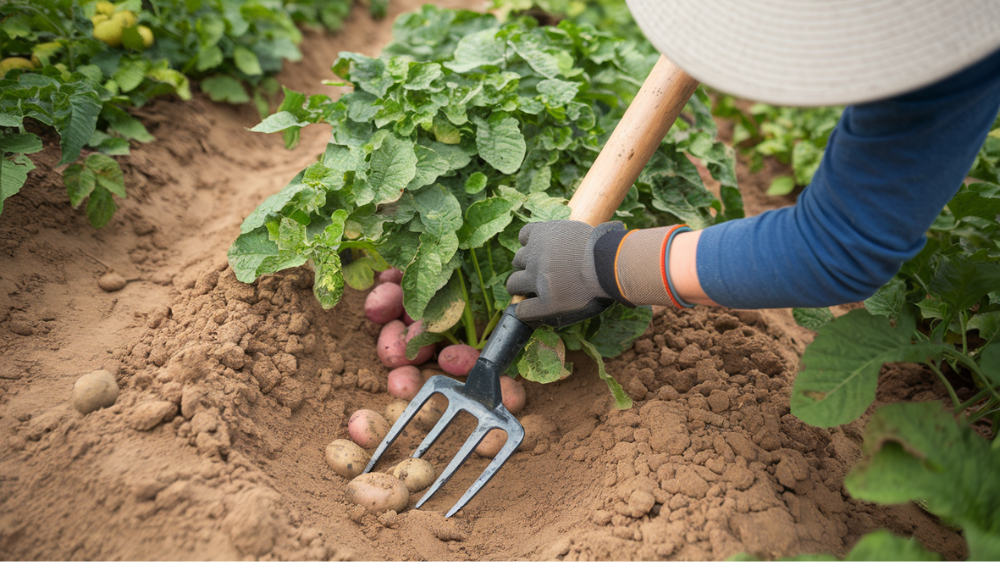
This method is most effective for most garden soils and potato varieties. The garden fork gives you control while protecting delicate potato skins from cuts and bruises. Start by positioning yourself 12-15 inches away from the plant stem to avoid accidentally spearing potatoes.
Apply steady downward pressure rather than jabbing motions to penetrate compacted soil smoothly. Insert the fork straight down at a 90-degree angle for maximum soil penetration. Rock the fork back and forth gently to loosen the soil without jerking movements.
Work in a complete circle around the plant to ensure no potatoes are missed. Check loosened soil with your hands for any potatoes the fork didn’t expose.
2. Hand Digging Method: Maximum Control
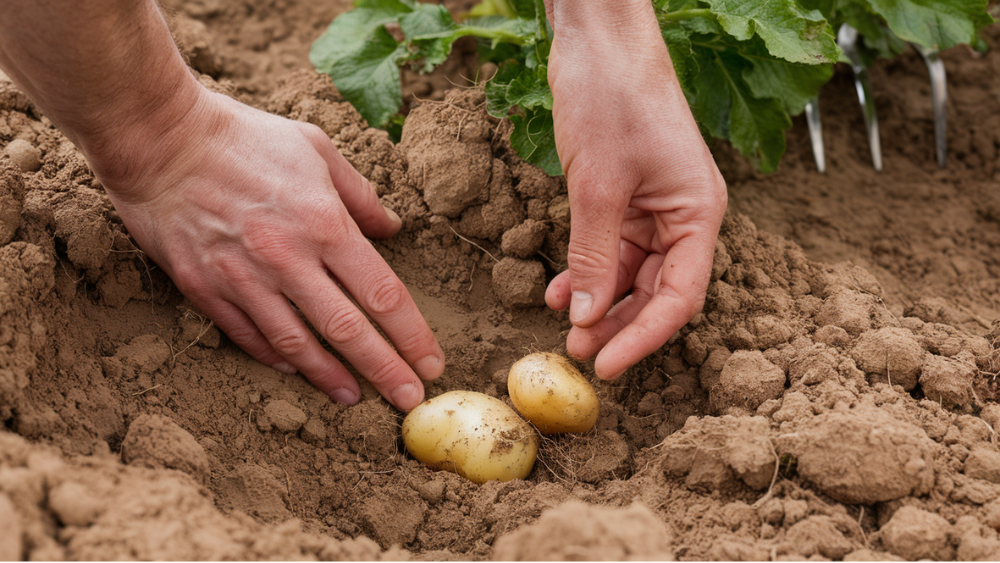
Use this gentle approach for clay soil, rocky ground, or when potatoes grow close together. Hand digging takes more time but gives you complete control over each potato. Begin by using your garden fork to break up the topsoil layer around the plant without digging deeply.
Work your hands into the loosened soil, being careful to feel for the potato shapes. When you locate a potato, trace its outline with your fingers before attempting to lift it out. Break up the surface soil crust first with light fork work to ease hand digging.
Move hands slowly through the soil to feel for potato shapes without puncturing the skins. Trace the outline of the potato completely before attempting to remove it from the soil. Rock potatoes gently back and forth to break root connections safely. Clear the soil away from each potato before lifting to prevent damage.
3. Trench Method: Best for Row Plantings
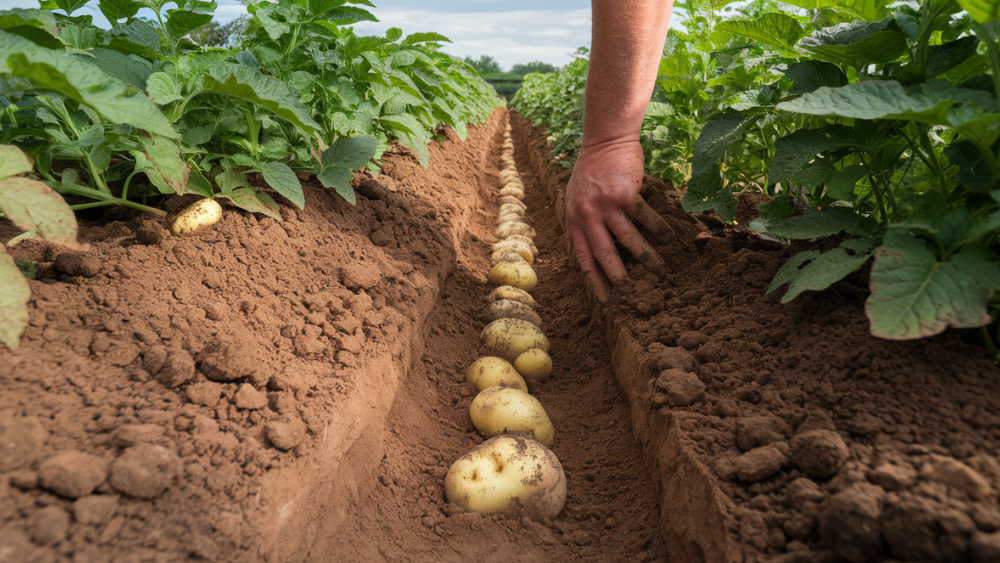
This systematic approach works perfectly for large potato plantings or raised bed gardens. The trench method exposes the locations of potatoes before you risk damaging them with your tools.
Start by digging a trench 6 inches deep alongside your potato row, positioning it about 8 inches away from the planted line. Work sideways from this trench into the potato planting area to see where potatoes are located before your digging tools reach them.
Remove soil in layers, checking each level for tubers before digging deeper. This method allows you to clear each potato completely before moving to the next section of the row, ensuring you don’t accidentally cut through valuable tubers with your spade or fork.
Post-Harvest Handling and Storage of Potatoes
Proper handling after harvest determines how long your potatoes stay fresh and safe to eat. The first few hours after digging are critical for preserving quality and preventing spoilage.
I. Curing: Essential First Step After Harvest
Curing hardens potato skins and seals minor cuts that occur during the harvesting process. This natural process creates a protective barrier that prevents moisture loss and bacterial infection.
1. Proper curing process: Allow freshly harvested potatoes to sit in warm, humid conditions for 7-10 days, allowing their skins to thicken and harden. This process seals small cuts and creates a natural protective layer.
2. Ideal curing environment: Maintain a temperature of 60-65°F with high humidity and good air circulation around each potato. The curing area should be well-ventilated but protected from direct sunlight.
3. Daily turning routine: Rotate each potato once per day during the curing period to ensure even air exposure. This simple step prevents soft spots from developing and ensures uniform skin hardening.
4. Damage inspection: Check potatoes daily during curing to identify and remove any with cuts, bruises, or signs of decay. Damaged potatoes should be used immediately or discarded.
II. Storage Conditions: Creating the Perfect Environment
Creating the right storage environment helps keep potatoes fresh for months, preventing sprouting and decay.
1. Temperature control: Maintain a consistent storage temperature of 38-40°F to slow potato respiration and prevent sprouting. Higher temperatures cause sprouting, while lower temperatures create off-flavors.
2. Humidity management: Keep storage humidity at 85-90% to prevent potato shriveling while ensuring adequate ventilation. Too little humidity causes wrinkles, while excessive moisture promotes mold and rot.
3. Complete darkness requirement: Store potatoes in total darkness to prevent chlorophyll production and the formation of solanine. Even small amounts of light can trigger the dangerous phenomenon of greening.
4. Ventilation necessity: Provide adequate air circulation around stored potatoes to prevent the buildup of carbon dioxide and moisture accumulation. Good airflow removes gases and maintains proper humidity.
5. Container selection: Use breathable storage containers, such as wooden crates, mesh bags, or perforated cardboard boxes. Plastic bags trap moisture and gases, creating perfect conditions for rot.
III. Avoiding Green Potatoes: Preventing Dangerous Solanine
Green potatoes contain toxic solanine that can cause serious health problems if consumed.
1. Light prevention methods: Completely block all light sources from reaching stored potatoes using opaque containers and dark coverings. Even fluorescent lights can trigger greening.
2. Understanding solanine toxicity: Recognize that green potatoes contain solanine, a natural toxin that causes a bitter taste and symptoms of poisoning. Solanine levels increase rapidly once greening starts.
3. Regular inspection routine: Check stored potatoes monthly for signs of greening and remove any affected tubers immediately. Green potatoes should be discarded completely.
4. Storage area evaluation: Inspect storage locations for potential light leaks from windows, doors, or artificial lighting sources. Even brief exposure during storage checks can start greening.
5. Safe disposal practices: Discard green potatoes in compost or trash rather than feeding them to livestock or pets. Green potatoes should never be cooked or eaten.
Conclusion
Timing your potato harvest correctly makes the difference between a mediocre crop and a bountiful one. The key signs are clear: wait for the foliage to die back, test skin firmness, and choose dry weather for digging.
Remember that different potato varieties have different harvest windows – first earlies in 10-12 weeks, second earlies in 12-14 weeks, and maincrop varieties in 20-26 weeks.
Proper harvesting and storage techniques protect your hard work. Use the right tools, cure your potatoes for 7-10 days, and store them in cool, dark conditions. Avoid common mistakes, such as harvesting too early or damaging tubers during digging.
What’s your biggest challenge with potato harvesting? Share your experiences in the comments below, and don’t forget to check out our guide on storing root vegetables for winter to keep your harvest fresh for months.