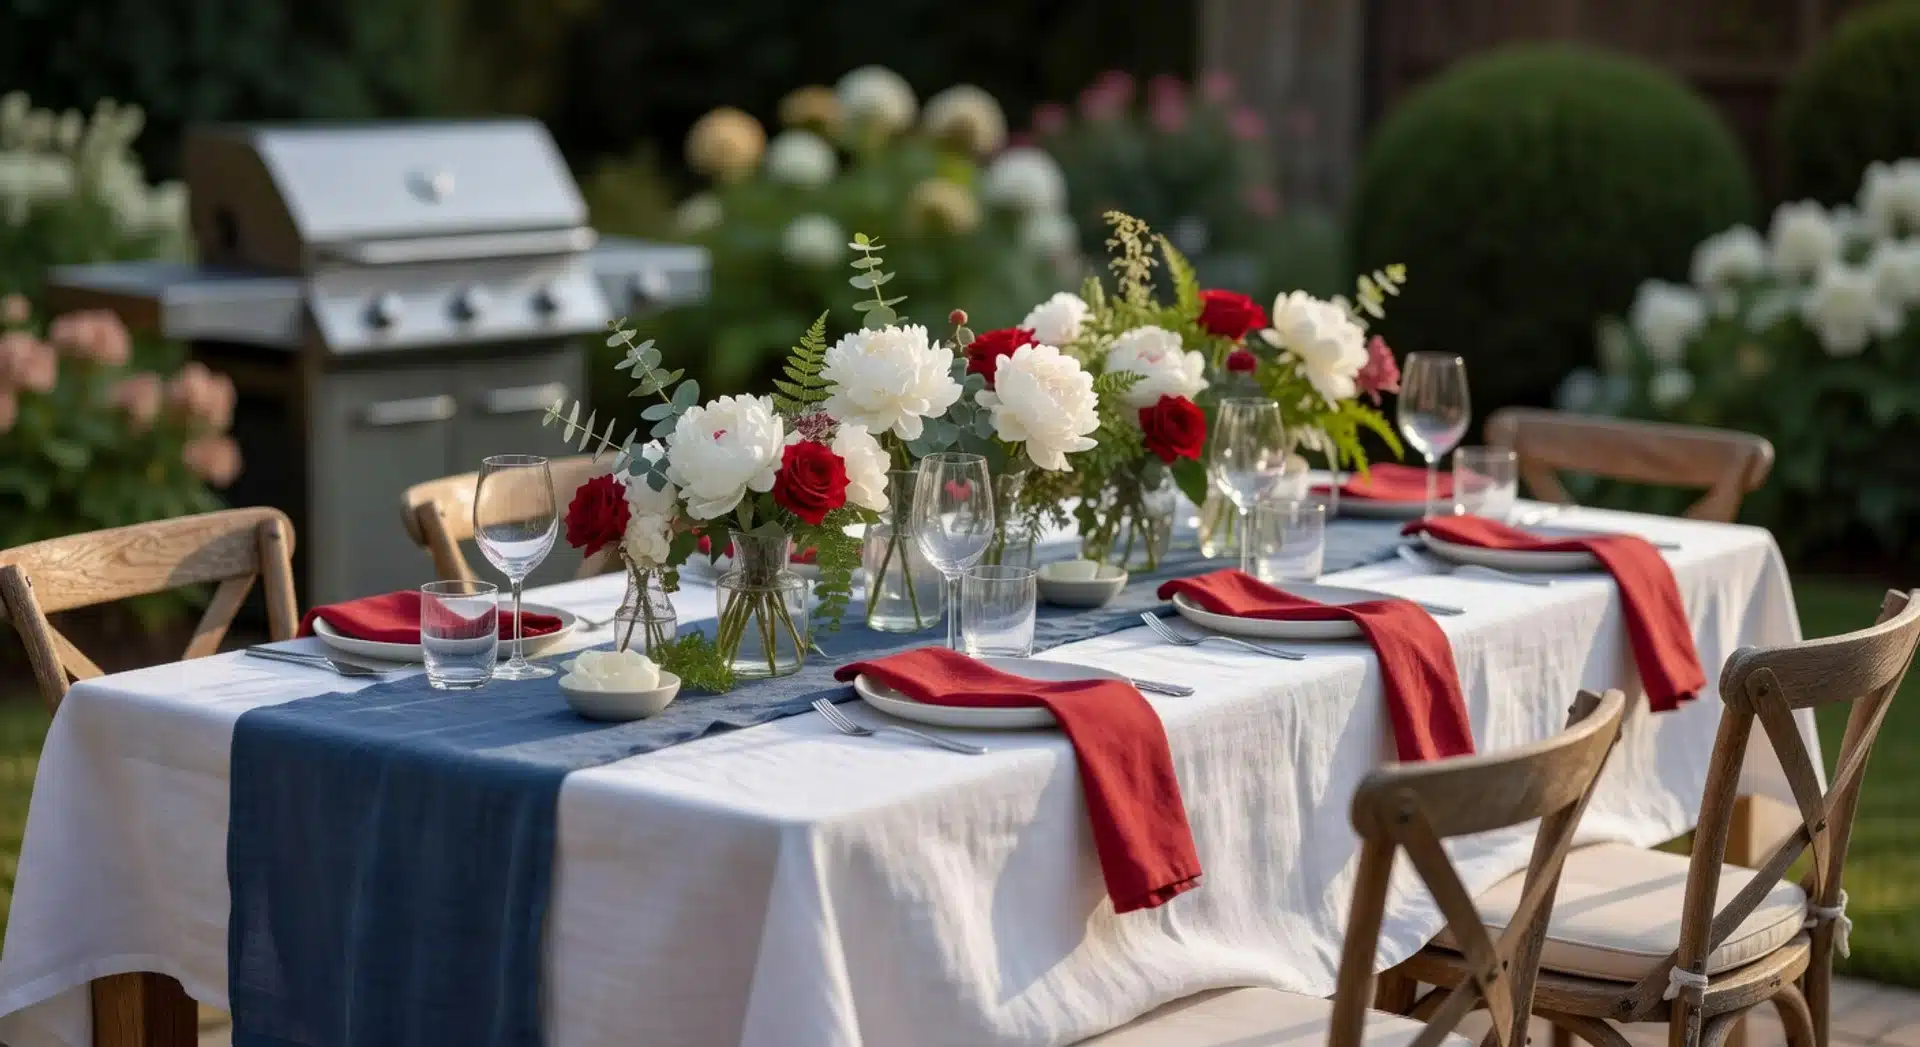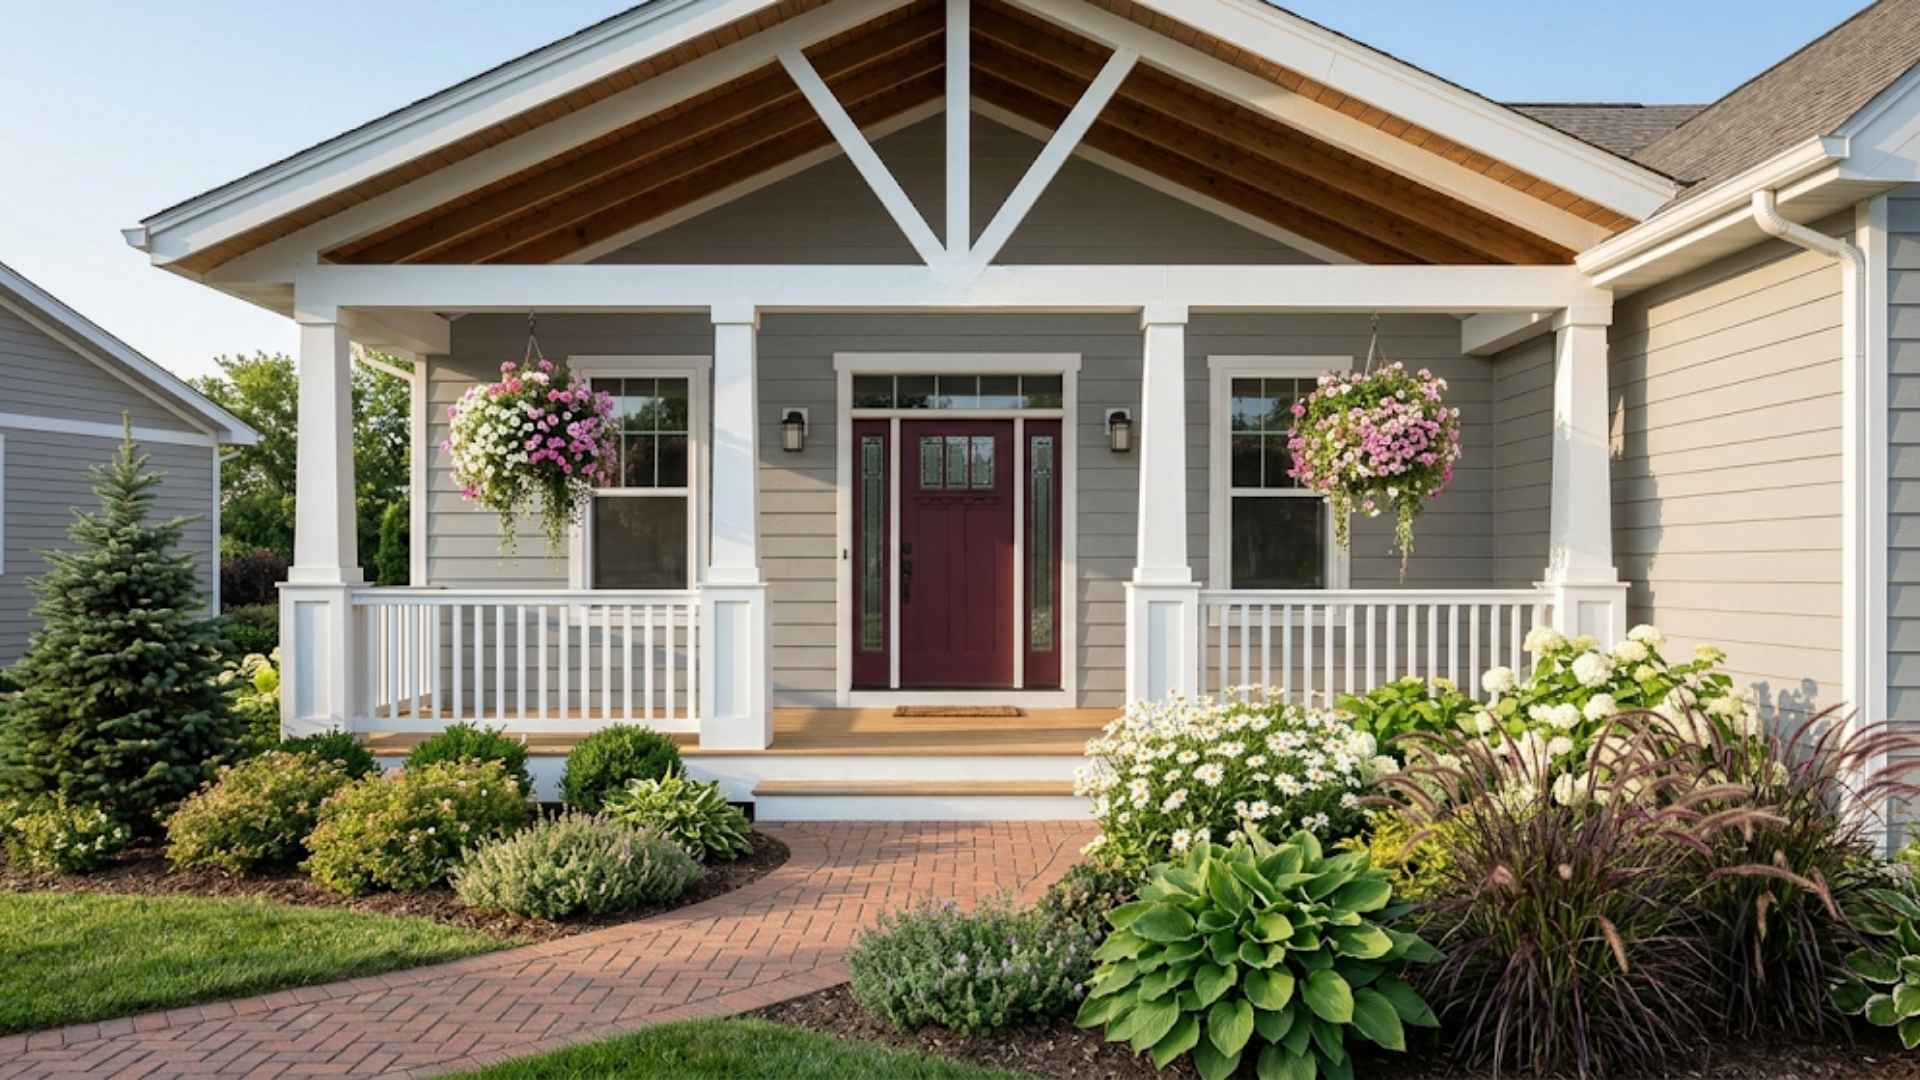

Does your front porch feel like it is missing something? I spent years working on residential exteriors, and I can tell you, the right planter setup changes everything about a home’s first impression.
II’ll walk you through how to pick the correct pot for your space, what plant combinations hold visual weight, and which arrangements genuinely photograph well.
I also cover tried-and-tested setups, the top plant picks for every light condition, a care routine that keeps things fresh year-round, and the pitfalls that cost most homeowners both money and time.
No fluff. No guesswork. Just real ideas pulled from hands-on residential projects. Ready to give your entryway a proper upgrade?
Let’s get into it!
How to Choose the Right Planters for A Front Porch?
Choosing the right planters was the first real decision I made before buying a single plant. The wrong size, material, or shape threw off the whole look of a porch, no matter how beautiful the flowers were.
Match the Planter Size to the Scale of the Porch:
When I worked on a large covered porch, I found that tall, wide planters held their own without looking lost. But on a small stoop, an oversized pot blocked the entry and felt heavy.
I always measured the available floor space first. My rule of thumb: the planter should not take up more than one-third of the usable width of the porch.
Use Materials That Suit Your Climate and Home Exterior:
When I picked a material, I considered both aesthetics and long-term durability. Here is a quick breakdown I referred to often:
| Material | Best Climate | Durability |
|---|---|---|
| Terracotta | Dry, mild climates | Cracks in hard frost |
| Fiberglass | All climates | Very high |
| Wood | Moderate climates | Medium with sealing |
| Metal | Dry or warm climates | High, but heats up fast |
I also matched the finish to the home exterior. A brick facade paired well with terracotta or dark metal. For a modern home, I reached for clean-lined fiberglass or concrete every time.
Pick Shapes That Frame the Door Without Crowding the Entry:
In my experience, tall and narrow planters worked best on either side of a front door. They drew the eye upward, creating a framed, welcoming look.
I avoided round, wide planters placed right at the door threshold. They tended to block foot traffic, making the entry feel smaller than it was.
Check Drainage Before Planting Anything:
Poor drainage was the top reason I saw porch plants fail early. I always check for drainage holes before buying any pot.
If a planter had none, I either drilled holes myself or used it as a cachepot with a drilled inner pot sitting inside.
| What Makes a Front Porch Planter Look Balanced?
I followed one simple rule: thriller at the center, fillers around it, spillers trailing over the edge. I repeated two colors across every pot and mixed the heights front to back. That alone made the whole porch feel planned. |
27 Front Porch Planter Ideas to Copy
Over the years, I pulled together ideas that genuinely worked on real porches. These are the combinations I kept returning to.
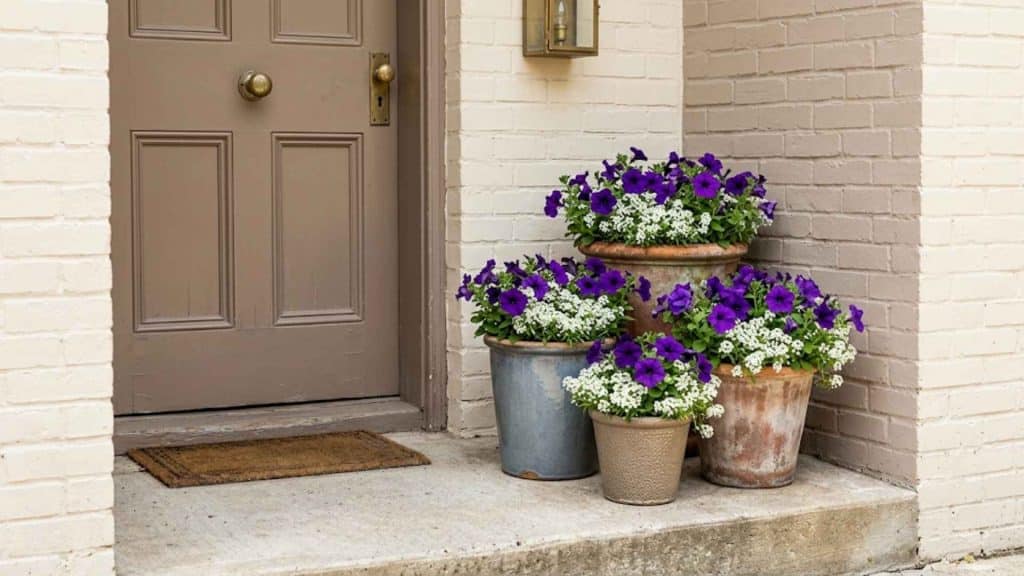
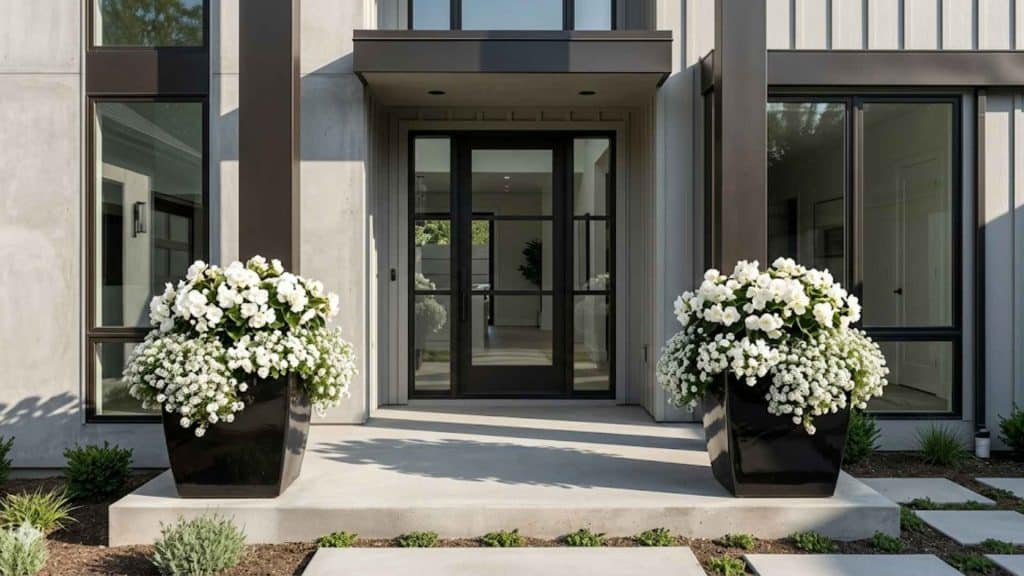
1. Matching Urn Planters on Both Sides of the Door

Identical urns flanking a front door are the oldest trick in curb appeal, and it works every time.
I kept boxwoods inside for year-round structure. These do best in urns that are at least 18 inches wide so the root ball has room to breathe.
Expect to spend $40-80 per urn at a big-box store, or $150+ if you want something with real weight. Trim the boxwoods into spheres twice a year (spring and late summer), and they stay tight without much fuss.
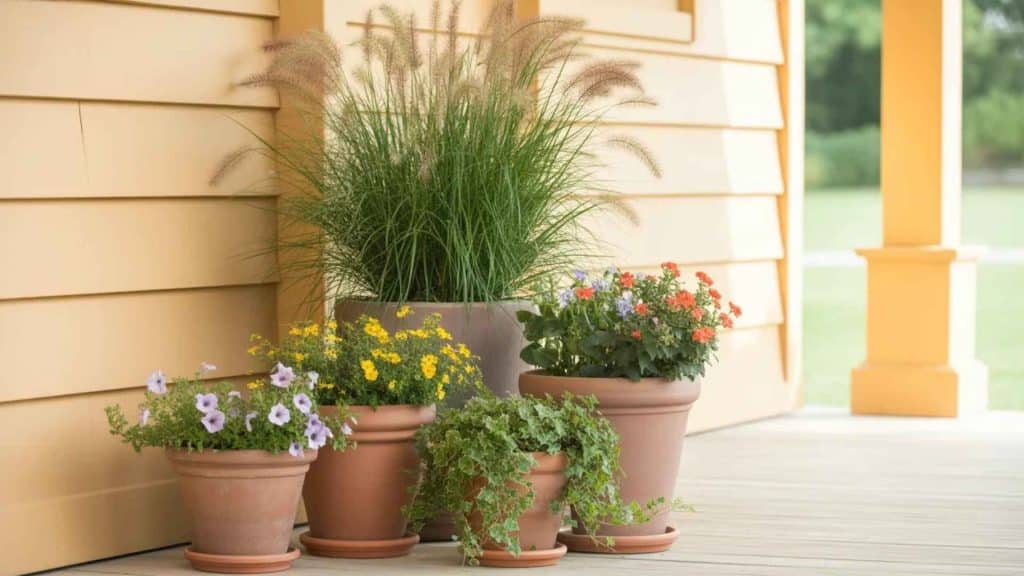
2. Tall Modern Black Planters With Architectural Grasses
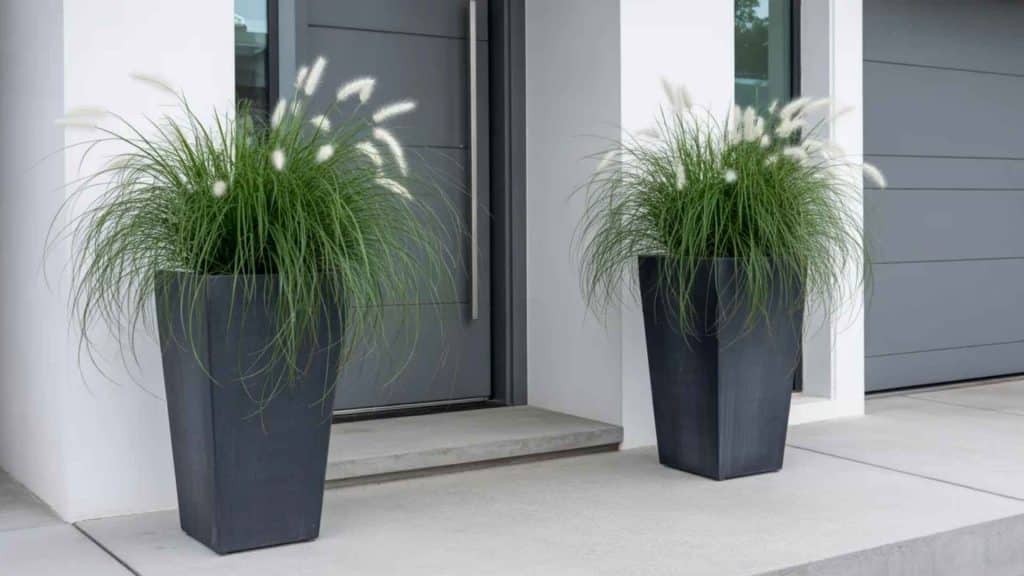
Black square planters with fountain grass gave a sharp, structured look to every contemporary home I placed them on.
The grass moves in the breeze, which adds life to what would otherwise be a static arrangement. Purple fountain grass is the go-to, but if you want something that comes back every year in zones 5-9, try Karl Foerster feather reed grass instead.
It stays upright through winter and the dried seed heads look good even in January.
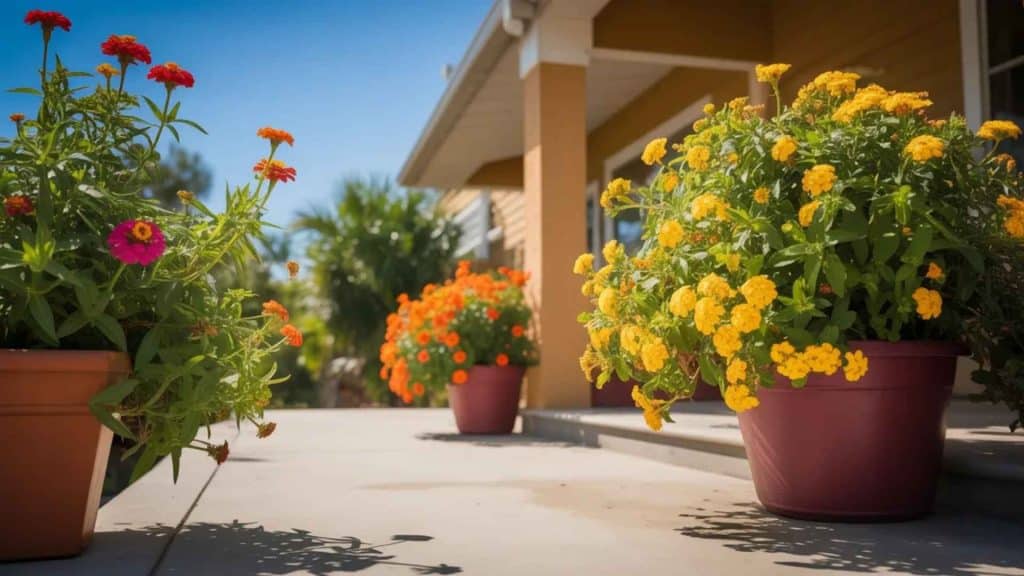
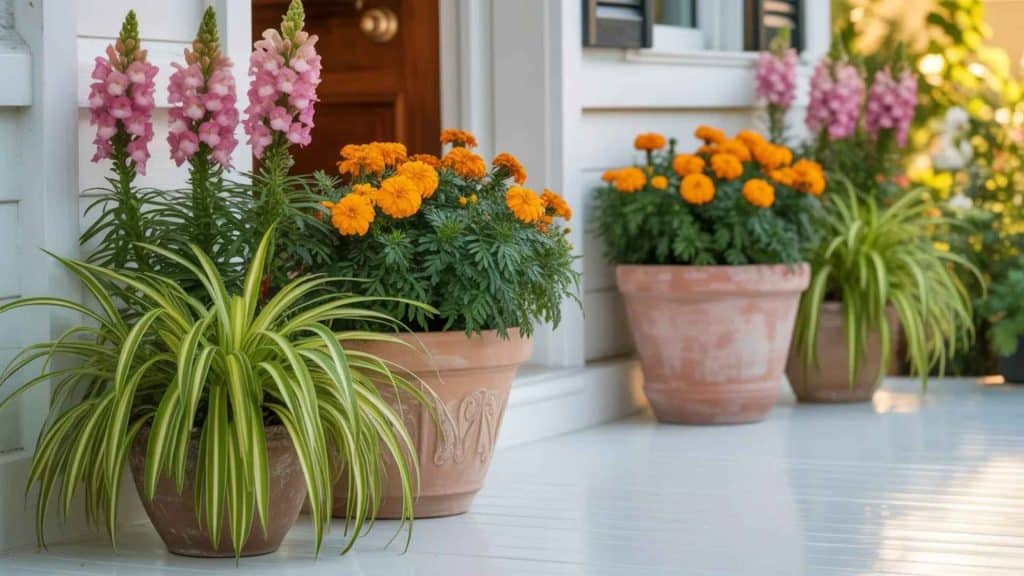
3. Colorful Cottage-Style Flower Pots
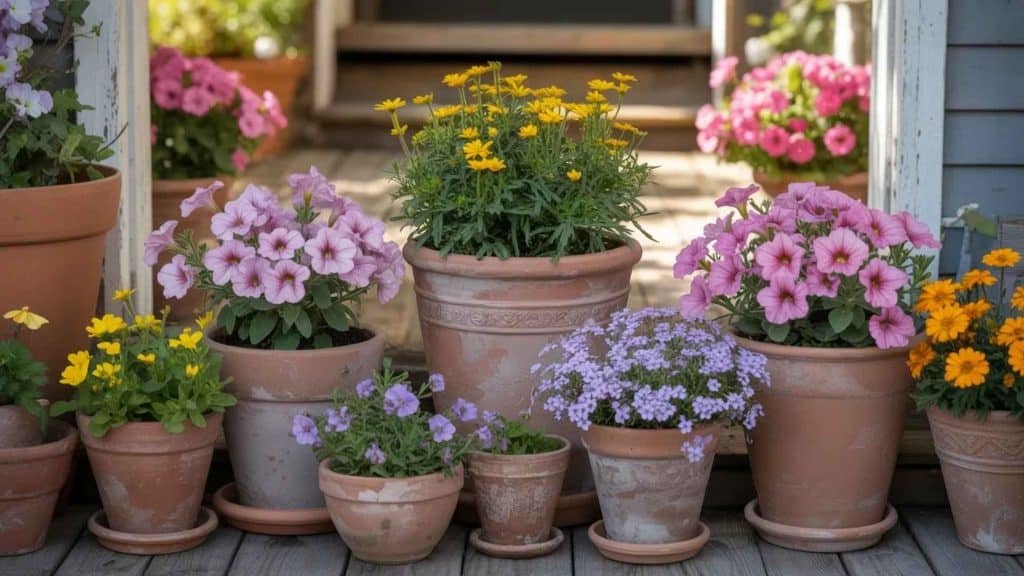
Mismatched terracotta pots crammed with petunias, marigolds, and verbena in every color you can find. The mess is the point. I grouped five or six pots of different sizes on the steps and let them overlap.
Cottage style only works if it looks unplanned, so do not try to match the pot colors or line them up symmetrically. The one rule I did follow: at least two pots should spill onto the step below to create a cascading effect.
4. Evergreen Porch Planters for Year-Round Structure
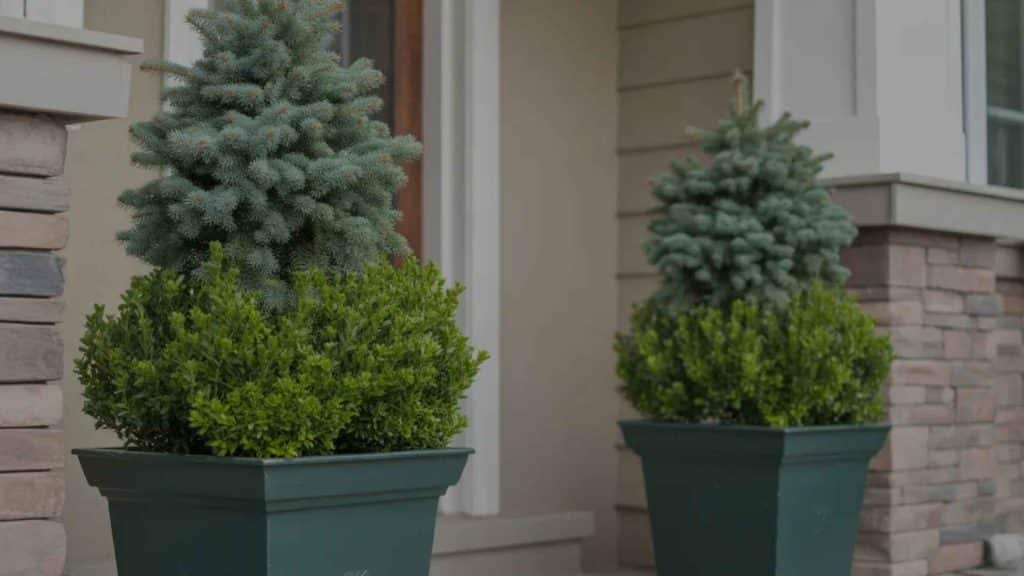
Boxwood spheres and dwarf conifers for a porch that looks good in every season without seasonal swaps. These are the lowest-maintenance options on this list.
Water when the top inch of soil is dry, feed once in spring with a slow-release granular fertilizer, and trim to shape in June. That is the entire care routine.
I used these as a permanent base and then tucked seasonal flowers around them: pansies in spring, petunias in summer, mums in fall, and evergreen branches in winter.
5. Herb Planters Near the Front Steps
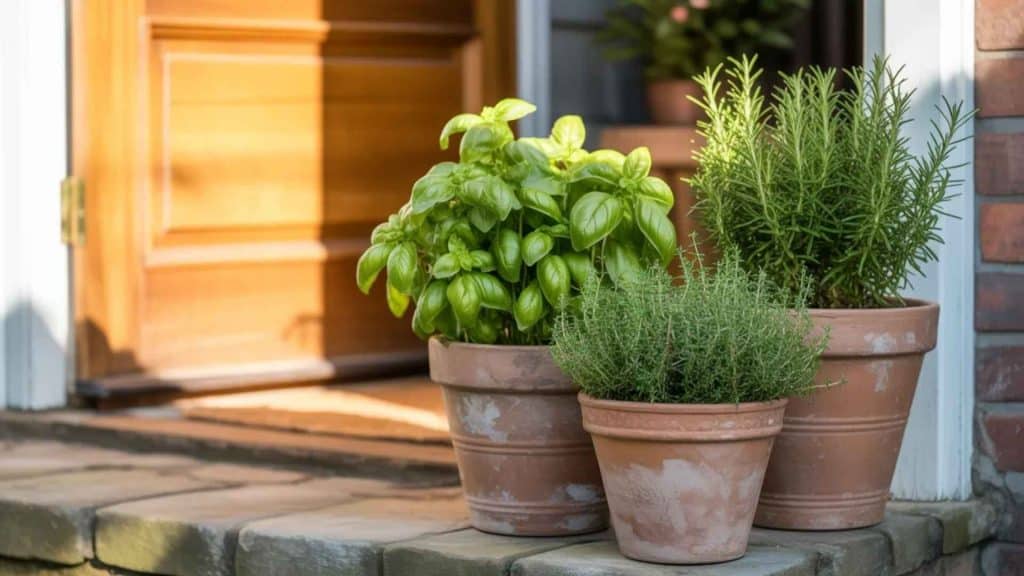
Rosemary, basil, and thyme are grouped in terracotta pots close to the front steps. These need at least 6 hours of direct sun, so this works on south or west-facing porches. The rosemary will overwinter down to about zone 7.
Basil is strictly a warm-season plant that dies at the first hint of frost, so plan to replace it in October. The upside beyond looks: guests notice the smell before they even reach for the doorbell, and you have fresh herbs 10 steps from your kitchen.
6. Layered Planters With a Thriller, Filler, Spiller Combo
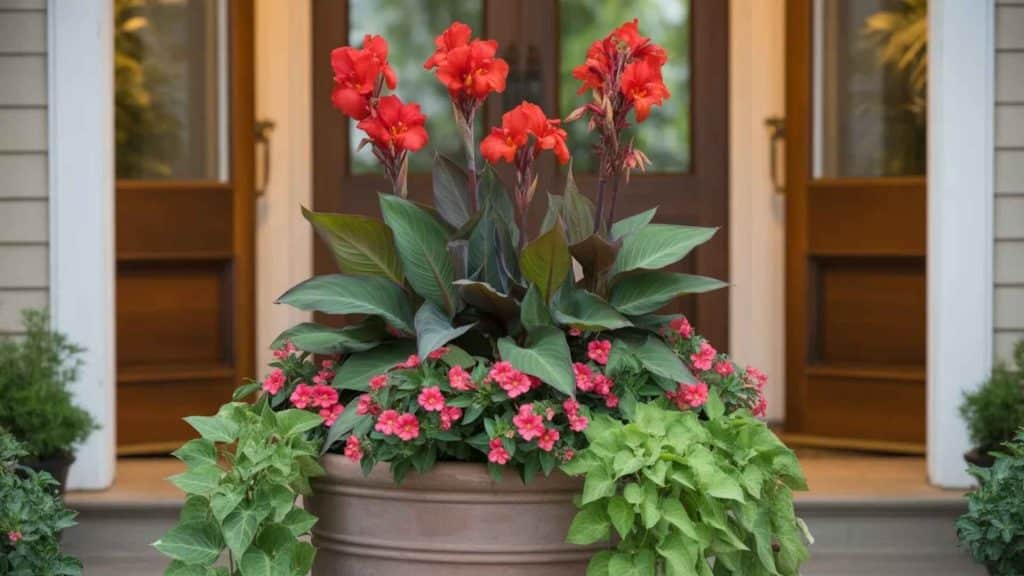
The thriller-filler-spiller formula is the backbone of container gardening for a reason. Canna lily stands tall in the center (the thriller), impatiens fill the middle layer (the filler), and sweet potato vine trails over the edge (the spiller).
Use a pot at least 16 inches in diameter because three plant types need sufficient soil volume to coexist without competing for water. Feed with liquid fertilizer every two weeks, or the filler layer fades by midsummer.
7. Monochrome White and Green Porch Planters
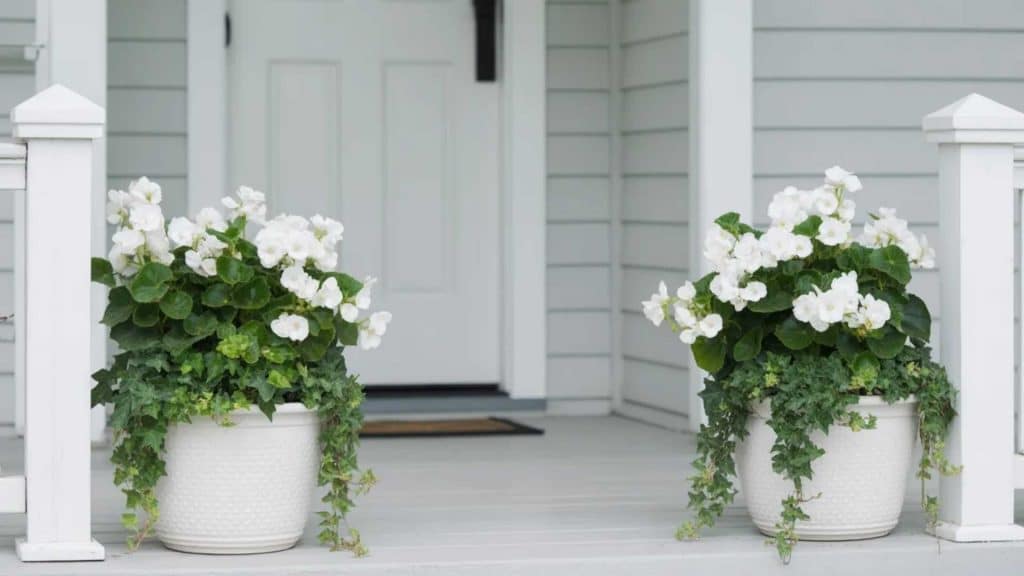
White pots, white flowers, green foliage. That is the entire formula. I used white impatiens with trailing English ivy in glazed ceramic pots, and the restraint made the entry feel polished without looking overdone.
This setup works particularly well on homes with a dark-painted front door because the contrast does the heavy lifting. Swap in white begonias for sunnier spots since impatiens scorch in direct afternoon light.
8. Vintage Galvanized Tubs With Seasonal Flowers
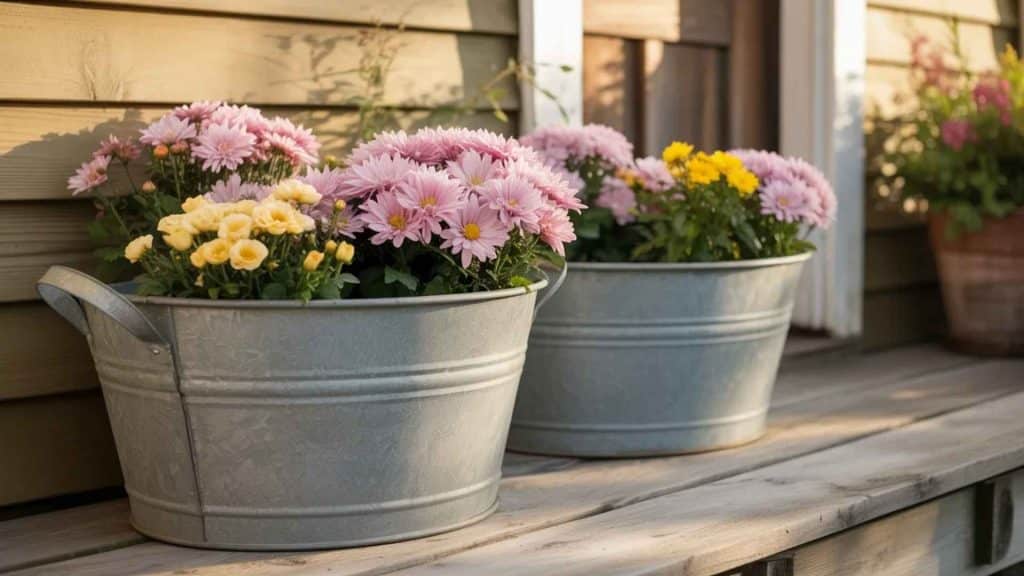
Old galvanized wash tubs from flea markets and estate sales are my favorite planter hack. Drill three to four drainage holes in the bottom with a step bit, fill with potting mix, and plant whatever is in season.
These tubs have more character than anything you will find at a garden center. I paid between $10-25 per tub, and they outlasted every plastic pot I have ever bought. They develop a nice patina over time that only improves the look.
9. Window Box and Floor Planter Combinations
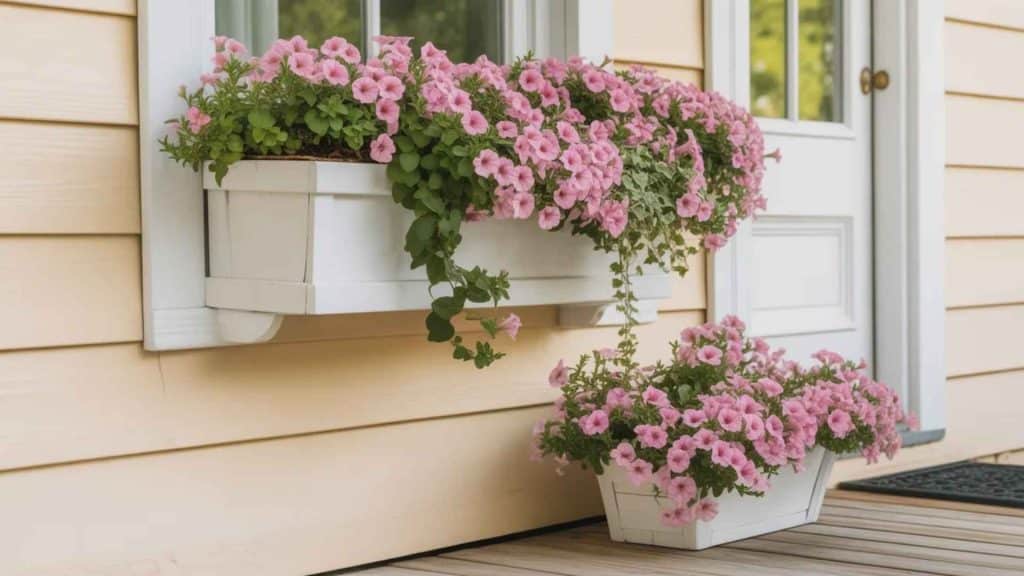
A window box above paired with a matching floor planter below creates vertical layering that makes small porches feel deeper. The key is matching the planter style and keeping the plant palette connected.
I used the same trailing petunia color in both the window box and the floor pot, then added a taller centerpiece (usually a spike dracaena) to the floor planter only. This way, the arrangement reads as a cohesive design rather than two unrelated plantings.
10. Lantern and Planter Pairings for the Entry
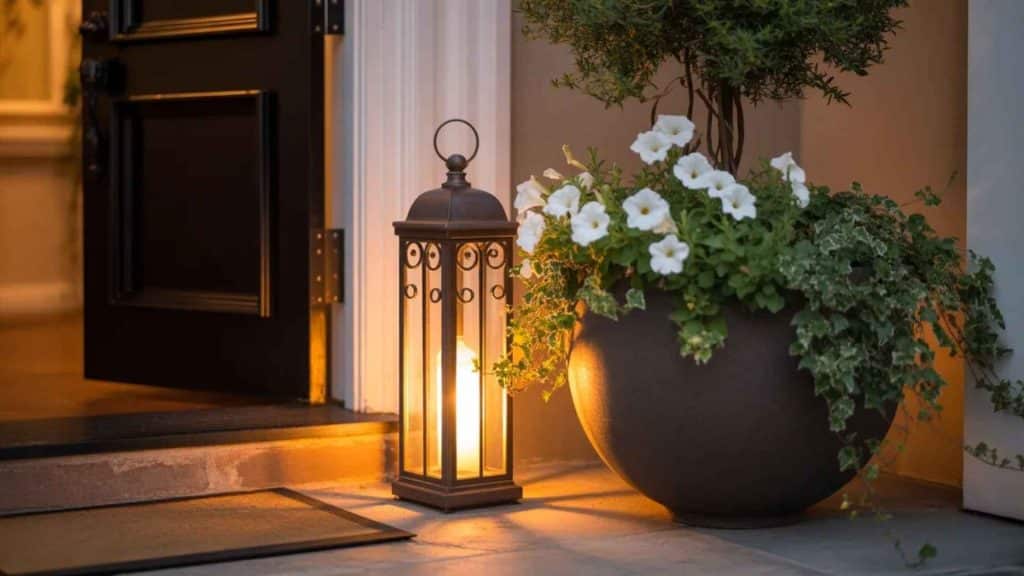
A tall lantern next to a rounded planter at the door adds warmth at night and visual interest during the day. The height contrast matters here. Aim for the lantern to be at least 6 inches taller than the planter so it reads as a deliberate pairing rather than two random objects.
Battery-operated candles inside the lantern are safer than real flames near the door, and the newer flickering LED versions look convincing enough. I placed the lantern on the knob side of the door and the planter on the hinge side.
11. Large Statement Planters for Wide Porches
A wide porch with small pots looks worse than a wide porch with nothing.
I learned this the hard way on a 12-foot-wide covered porch where the homeowner had four 8-inch pots scattered around. We replaced them with two 24-inch fiberglass planters and planted banana leaf cannas in each.
The porch went from feeling empty to feeling like an entrance. If your porch is wider than 8 feet, your planters need to be at least 20 inches in diameter, or they will look like afterthoughts.
12. Compact Containers for a Small Stoop
Three pots of different heights are grouped together. That is all a small stoop needs. I used a 14-inch pot in the back, a 10-inch in the middle, and an 8-inch in front. All three sat on the same side of the door to leave the entry clear.
In tight spaces, one side only is the rule. The moment you put planters on both sides of a narrow stoop, the entry feels like an obstacle course.
13. Neutral Ceramic Planters for a Clean Look
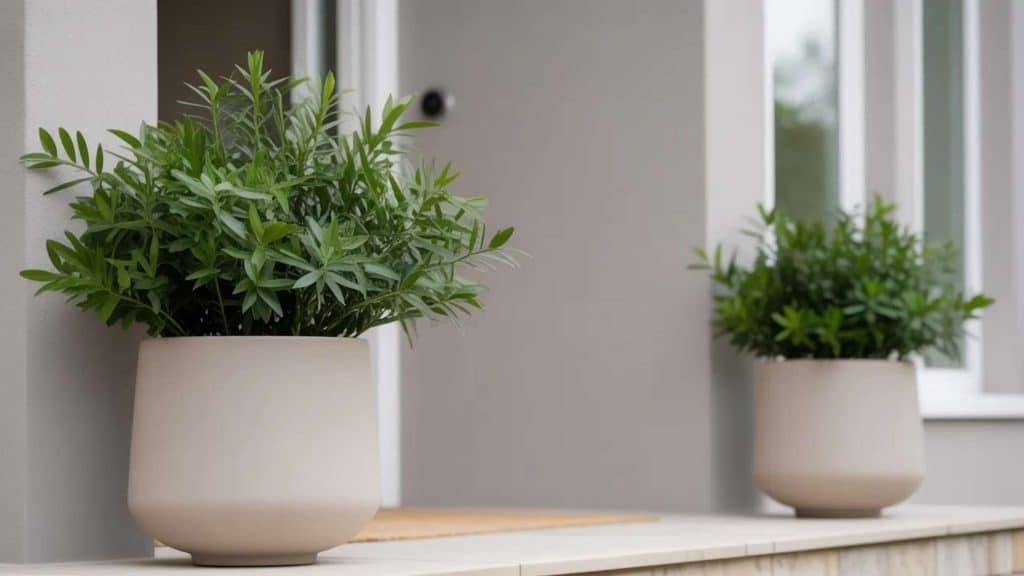
Matte beige or grey ceramic pots disappeared into the architecture of homes with neutral siding, which was exactly the point. The plants became the focus instead of the container.
I filled these with a single variety, usually Boston fern or a trailing pothos, rather than mixing. When the pot is quiet, one bold plant reads better than a busy arrangement.
14. Rustic Wood Crate Planter Displays
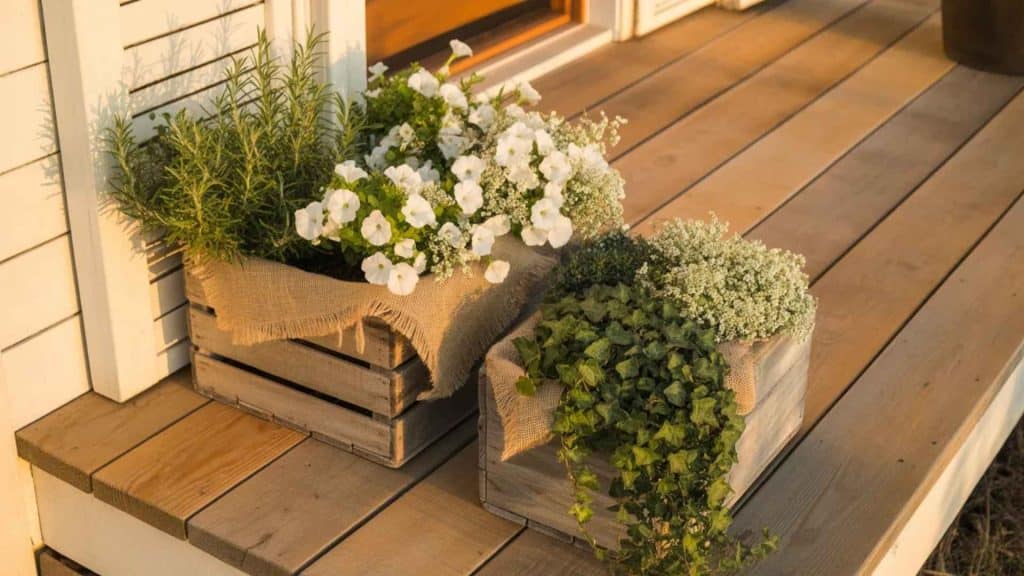
Wooden crates lined with landscaping fabric or burlap and filled with herbs or trailing flowers. These suit farmhouse-style porches. Stack two crates at different angles for a more interesting display.
Untreated wood weathers naturally and looks better with age, but it will break down in two to three seasons. I coated mine with a clear exterior sealant to get an extra year out of them.
Cost: about $8-15 per crate from a craft store, or free if you ask at your local farmers market.
15. Tropical Planters for a Bold Summer Porch
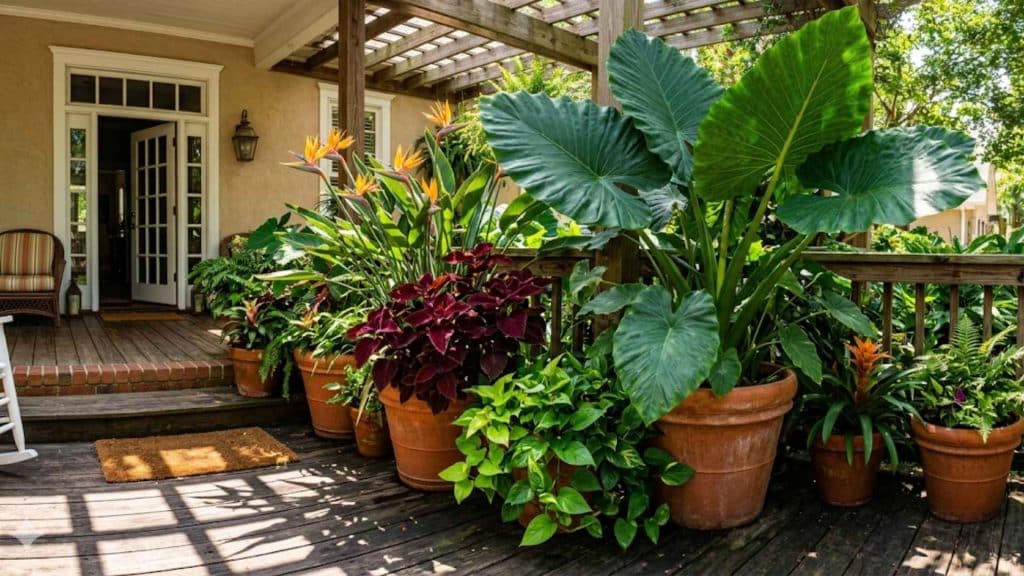
Elephant ear, bird of paradise, and coleus turned a plain south-facing porch into something that looked like it belonged in a resort. These are hungry plants.
They need rich soil, consistent moisture, and monthly 20-20-20 fertilizer. Elephant ears, in particular, will wilt and yellow if the pot dries out even once in July. Worth the effort, though. Nothing else gives you that lush, overgrown look from a single container.
16. Shade-Loving Planter Setups for Covered Porches
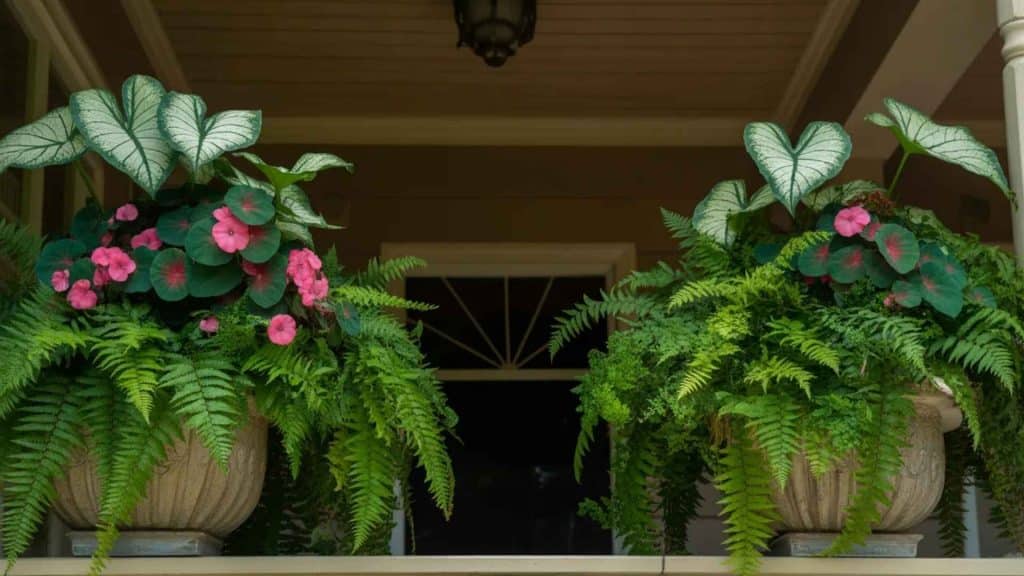
Ferns, caladiums, and impatiens are the reliable trio for porches that get less than three hours of direct sun. Caladiums are the showpiece here because their patterned leaves come in white, pink, red, and green combinations that look more interesting than most flowers.
One thing that tripped me up: caladiums are tropical bulbs that will not survive frost. In zones 7 and below, pull the bulbs in October and store them dry indoors until May.
17. Sun-Loving Containers for Open Front Entries
Lantana, portulaca, and zinnia handled full sun and 95-degree heat without wilting, which made them the default for exposed porches on every project I worked on.
Portulaca is especially forgiving because it actually thrives on neglect. Overwater it, and it rots. Ignore it for a week, and it flowers harder. Zinnias attract butterflies and hummingbirds as a bonus, so the porch stays lively even when you are not sitting on it.
18. Low-Maintenance Succulent Planter Arrangements
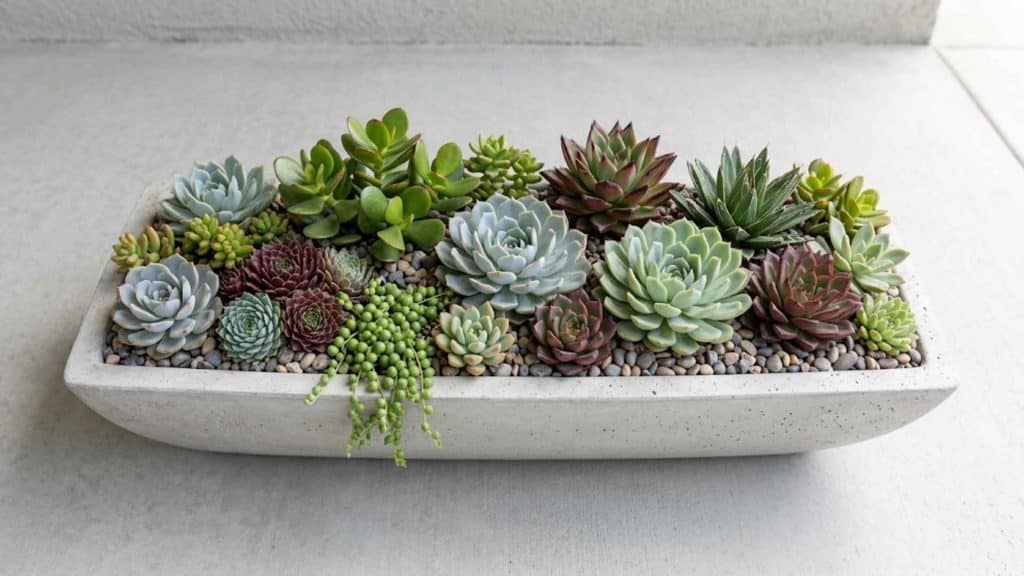
Succulents in a shallow trough planter need almost no attention. Water every 10-14 days, never in the evening, and use cactus mix instead of regular potting soil.
The drainage matters more than the watering. I topped the soil with decorative pebbles to keep the look clean and prevent soil splash during rain.
These work on sunny porches in zones 9+ year-round, or as a warm-season porch plant in colder zones. Bring them inside before the first frost, or you lose everything overnight.
19. Planters With Trailing Vines for Softer Edges
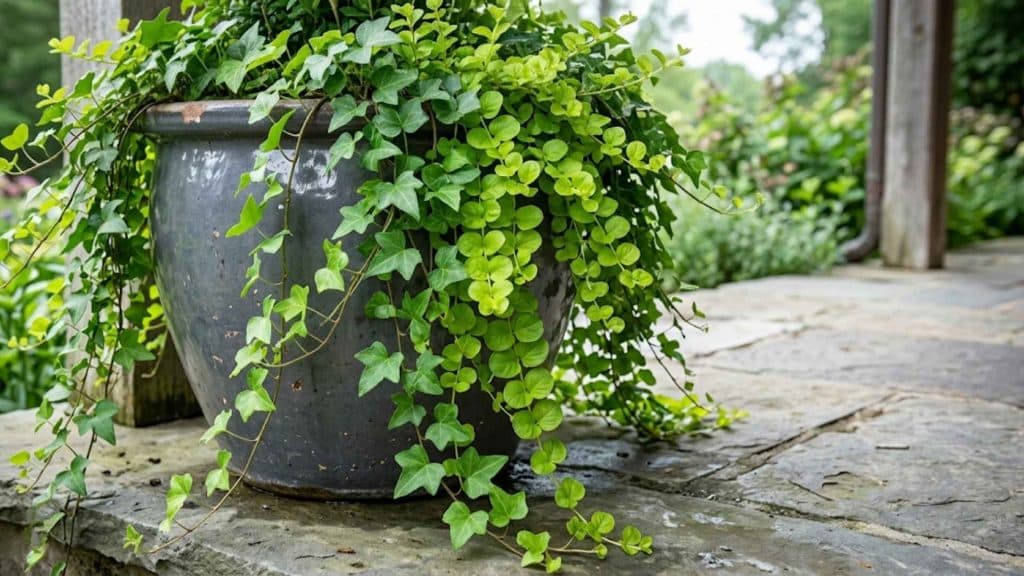
I added creeping jenny or ivy to the edges of larger pots. The trailing effect softened hard lines and made planters look more natural.
20. Porch Corner Planter Groupings With Different Heights
Empty porch corners are wasted space. I filled them with three to five pots, arranged tallest at the back and shortest at the front. The height gradation draws the eye in a diagonal line, making the grouping feel intentional.
Ornamental grass in the tallest pot, geraniums in the middle, and trailing creeping jenny in the front pot was a combination I used dozens of times because it never failed. The grass gives movement, the geraniums give color, and the creeping jenny softens the edge.
21. Black and White Planter Ideas for Modern Exteriors
Glossy black pots with white alyssum or wax begonias. On a modern home with dark trim, this looks deliberate and expensive even if the pots cost $30 each.
I found that square or rectangular pots read cleaner than round ones on contemporary facades.
One thing to watch: black pots absorb heat, so in zones 8+, you will want to line the interior with bubble wrap insulation or the roots will cook by August.
22. Fall Mums and Ornamental Cabbage Displays
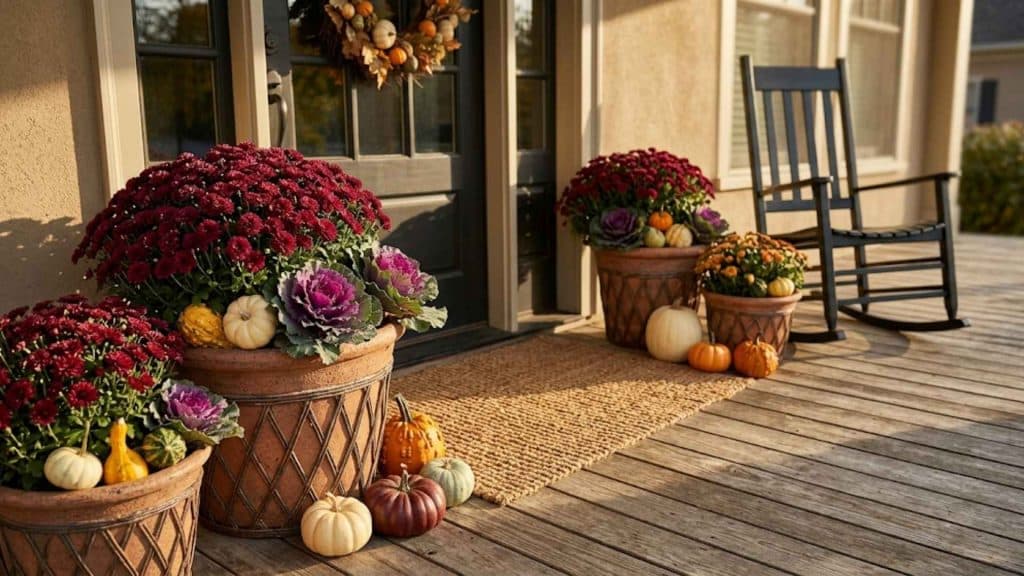
Every fall, I swap. Every September, I swap summer annuals for mums and ornamental cabbage. Buy mums that are still mostly in bud rather than fully open; they last three to four weeks longer that way.
Pair them with small white or orange pumpkins at the base of the planter. One mistake I made early on: planting mums too deep.
Keep the crown at soil level or slightly above, otherwise the stems rot in the first heavy rain. Paired with small pumpkins, they made the porch feel seasonally complete.
23. Winter Greens With Branches and Berries
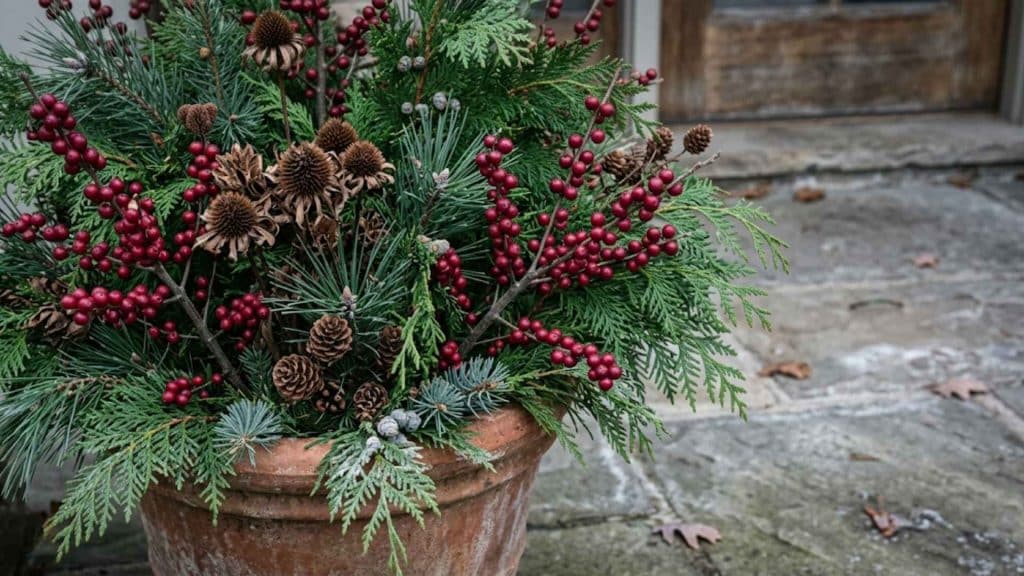
Cedar and pine branches, red winterberry stems, and dried seed heads filled empty pots through December and January without any maintenance.
I just shoved cut branches into the existing soil from the fall planting and arranged them by height. These arrangements hold up through snow, ice, and freezing temperatures.
Add a few pinecones at the soil line, and you have a winter planter that looks intentional rather than abandoned.
24. Pet-Friendly Front Porch Planter Options
Marigolds, snapdragons, and spider plants for homes with dogs or cats. All three are non-toxic according to the ASPCA database. This matters more than most people realize. Lilies, sago palms, and oleander are common porch plants that are genuinely dangerous to pets.
I started keeping a short list of safe plants after a client’s dog chewed a lily stalk, got sick, and the vet bill ran over $800. Not worth the risk when safe options look just as good.
25. Fragrant Planter Ideas Near the Front Door
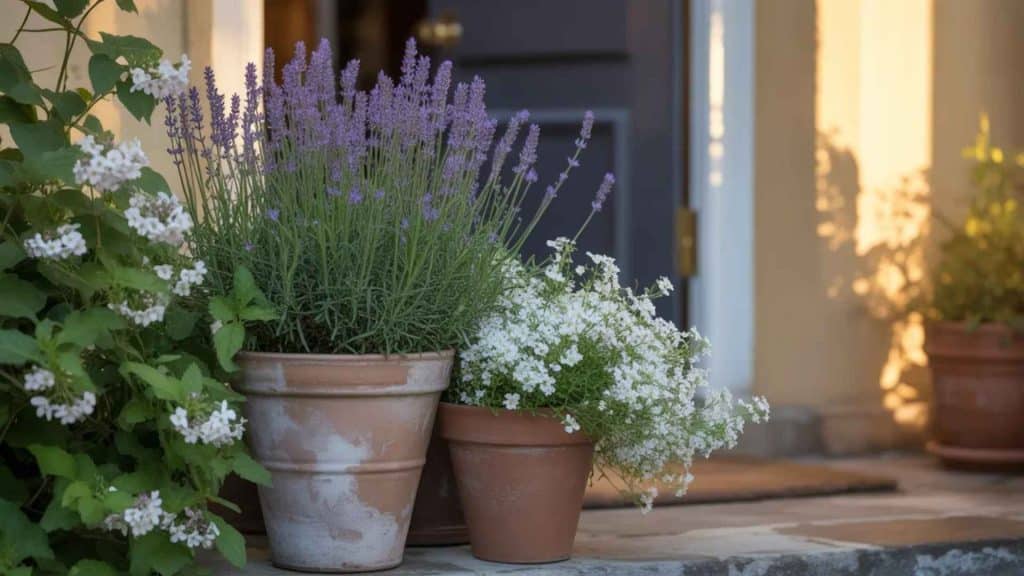
Lavender, jasmine, and sweet alyssum are planted close to the door so the scent hits you as you walk up. Lavender needs full sun and dry conditions.
Jasmine needs something to climb, so I paired it with a small trellis insert pushed into the pot. Alyssum fills the base and spills over the edge.
This combination works best in zones 7-10. In colder zones, swap jasmine for garden phlox, which is fragrant and cold-hardy down to zone 3.
26. Budget-Friendly DIY Planter Ideas
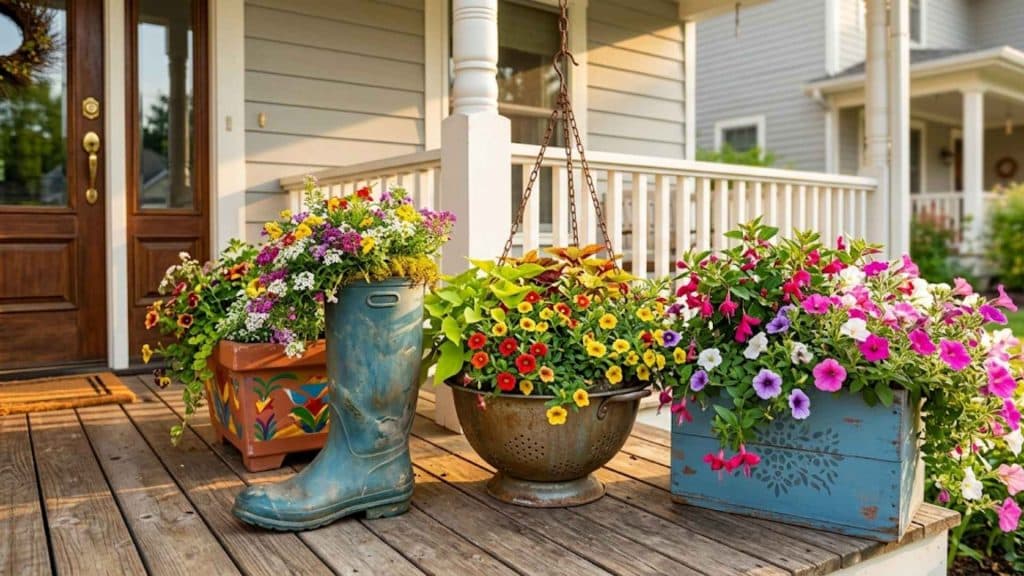
Old colanders, wooden boxes, and rain boots all work as planters if you drill drainage holes and use a liner. A coat of exterior-grade spray paint ($5 per can) makes even a rusted bucket look purposeful.
My cheapest porch project ever cost $22 total: two thrift store colanders ($3 each), a bag of potting mix ($8), and a six-pack of petunias ($8). It looked better than the $200 ceramic setup next door because it had personality.
27. Self-Watering Planters for Easier Upkeep
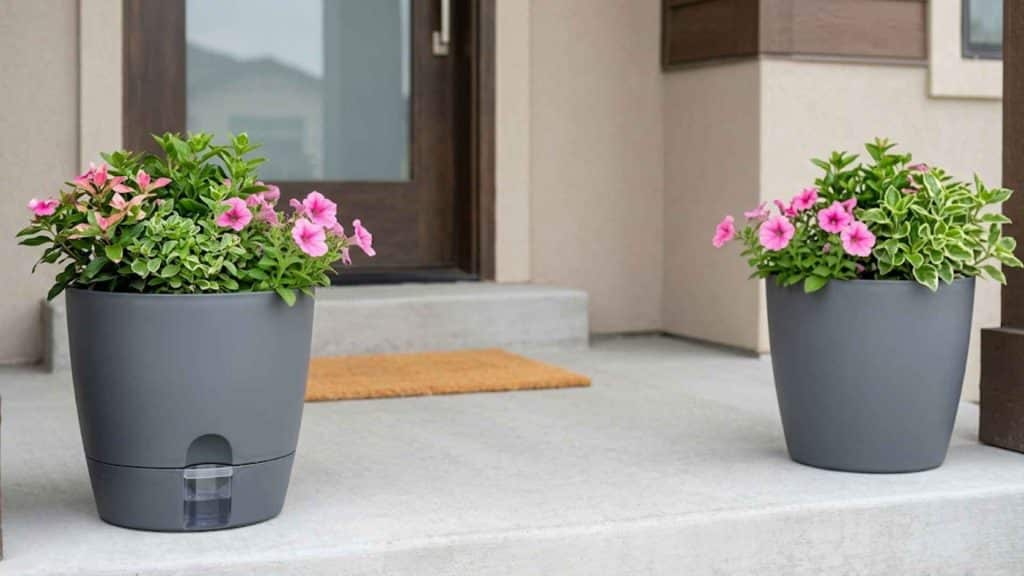
Self-watering containers have a built-in reservoir at the bottom that wicks moisture up to the roots. I switched several clients to these during the summer when daily watering was not realistic.
The reservoir gives you 3 to 5 extra days between waterings, depending on the heat and pot size. Lechuza and Bloem make good ones in the $30-60 range. The one caveat: do not use self-watering pots for succulents or herbs that prefer dry soil. They will stay too wet and rot.
How to Choose the Right Planters for Your Front Porch
Now that you have seen the ideas, here is how to narrow down which setup actually suits your space.
1. Match the Planter Size to Your Porch
Tall, wide planters hold their own on a large covered porch without looking lost. But on a small stoop, an oversized pot blocks the entry and makes the whole space feel heavy.
Measure the available floor space first. A good rule: the planter should not take up more than one-third of the usable width of the porch.
2. Use Materials That Suit Your Climate and Home Exterior
Material choice affects both how the planter looks and how long it lasts.
| Material | Best Climate | Durability | Avg. Cost Range |
|---|---|---|---|
| Terracotta | Dry, mild climates | Cracks in hard frost | $15–50 |
| Fiberglass | All climates | Very high | $40–120 |
| Wood | Moderate climates | Medium with sealing | $20–60 |
| Metal | Dry or warm climates | High, but heats up fast | $25–80 |
| Concrete | All climates | Very high, heavy | $50–150 |
Match the finish to the home exterior. Brick facades pair well with terracotta or dark metal. Modern homes look best with clean-lined fiberglass or concrete.
3. Pick Shapes That Frame the Door
Tall and narrow planters on either side of a front door draw the eye upward and create a framed, welcoming look. Round, wide planters right at the door threshold tend to block foot traffic and make the entry feel smaller than it is.
If you have stairs, consider planters that step down with the stairs rather than one large pot at the top.
4. Check Drainage Before Planting Anything
Poor drainage is the top reason porch plants fail early. Always check for drainage holes before buying. If a planter is unavailable, drill one yourself or use it as a decorative cachepot with a drilled inner pot inside.
Standing water at the bottom of a sealed pot indicates root rot within 2 to 3 weeks, and by the time you notice the plant wilting, it is already too late to save it.
How to Keep Front Porch Planters Looking Good Longer?
Good-looking planters did not happen by chance. I kept a simple routine going through every season, and it made a real difference.
| Task | When | Why It Matters |
|---|---|---|
| Check soil moisture | Daily in summer | Prevents overwatering |
| Water deeply | Until drainage flows | Reaches roots fully |
| Feed with liquid fertilizer | Every two weeks | Keeps blooms strong |
| Pinch off dead flowers | Weekly | Encourages new blooms |
| Trim leggy stems | Monthly | Promotes bushy growth |
| Remove yellow leaves | As soon as I spotted | Stops the spread of disease |
| Refresh seasonal plants | Four times a year | Keeps the porch looking current |
| Move pots to partial shade | During peak afternoon heat | Protects roots from burning |
| Wrap terracotta in burlap | Before the first frost | Prevents cracking and damage |
Common Front Porch Planter Mistakes to Avoid
I made most of these mistakes early in my career. Learning to spot them saved a lot of wasted money and dead plants.
1. Choosing Plants Without Checking Sun Exposure
- The Problem: I watched clients buy beautiful flowers that wilted within a week. The porch got full afternoon sun, and the plants were shade lovers. The wrong light killed them fast.
- The Fix: I started tracking sun exposure before buying anything. I noted how many hours of direct sun the porch received and matched plants to that number precisely.
2. Using Pots That Are Too Small
- The Problem: Small pots dried out within hours on hot days. Roots had no room to grow, and plants became stunted. The whole arrangement looked sparse and thin by midsummer.
- The Fix: I moved to larger containers with more soil volume. Bigger pots held moisture longer and gave roots the space they needed to support strong above-ground growth.
3. Ignoring Drainage and Watering Needs
- The Problem: I saw more plants drown than dry out. Pots without drainage holes held standing water at the root zone. Root rot set in quietly and killed plants from the bottom up.
- The Fix: I made drainage non-negotiable. Every pot I used had holes at the base. For decorative pots without holes, I used a drilled inner pot and set it inside the outer one.
4. Overfilling the Porch With Too Many Containers
- The Problem: More pots did not always mean a better porch. I visited homes where every inch of floor space was filled with containers. The entry felt cluttered and hard to move through comfortably.
- The Fix: I pulled back to three to five well-placed pots. Grouping them intentionally near the door and steps gave the porch breathing room and made each planter stand out more.
Conclusion
Through years of working on residential porches, I found that the best planter setups were never the most complicated ones.
The right pot size, a simple thriller-filler-spiller combo, matched colors, and a basic care routine were all it really took.
I avoided overcrowding, checked sun exposure first, and always made sure drainage was sorted before planting anything.
A well-planted front porch does not need a big budget. It needs a clear plan and a little consistency. So, which of these front porch planter ideas are you planning to try first?
Drop your thoughts in the comments below. If seasonal container swaps interest you, our year-round porch decorating guide walks you through every transition in detail.
Frequently Asked Questions
What Are the Best Low-Light Plants for A North-Facing Porch?
Focus on foliage-heavy plants like Hostas, Snake Plants, or Aspidistra. These varieties thrive in deep shade and maintain their vibrant green color without needing direct daily sunlight.
How Do I Prevent Heavy Porch Planters from Scratching the Floor?
Place adhesive felt pads or rubber feet on the bottom of the pots. You can also use rolling plant caddies to move heavy containers easily without damaging surfaces.
Can I Reuse Potting Soil for My Porch Plants Next Year?
It is risky because old soil loses nutrients and may harbor pests. For best results, replace at least half of the soil and mix in fresh compost or fertilizer.
What Is the Best Way to clean mineral deposits off terracotta?
Soak the empty pots in a mixture of one part white vinegar to four parts water. Scrub with a stiff brush to remove white salt buildup and debris.
How Can I Secure Lightweight Plastic Planters Against Strong Winds?
Place heavy stones or bricks at the bottom of the pot before adding soil. This lowers the center of gravity and prevents the container from tipping over during storms.