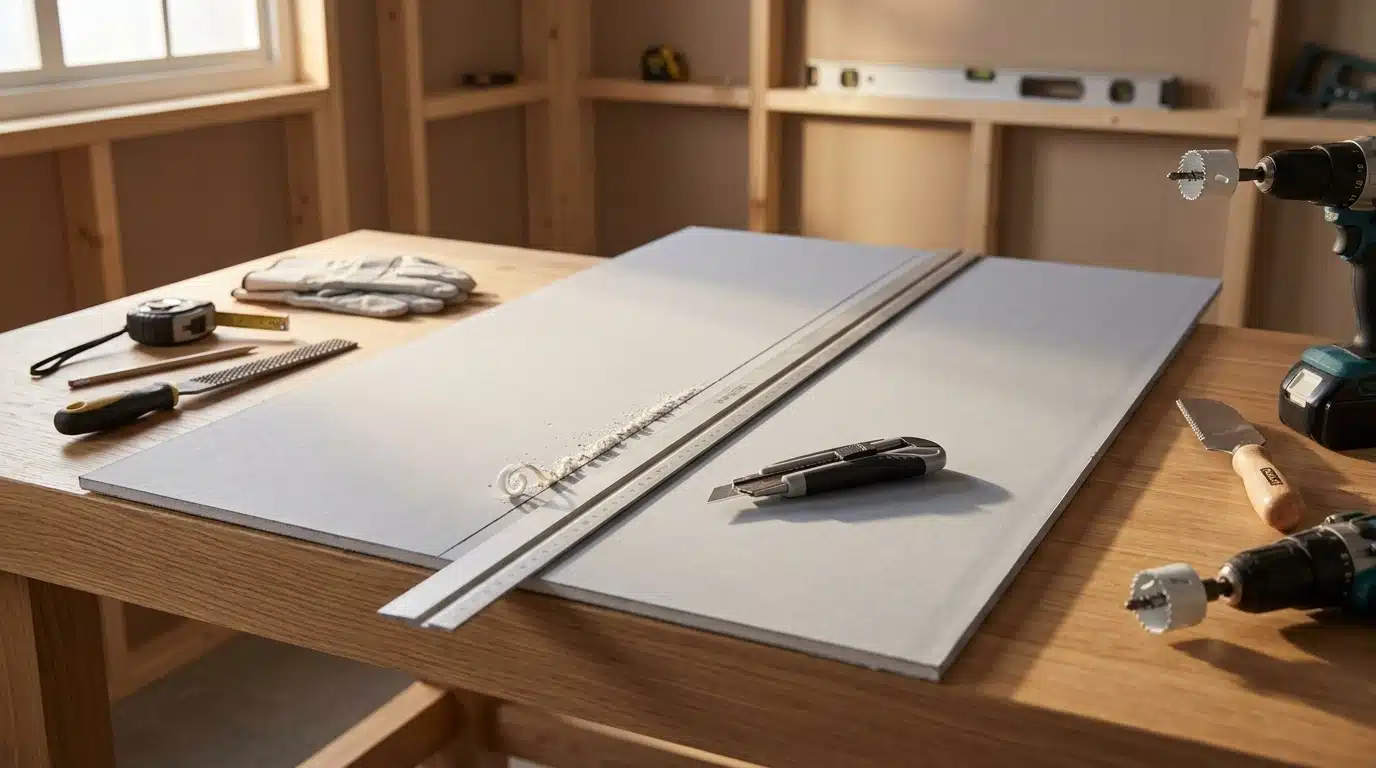

Cracked boards, torn paper, and pieces that don’t fit the opening are the most common results of a first attempt at cutting plasterboard.
Plasterboard cracks from poor tools, measurements, or cutting methods.
If you’re making a straight cut, trimming around a socket, cutting for pipes, or fitting boards around doors and windows, using the right technique makes the work quicker and helps avoid wasted material.
In this blog, you’ll learn how to cut plasterboard for different situations, which tools to use, common mistakes to avoid, and simple tips for getting clean, accurate cuts every time.
What Is the Best Way to Cut Plasterboard?
The score-and-snap method is the fastest and cleanest way to make straight cuts in plasterboard.
It works by scoring the paper face and gypsum core with a utility knife, then snapping the board along that line.
This method is the industry standard for good reason:
- No power tools needed
- Minimal dust
- Clean, straight edges on standard boards
- Works on all common plasterboard thicknesses
That said, score-and-snap is not right for every job. Here’s when to use other methods:
| Cut Type | Best Method |
|---|---|
| Straight cuts | Score and snap |
| Socket/switch openings | Jab saw or padsaw |
| Pipe holes | Hole saw |
| Curved cuts | Jigsaw or drywall saw |
| Cuts on installed boards | Oscillating multi-tool |
| Ceiling trimming | Utility knife + drywall rasp |
| Insulated boards | Fine-toothed handsaw or plasterboard saw |
The method you choose depends on the shape of the cut and whether the board is already fixed to the wall or ceiling.
Tools You’ll Need to Cut Plasterboard
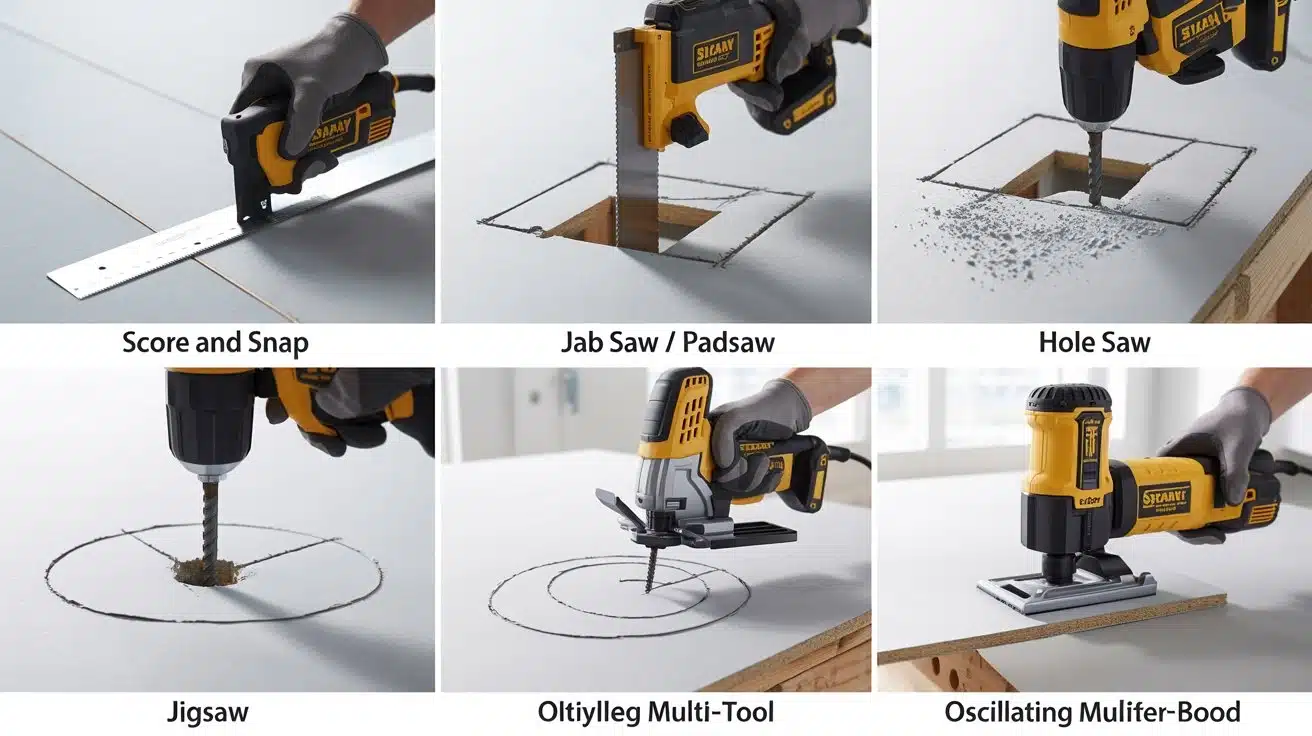
Having the right tool makes a big difference. Here’s a breakdown of the most common tools used for cutting plasterboard:
| Tool | Best For | Pros | Limitations |
|---|---|---|---|
| Utility knife | Straight cuts | Clean edge, cheap, no dust | Not ideal for curves |
| Plasterboard saw | General cut-outs | Fast and easy to use | Rougher edges |
| Jab saw (padsaw) | Socket and switch holes | Good control | Slower than power tools |
| Oscillating multi-tool | Cuts on installed boards | Very accurate | Creates more dust |
| Hole saw | Pipe and downlight openings | Perfect circles | Size-specific |
| Drywall rasp | Smoothing cut edges | Gives a clean finish | Finishing only, not cutting |
| Jigsaw | Curved cuts | Fast for shaped cuts | Needs more care on the paper face, creates more dust than scoring |
You’ll also need these basics:
- Tape measure
- Pencil or chalk line
- Long straight edge or spirit level
- T-square (for long, accurate lines)
- Safety glasses
- Dust mask (N95 or FFP2 rated)
- Work gloves
Pro Tip: Change your utility knife blade often. A dull blade drags through the gypsum instead of cutting it, which tears the paper and gives you a rough, crumbling edge. In my own projects, a fresh blade every board or two pays for itself. It cuts the time I spend fixing a torn edge in half.
Measure and Mark Before You Cut
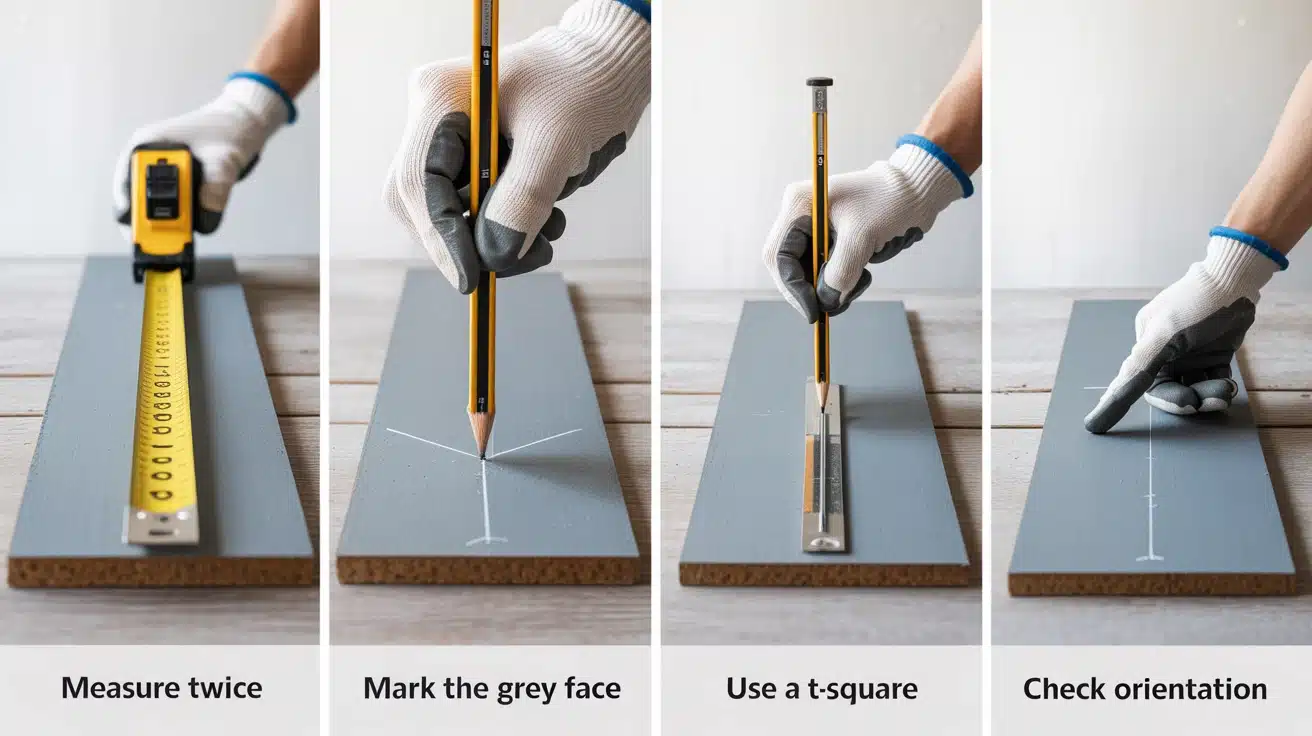
Bad measurements cause more wasted boards than bad cutting technique. Take your time here.
Follow these steps before every cut:
- Measure twice: Check your measurement at both ends of the cut line, not just one.
- Mark from the finished (grey paper) face: This is the side that faces outward once the board is fixed. Cutting from the right side gives you a cleaner, visible edge.
- Use a long straightedge or T-square to draw the line: A short ruler won’t stay straight across a full sheet.
- Check orientation before cutting: Make sure you know which piece you’re keeping; it’s easy to cut the wrong side.
Quick Measuring Checklist:
Measurements taken at both ends of the cut line
Board marked on the grey (finished) face
Straight edge checked against the line
Cut direction confirmed you’re keeping the right piece
Board flat and stable on the work surface
How to Cut Plasterboard: Step by Step
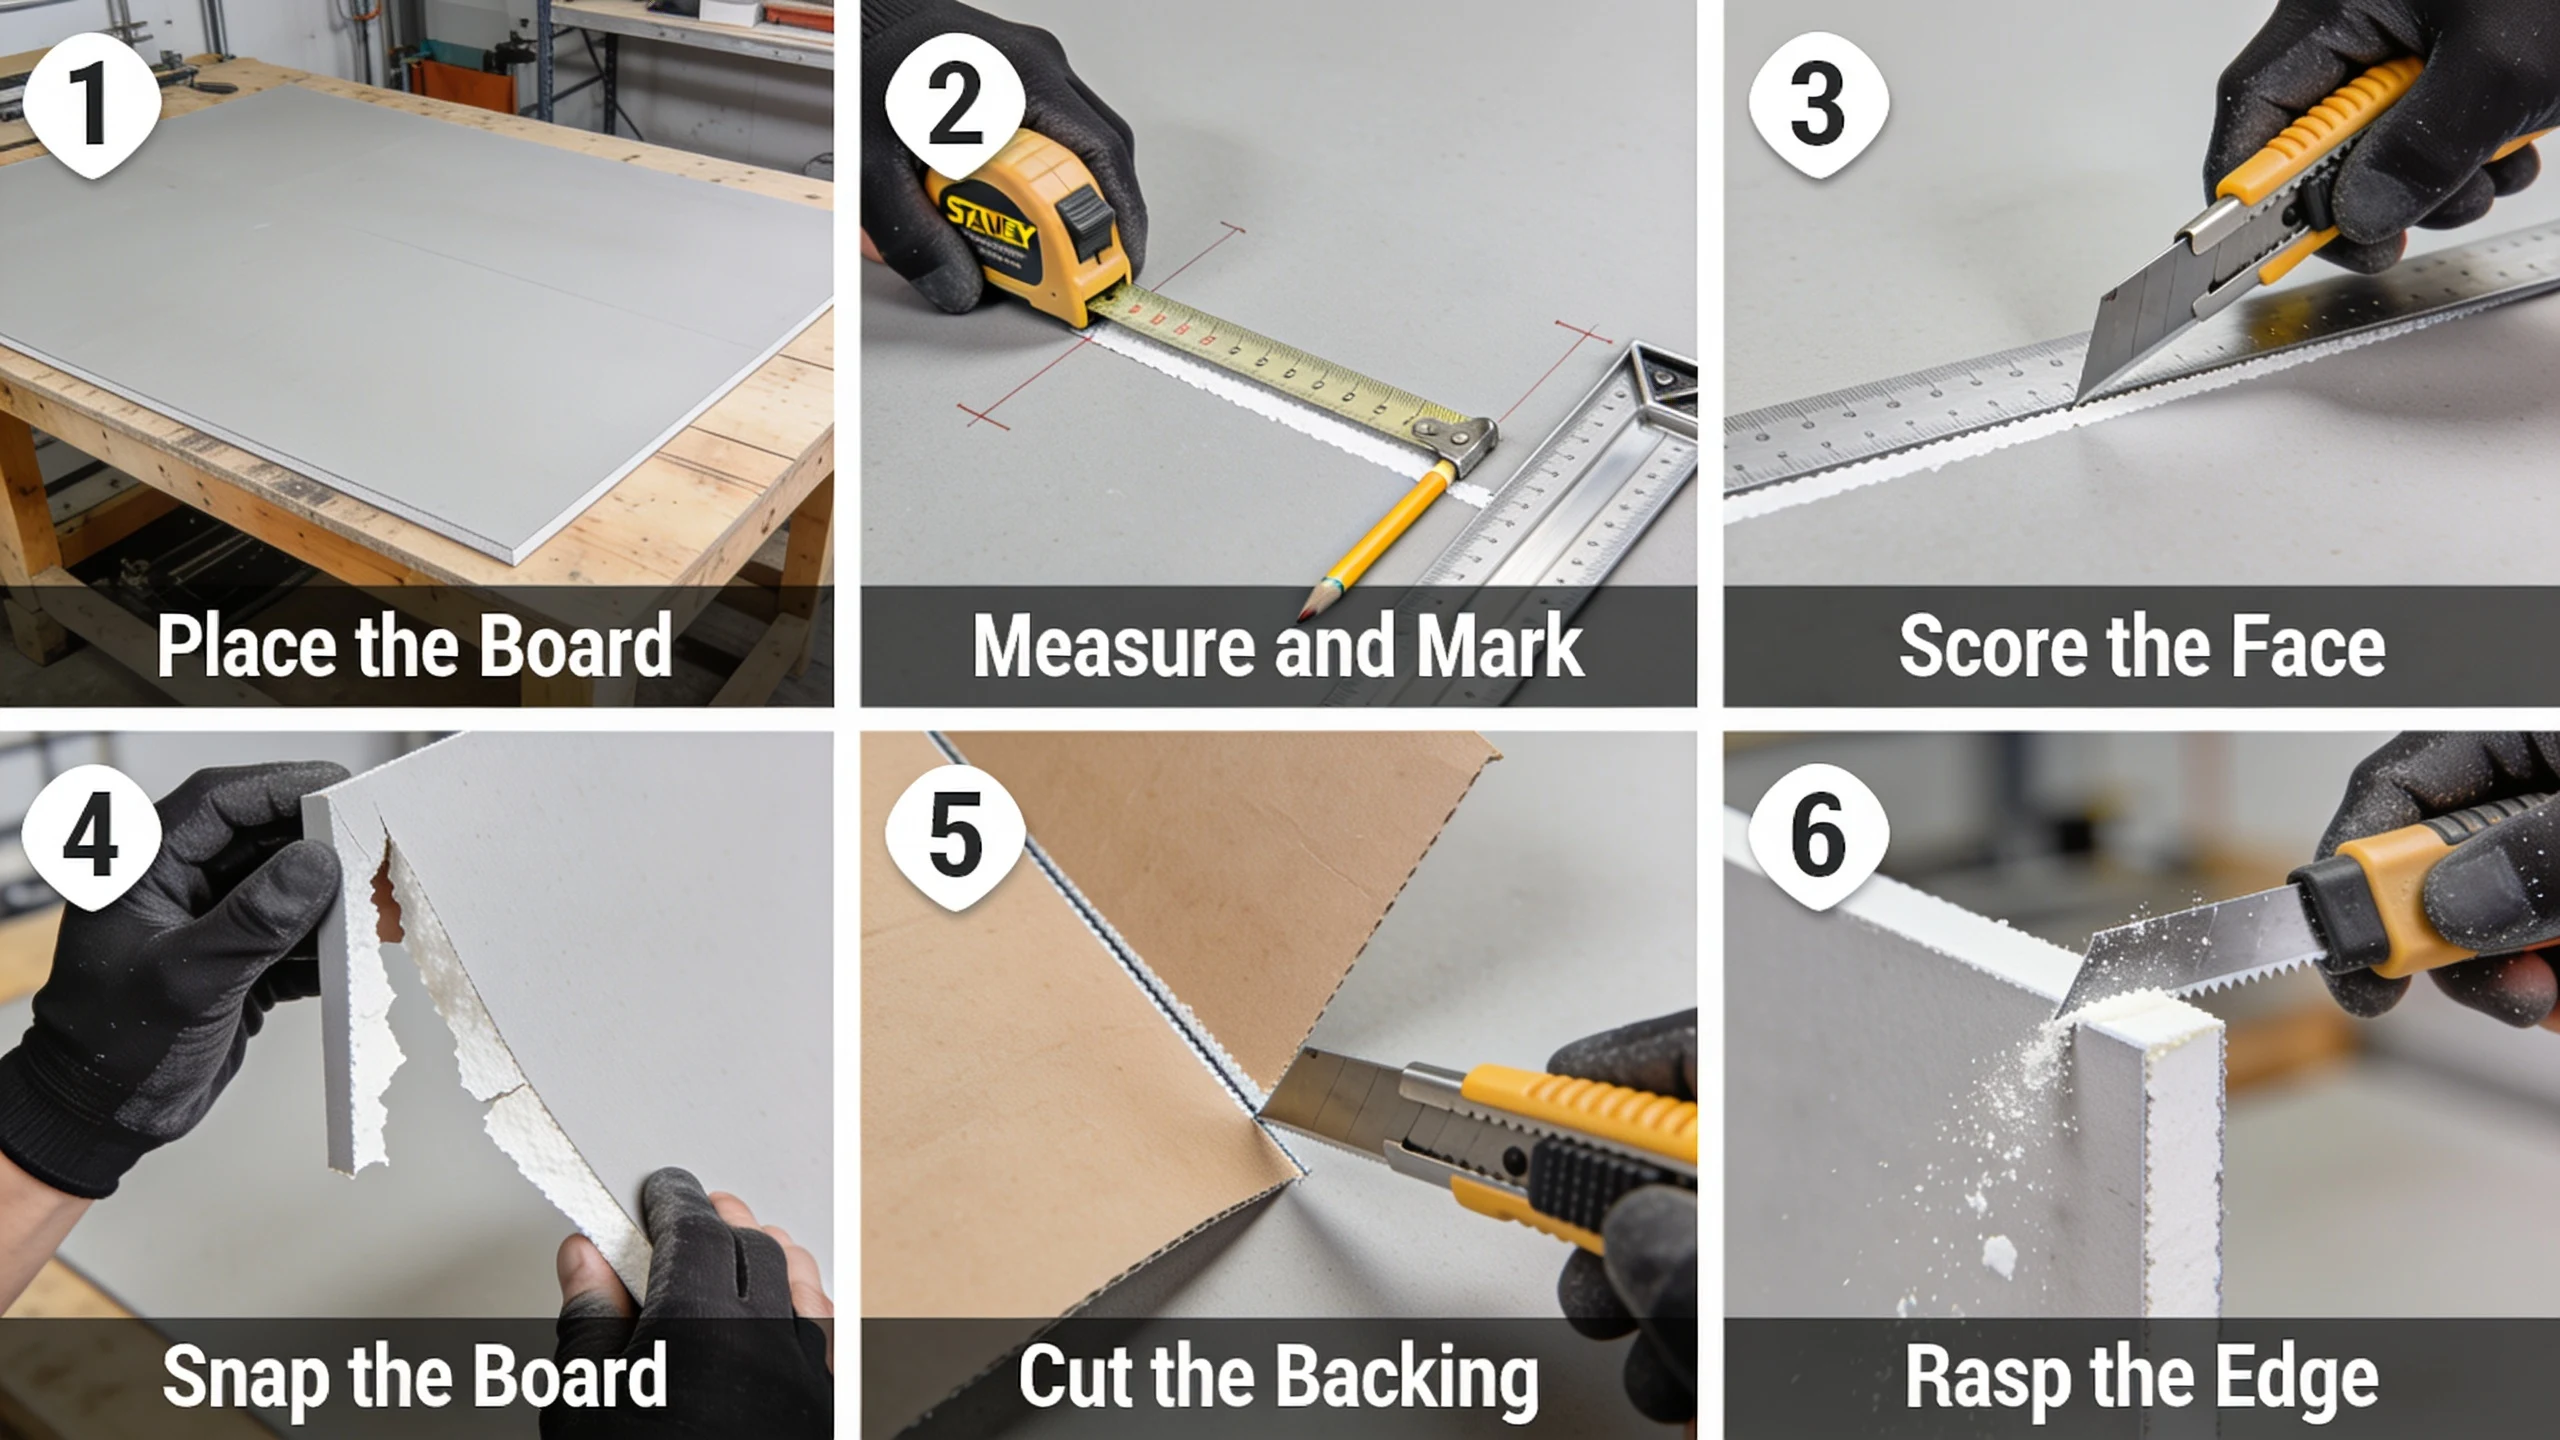
This is the standard score-and-snap method for straight cuts. It works on all common plasterboard thicknesses.
Step 1: Place the Board on a Flat Surface
Lay the board flat on a stable work surface, with the grey-finished face up. Make sure it’s fully supported; if part of the board hangs off the edge, it may snap before you’re ready.
A pair of trestles, a workbench, or even a clean floor can work well. The key is to keep the board steady so your cut stays straight and controlled.
Step 2: Measure and Mark the Cut Line
Use a tape measure and pencil to mark the cut line at both ends. Connect the marks using a long straight edge or T-square.
Check your measurement twice before cutting, especially if the board needs to fit around a corner, door frame, or stud. A clear pencil line makes scoring easier and reduces mistakes.
Step 3: Score the Front Face with a Utility Knife
Place your straight edge along the marked line. Hold it firmly in place. Run your utility knife along the line with steady, firm pressure.
You don’t need to cut all the way through. One firm pass is enough to cut through the grey paper and score the gypsum core underneath. If your blade is sharp, one pass is all it takes.
Important: Keep the knife blade perpendicular (upright, at 90°) to the board surface. A tilted blade cuts at an angle and gives you an uneven edge.
Step 4: Snap the Board Along the Scored Line
Pick up the board (or lift it slightly from one side). Apply firm, quick pressure to snap the board away from you along the scored line. The gypsum core will break cleanly along your cut.
Support the off-cut piece with your other hand as it snaps; letting it drop can cause the paper backing to break unevenly.
Step 5: Cut the Paper Backing
After snapping, the two pieces are still held together by the brown paper backing. Fold the board back slightly to open the break, then run your utility knife along the paper to cut it cleanly.
Keep the blade close to the folded edge so the backing does not tear. This gives you a cleaner finish and makes the board easier to fit in place.
Step 6: Smooth the Edge with a Drywall Rasp
Run a drywall rasp along the cut edge to remove any rough gypsum and level the edge.
This is especially important where two boards meet; a smooth edge means a better joint and less filler needed.
Work slowly and take off only small amounts at a time. Over-rasping can make the board too small or leave gaps that are harder to fill later.
How to Cut Different Shapes in Plasterboard
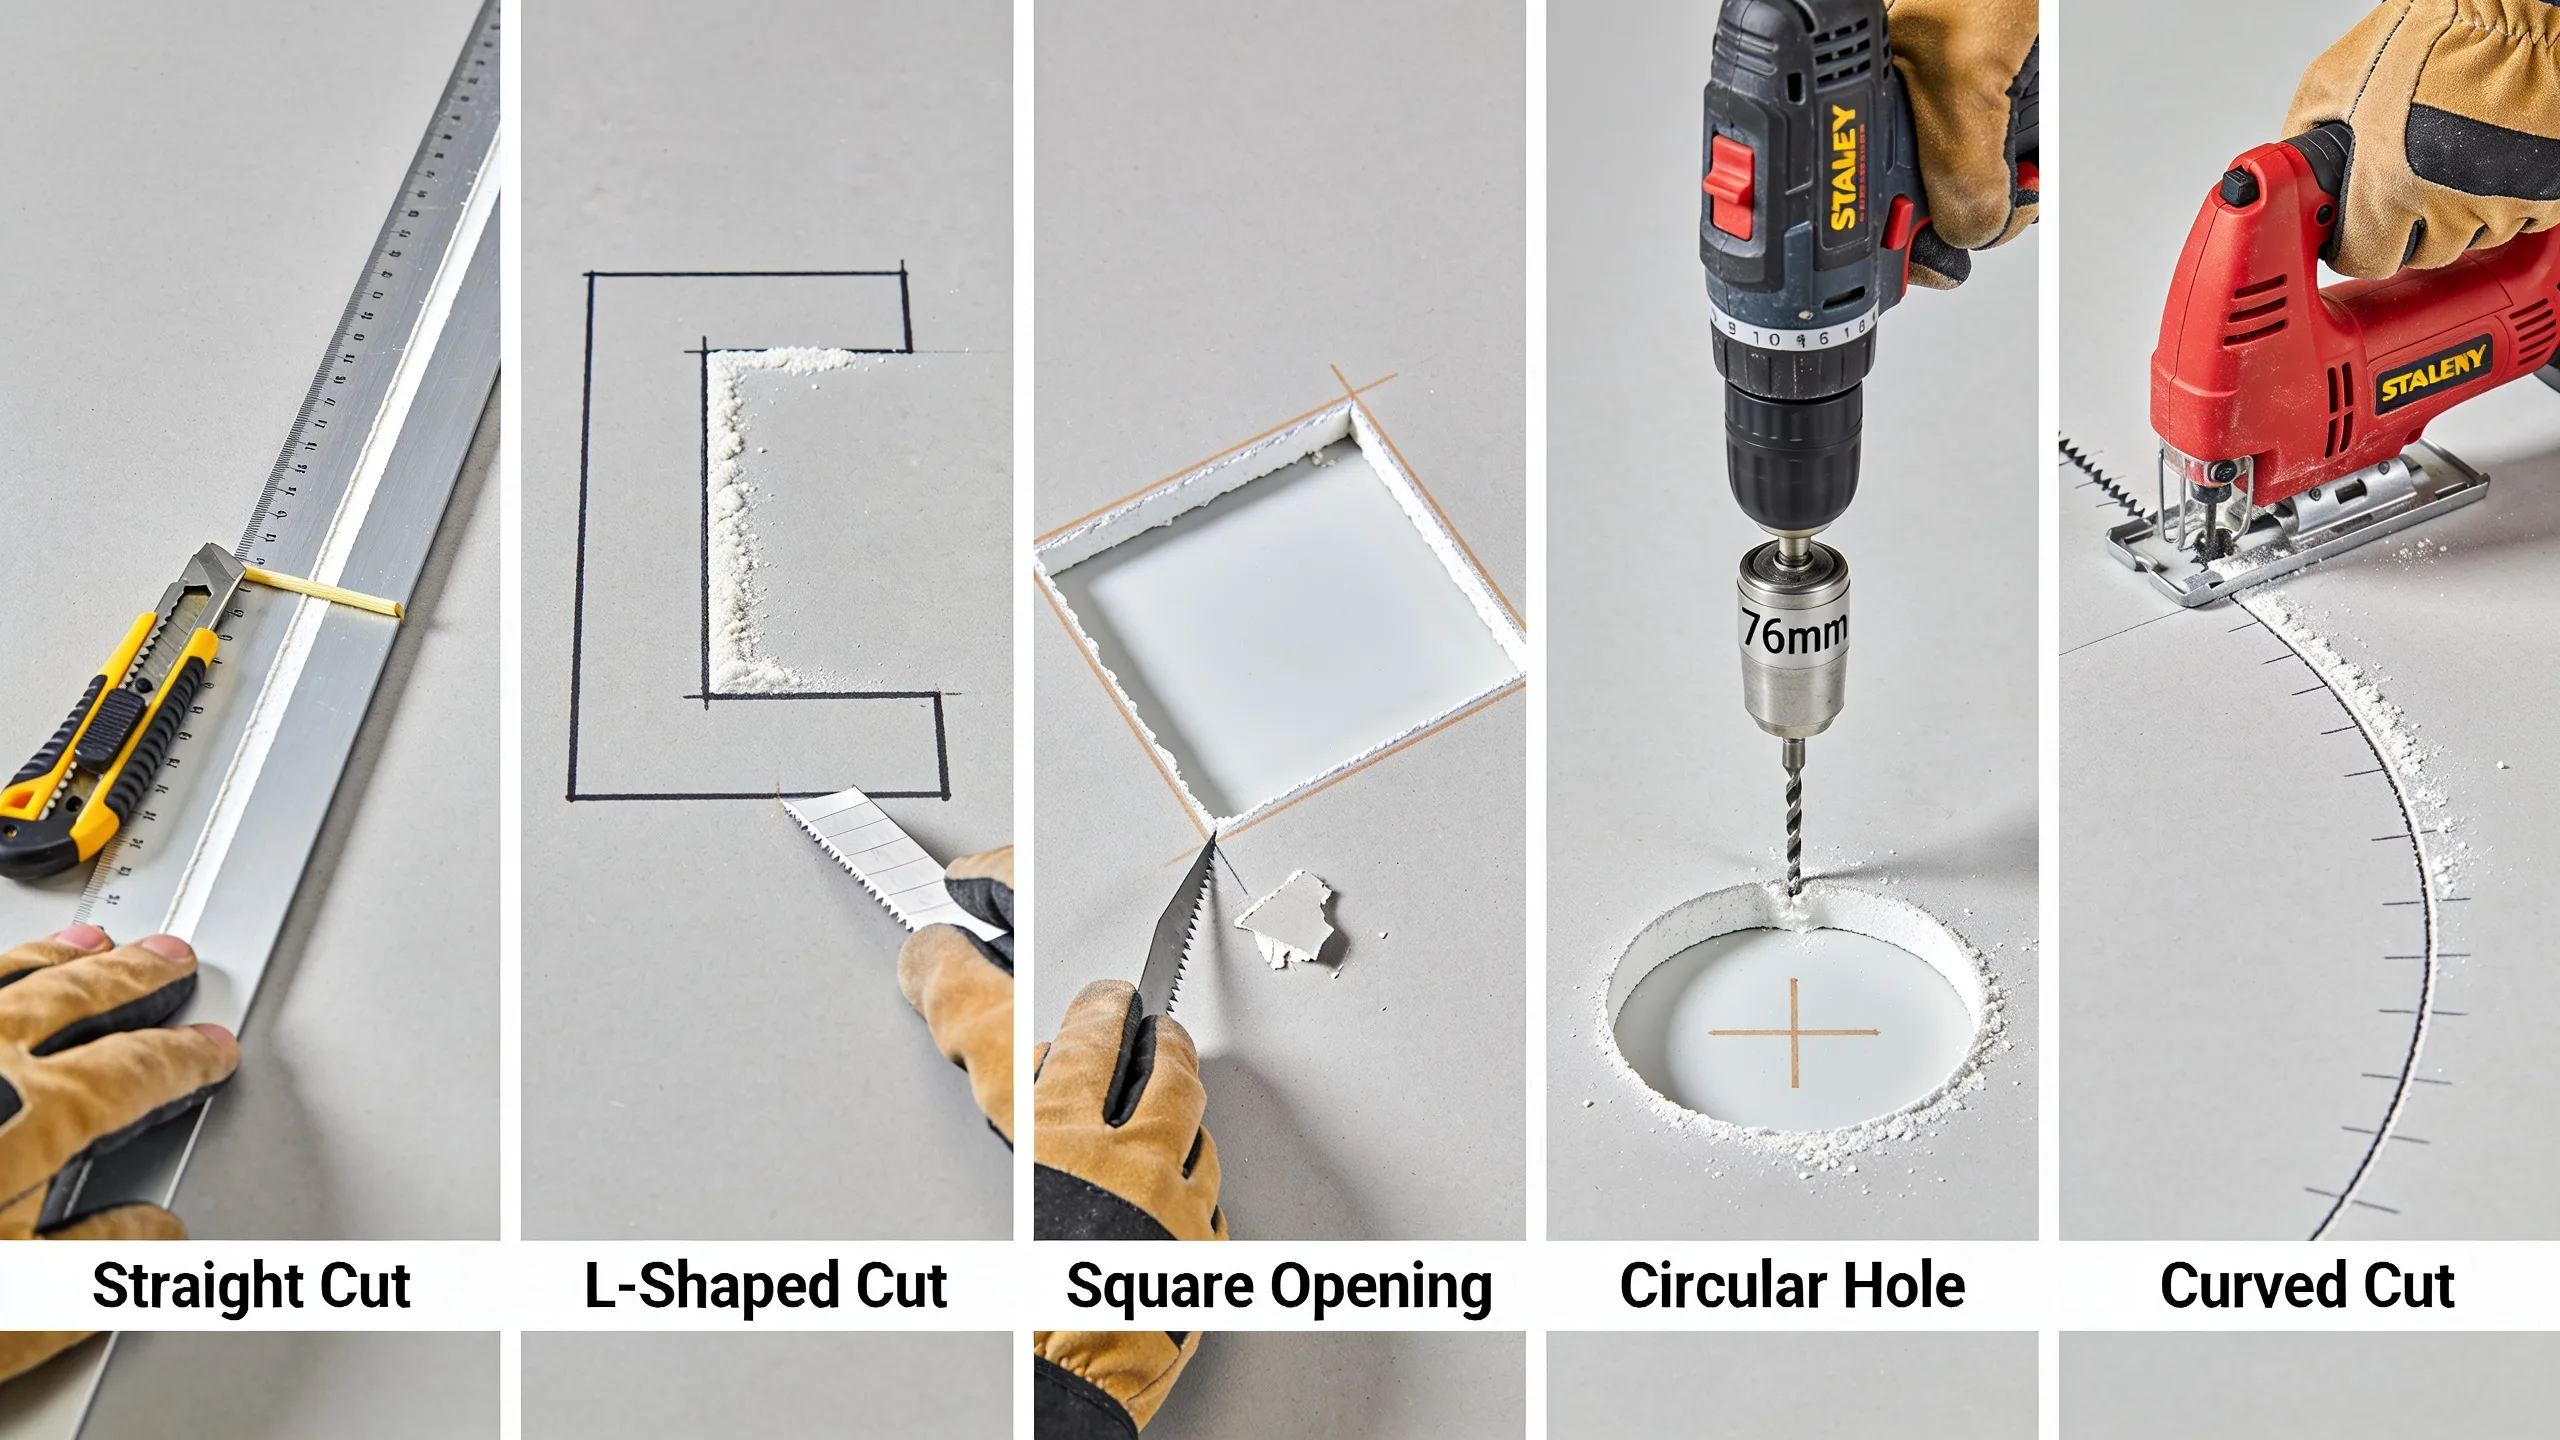
Cutting plasterboard shapes is easier when you match the tool to the cut. Use a knife for straight lines, a jab saw for openings, and a hole saw or jigsaw for rounded shapes.
| Shape | Best Method | Best Tool |
|---|---|---|
| Straight cuts | Score and snap along a marked line | Utility knife, T-square |
| L-shaped cuts | Score the long side, saw the notch | Utility knife, jab saw |
| Square openings | Pierce one corner and cut around | Jab saw, rasp |
| Circular holes | Drill or cut around the marked circle | Hole saw, jigsaw |
| Curved cuts | Follow a template slowly | Jigsaw, drywall saw |
How to Cut Insulated Plasterboard
Insulated plasterboard has a rigid foam layer, usually PIR, bonded to the back of a standard gypsum board.
That foam backing stops the score-and-snap method from working cleanly, so the technique changes.
- Use a fine-toothed handsaw or a plasterboard saw: Cut straight through the gypsum board and the insulation in one pass, working from the finished (paper) face.
- Keep the saw blade perpendicular to the board: A tilted blade compresses the foam unevenly, leaving a ragged edge.
- Support both sides of the cut: Insulated boards are heavier than standard plasterboard, so an unsupported edge can crack the gypsum core as you saw through it.
- Score the paper face-first on thinner boards: For boards with a total thickness under around 30mm, a light knife score before sawing helps guide a straighter line.
- Finish with a rasp or a Surform file: Run it along the cut edge to square off the foam and gypsum so the boards butt together tightly.
Wear a dust mask and gloves for this one. Cutting through PIR insulation releases fine particles that irritate the skin, eyes, and airways more than gypsum dust alone does.
How to Cut Ceiling Plasterboard Safely
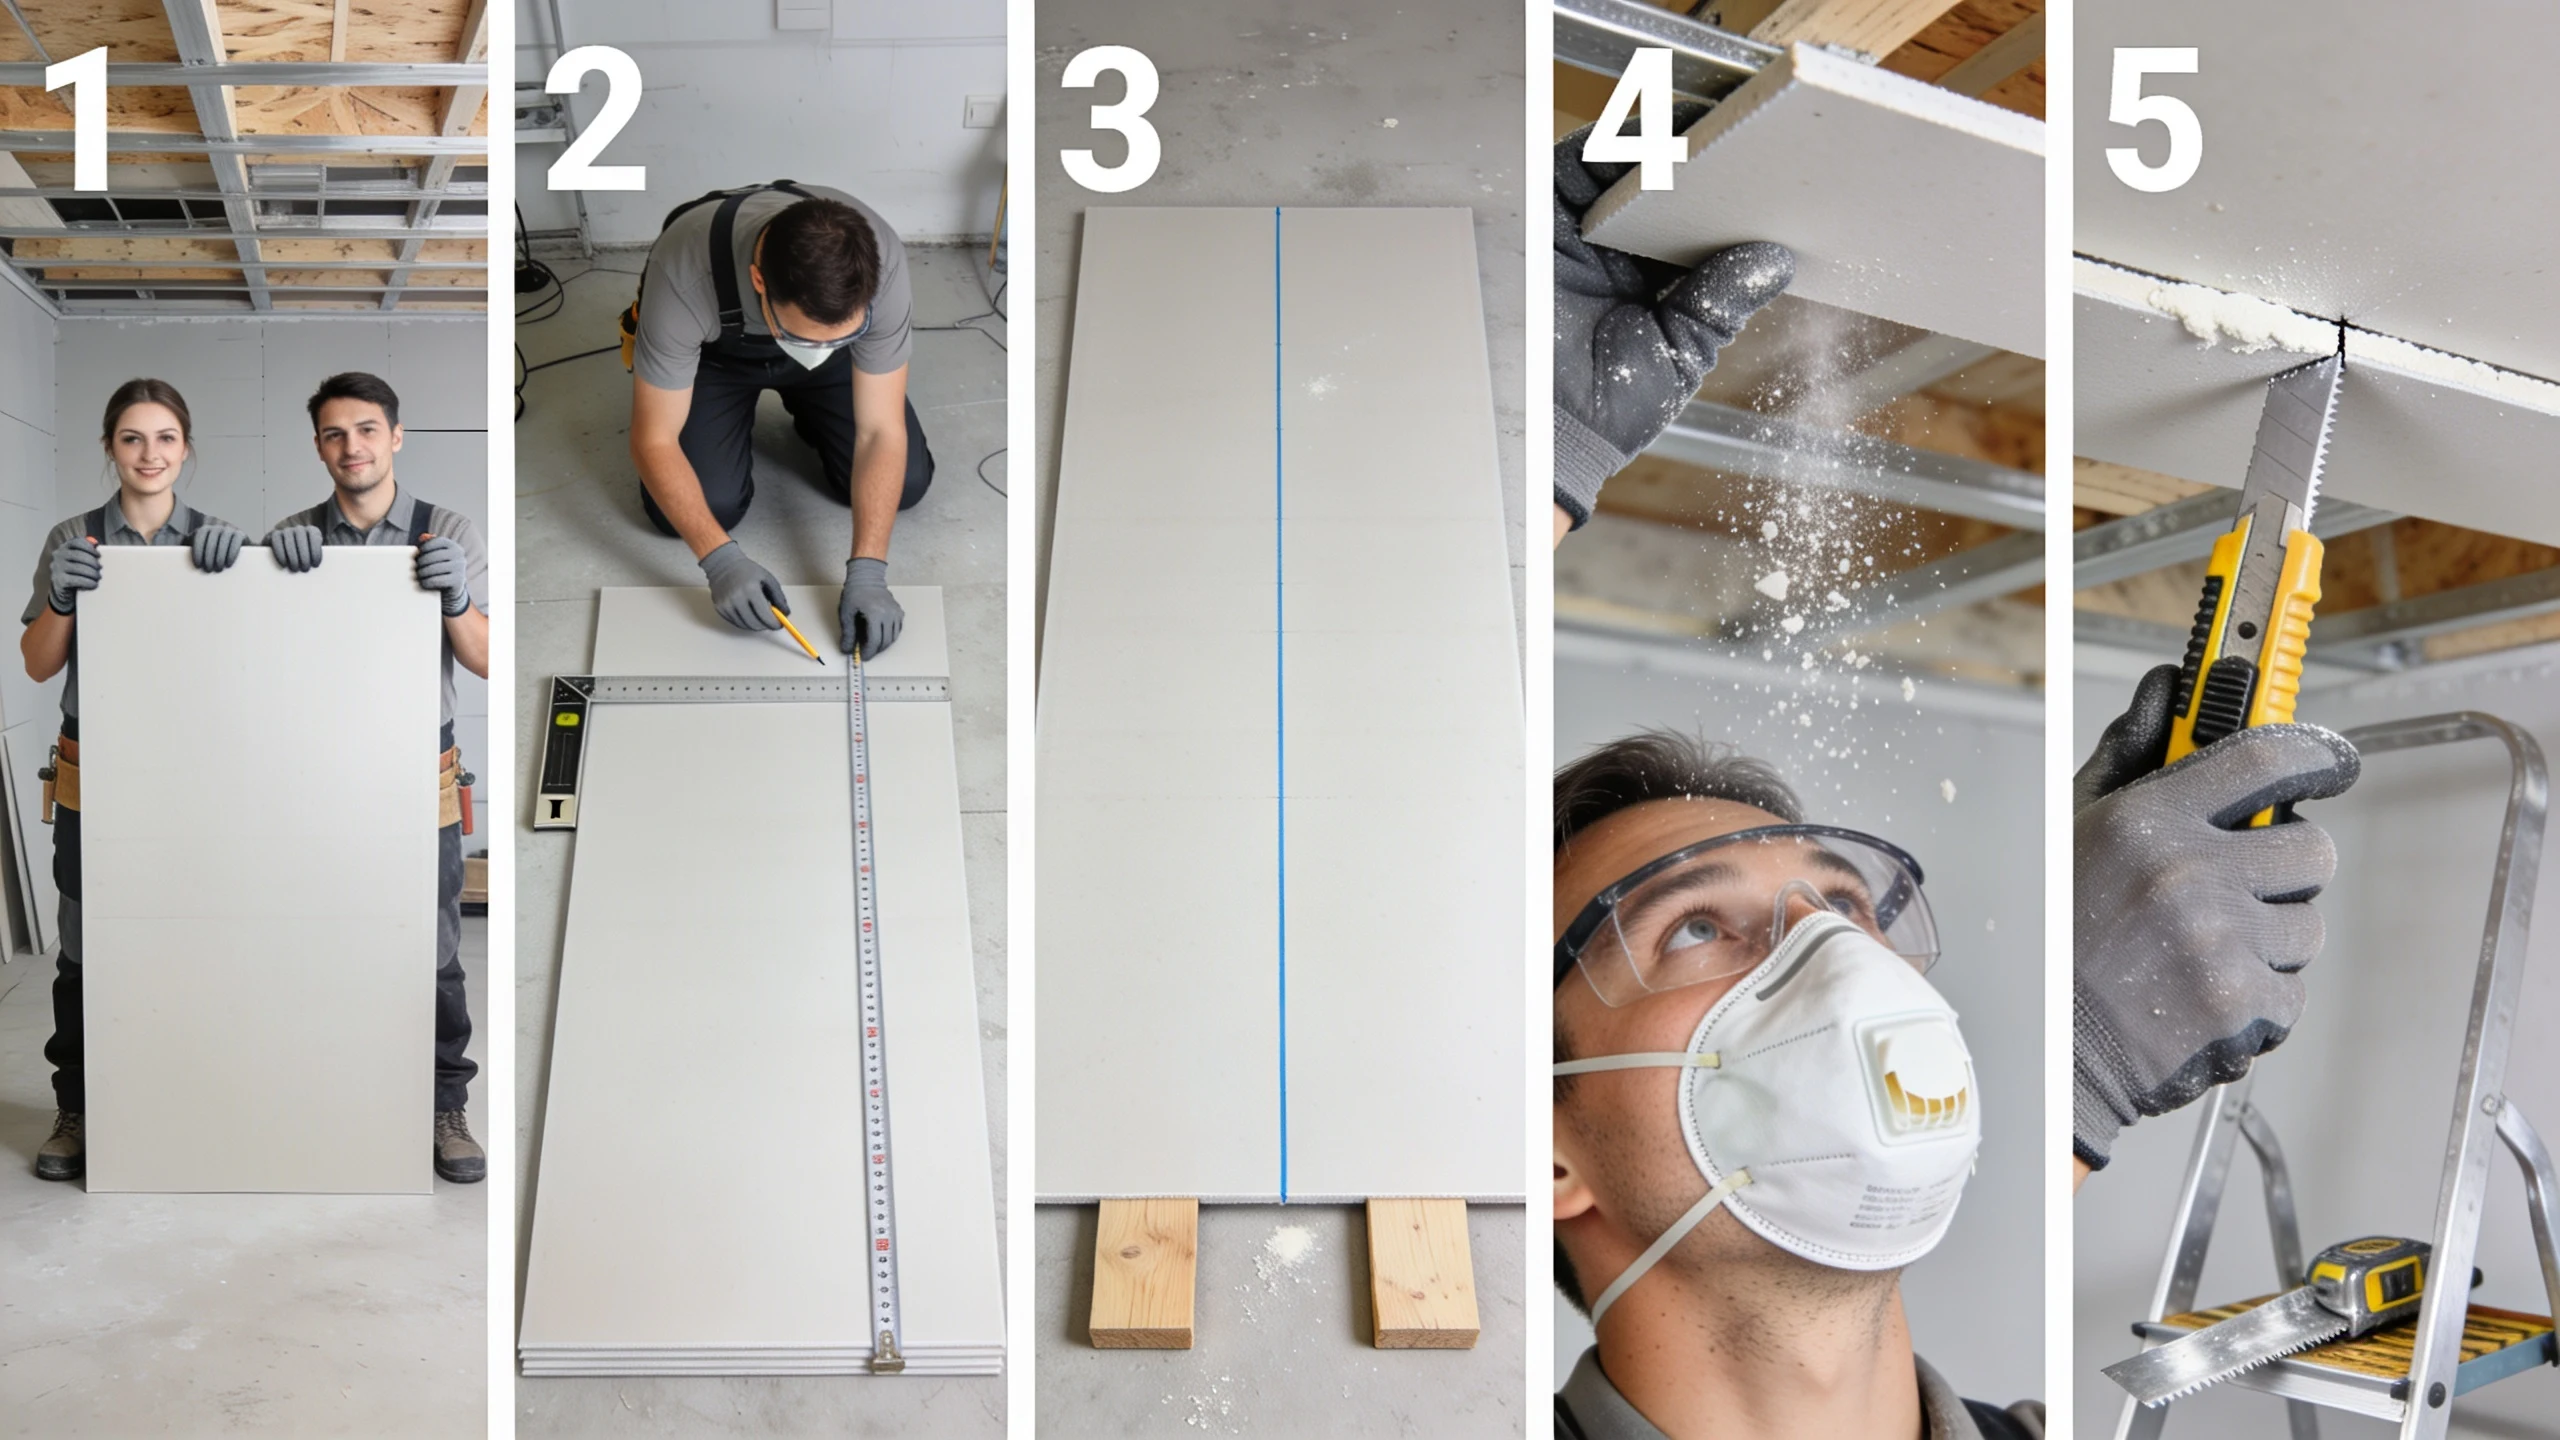
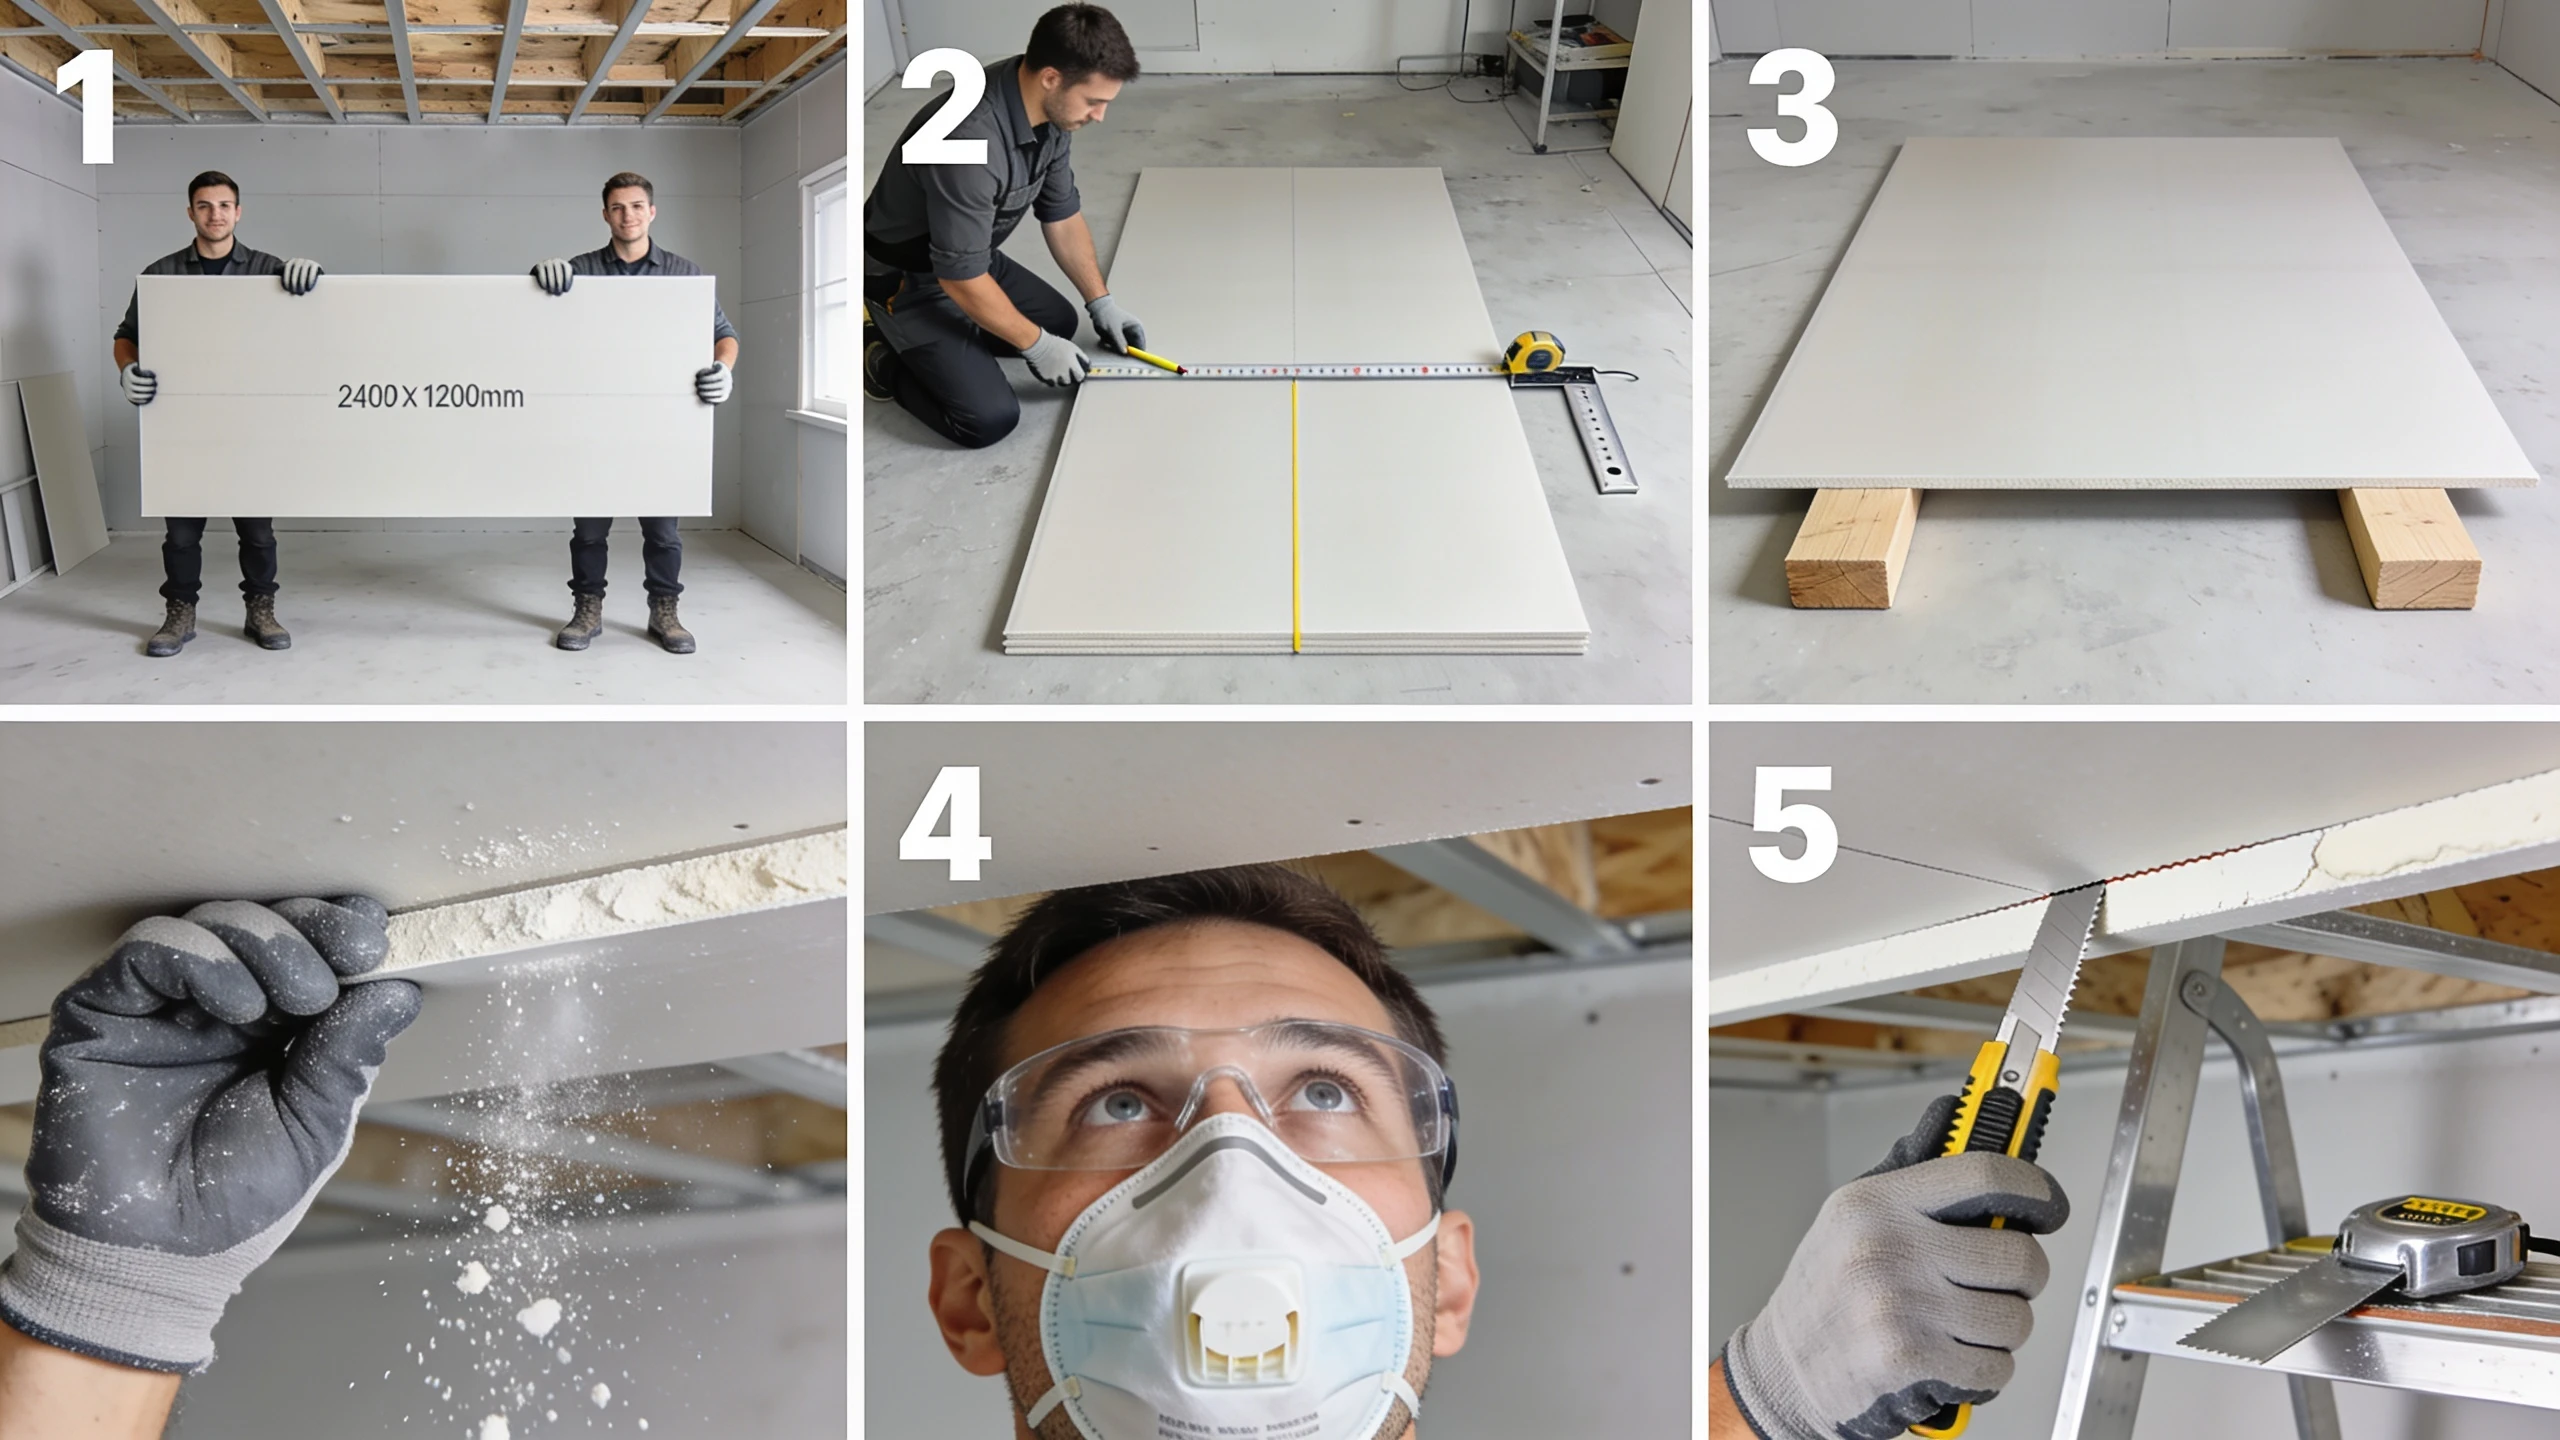
Ceiling plasterboard is heavier and harder to handle, so a little extra care goes a long way.
- Work with a helper: Ceiling boards are too large and heavy to hold steady and cut accurately on your own, so get a second pair of hands.
- Measure and cut on the ground: Take all your measurements and make every cut before lifting the board, since cutting overhead is slower and less accurate.
- Support the sheet fully: Rest the board flat across trestles or a bench so no section overhangs, which can cause it to crack mid-cut.
- Wear safety glasses and an FFP2 dust mask: Cutting overhead sends dust and debris straight down onto your face, so proper eye and lung protection matters here.
- Trim the installed boards carefully: Score lightly with a utility knife, snap gently by hand, then run a rasp along the edge to finish it smooth.
How to Cut Plasterboard Already Fixed to a Wall
You may need to cut plasterboard that’s already installed to add a socket, access pipes, or repair damage.
This is common on dry-lined walls, where the plasterboard is fixed directly to masonry without a stud frame behind it.
Unlike a loose sheet, you can’t use the score-and-snap method, so a different approach is needed.
Step 1: Check for Hidden Hazards
Use a pipe and cable detector before cutting to avoid damaging electrical wiring or plumbing.
Move the detector slowly across the whole cutting area, not just the center. If anything is detected, adjust your cut line or call a professional before cutting.
Step 2: Locate the Studs
Find the studs with a stud finder or by tapping the wall. Whenever possible, plan your cut so the edges finish on or near a stud for easier repairs.
Cutting near a stud gives the new piece of plasterboard stronger support. It also makes it easier to screw the patch in place without adding extra backing timber.
Step 3: Mark the Cut Area
Measure carefully and draw the outline with a pencil and a straight edge.
Keep the lines clear and square, so the opening is neat. For sockets or access panels, double-check the size before cutting, as small mistakes can leave visible gaps.
Step 4: Cut the Opening
An oscillating multi-tool is the best choice for fixed plasterboard. Set the blade depth to match the board thickness, typically 9.5mm or 12.5mm.
For smaller openings, a jab saw also works well; just cut slowly near the edges. Avoid pushing too hard, as this can damage nearby plasterboard or hidden materials behind the wall.
Step 5: Remove the Section and Tidy the Edges
Lift out the cut piece carefully, then smooth the exposed edges with a drywall rasp before fitting the replacement.
Work gently so the surrounding wall does not crack or chip. A clean edge helps the patch or fitting sit neatly and makes finishing easier later.
Safety Tip: Turn off the power at the consumer unit before cutting near electrical cables, and always use a cable detector when working on existing walls or ceilings.
Choosing the Right Cutting Method for Every Job
Use this quick-reference guide when you’re not sure which tool or method to reach for:
| Task | Best Tool | Notes |
|---|---|---|
| Long straight cut | Utility knife (score and snap) | Works on all standard thicknesses |
| Short notch or L-shape | Jab saw the shortcut | Score and snap the long side first |
| Socket/switch opening | Jab saw or oscillating tool | Double-check measurements before cutting |
| Downlight or pipe hole | Hole saw | Match drill size to fitting size |
| Curved cut | Jigsaw or drywall saw | Cut from the grey face, go slowly |
| Cut on a fixed wall | Oscillating multi-tool | Check for cables and pipes first |
| Insulated board | Fine-toothed handsaw or plasterboard saw | Cut through gypsum and foam in one pass |
| Ceiling trimming | Utility knife + drywall rasp | Cut on the ground before lifting |
| Edge smoothing | Drywall rasp | Use on all cut edges before boarding |
Common Mistakes When Cutting Plasterboard
Here are the common errors that often lead to wasted boards and less-than-ideal results:
- Measuring once. A single measurement hides errors, so check both ends of the cut line before you commit to it.
- Using a dull blade. A blunt edge drags through the paper and gypsum rather than slicing them, leaving a torn, uneven line.
- Sawing straight cuts. Sawing is slower and rougher than needed here, so use the score-and-snap method instead.
- Cutting from the wrong side. Always score the grey finished face, since cutting from the back leaves the rough edge showing.
- Scoring too lightly. A shallow score won’t allow a clean break, so cut deep enough into the gypsum core to achieve a straight snap.
- Not supporting the off-cut. An unsupported piece drops and tears the paper backing, so hold it steady as the board snaps.
- Skipping edge finishing. A rough cut edge makes a poor joint, so smooth it with a drywall rasp before boarding.
- Ignoring PPE. Plasterboard dust and sharp offcuts are common causes of minor injury, so wear a mask, glasses, and gloves.
Tips for Cleaner, More Accurate Cuts
Even small habits can have a big impact when you’re cutting plasterboard. Remember, little steps add up to great results!
- Use a sharp blade. A fresh edge cuts through the paper and gypsum in one clean pass, so swap it out often.
- Use a T-square. It keeps long cuts straight in one motion, which is more reliable than lining up a ruler twice.
- Cut on a flat surface. A stable base stops the board flexing mid-cut, which is what causes uneven or wandering lines.
- Support off-cuts. Holding the waste piece as you snap stops the paper backing from tearing away unevenly.
- Reduce dust. Cut outdoors when you can, or keep a window open and wear a dust mask if you’re working indoors.
- Score thick boards twice. A second pass deepens the cut, which makes the snap cleaner on thicker sheets.
- Keep the blade upright. A 90° angle gives a square, clean edge, while a tilted blade cuts on a slant.
Conclusion
Cutting plasterboard doesn’t have to be difficult. Once you know the right tool for each job, you can get clean cuts with minimal waste.
Score straight cuts; saw or multi-tool detailed, fixed-board cuts.
Don’t worry if it’s not perfect at first. In my own projects, mistakes usually happen when I rush the marking, so practice on offcuts, keep the blade sharp, and measure twice.
Wear PPE and control plasterboard dust, as it can irritate your eyes and airways.
If you’re installing plasterboard as part of a larger project, the British Gypsum installation and technical guidance are also excellent resources to follow.
If that project is a media wall build, the framing and fasteners matter as much as the cut.
With the right technique, tools, and a little practice, you’ll be able to cut plasterboard accurately and confidently on your next DIY project.
Frequently Asked Questions
What is the Best Tool to Cut Plasterboard?
For long straight edges, a Stanley utility knife is the best manual tool. For plunge cuts and holes, an oscillating multi-tool is the top power tool.
What is the Best Way to Start a Cut in Plasterboard?
Mark the cut line, make a starter hole with a plasterboard hammer, then insert a plasterboard saw and cut along the marked lines.
How to Cut Plasterboard Fast?
A jigsaw is the fastest option after score-and-snap. Draw your cut line with a pencil, line the blade up next to the mark without touching it, then run the saw at high speed straight through the board.
Is Plasterboard Dust Harmful to Humans?
Plasterboard dust can irritate your eyes, skin, and airways. Repeated exposure may increase the risk of respiratory conditions like asthma or COPD, so wear a dust mask when cutting.