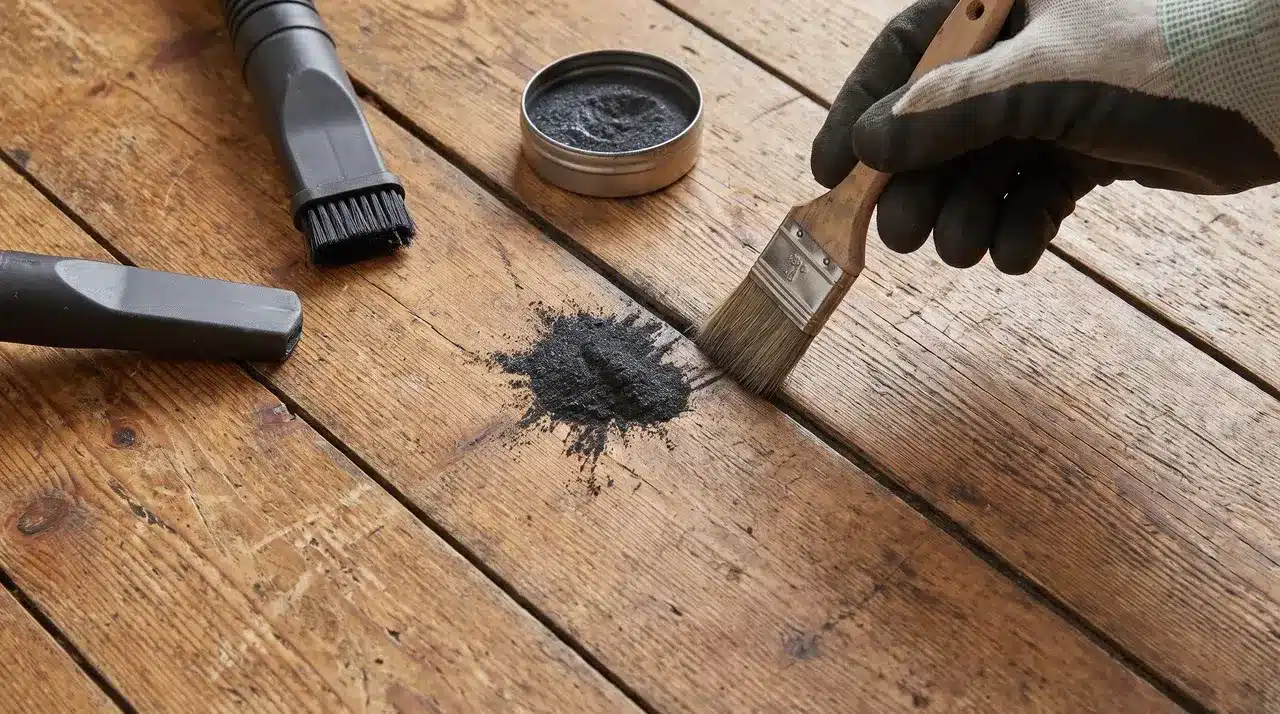

Every home has that one floorboard. Step on it, and it groans every time someone crosses the room.
That creak almost always comes from wood, nails, or subfloor parts rubbing together, not a broken board.
I have spent years fixing homes as a builder, and learning how to fix creaky floorboards is one of the simplest repairs you can do.
You can often fix a single noisy spot without touching the rest of the floor.
The right method depends on your floor type and whether you can reach the area from below. Keep reading for the exact fix.
Why Do Floorboards Creak?
Floorboards creak when parts of the floor move and rub against each other. This happens most when weight presses down on a loose spot.
Many things can cause this movement. Loose nails often shift inside their holes. Boards can rub against the board next to them. Sometimes a gap opens between the subfloor and the joists.
Timber shrinks in dry weather, and it swells when there’s extra moisture or humidity. Some floors just didn’t get enough fixings during installation.
Bowed, weak, or damaged joists also cause creaks. Even pipes or heating parts can rub against timber and add to the noise.
Pro tip: Creaks often change with the seasons, since wood expands and shrinks as indoor humidity shifts. In my own repair work, wood movement and loose fixings are behind most of the creaks I find.
Find the Exact Source of the Creak
First, locate the exact source of the squeak and check how the floor moves. This helps you choose the right repair instead of guessing.
- Mark noisy areas: Walk slowly and tape each squeaky spot.
- Check movement: Side movement means rubbing; vertical movement may mean a loose fixing or joist gap.
- Inspect the floor: Check from below if possible and identify your flooring type.
- Match the fix: Use lubricant, screws, shims, blocking, or relaying based on the cause.
Tools and Materials You May Need
Gather your tools before you start, since having everything ready saves time once you find the noisy spot.
| Category | Items Required |
|---|---|
| Tools | Painter’s tape, tape measure, torch, drill and bits, screwdriver, hammer, nail punch, countersink bit, joist detector, eye protection, dust mask |
| Repair materials | Flooring or wood screws, breakaway screws, wooden shims, wood glue or construction adhesive, powdered graphite, color-matched filler or wax, timber blocks |
Note: Check for electrical cables, water pipes, gas lines, and underfloor heating before you drill, and use a detector rather than guessing joist spacing.
How to Fix Creaky Floorboards From Above
These repairs suit boards you can easily access from the top of the floor, so you can do the work without removing the entire floorboard.
Method 1: Apply Graphite Between the Boards
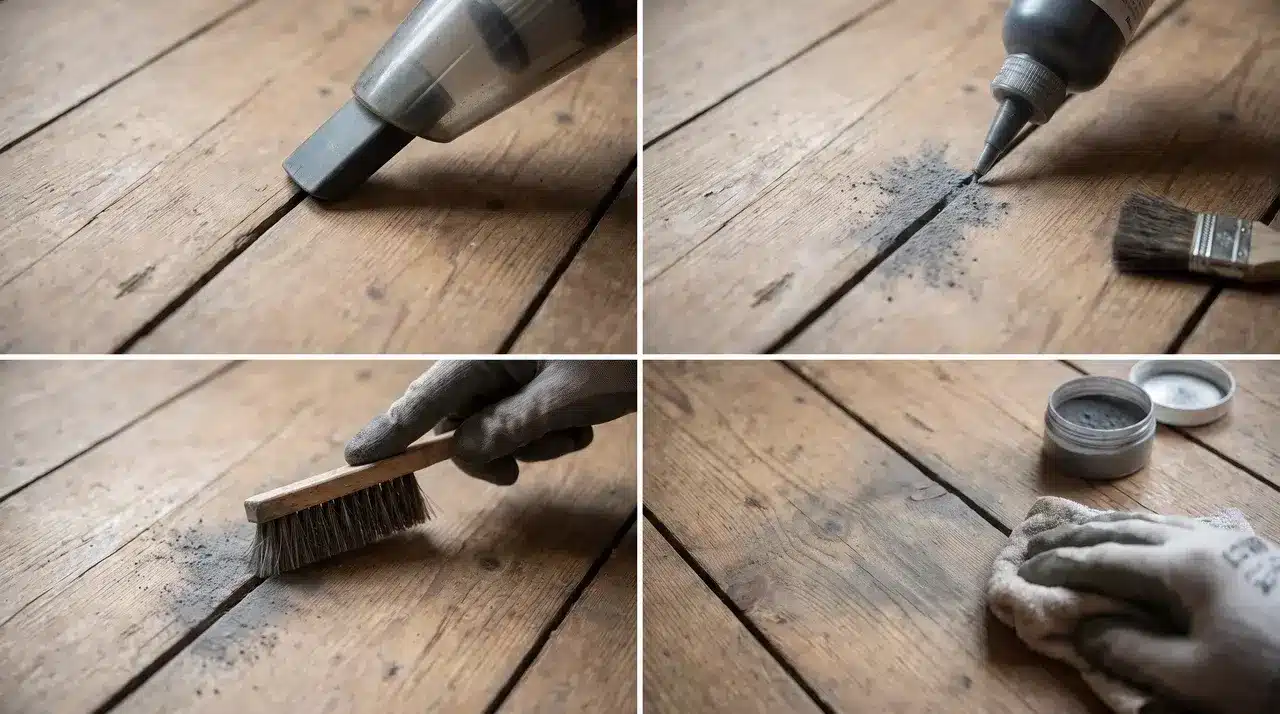
Vacuum dirt out of the joint, then sprinkle powdered graphite into the gap and brush it down. Gently step on the area a few times to help work in the powder, then wipe away any excess.
Remember, graphite helps reduce friction but doesn’t secure a loose board, so it’s a good idea to test it in a hidden spot first.
Best for: Exposed boards that rub along their edges
Method 2: Replace Loose Nails With Screws
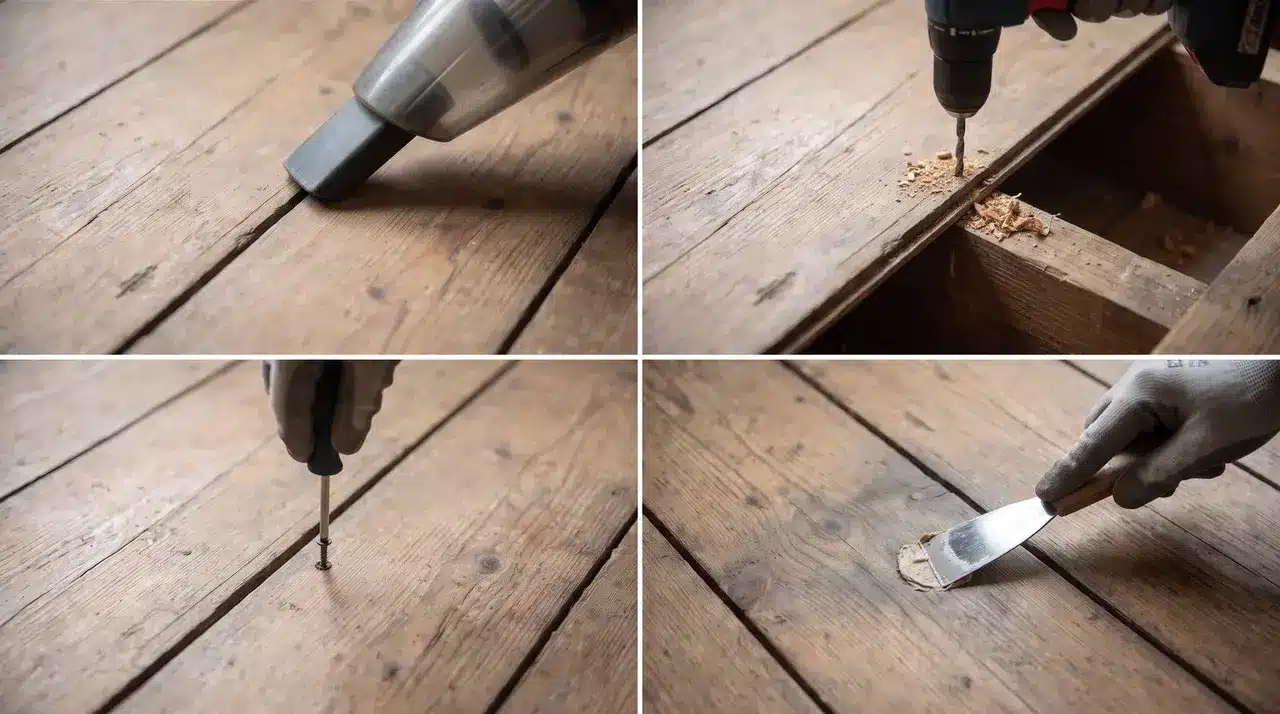
Confirm the joist position and check for hidden pipes or cables before you drill. Drill a pilot hole, then drive a flooring screw into the center of the joist.
Stop when the head sits just below the surface, then cover it with matching filler or wax.
Best for: Boards that move up and down over a joist
Method 3: Use Breakaway Screws on Finished Wood
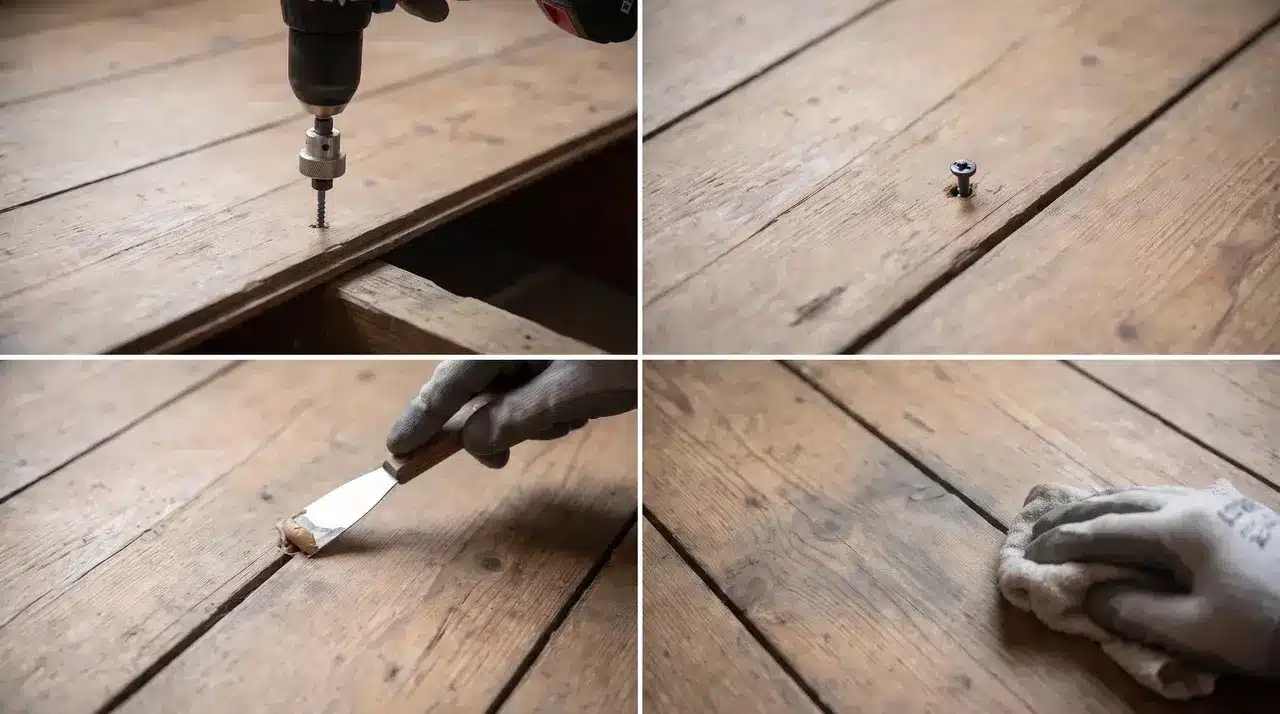
Mark the squeak, find the joist, and follow the pilot-hole steps from your kit. Drive the scored screw through its depth-control fixture, then snap the head off cleanly.
Cover the hole with color-matched wax or filler for a clean finish that blends into the floor.
Best for: Finished floors where a visible screw head would spoil the look
Method 4: Refix a Loose Board End
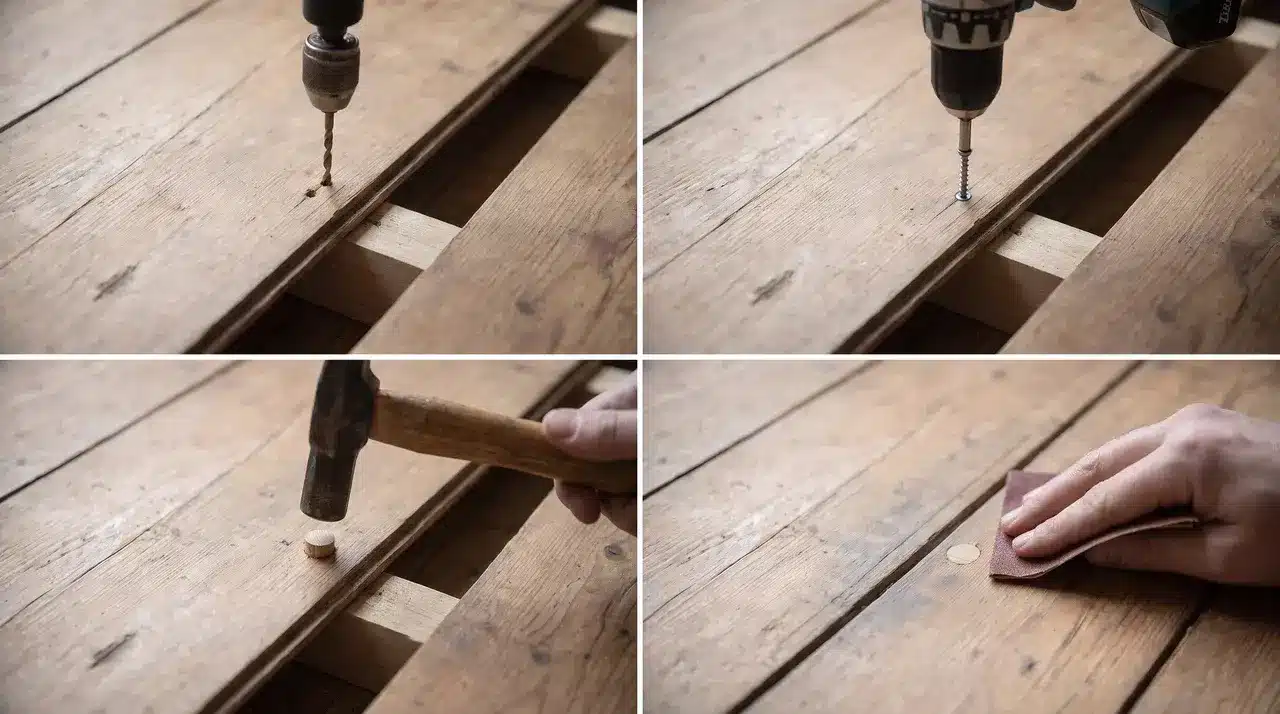
Find the nearest joist or noggin and add support underneath. Drill a small pilot hole near the board end first to stop splitting.
Secure the board firmly, but don’t overtighten it or block its normal movement.
Best for: Loose or unsupported board ends
Method 5: Insert a Glued Shim Between the Joist and Subfloor
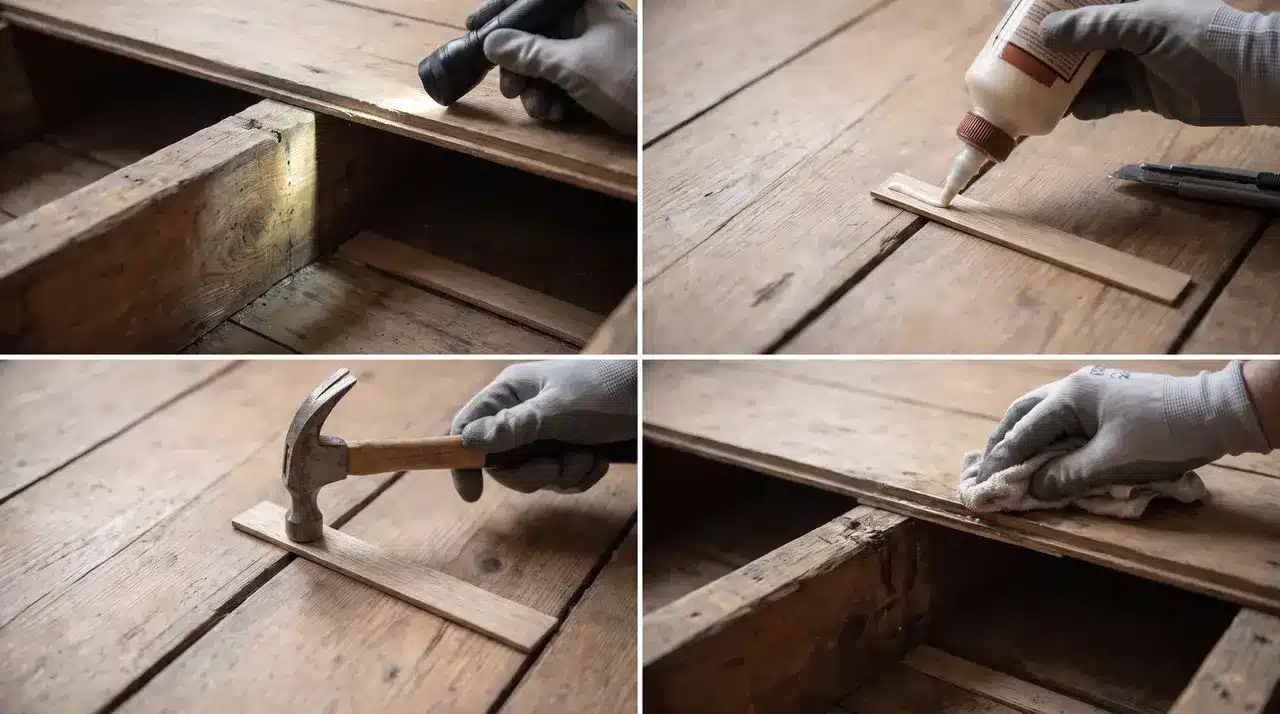
Have a helper stand on the noisy spot while you find the gap from underneath. Coat a thin timber shim with glue and push it in until snug.
Stop before the floor starts to lift, then let the glue cure fully before walking on the repaired area.
Best for: Gaps above a joist that you can reach from below
Method 6: Add Timber Blocking Between Joists
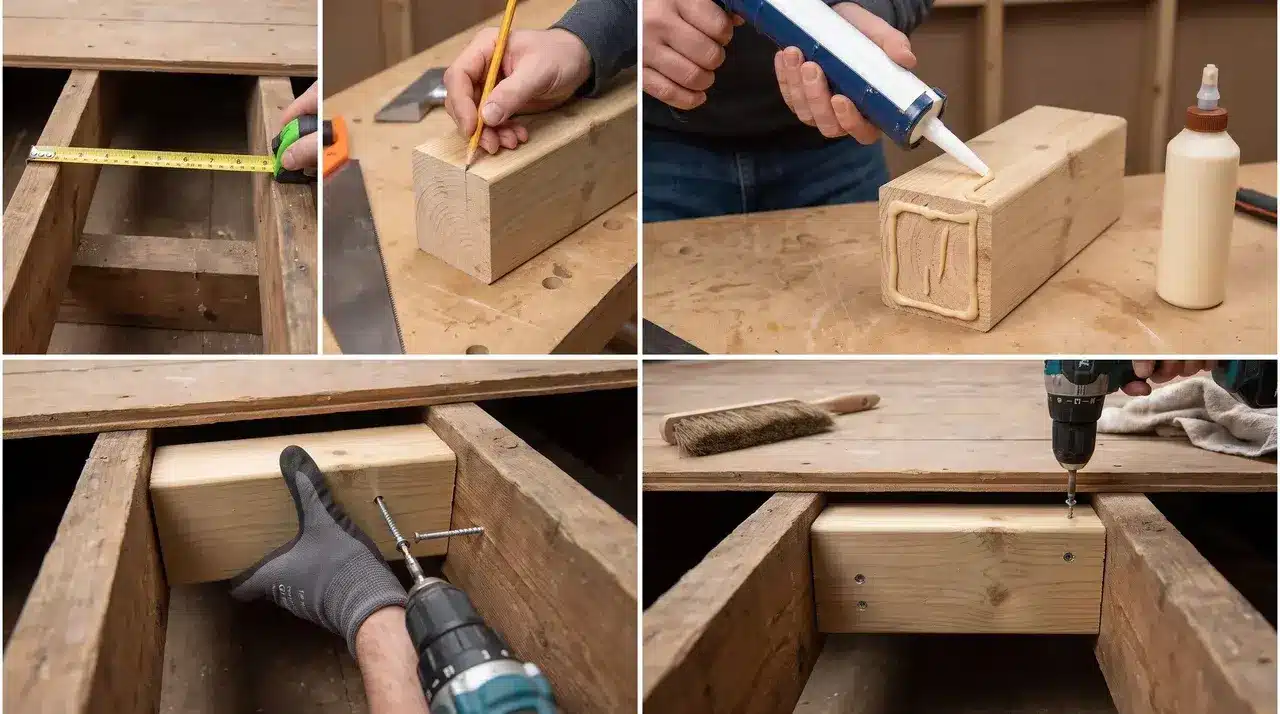
Measure the gap between joists and cut a timber block to fit snugly. Apply construction adhesive, then position the block under the moving section.
Secure it to both joists and the subfloor, provided the screw length is safe for hidden pipes or cables.
Best for: Movement between joists or a flexing board joint
Method 7: Without Removing the Carpet
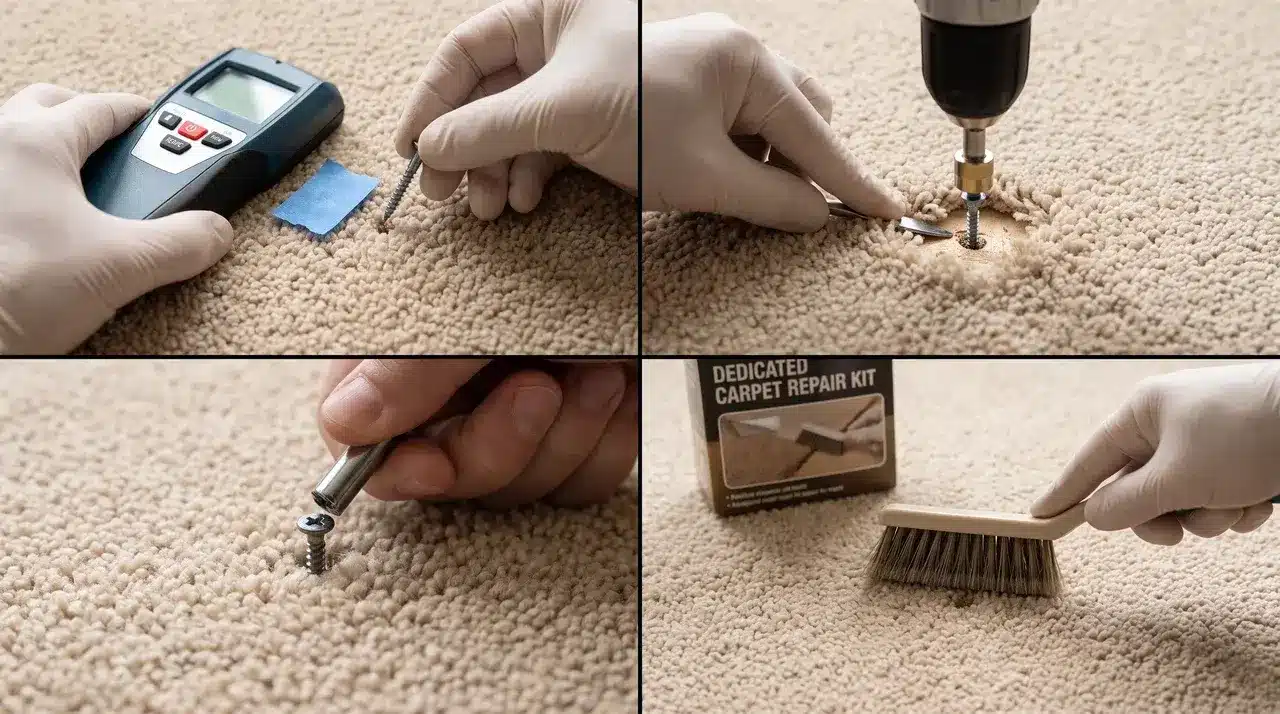
Mark the exact creak and locate the joist with a detector or your kit’s screw. Carefully part the carpet fibers before drilling so you don’t damage the weave.
Use a breakaway screw, then snap it off below the carpet surface for a neat, secure finish.
Best for: Carpeted floors where lifting the carpet isn’t an option
Best Materials for Fixing a Squeaky Floor
Each repair suits a different type of movement, and picking the right one depends on where the creak comes from.
| Repair | Best Used For | Limitation |
|---|---|---|
| Powdered graphite | Boards rubbing at their edges | Doesn’t repair loose support |
| Flooring screws | Loose boards over joists | Leaves a hole unless hidden |
| Breakaway screws | Finished wood or carpet | Needs an accurate joist location |
| Glued shims | Small gaps above joists | Can lift the floor if pushed too far |
| Construction adhesive | Movement reachable from below | Needs clean surfaces and time to cure |
| Timber blocking | Flexing between joists | Needs access from underneath |
| Nails | Minor refixing in suitable timber | May loosen again with movement |
Choose a repair that’s specific to the problem, and you’ll enjoy a solution that lasts much longer than a quick, generic fix.
When to Call a Professional
Get help when the floor sags, bounces, or feels unsafe to walk on. Timber that shows rot or insect damage also needs a professional look.
A leak may have damaged the subfloor or joists, and hidden pipes, cables, or underfloor heating can block safe drilling.
Call an expert if the flooring is valuable, damage keeps returning, or several rooms need structural repair.
A carpenter or joiner handles most board and joist repairs. A flooring installer suits laminate or engineered floors.
Call a plumber or electrician for leaks and wiring. A pest specialist handles insect damage, and a structural engineer handles sagging or major movement.
How Much Does It Cost to Fix Creaky Floorboards?
Costs vary widely depending on the repair type, the cause, and whether you use a professional or a DIY approach.
| Repair Type | Typical Cost |
|---|---|
| DIY fixes (lubricant, screws, filler) | $10–$100 |
| Spot repair (breakaway screws) | $100–$300 per spot |
| Carpet lifting and refitting | $200–$1,000 per room |
| Carpenter repair visit | $200–$1,000 per room ($65–$120/hr labor) |
| Subfloor or joist repair | $300–$3,000, up to $20,000 for major joist work |
Several factors affect the final price: how many noisy spots need fixing, the floor covering, whether you can reach the area from below, and any rot, moisture, or structural damage found.
Common Floorboard Repair Mistakes
Avoiding a few common mistakes can make your floor repair safer and longer-lasting. I once pushed a shim too far and made the floor feel tighter but noisier, so small adjustments matter.
- Check before drilling: Look for pipes, cables, and hidden services, and never drive screws between joists.
- Use the right fixings: Avoid screws that are too long, and use screws with adhesive rather than relying only on nails.
- Protect floor movement: Never screw through floating laminate, over-tighten shims, or fill expansion gaps with rigid filler.
- Prevent future creaks: Keep humidity stable, repair leaks quickly, support board ends properly, and check suspended floors for damp.
Wrapping It Up
The right fix for creaky floorboards depends on where the movement starts. Find that spot first, and the rest gets much easier.
Choose a dry lubricant, screws, glued shim, or added support based on the floor movement.
Before you drill, check for hidden pipes, wiring, and heating systems. A quick check now saves a costly mistake later.
If your floor feels soft, sags, or shows damp, call in a professional. In my repair work, the simplest fix wins. Mark your creak today and try the method that fits your floor.
Frequently Asked Questions
How To Stop Floors From Creaking When Walking?
Find the exact noisy spot, then match the fix to the cause: lubricant for rubbing edges, a screw for loose boards.
How Do Professionals Fix Squeaky Floors?
They identify the joist and then tighten loose boards using screws or shims, typically starting from underneath.
Do I Need To Worry About Creaky Floorboards?
Not usually; a single noisy board is rarely serious, but sagging or damp timber can signal a bigger problem.
Should You Remove and Replace Floorboards to Fix a Squeak?
No, most squeaks stop with screws, shims, or graphite. Replacement is only for damaged or rotted boards.