Store-bought broccoli often tastes flat. Sometimes it’s bitter. By the time it reaches your kitchen, it can be days past its best.
That changes when you grow it yourself; home-harvested broccoli is noticeably sweeter, more tender, and packed with vitamins A, C, and K, plus plenty of fiber and folate (USDA FoodData Central).
Once you understand a few basic rules about timing and temperature, growing broccoli at home becomes one of the most rewarding things you can do in a kitchen garden.
Everything you need to know: pick the right variety, prep your soil, space and care for your plants, troubleshoot issues, and harvest at the perfect time.
Tools and Materials You’ll Need
Having the right tools and materials on hand makes growing broccoli easier and more successful. From seeds and soil to watering tools and harvesting equipment, each item helps ensure healthy plants and a bountiful harvest.
- Seeds and Varieties: Broccoli seeds (Bellstar, Czecho, Walam 29, Burgundy for sprouting types)
- Containers and Cells: Seedling trays or cells; Small pots for transplanting
- Soil and Fertilizer: Fine potting mix or seed-starting soil; Compost; Organic slow-release fertilizer
- Watering and Care: Watering can or hose; Mulch (optional, for moisture retention)
- Planting Tools: Hand trowel, Gloves, Labels for varieties
- Harvesting Tools: Sharp knife or garden shears
- Storage Supplies: Produce bags; Paper towels (for absorbing moisture in storage)
Choosing the Right Broccoli Variety
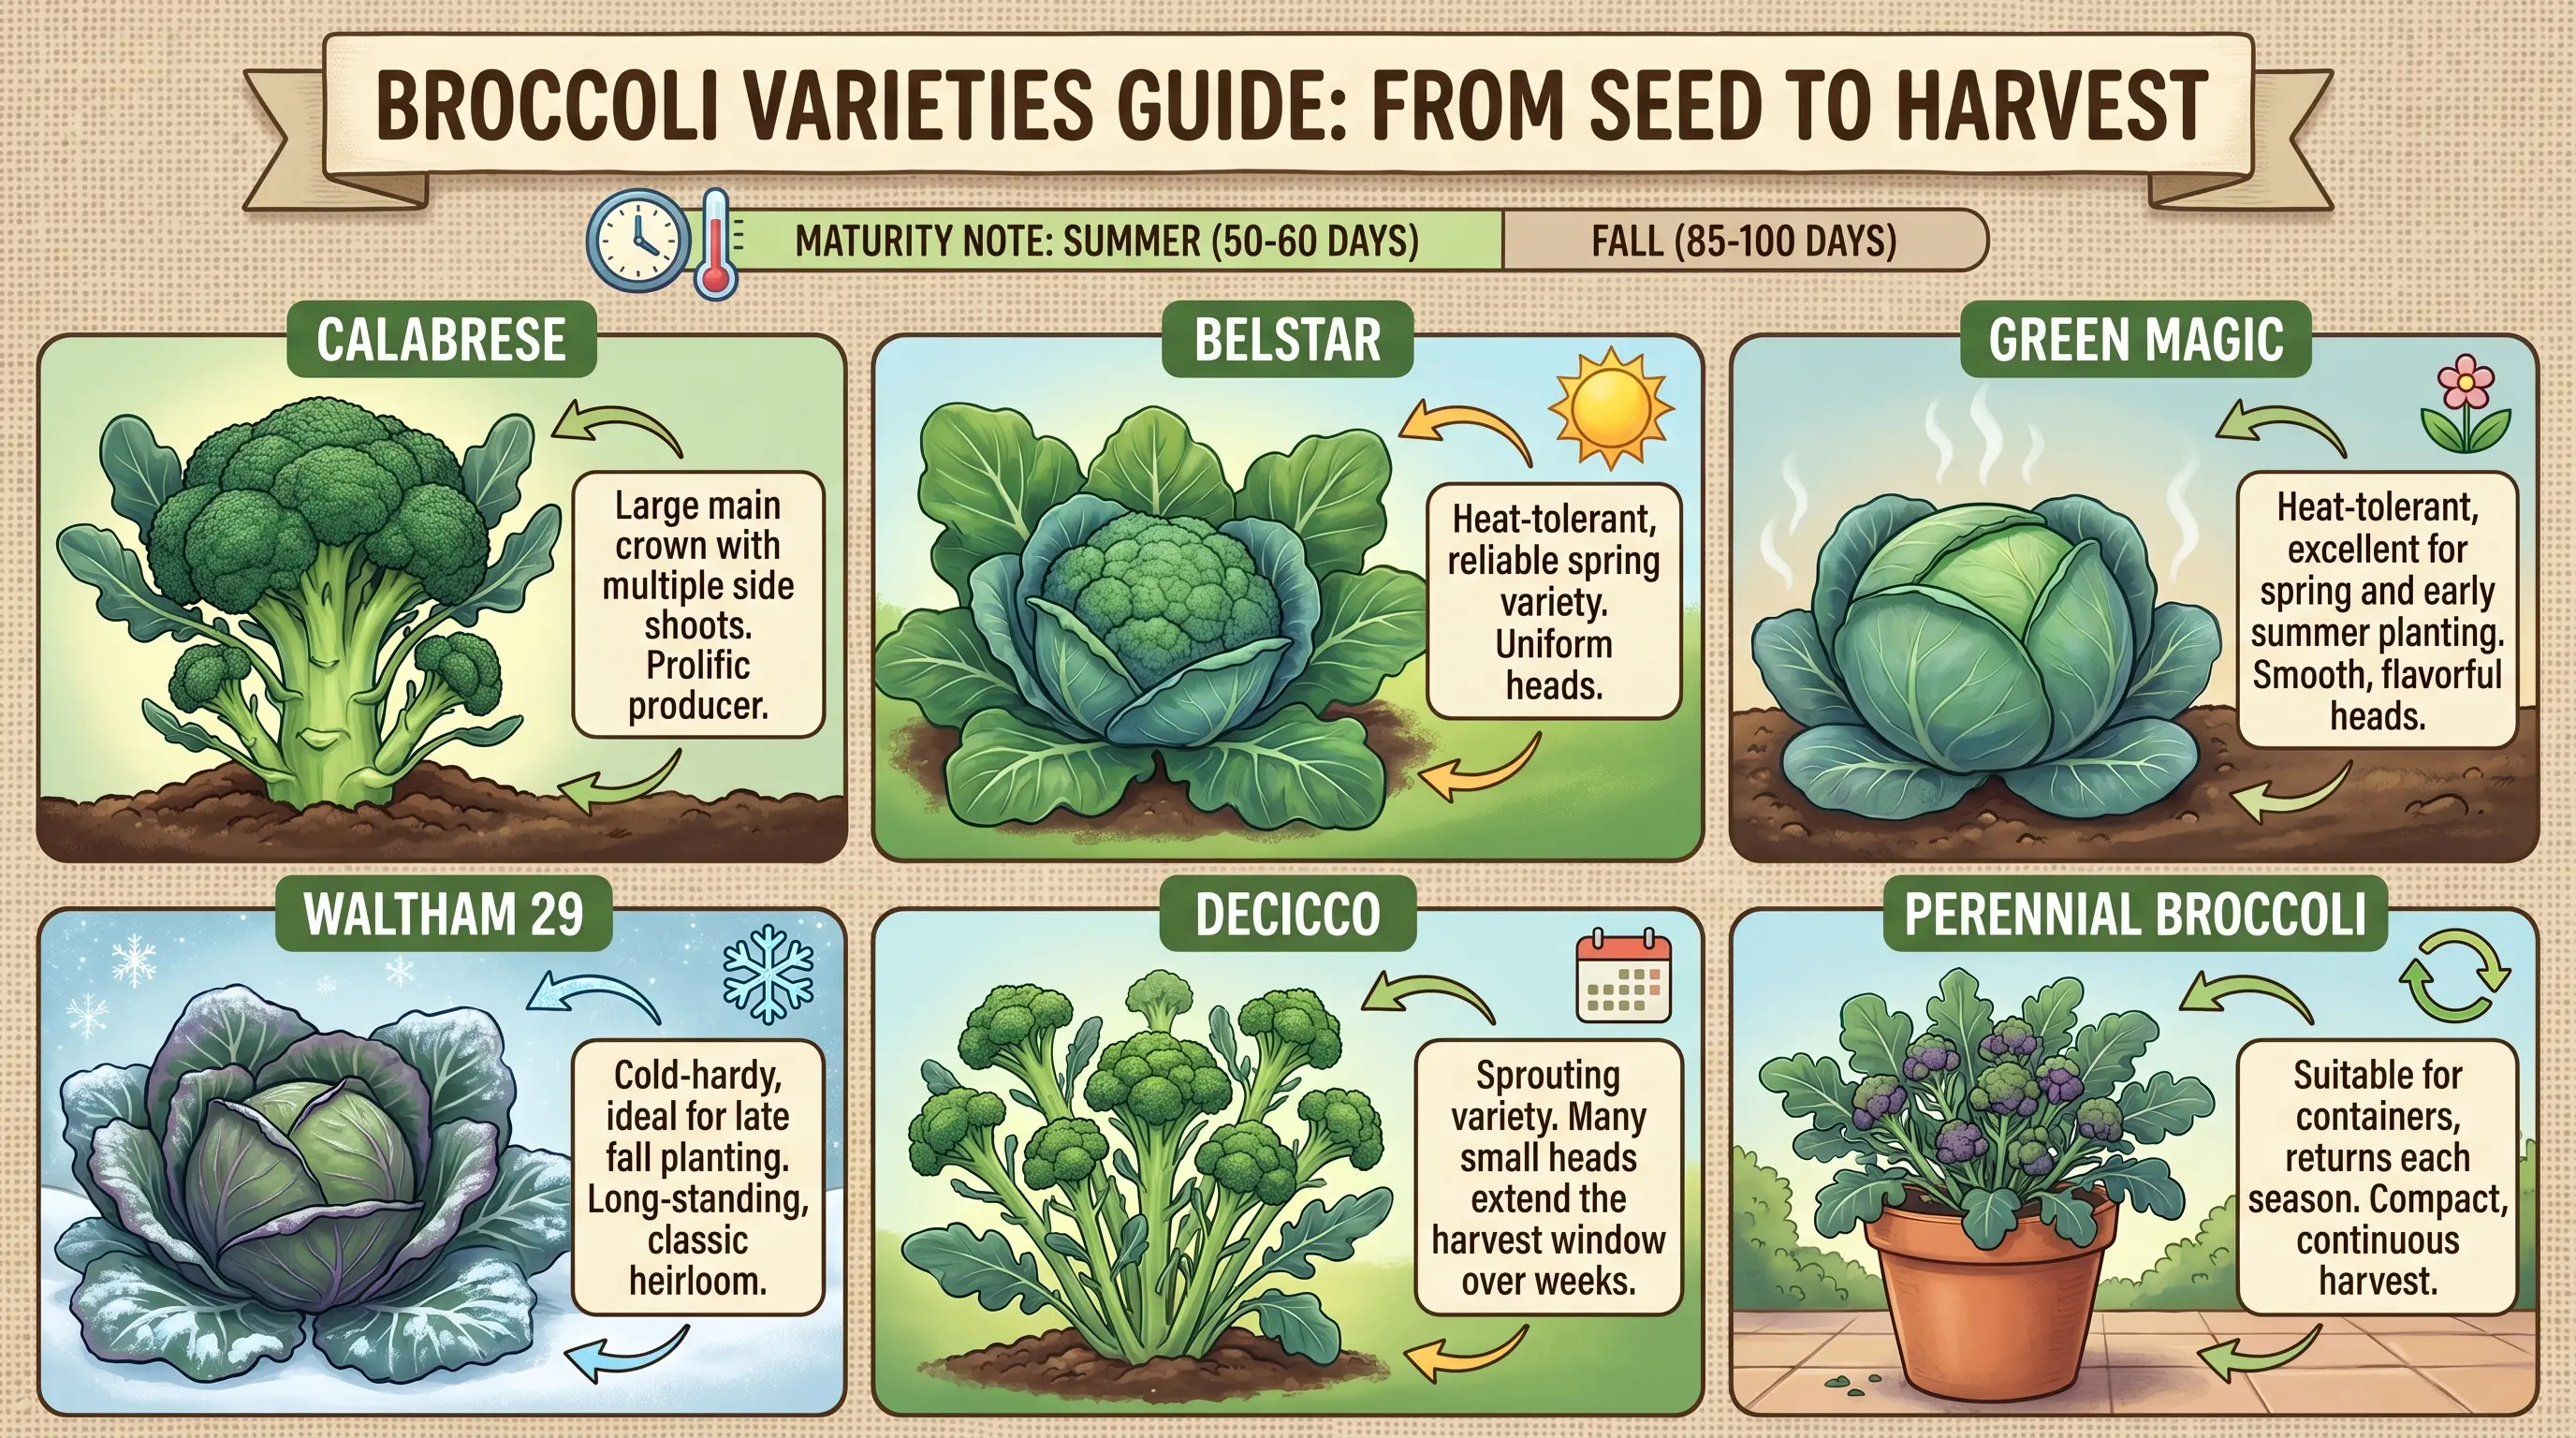
Not all broccoli grows the same way, and the variety you pick should match your climate and how you plan to use the harvest.
- Calabrese: Classic large-headed type; produces one main crown followed by smaller side shoots for weeks.
- Belstar and Green Magic: Heat-tolerant varieties; hold up better in warmer springs and resist bolting.
- Waltham 29: Cold-hardy variety; ideal for late fall planting.
- Sprouting varieties (e.g., DeCicco) produce many small heads rather than a single large crown, extending the harvest window.
- Perennial broccoli: Suitable for containers; returns each season and works well in large pots.
- Maturity notes: Summer varieties typically mature in 50–60 days; fall varieties take 85–100 days from transplant.
- Planning tip: Check the seed packet and count backward from the expected frost date before purchasing seeds.
How to Grow Broccoli Step-by-Step Easily
Ready to enjoy fresh, homegrown broccoli? Follow this simple approach to pick the best variety, prepare your soil, plant with confidence, and harvest tender, flavorful heads straight from your garden.
Even beginners can grow a bountiful crop with these easy tips.
Step 1: Choose Your Broccoli Variety
Select a variety suited to your garden and climate. Options include Calabrian types such as Bellstar, Czecho, and Walam 29, as well as sprouting types such as Burgundy. Consider taste, growth habit, and heat tolerance.
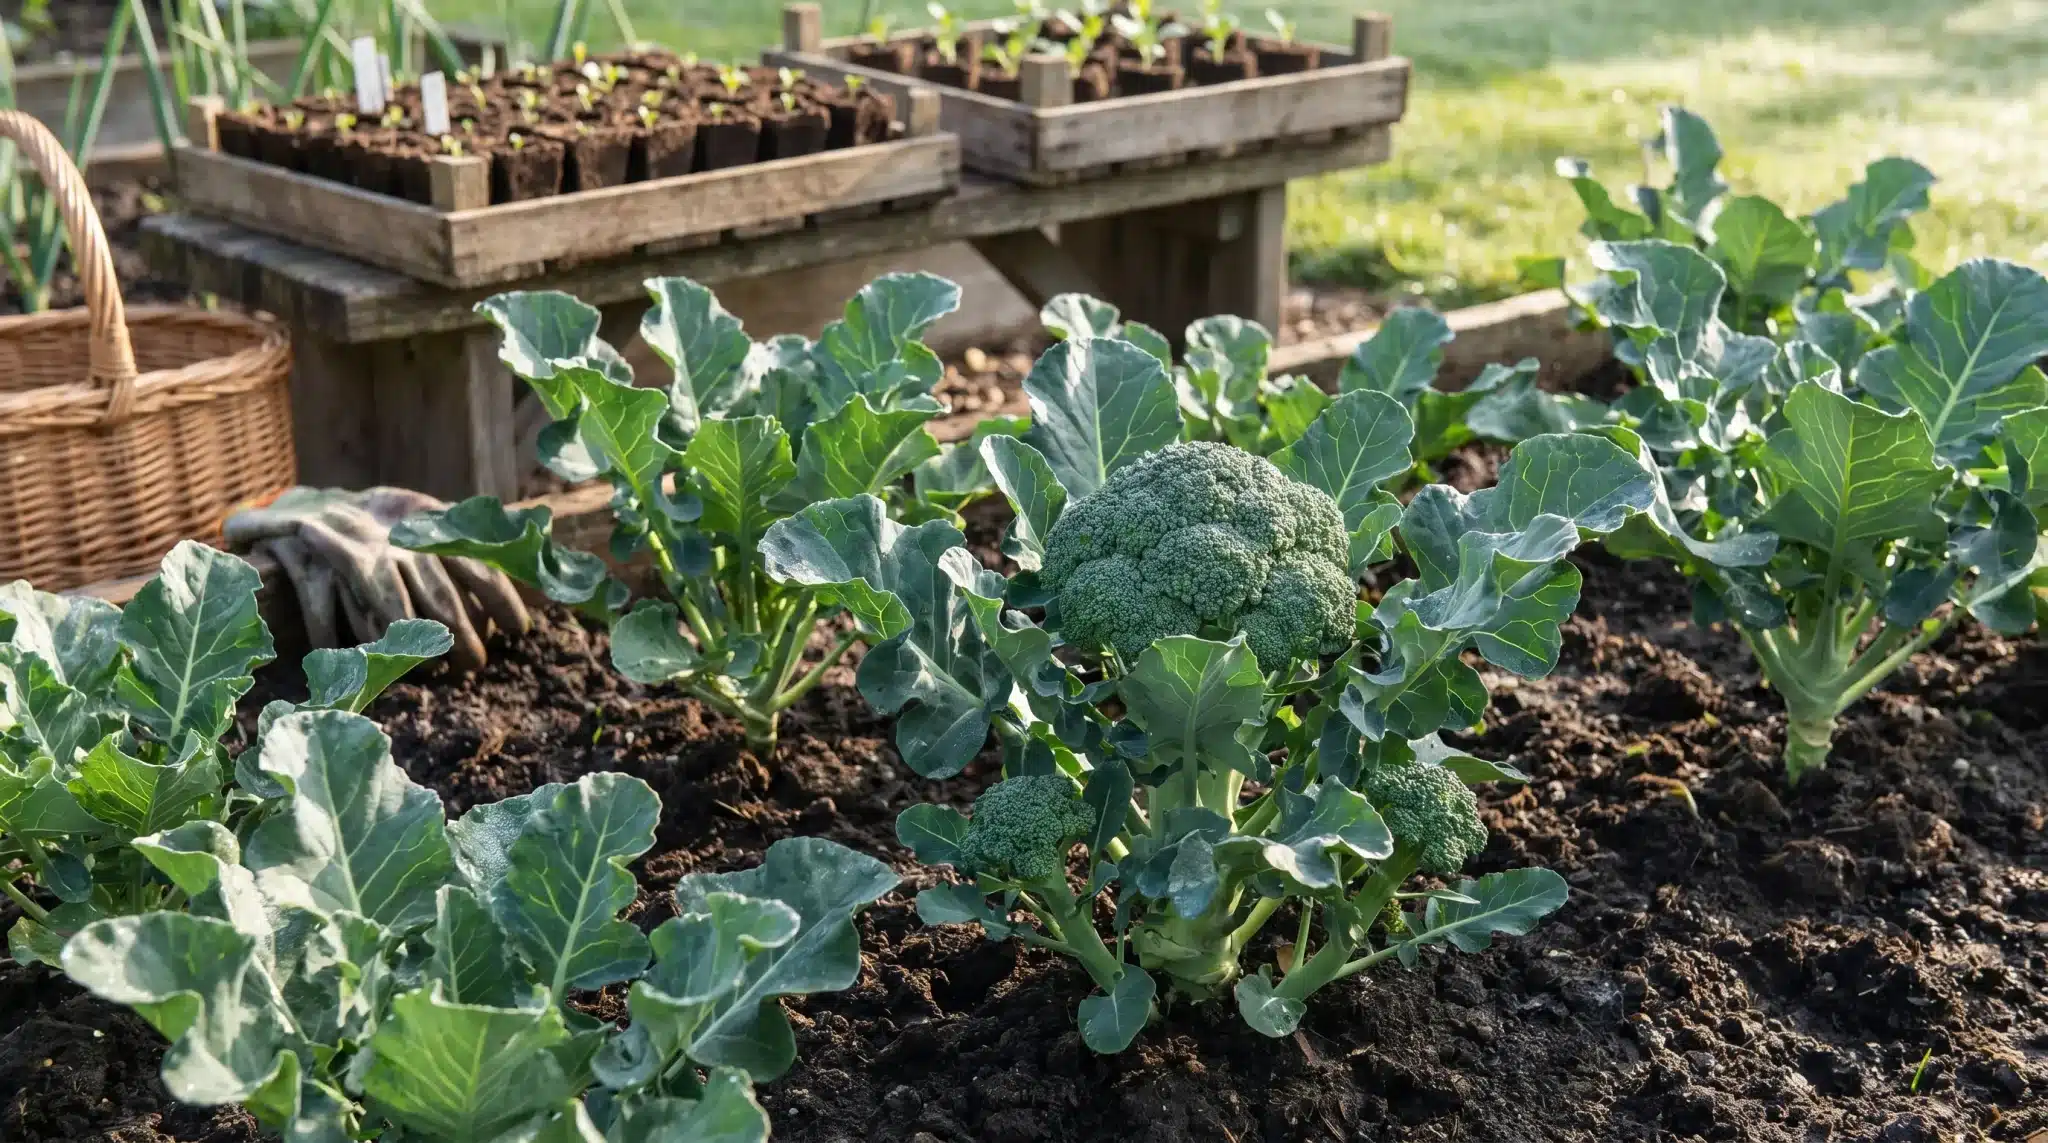
Step 2: Start Seeds in Cells
Plant 2–3 seeds per cell using fine, moist potting mix. Keep the soil consistently damp, covering seeds lightly. Thin seedlings to the strongest plant once they emerge.
Step 3: Prepare for Transplanting
Wait for 2–4 true leaves before moving seedlings to larger pots or garden beds. Avoid leaving seedlings in trays for too long to prevent premature flowering.
Step 4: Choose Planting Location
Select a sunny garden spot. Ensure the soil is fertile by adding compost to the surface and a small amount of slow-release organic fertilizer to each planting hole.
Step 5: Transplant Seedlings
Space plants appropriately (12–24 inches apart). Gently place seedlings in soil, covering roots completely. Firm the soil lightly around the base to remove air pockets.
Step 6: Monitor Growth and Maintenance
Check plants regularly for water needs; broccoli prefers consistently moist soil. Watch for side shoots and encourage healthy branching by harvesting appropriately.
Step 7: First Harvest
Harvest the main head when florets are tight and compact. Use a sharp knife to cut just below the head, leaving leaves intact to encourage side shoots.
Step 8: Subsequent Harvests
Collect side shoots as they appear. Continue harvesting multiple times to maximize yield. Side shoots are tender and cook quickly.
Step 9: Storing Broccoli
Break down heads into smaller florets and stems. Place in produce bags with a paper towel to absorb moisture. Store unwashed in the fridge to prolong freshness
Video Tutorial
I’d like to acknowledge Epic Gardening for the insightful video, which was a key reference in putting this guide together.
How to Stop Broccoli from Bolting
Bolting, when the plant rushes to flower instead of forming a tight head, is the most frustrating thing for broccoli growers. Once it starts, it can’t be reversed.
The trigger is almost always temperature: soil above 80°F, or a sudden cold snap after plants are established. Both stress the plant into seed-production mode.
Prevention steps:
- Plant at the right time for your zone (spring or fall, not summer)
- Mulch heavily to buffer soil temperature swings
- Water consistently, drought stress triggers bolting just as heat does
- Use shade cloth on unexpectedly hot days
If your plant does bolt, don’t throw it away immediately. Harvest the heads at once, cooked in soups or stir-fries, boiled broccoli is much milder than it tastes raw.
You can also let one plant go fully to seed and save those seeds for next season.
When to Plant Broccoli
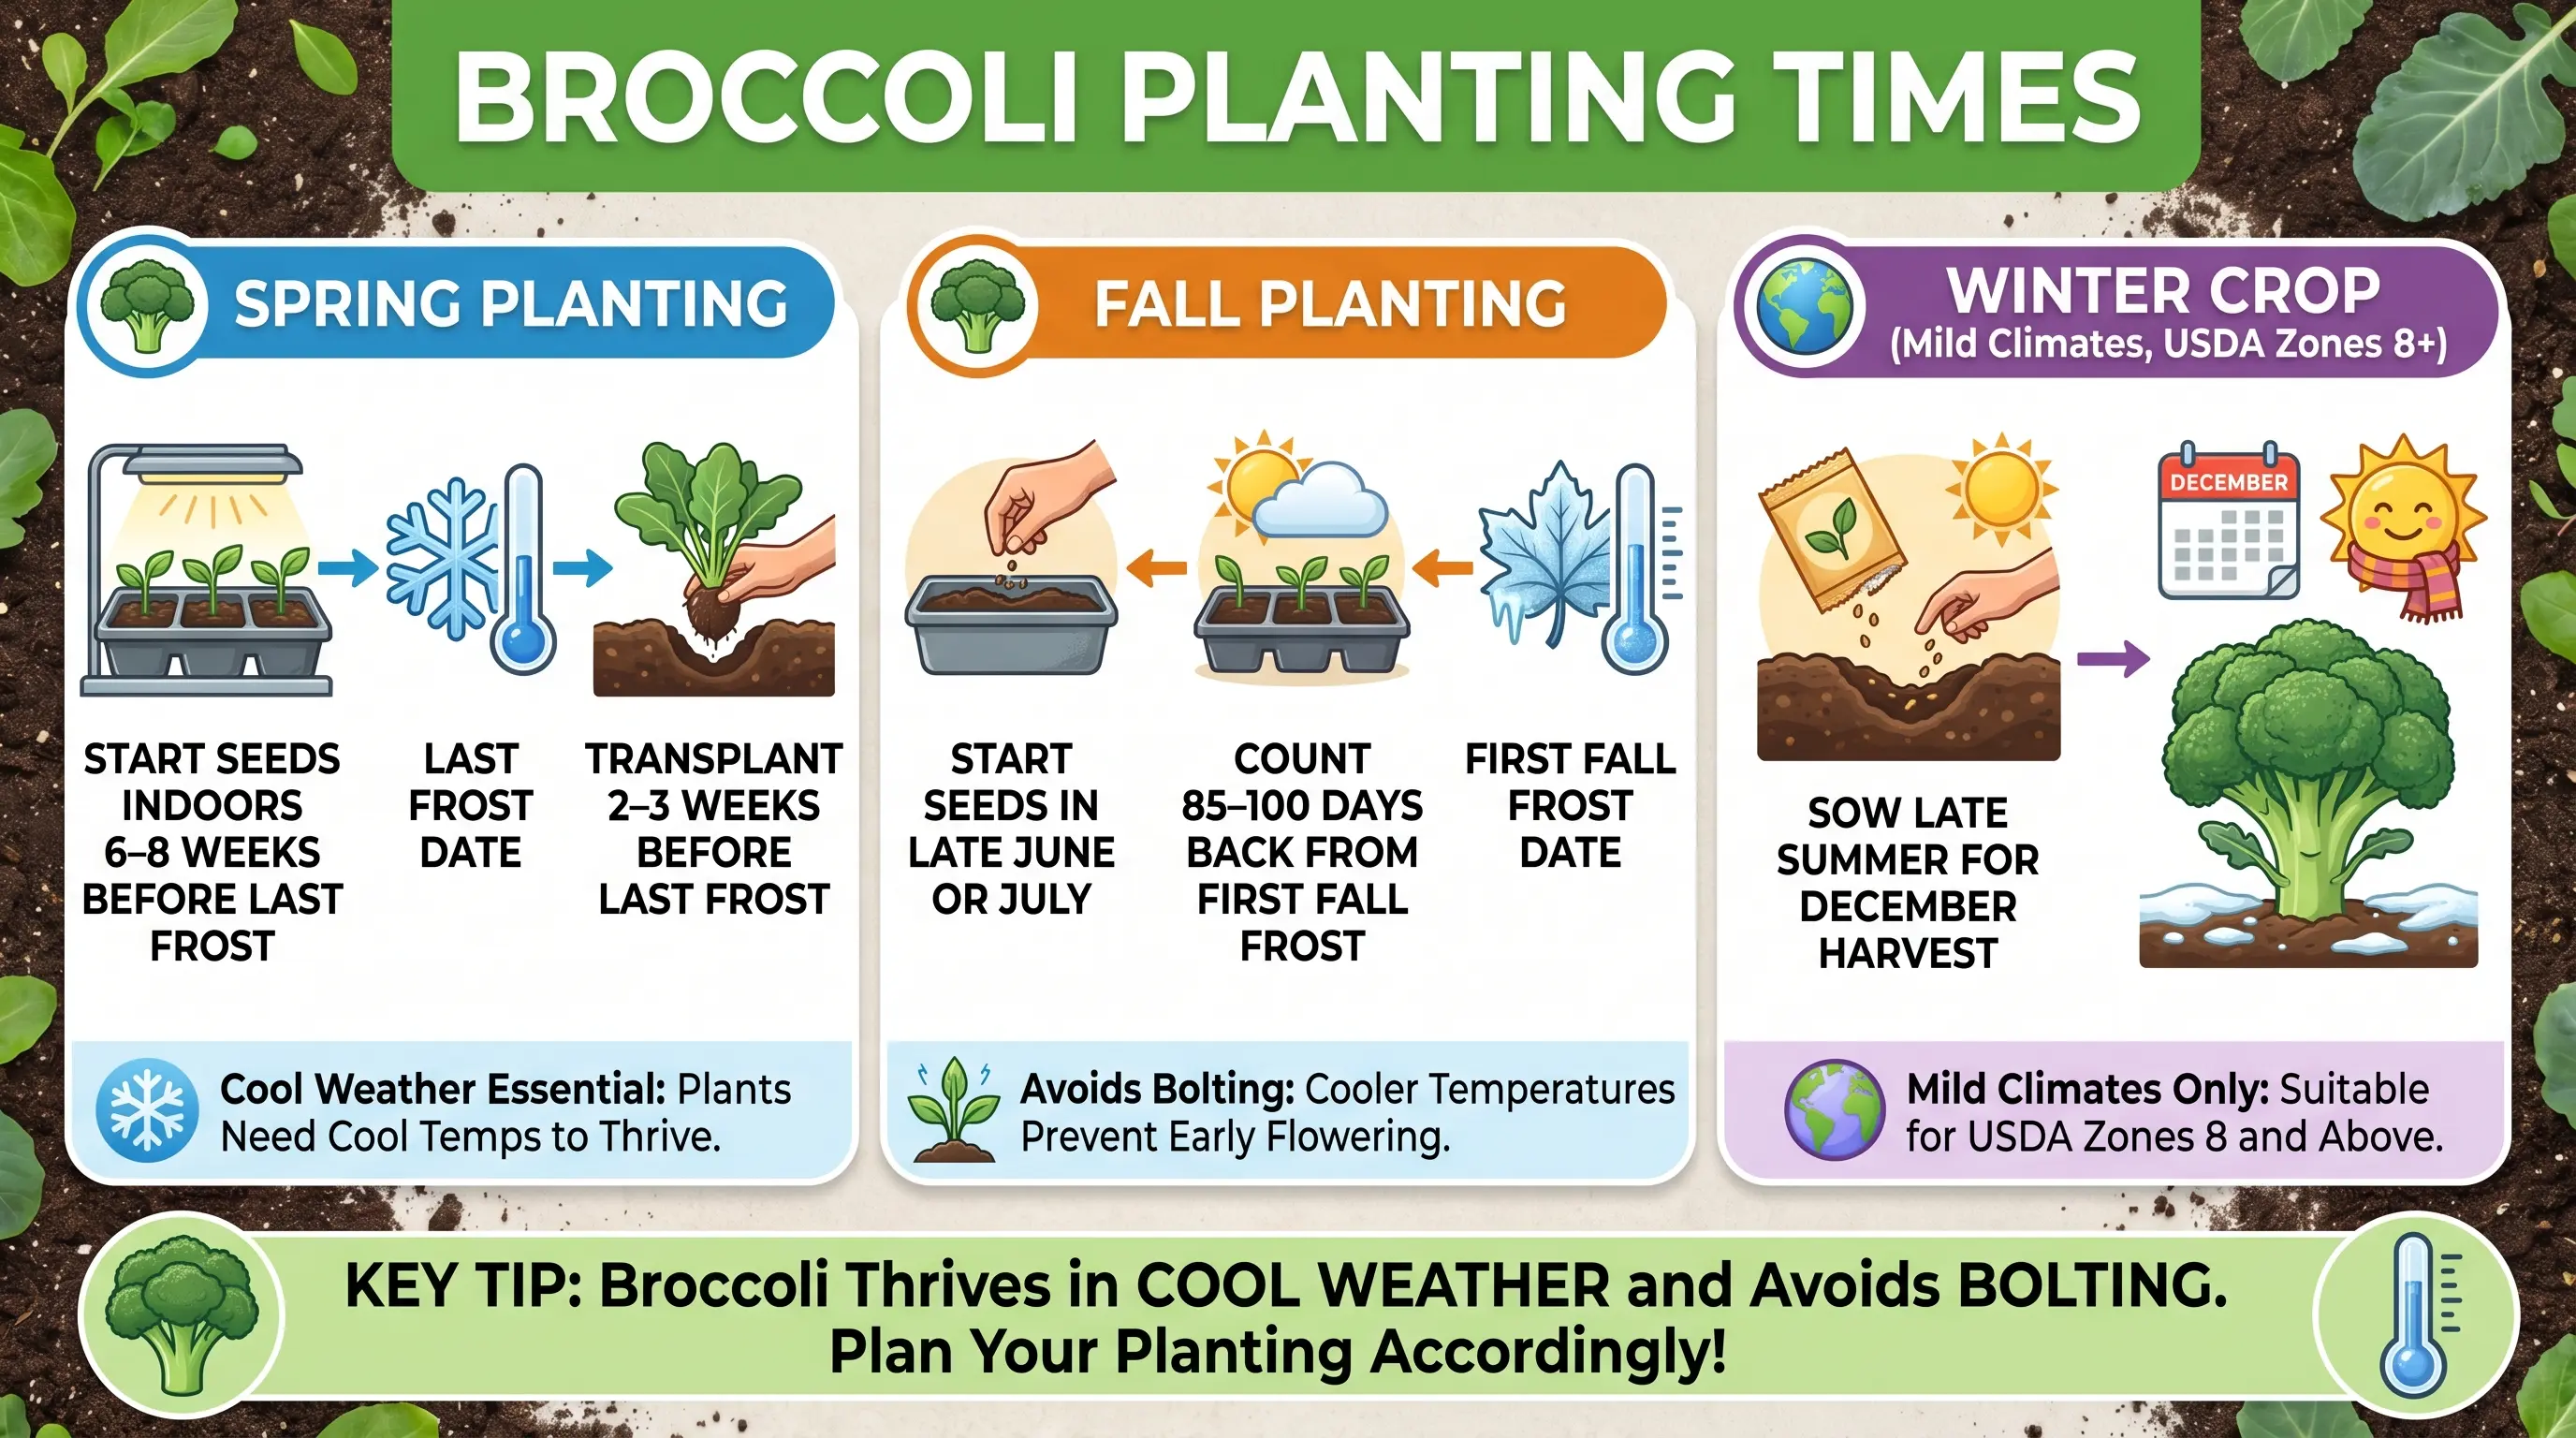
Timing is the single biggest factor in whether your broccoli succeeds or bolts into yellow flowers before you get a single head. It needs to mature during cool weather.
If it’s still growing when temperatures climb above 80°F, the plant panics, goes to flower, and the heads become bitter and inedible.
1. Spring Planting
Start seeds indoors 6–8 weeks before your last frost date. Move transplants outside 2–3 weeks before that date; the crop handles light frost just fine and actually grows better in cool soil.
2. Fall Planting
This is where most home gardeners miss a second crop. Count 85–100 days back from your first expected fall frost, and that’s your outdoor transplant date. For many gardeners in the US, that means starting seeds indoors in late June or July.
3. Winter Crop (Mild Climates Only)
In USDA zones 8 and above, you can sow in late summer for heads ready around December. The plants can survive down to about 26°F if the soil is mulched and they’re well established.
A simple way to organize this is to check your local Cooperative Extension office’s frost date calendar; it’s free, region-specific, and far more accurate than any general guide.
Watering, Feeding, and Mulching a Broccoli
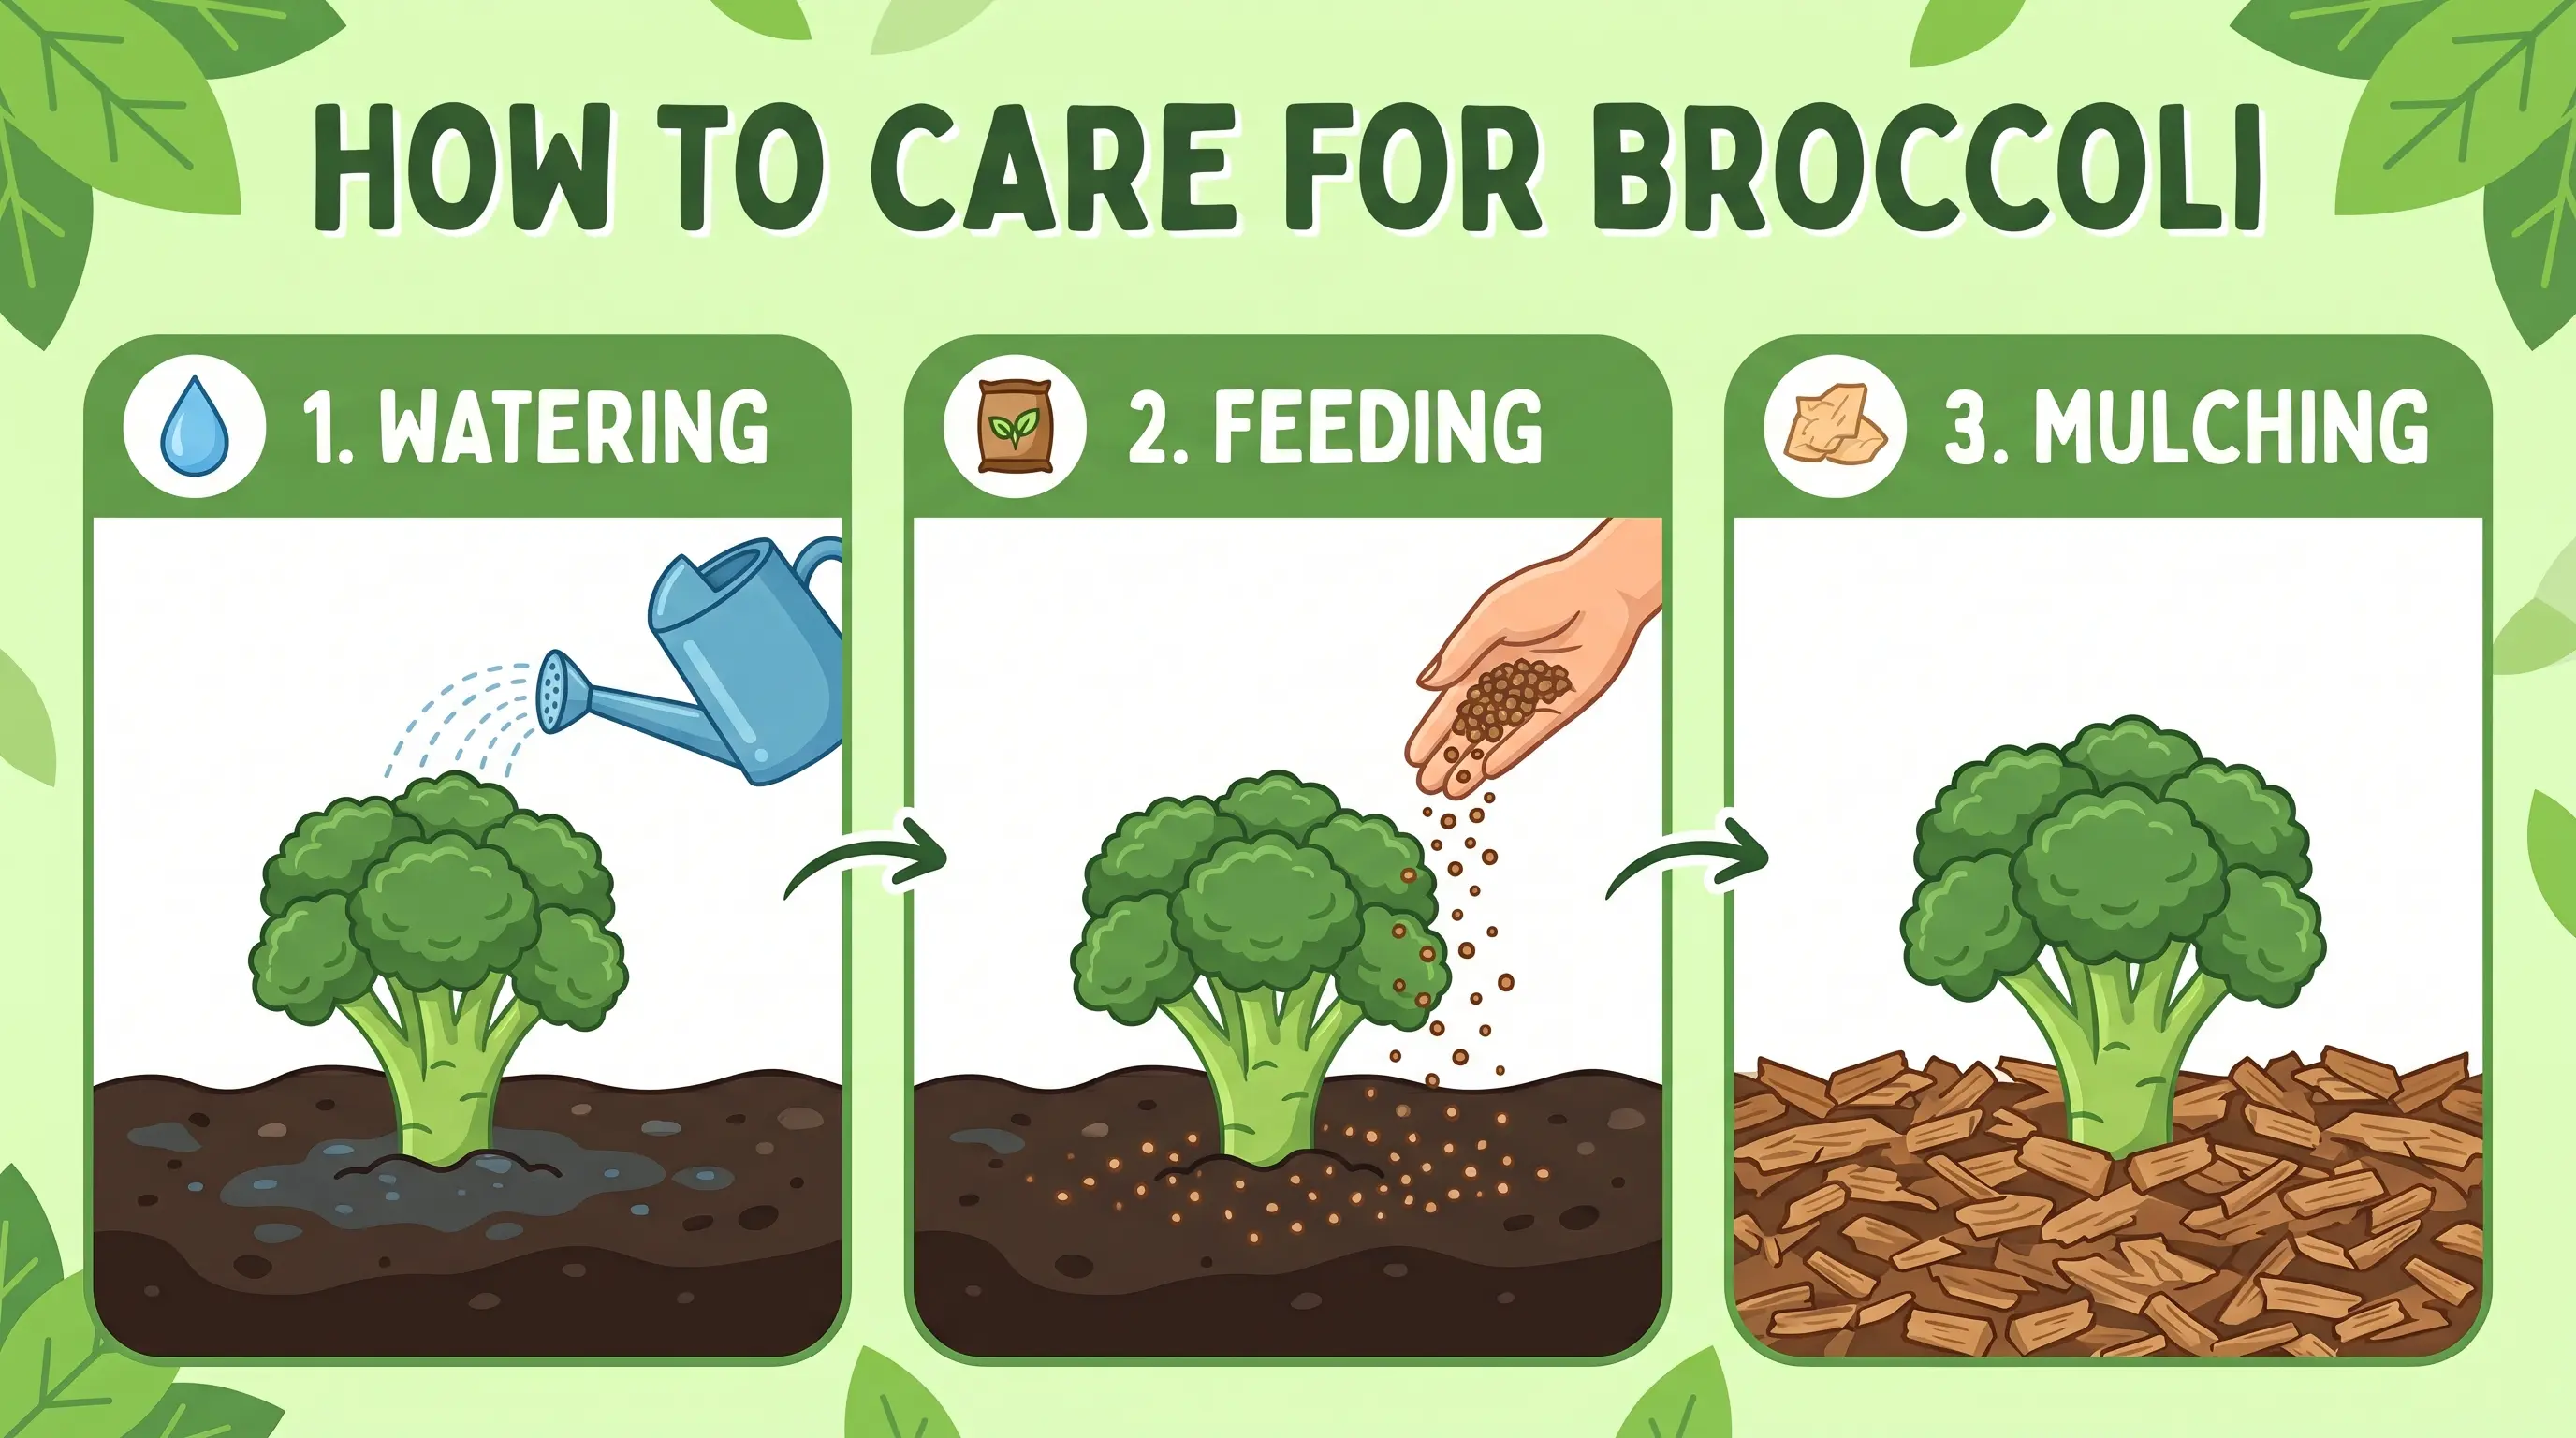
Broccoli needs about 1–1.5 inches of water per week. If you can, water at soil level rather than overhead; wet heads can rot. Drip irrigation or a soaker hose works well here.
For feeding, side-dress plants with a nitrogen-rich fertilizer when they reach about 6 inches tall. Container plants need more frequent feeding.
A balanced liquid fertilizer every 2–3 weeks keeps them productive, as nutrients leach out faster.
A 2-inch layer of mulch around each plant does several jobs at once: it keeps soil cool (critical for preventing bolting), holds moisture, and suppresses weeds competing for nutrients.
One diagnostic note: if stems look hollow at harvest, it usually indicates boron deficiency or nitrogen overdose. A soil test will confirm which one you’re dealing with.
Conclusion
Growing broccoli at home is less complicated than most people assume it mostly comes down to timing, soil preparation, and temperature. Get those three things right, and the plant does most of the work on its own.
Start with a variety suited to your climate. Prepare the soil before anything goes in the ground. Plant in spring or fall, not summer.
Water consistently, feed through the season, and watch your heads closely as harvest day approaches. Cut at the right moment, and you’ll get flavor that store-bought produce simply cannot match.
Don’t stop after the main harvest. Leave the plant in the ground, keep it watered, and the side shoots that follow will keep your kitchen stocked for several more weeks.
That’s the part most first-time growers never expect and the part that turns a one-season experiment into something you plant every year.
Frequently Asked Questions
Why is Broccoli Hard to Grow?
Broccoli is hard to grow because it requires consistently cool temperatures, fertile soil, and careful timing; if it experiences heat or stress, it bolts quickly, producing bitter flowers instead of edible heads.
How Many Heads of Broccoli Do You Get from Each Plant?
Each broccoli plant produces one main head, followed by multiple side shoots that continue to grow after the first harvest. Depending on the variety and care, you can get two to three additional harvests from the side shoots.
Is September Too Late to Plant Broccoli?
September can work for planting broccoli if you live in a mild climate (USDA zones 8+) and count backward from your first fall frost. Start seeds indoors or use transplants so the plants mature before cold weather sets in