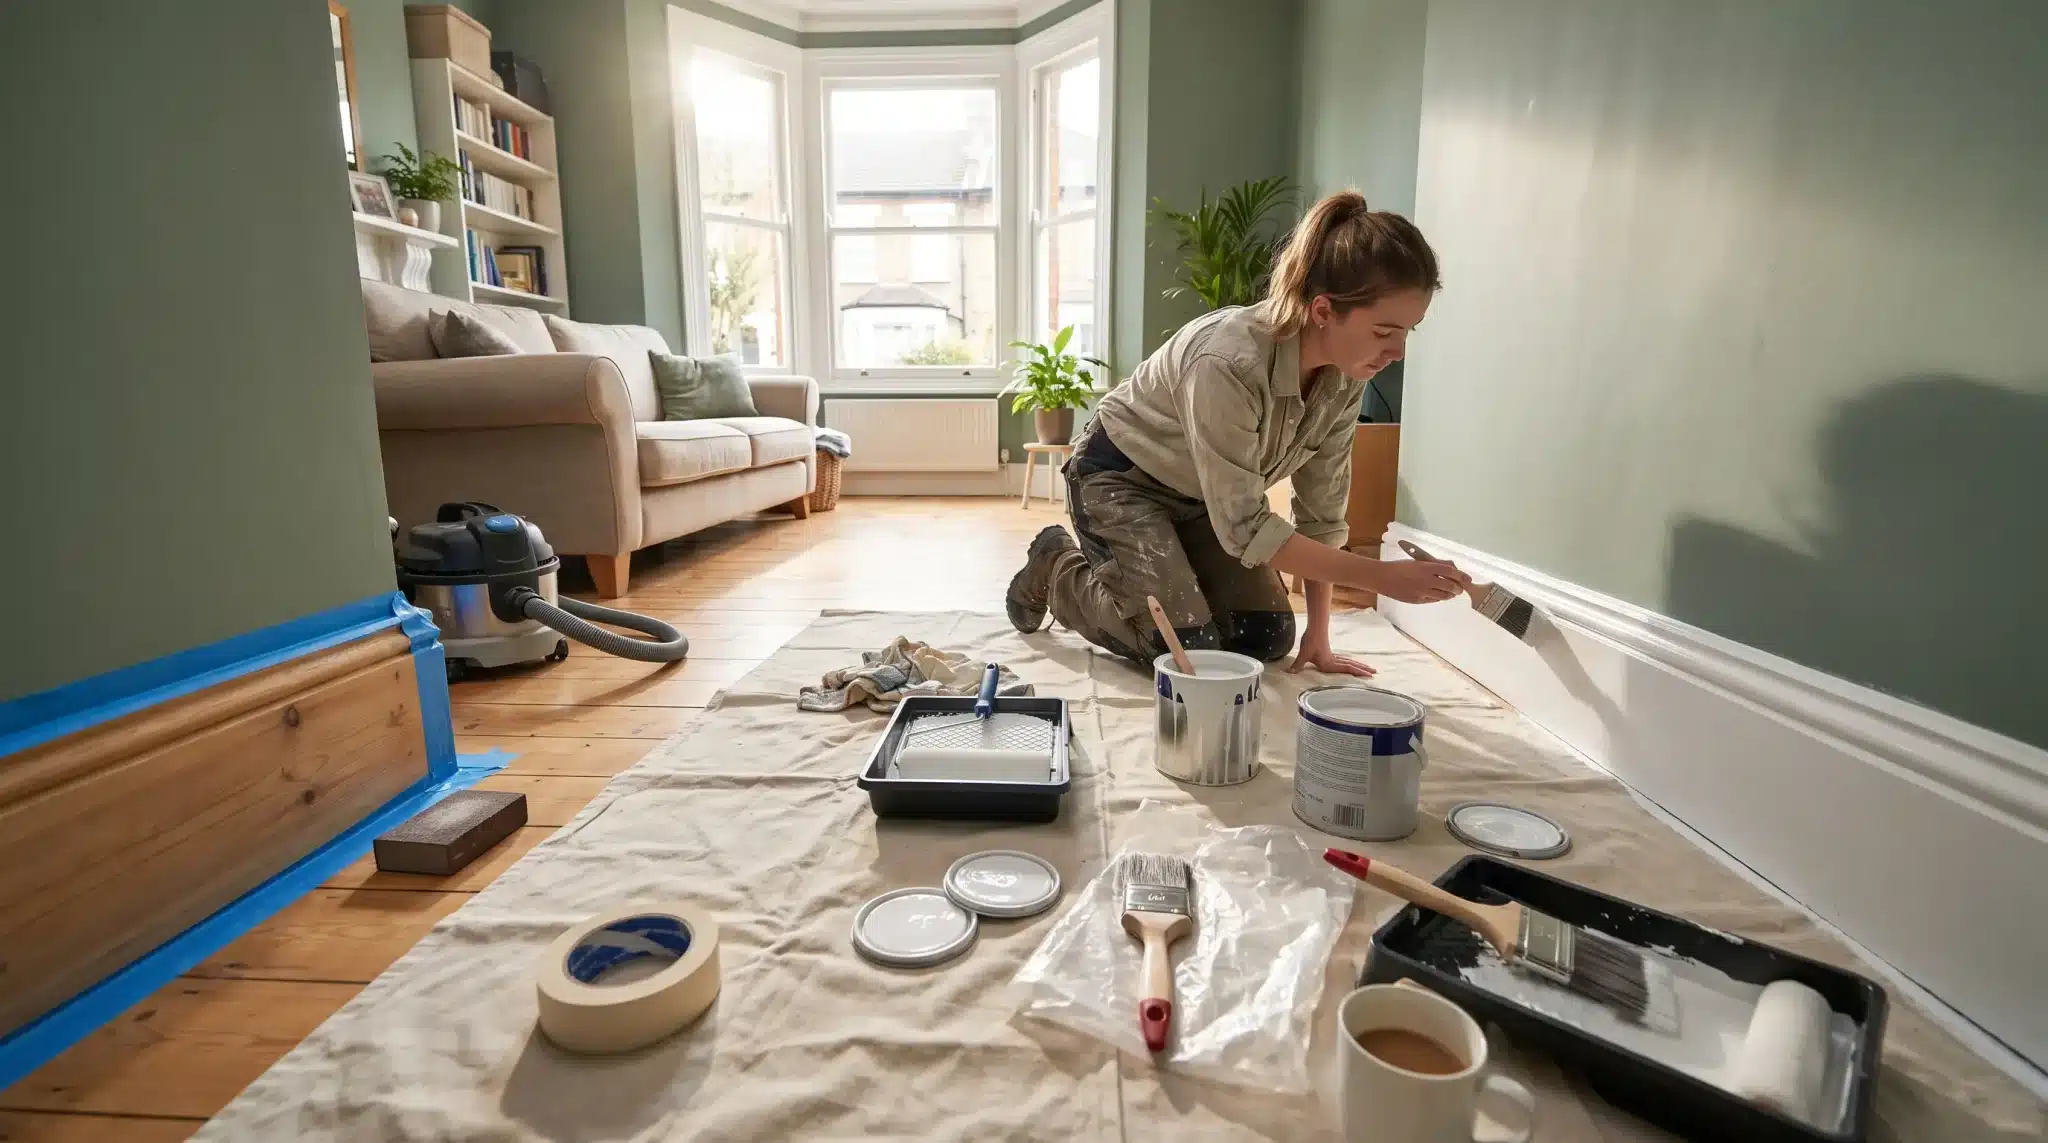

The first time I repainted the skirting boards in my old flat, I thought it would be an easy weekend project.
I had a tin of white gloss paint, an old brush, and confidence. Within minutes, paint was on the carpet, drips ran down the wood, and the finish needed fixing.
I’d skipped the basics: cleaning, sanding, protecting the edges, and letting each coat dry.
Painting skirting boards is simple when you know the right approach, and it really makes the process much easier and more enjoyable.
If yours look scuffed, faded, or outdated, a fresh coat can transform the room without the mess.
Tools and Materials You Need to Paint Skirting Boards
Having the right tools and materials makes painting skirting boards easier and helps produce a clean, even finish.
Preparing everything before you start can also reduce interruptions and help keep the surrounding walls and flooring protected.
| Tool/Material | Purpose |
|---|---|
| Angled paint brush | Helps you paint neat edges and tight corners |
| Sandpaper or sanding block | Smooths the surface and helps paint stick better |
| Paint scraper | Removes loose or flaking paint |
| Filling knife | Helps apply filler to small repairs |
| Dust sheets | Protects floors and furniture from paint splashes |
| Painter’s tape | Creates cleaner edges and protects nearby areas |
| Vacuum or dust brush | Clears away dust before painting |
| Trim paint | Gives skirting boards a hard-wearing finish |
| Primer | Helps paint cover and bond to tricky surfaces |
| Wood filler | Fills cracks, holes, and small dents |
| Caulk | Covers gaps between the skirting board and wall |
| Cleaning solution and cloths | Removes dirt and buildup before painting |
Once everything is ready, the painting process feels much less overwhelming.
Taking a little extra time to prepare now can make a big difference later, helping you get cleaner edges, fewer mistakes, and a finish you’ll be happy with.
How to Paint a Skirting Board Step by Step
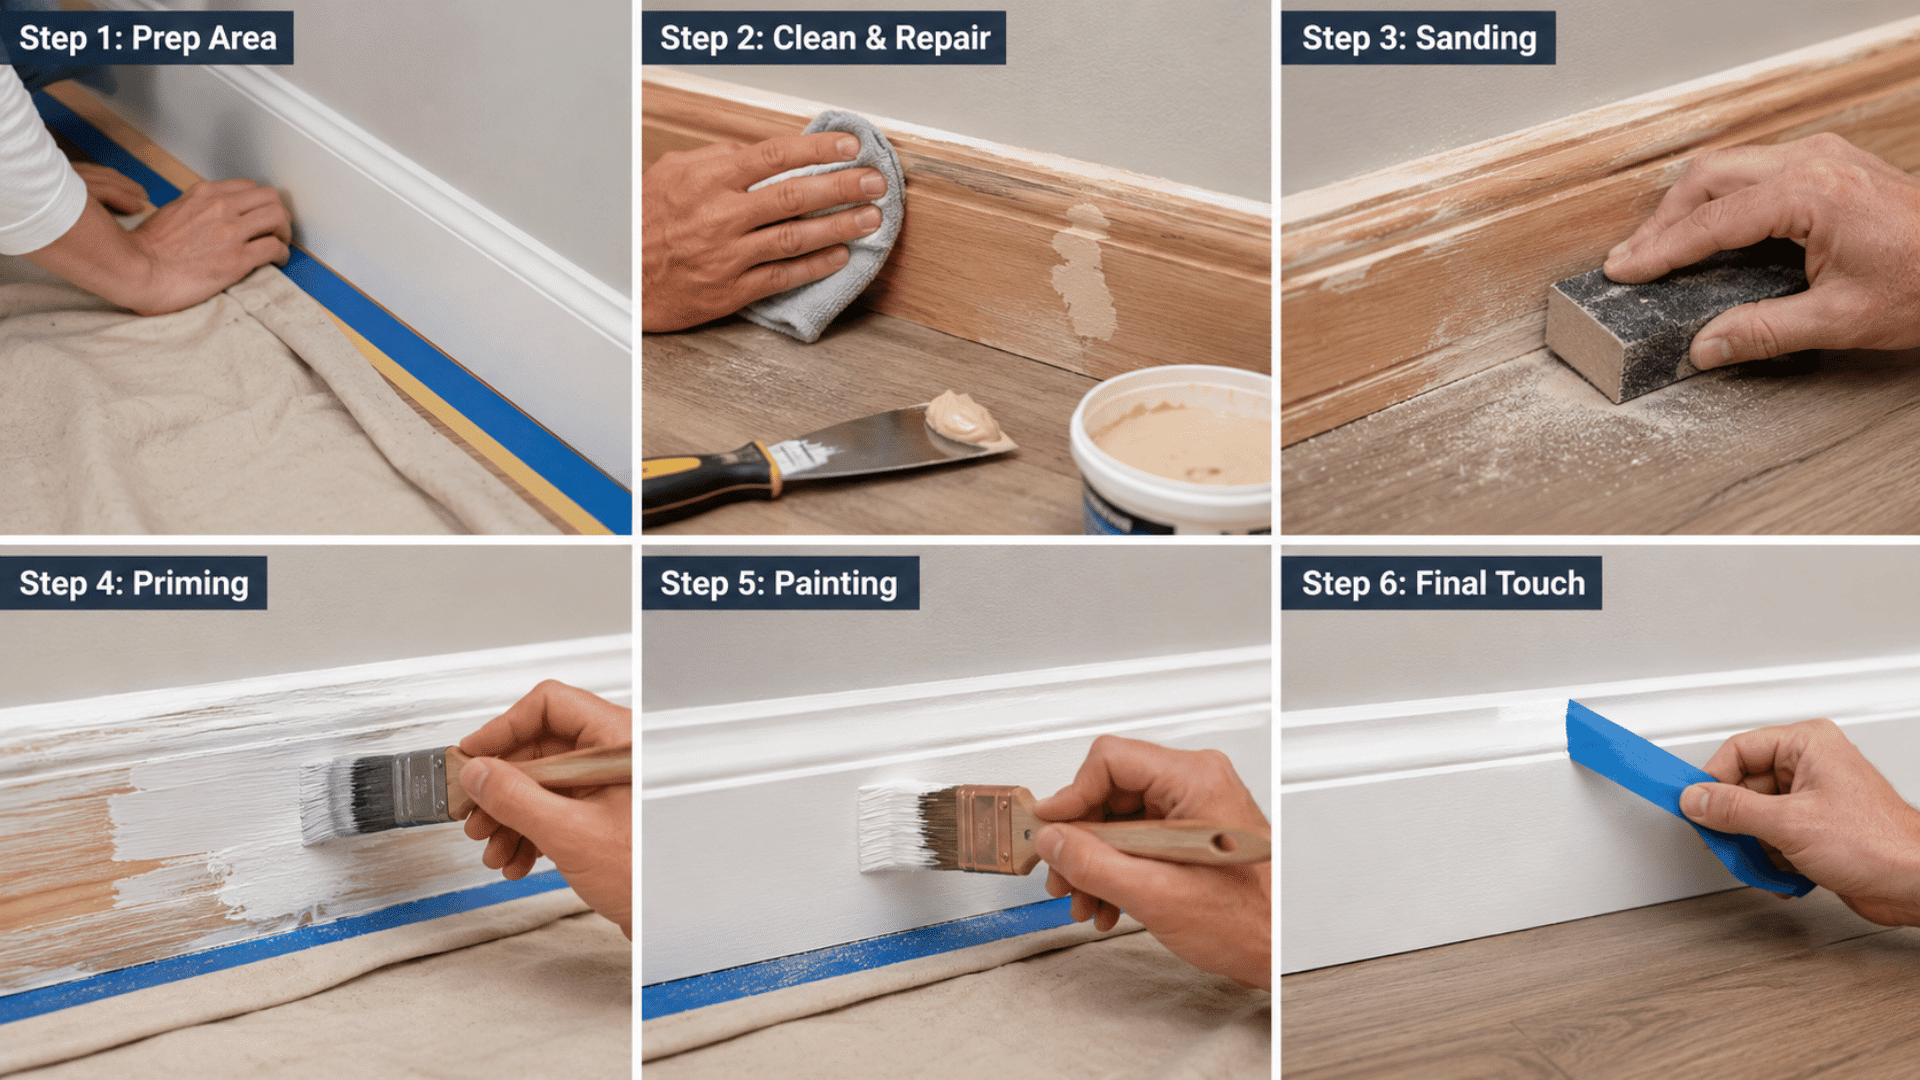
Painting skirting boards is mostly about getting the order right. The painting itself is simple, but good preparation helps you avoid uneven coverage, messy edges, and extra touch-ups later.
Follow each stage carefully, from preparing the surface to applying the final coat, and you’ll have a smoother, cleaner finish that lasts.
Step 1: Prepare the Area
Start by creating a clear workspace. Move furniture away from the walls and place dust sheets over nearby flooring to protect it from splashes.
Apply painter’s tape along areas that need protection, such as carpet edges or where the skirting meets the wall. Before painting, remove dust and loose debris with a vacuum or soft brush.
Step 2: Clean and Repair the Skirting Boards
A clean, smooth surface gives paint a better base to stick to. Wipe the skirting boards with a suitable cleaning solution to remove dirt and grease.
Fill small cracks, dents, and holes with wood filler, then use caulk to fill gaps between the skirting board and the wall. Allow repairs to dry fully before moving on.
Step 3: Sand the Surface
Sanding helps the new paint adhere better and creates a smooth, polished finish. It makes the whole painting process easier and results in a nicer look.
Lightly sand the existing surface, especially glossy areas or spots where paint is bubbling or peeling. Once finished, remove all dust before applying primer or paint.
Step 4: Apply Primer If Needed
Primer is useful when the surface needs extra preparation. Use it for bare wood, stained areas, major color changes, or glossy finishes where paint may struggle to stick.
Let the primer dry completely before painting. If the skirting boards are already in good condition, you may be able to skip this step.
Step 5: Paint the Skirting Boards
Start at the corners and edges, and then gently work your way along the length of the board with smooth, even strokes.
Keep the brush lightly loaded to prevent drips and thick patches. Apply thin, even coats and allow enough drying time between layers for the best finish.
Step 6: Apply the Final Coat and Inspect the Finish
Once the first coat is dry, check the coverage in good lighting. Add another coat if the color underneath still shows through.
Carefully remove the painter’s tape and look for any missed areas or uneven spots that need a quick touch-up.
How to Paint Skirting Boards Around Carpet
Most rooms take a single day to prep and paint, though repairs or primer can stretch the job into a weekend.
Prep requires effort with cleaning, repairs, and sanding before painting. Each coat takes hours to apply and dry.
Paint may feel dry before curing, so wait before replacing furniture or cleaning.
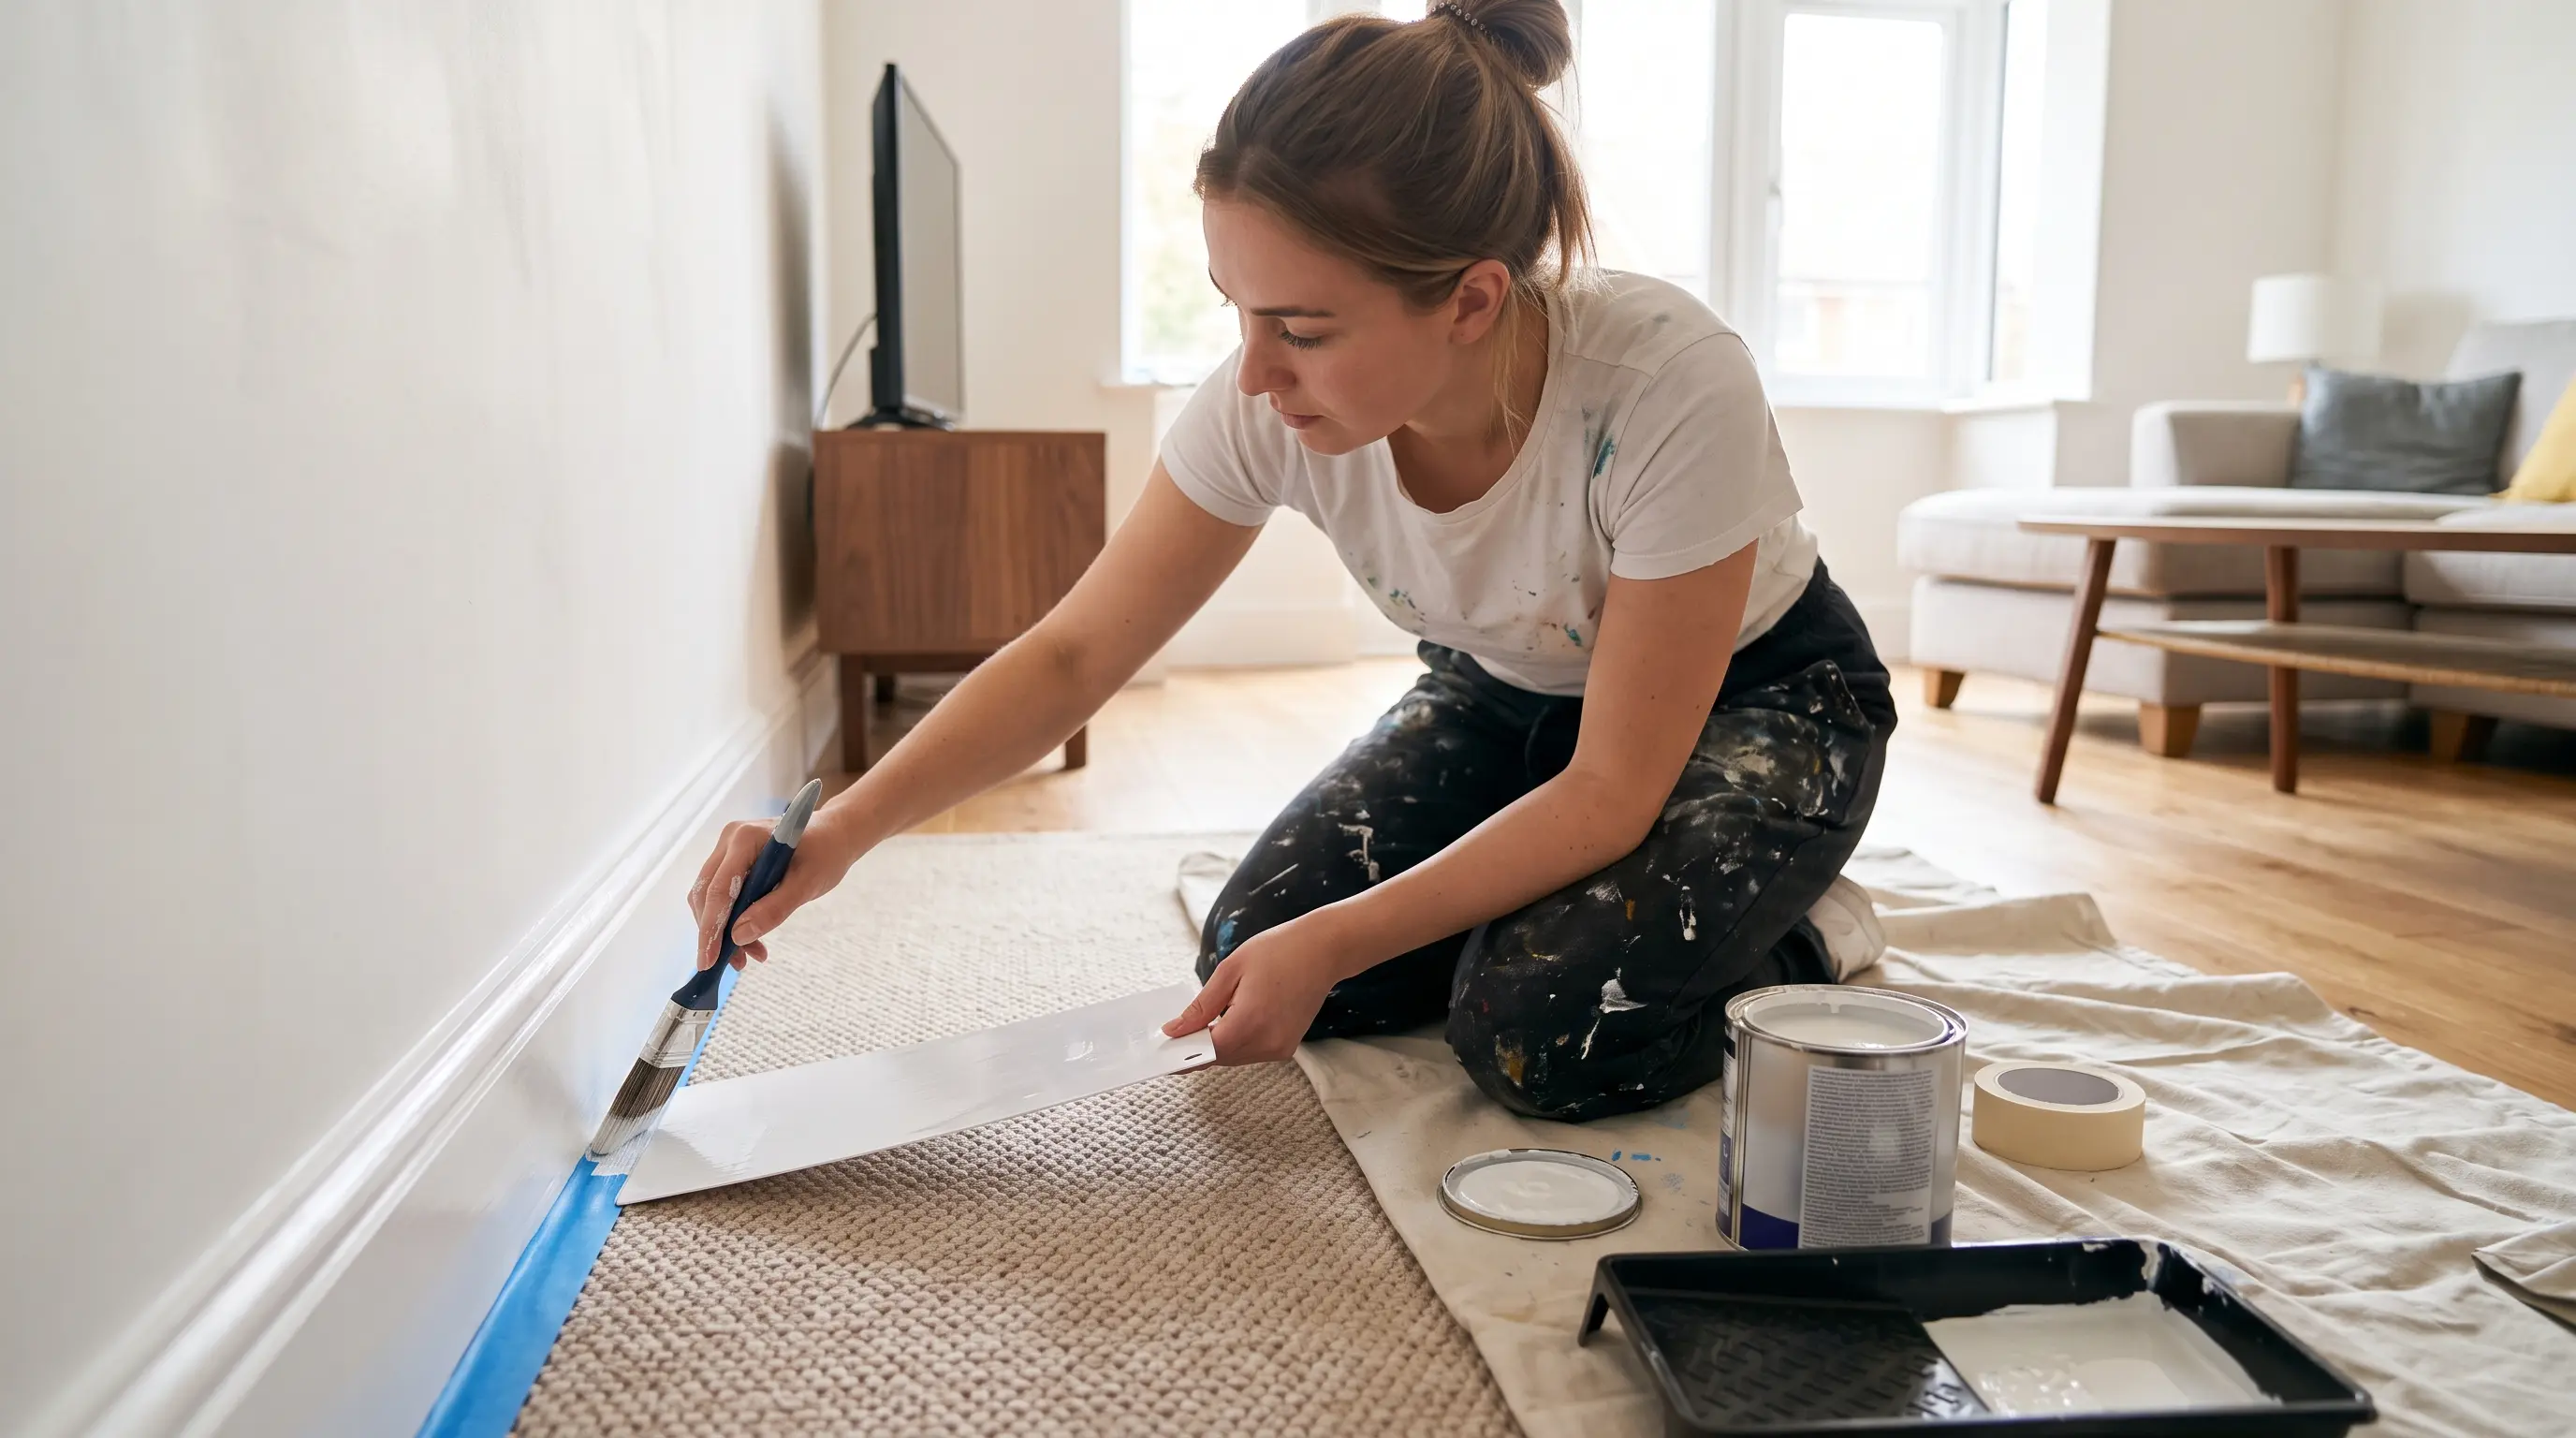
You can paint skirting boards without removing the carpet. Protect the edge where carpet meets wood, and the finish will come out sharp.
Protect the Carpet Before Painting
Use painter’s tape along the carpet edge and press it down firmly to stop paint from slipping underneath.
For better control, place a paint shield, scraper, or flat tool between the carpet and skirting board as you work.
An angled brush makes it easier to paint close to the floor without spreading paint where it shouldn’t go.
Deal With Spills Quickly
Small spills are easier to fix when they are fresh. If paint gets onto the carpet, clean it immediately with a damp cloth.
Remove tape carefully before the paint fully dries to keep the edges clean.
| Method | Best Use |
|---|---|
| Painter’s tape | Protecting carpet edges |
| Paint shield | Preventing accidental brush contact |
| Carpet protector | Covering larger areas |
Things to Know Before Painting Skirting Boards
Before painting skirting boards, it helps to understand the surface condition, preparation requirements, and type of paint already in place.
Checking these factors beforehand can improve paint adhesion and help you achieve a smooth, long-lasting finish.
- Check room conditions. Good airflow, moderate temperatures, and low moisture levels help paint dry properly.
- Plan for major color changes. Dark skirting boards may need extra coats when switching to a lighter shade.
These same prep steps carry over if you’re also painting stair trim from prep work to a perfect finish elsewhere in the house
How to Choose the Right Paint for Skirting Boards
A suitable paint for skirting boards should balance durability, ease of cleaning, drying time, and the finish you want.
Comparing the main paint types and finishes can help you choose an option that suits the room and level of everyday wear.
| Option | Key Features | Best For |
|---|---|---|
| Water-based | Quick-drying, low odor, easy to apply and clean | Small projects and occupied rooms |
| Oil-based | Hard-wearing, smooth, resistant to knocks and cleaning | High-traffic areas |
| Hybrid | Durable with easier application and faster drying | Most household skirting boards |
| Gloss | Shiny, tough, easy to wipe | Frequently cleaned areas |
| Satin | Soft sheen with good durability | Modern interiors |
| Eggshell | Low sheen and softer appearance | Low-traffic rooms |
Common Mistakes When Painting Skirting Boards
Most painting problems come from rushing the small details. Knowing what to avoid can save you time and prevent you from having to redo the work later.
- Skipping preparation: Paint will not hide dirt, rough patches, or damaged areas.
- Using unsuitable paint: Skirting boards need a finish that can handle knocks and cleaning.
- Leaving imperfections until the end: Fixing drips and brush marks while the paint is fresh is much easier.
- Skipping the sand between coats: A light scuff with fine sandpaper helps the next layer bond and smooths out brush marks.
- Using a worn-out brush: Shedding bristles can stick in wet paint and ruin the finish.
Wrapping It Up
Painting skirting boards may seem like a small update, but the difference it makes to a room is easy to notice.
Fresh, clean edges around the floor can make the whole space feel more finished and cared for.The key is not rushing the process.
Taking time to prepare the surface, choose the right paint, and let each coat dry properly will always give better results than trying to finish everything in a hurry.
Whether refreshing old boards or finishing a newly decorated room, a careful approach helps your skirting boards stay neat and durable for years.
Frequently Asked Questions
How Long Should Skirting Boards Dry Before You Touch Them or Add Furniture?
Most paint feels dry within a few hours, but wait 24–48 hours before touching it or placing furniture back to avoid marks.
Can You Use A Roller To Paint Skirting Boards?
A small roller is great for covering large, flat boards quickly, but if you want more precision around corners and edges, a brush is your best friend.
How Do You Fix Uneven Paint On Skirting Boards?
Sand the uneven area once dry, wipe away the dust, then apply a thin touch-up coat to blend it in.
Do Skirting Boards Need To Be Gloss Paint?
No, satin or eggshell works well too. Gloss is durable but shows every imperfection, so it needs careful prep.
Should You Paint Walls Before Or After Skirting Boards?
Paint the walls first, following the right order to paint a room, then finish with the skirting boards for cleaner edges.