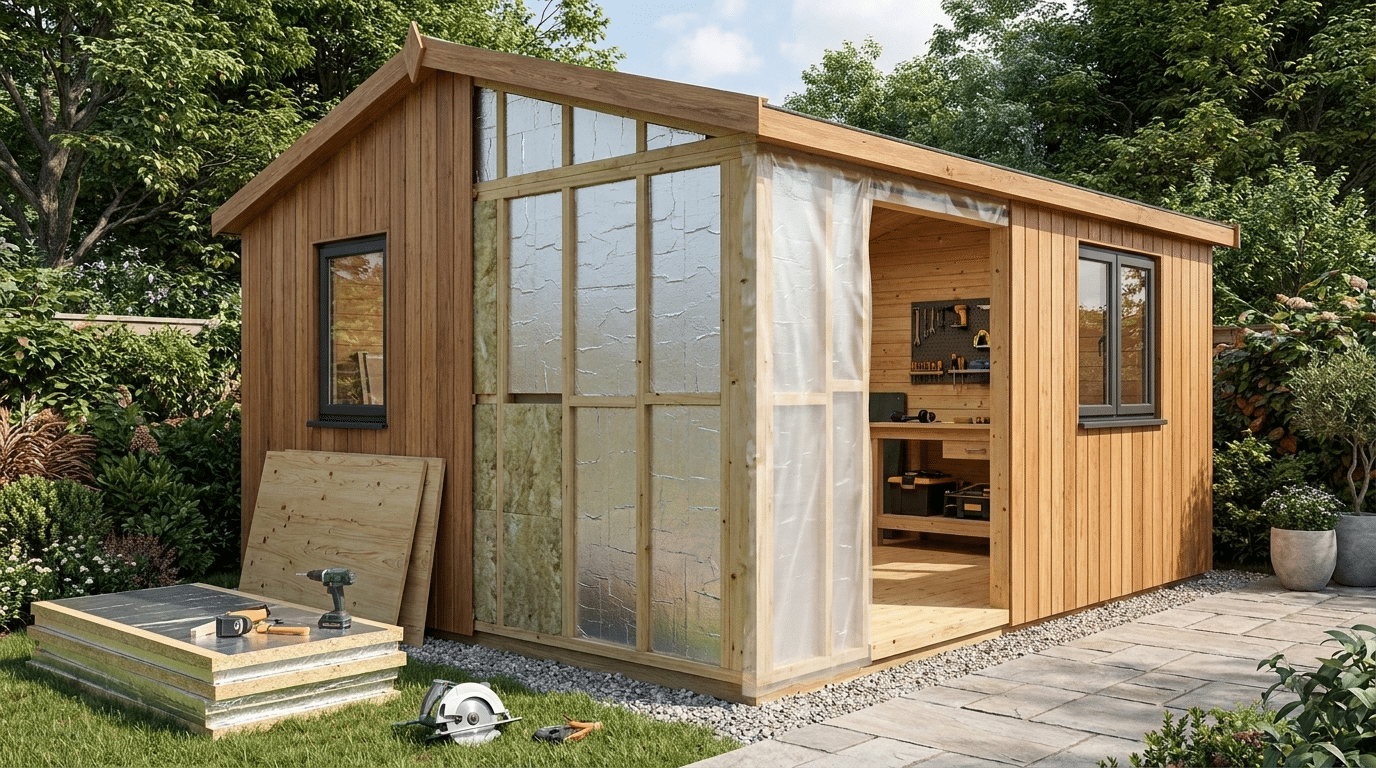

Cold, damp sheds are a common thing for UK homeowners. Once autumn arrives, many sheds become unusable.
Damp creeps into stored furniture, and wood starts to rot at the joints. If you use your shed as a workshop, office, or hobby space, the problem gets worse.
A few cold months can undo months of good use.
Learning how to insulate a shed properly can turn a chilly outbuilding into a space you can use all year.
I’ve walked plenty of readers through this exact project, and with the right materials and a clear step-by-step approach, it’s a weekend job for a confident DIYer.
Does a Shed Need Insulation?
Yes, most sheds benefit from insulation, especially in the UK climate. In the uninsulated sheds I’ve worked on, indoor temperature can swing 10 to 15°C in a single day.
That swing speeds up condensation. It also wears down timber and metal fittings faster than normal.
Sheds used purely for occasional storage may cope without insulation, but if you store tools, electronics, or furniture, moisture damage is a real risk.
Rust, mold, and swollen wood are common signs that a shed needs attention.
Sheds used as workspaces face a bigger problem. A cold office or hobby room is hard to enjoy in winter. It gets too hot in summer, too.
Insulation solves both problems at once. It slows heat loss when it’s cold outside. It also keeps the space cooler when the sun is strong.
Wooden sheds are usually easier to insulate than metal ones. Metal sheds can still be insulated, but they need moisture-resistant boards.
What Materials Do You Need to Insulate a Shed?
The core materials are foil-backed bubble wrap or reflective foil for budget jobs, mineral wool or PIR foam boards for proper thermal performance, and a vapor barrier with timber battens and fixings to install them.
Picking the right materials before you start saves time and money later. Your choice depends on your budget, your shed’s frame, and how you plan to use the space.
| Material | Best For | Approx. Cost | Ease of DIY Install |
|---|---|---|---|
| Bubble wrap (foil-backed) | Budget builds, temporary use | £7-£40 per roll | Very easy |
| Reflective foil insulation | Walls and roof, flexible fitting | £10-£40 | Easy |
| Mineral wool/fiberglass | Stud walls, sound, and heat control | Mid-range | Moderate |
| PIR foam boards | Walls, roof, floor; highest R-value | Higher upfront cost | Moderate |
| Polystyrene sheets (EPS/XPS) | Regular-width gaps, lightweight jobs | Low to mid-range | Easy |
Other Materials Needed:
- Vapor barrier or breather membrane
- Timber battens
- Staple gun and staples
- Screws and a screwdriver
- OSB or plywood sheets
- Utility knife and a fine-tooth saw
- Tape measure
- Safety gear
How to Prepare a Shed Before Insulating
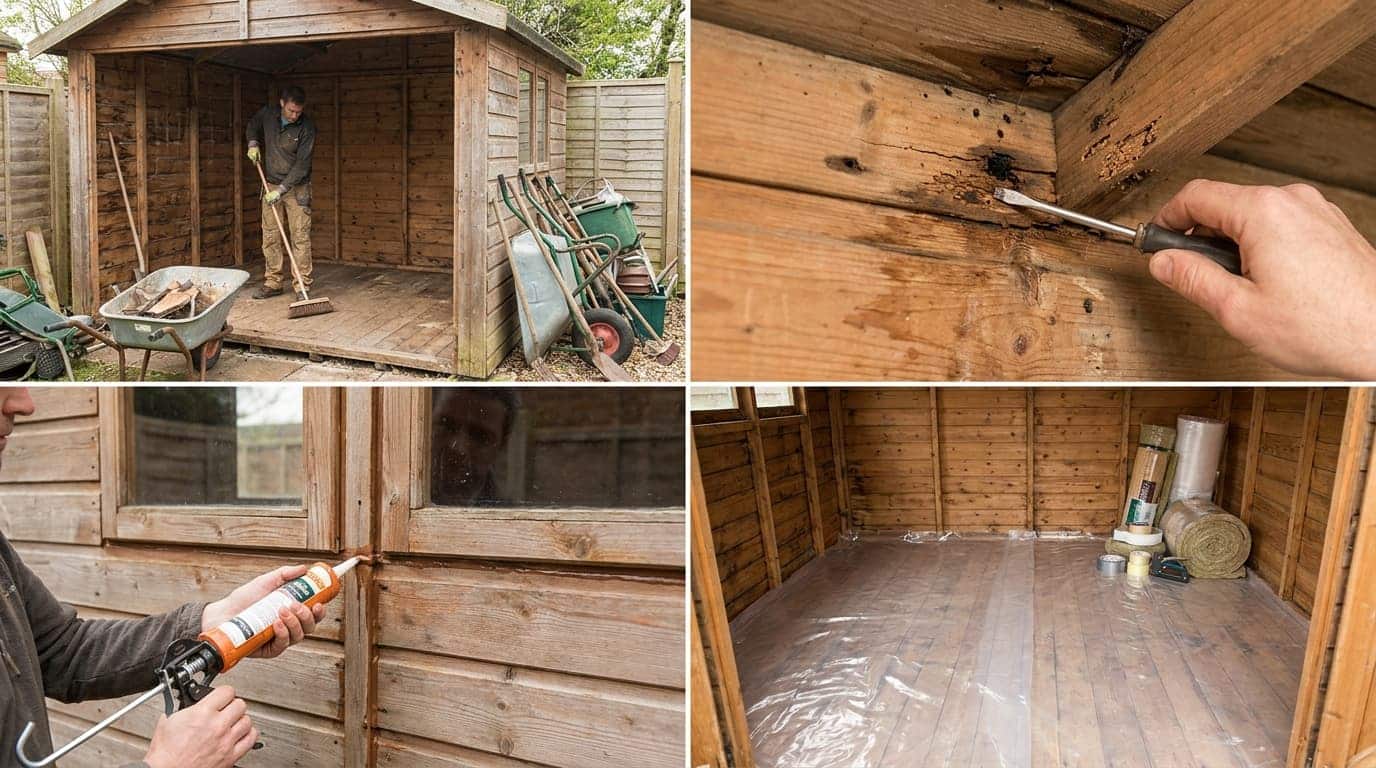
Good preparation makes the rest of the job easier and stops damp problems later. Skipping this step is one of the most common mistakes people make.
- Start by clearing everything out of the shed. An empty space gives full access to every wall, corner, and floorboard. Next, check the whole structure for damage.
- Look closely at the roof, walls, and floor for cracks, rot, or rust. Gently push a screwdriver into any suspect timber. If it sinks in easily, that section needs repair or replacement first. I check the corners and sill first, since that’s where damp collects longest.
- Check the windows and doors too. Gaps around frames let heat escape and let damp in, so it’s worth fixing these before adding insulation.
- Look for daylight shining through wallboards. Seal any visible gaps with a weatherproof sealant.
- Once repairs are done, seal remaining gaps in the cladding. This step alone reduces draughts and supports everything you add afterward.
- Finally, lay down protective sheeting on the floor to keep your work area clean while you cut and fit materials.
How to Insulate a Shed Step-by-Step
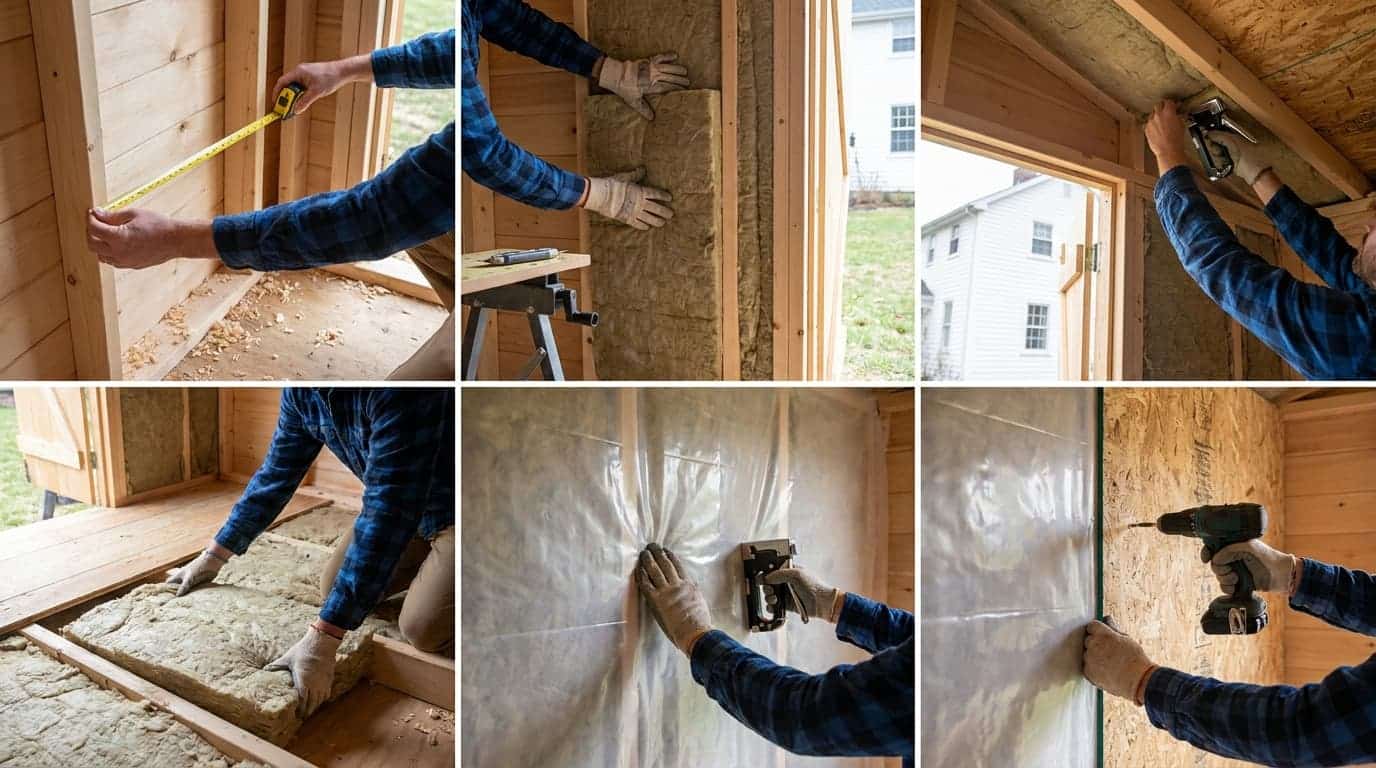
Once your shed is prepped, the actual insulation work is straightforward. Follow these steps in order for the best results.
Step 1: Measure the Shed Walls, Floor, and Roof
Start with a tape measure and check every wall, the floor area, and the roof space, and measure the gaps between studs and rafters separately, since older sheds rarely have even spacing.
Note down each measurement so you buy the right amount of material and avoid awkward gaps later.
If your studs sit 45 to 60cm apart, standard roll or batt insulation will fit without extra cutting. Wider or uneven gaps usually call for rigid foam boards instead.
Step 2: Install Shed Wall Insulation
Start by checking the spacing between your wall studs, since older sheds rarely have evenly spaced studs.
Cut your chosen material, whether mineral wool, fiberglass, or foam board, to fit each cavity snugly. Push it into place without compressing it, since squashed insulation loses its ability to trap warm air.
If you’re using rigid PIR boards, fix timber battens across the studs first to create a small air gap, around 25mm, between the insulation and the outer cladding.
This gap helps stop condensation from forming where warm and cold surfaces meet.
Once the insulation sits in place, screw your boards directly onto the battens or studs for a solid, even finish ready for the interior covering.
Step 3: Insulate the Shed Roof
The roof loses more heat than any other part of a shed, so this step makes a real difference. Check the roof felt and rafters first for leaks or dark, damp patches.
Fix any of these before you add insulation, since trapped moisture will ruin the material and rot the timber underneath.
Staple a breathable membrane under the rafters, pulling it smooth to stop wrinkles that trap condensation.
Cut PIR boards or mineral wool to size and fit them snugly between the rafters. Leave a small air gap, around 50mm, between the insulation and the roof cladding.
This gap stops condensation from forming where warm and cold surfaces meet.
Step 4: Insulate the Shed Floor
A cold floor pulls heat out of the whole shed, so don’t skip this step. Treat the floor joists against rot before you install anything.
Fit pressure-treated timber blocks under each joist to lift the floor slightly and keep the insulation away from the ground.
Measure the gap between joists, then cut PIR boards or mineral wool to fit snugly inside each cavity.
Press the material in firmly but don’t compress it, since squashing insulation reduces its ability to hold warm air.
Finish with a plywood or OSB layer on top to protect the insulation and give you a solid floor to walk on.
Step 5: Insulate the Shed Door
A shed door with no insulation undercuts everything else you’ve done, since gaps around the frame and an uninsulated panel let heat escape fast.
Cut a rigid PIR foam board to match the door’s dimensions and glue it to the inside face with foam adhesive.
Fit a door sweep along the bottom edge to block drafts, and seal any remaining gaps around the frame with weatherproof sealant.
Step 6: Add a Vapor Barrier and Finish Interior Walls
A vapor barrier stops moisture from reaching your insulation and causing mold.
Staple a breathable membrane across the walls, roof, and floor, overlapping each sheet a few centimeters and taping the seams.
Skipping this step lets moisture rot the wood over time. Once it’s in place, add OSB, plywood, or plasterboard over the top for a clean, finished look.
How Much Does It Cost to Insulate a Shed?
Insulating a shed in the UK typically costs between £670 and £1,600 in total, depending on shed size and the material you choose
| Insulation type | Material cost per m² | Typical total for an 8x6ft shed | Typical total for a 10x12ft shed |
|---|---|---|---|
| Bubble wrap (standard) | around £10 per m² | £70–£120 | £150–£220 |
| Foil-backed bubble wrap | £15–£25 per m² | £150–£280 | £300–£500 |
| Mineral wool/fiberglass batts | £5–£10 (materials), £15–£25 fully installed | £300–£550 | £550–£900 |
| PIR foam boards | £30–£45 per m² | £500–£800 | £900–£1,400 |
| Professional installation (any material) | Adds labor on top | +£150–£300 | +£300–£600 |
Overall project range: Shed insulation prices in the UK typically fall between £670 and £1,600, depending on shed size and material choice.
Common Mistakes When Insulating a Shed
Even a straightforward DIY project can go wrong if you skip key steps. Knowing these common mistakes ahead of time saves both money and rework.
- Sealing the shed completely airtight: Insulation traps heat, but a shed still needs airflow. Blocking every gap without adding ventilation causes moisture to build up.
- Skipping the vapor barrier: Some DIYers add insulation and skip the membrane to save time. Without it, moisture from the air reaches the insulation directly, cutting its lifespan and inviting mold.
- Using the wrong material on the roof: A non-breathable plastic sheet might seem like a quick fix, but it traps moisture against the timber.
- Ignoring the floor: Many people focus only on walls and roof, forgetting that a cold floor pulls heat out of the whole space. Skipping floor insulation undermines the rest of the project.
- Compressing the insulation: Cramming too much material into a tight gap seems efficient, but it isn’t. Insulation works by trapping small pockets of air. Squashing it destroys that effect and lowers its thermal rating.
- Insulating over existing damage: Fitting insulation directly over rot, damp patches, or unsealed gaps only hides the problem. It doesn’t fix it. Repairs always need to happen first.
How to Keep an Insulated Shed Dry and Comfortable
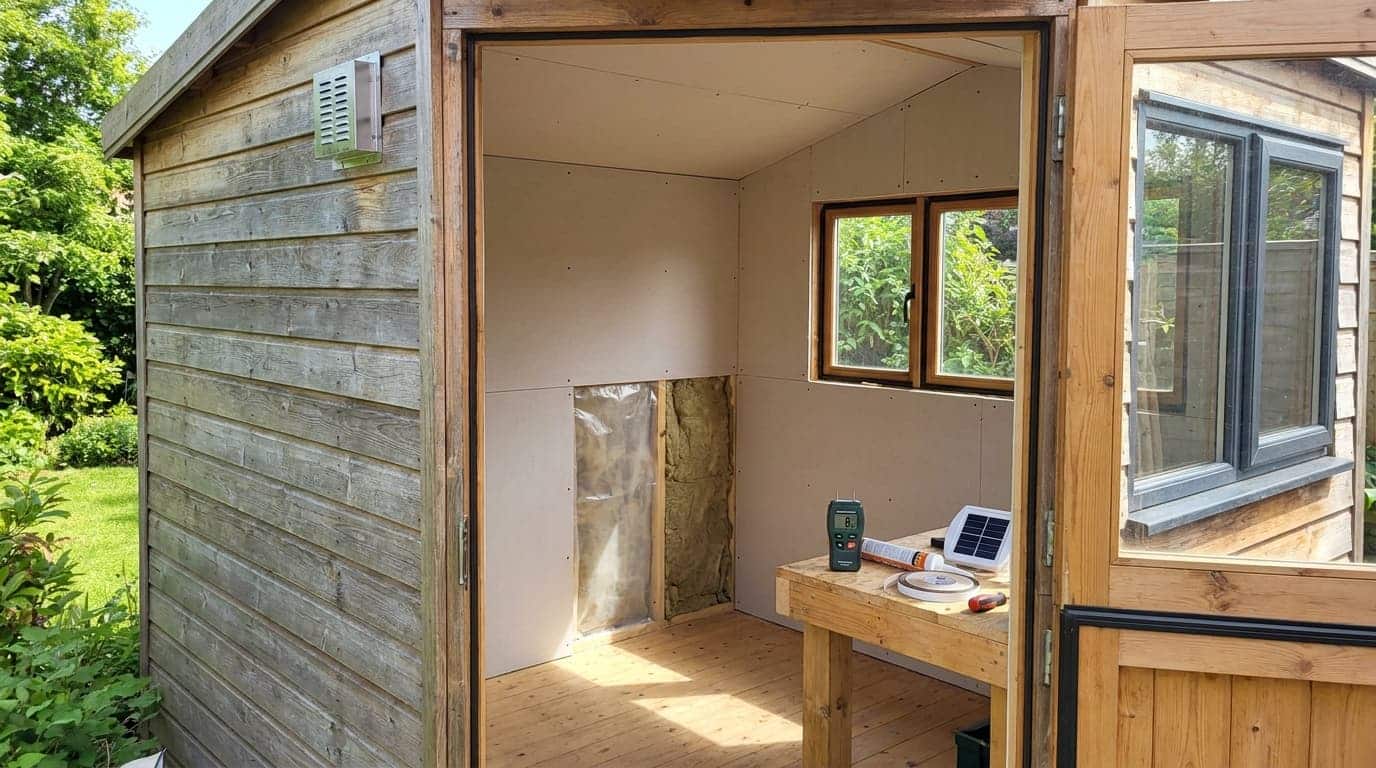
Insulation alone doesn’t guarantee a dry, comfortable shed. A few ongoing habits keep the space working well through every season.
Ventilation matters just as much as insulation. Fit passive vents or louvers in the eaves or soffits to allow steady airflow without undoing your thermal work.
This keeps moisture from building up behind the walls.
Check your shed regularly for early signs of damp. Dark patches, a musty smell, or soft timber usually mean water has found a way in.
Catching these issues early stops small problems from turning into costly repairs.
Upgrade doors and windows where you can. Draughty frames are a common weak point, even in a well-insulated shed.
Adding weatherstripping or switching to double-glazed units significantly reduces heat loss.
Keep an eye on the vapor barrier too. Over time, staples can loosen, and seams can lift. A quick inspection once or twice a year helps you spot and fix any gaps before they cause trouble.
Wrapping It Up
Learning how to insulate a shed doesn’t need to be complicated. With the right materials and a clear step-by-step approach, most sheds can go from cold and damp to warm and usable within a weekend.
Prepare the structure properly. Choose materials suited to your budget and shed type. Insulate the walls, roof, floor, and door in the right order.
Add a vapor barrier to protect your work. Finish with a clean interior surface.
Getting this right pays off well beyond winter. In my own shed conversions, the floor is the step people skip most often, and it’s the one that costs the most to fix later.
A properly insulated shed protects tools, furniture, and equipment from dampness and temperature fluctuations year-round.
Frequently Asked Questions
Can You Insulate a Shed That is Already Built?
Yes, you can insulate an existing shed without rebuilding it. Add insulation between studs or over existing walls, then cover it with interior boards for a finished space.
Should I Insulate My Shed Roof or Walls First?
Insulate the shed roof first because it is usually the biggest source of heat loss. After the roof, insulate the walls, then the floor, for better temperature control.
Can You Insulate a Shed Without Removing the Walls?
Yes, you can insulate a shed without removing the walls by adding insulation over the existing surfaces. Thin options like foil insulation or rigid boards work well
What R-Value Insulation Should You Use in a Shed?
Aim for R-13 to R-23 in the walls and R-30 to R-49 in the roof, since heat escapes fastest through the ceiling.
Can You Insulate a Metal Shed the Same Way as a Wooden One?
Not quite. Metal sheds need moisture-resistant rigid foam boards and battens, since insulation can’t be stapled directly to metal walls.